Growatt SPH Series Installation & Operation Manual
Hide thumbs
Also See for SPH Series:
- User manual ,
- Installation manual (66 pages) ,
- Installation & operation manual (36 pages)
Table of Contents
Advertisement
Advertisement
Table of Contents

Related Manuals for Growatt SPH Series


Summary of Contents for Growatt SPH Series
- Page 1 Installation & Operation Manual...
-
Page 2: Table Of Contents
2 Safety 2.1 Purpose Use 2.2 Safety Measure 2.3 Symbols introduction on the SPH inverter 3 Product Description 3.1 Growatt SPH series inverter 3.2 Label Explanation 3.3 Size and weight 3.4 The advantage of the unit of Growatt SPH 4 Unpacking 5 Installation 5.1 Basic installation requirements... - Page 3 6 Commissioning 6.1 Commissioning of SPH 6.2 Operation modes 6.3 Country setting 6.4 Display and button 6.5 Communication 7 Start-up and shut down 7.1 Start-up the SPH system SPH system 7.2 Disconnect the SPH system 8 Attention of the installation environment, maintenance and cleaning 9 Fault removal...
- Page 4 11.1 Dismantling the energy storage 11.2 Packing the SPH inverter 11.3 Storing SPH inverter 11.4 Disposing of theSPH inverter 12 Product specification 12.1 Growatt SPH series energy storage machine product specification 12.2 DC input terminal parameter 12.3 Torque 12.4 Appendix...
-
Page 5: Brief Introduction
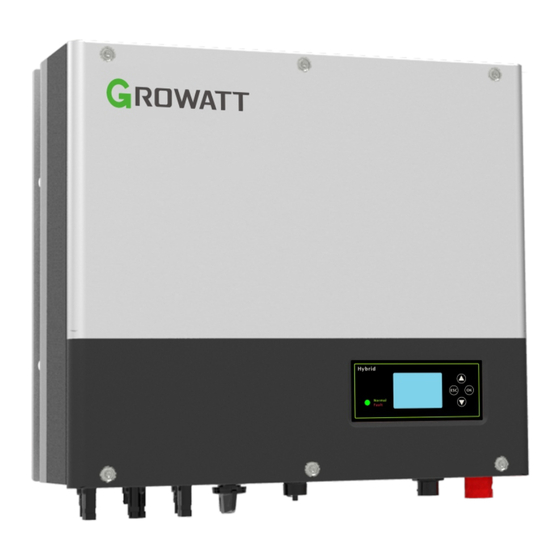
1 Brief Introduction 1.1 Preface This manual will provide the users who use the Growatt SPH TL3 BH-UP Series of Shenzhen Growatt New Energy Technology Co.,LTD(Short for Growatt as below) with the detailed product information and the installation instructions. Please read this manual carefully and put this manual on some place where is convenient to installation, operation, obtain. - Page 6 Overview: Chart 1.1 Position Description LED of status display LCD screen Function button Ground point Breathable valve EPS output(off grid connection) RSD(do not open except by Professional staff) AC Grid (on grid connection) RS485 communication interface(Reserved) RS485 communication interface of meter2(Reserved) NTC: Lead-acid temperature sensor terminal Rj45 interface of DRMs(used only in Australia) Rs485 communication interface of meter1...
-
Page 7: Safety Instructions
1.4 Safety Instructions 1.Please be clear which kind of battery system you want, lithium battery system or lead- acid battery system, if you choose the wrong system, SPH can't work normally. 2.Please read this manual carefully before the installation, The company has the right not to quality assurance,If not according to the instructions of this manual for installation and cause equipment damage. -
Page 8: Safety Measure
PD2, meanwhile the temperature should be control in the 0-40℃ of indoor ventilation and the humidity should be 5%-85%. If the chosen PV modules needs to positive or negative ground connection, please contact with Growatt for technical support before installation. -
Page 9: Growatt Sph Series Inverter
Direct Current(DC) Alternating Current(AC) The machine complies with the requirements of the applicable CE guidelines Refer to the operating instructions. 3 Product Description 3.1 Growatt SPH series inverter Marks of SPH Mark Description Explanation Operation of display screen and set system... -
Page 10: Label Explanation
3.2 Label Explanation Label contains the following information: for example SPH 10000TL3 BH-UP shows as below:... - Page 11 Description of label: Growatt SPH 10000TL3 BH-UP The type of product PV input data Max. PV voltage 1000Vdc PV voltage range 120~1000Vdc PV Isc 16.9A*2 Max. input current 13.5A*2 AC output/input data Max. output power 10000W Max. apparent power 10000VA...
-
Page 12: Size And Weight
D(mm) weight(kg) Growatt SPH TL3 BH-UP 198.5 453.5 3.4 The advantage of the unit of Growatt SPH Features below: Ø All in one design. Can improve self consumption, back up and also pinch the valley. Ø Smart management, work mode can be set. - Page 13 Before unpacking, please check whether there are any visible external damages. After unpacking, please check whether there damages or missing of the parts, if it happen, please contact with supplier. Growatt SPH series and accessories shows as follows: Chart 4.1 Number...
-
Page 14: Basic Installation Requirements
Installation 5 5.1 Basic installation requirements A. The installation location must be suitable for SPH's weight for a long period time. B. The installation location must conforms with dimension of SPH. C. Do not install the unit on structures constructed of flammable or thermo labile materials. -
Page 15: Installation Requires Tools And Rj 45 Terminal Sequence Of The Lan Line
H. Installation position shall not prevent access to the disconnection means. I. In order to ensure machine can run normally and easy to operate, please pay attention to provide adequate space for SPH, Please refer to below: Chart 5.3 J. Do not install the machine near television antenna or any other antennas and antenna cables. - Page 16 Description Press the RJ45 terminal Press battery terminal connector Disconnect PV terminal Unscrew nut Unscrew screw Knock expansion screw Drill holes on the wall LAN line RJ45 sequence as follow: Chart 5.5 Chart 5.6 LAN line 1-8 colors as below: White White White...
-
Page 17: Installation Instructions
5.3 Installation Instructions 5.3.1 Attention Layout(length of sensors consider) Growatt SPH4000-10000TL3 BH-UP only use meter as its sensor, before installing your system you should know something as below: 1.The cable of meter is suggested not longer than 15m. Because of this, you should consider the cable length between SPH and combiner box. -
Page 18: Sph System Connection Mode
4.Drill four Ф8 holes at the mark point, the depth is not less than 55mm. 5.Knock four explosion bolt into Ф8 holes (As the chart 5.8b below). 6.Hang the energy storage machine on the four setscrews (As the chart 5.8c below). 7.Lock the nut of setscrew (As the chart 5.8d below). - Page 19 Similar to the traditional inverter connecting, the input of PV panel energy can be realized by using MC4 PV terminal, the detail steps are as follows: Step 1: Turn off PV switch. Step 2: Insert PV panel positive and negative cables into MC4 terminal,then connect positive pole(+) of connection cable to positive pole(+) of PV input connector, Connect negative pole(-) of connection cable to negative pole(-)of PV input connector.
- Page 20 Chart 5.11 Note: When installing the euqipment, you need to install the EPS output connector (Item F in the accessory kit) onto the SPA whether the EPS output port is to be connected or not, as shown in Fig 5.11. Note: Locking screws (for details of the accessory kit, see Figure 4.1).
- Page 21 Step 2: Route the stripped cables through the locking nut, sealing ring and threaded sleeve, insert them into the connection terminal in accordance with the marks on the connection terminal, and secure the connection by tightening the screws. You can pull the cables gently to ensure that the cables are secured in place.
- Page 22 Step 5: To remove the EPS connector, loosen the screws on the protective cover, then remove the cover. Rotate the EPS connector anticlockwise, then pull it out. The inverter The inverter side side Securing the screws Chart 5.16 Connecting the AC connector: Step 1: Disassemble the AC connector which is delivered in the accessory bag.
- Page 23 Step 3: Push and rotate the threaded sleeve onto the connection terminal until both are locked tightly. Then tighten the locking nut. Chart 5.19 Step 4: Push the AC connector into the AC Grid port The inverter side Chart 5.20 Step 5: To remove the AC connector, insert the screwdriver and press the release- mechanism to pull the connector out.
- Page 24 The recommended wiring diagram is as follows: Diagram A SPH Inverter AC GRID EPS OUTPUT EPS Load Chart 5.22 Note: This diagram is an example for gird system without special requirement on electrical wiring connection.The neutral line is necessary. Diagram B SPH Inverter EPS OUTPUT AC GRID...
- Page 25 Diagram C SPH Inverter AC GRID Chart 5.24 Note: This diagram is an example for customer who only wants to use the on grid storage system.The neutral line is necessary. Notice: Ø The machine shell has a screw for a ground wire. It is important to connect the shell to the earth.
- Page 26 5.4.3 Connection of battery terminal Similar to the traditional inverter connecting, the input of battery can be realized by using MC4 terminal, the detail steps are as follows: Step 1: Turn off battery switch. Step 2: Insert battery panel positive and negative cables into MC4 terminal,then connect positive pole(+) of connection cable to positive pole(+) of battery input connector, connect negative pole(-) of connection cable to negative pole(-)of battery input connector.
- Page 27 Step9: Screw the swivel nut onto the waterproof cover. Note: 1. Meter must be provided by Growatt. If not, maybe meter can't communicate with SPH inverter. 2. The more detail describe of meter installation, please turn to meter user manual.
- Page 28 Chart 5.28 Remark: Meter wire (15m in length) specification: RJ45, standard LAN line (one end with 8P modular plug, the other connected with transformer). But if the length is not enough, customer can add cable, so the length can be increased to 25m max, the operation is as follow chart: Chart 5.29...
- Page 29 5.4.5 Connection of communication terminal for lithium battery (CAN) When using CAN communication with lithium batteries(for example ARK H1), connect lithium battery terminal (RJ45) steps as follows: Step1: Unscrew the swivel nut from the cable gland. Step2: Thread the swivel nut over the “CAN” cable. Step3: Press the cable support sleeve out of the cable gland.
- Page 30 5.4.6 Connection of RS 485 terminal RS 485 reserved communication interface, can be used for meter communication, please connect the terminal (RJ45) as follows: Step1: Unscrew the swivel nut from the cable gland. Step2: Thread the swivel nut over the “RS485” cable. Step3: Press the cable support sleeve out of the cable gland.
- Page 31 5.4.7 Connection of DRMS terminal(Australia only) When SPH is applied to Australia, the DRMS terminals need to be connected, the connection way appears as follows: Step1: Unscrew the swivel nut from the cable gland. Step2: Thread the swivel nut over the “DRMS” cable. Step3: Press the cable support sleeve out of the cable gland.
- Page 32 RJ45 terminal pin assignment assignment for inverter scapable of both charging and discharging DRM5 DRM6 DRM7 DRM8 RefGen COM/DRM0 Method of asserting demand response modes MODE Rj45 socket asserted by shorting pins Requirement operate the disconnection device DRM0 DRM5 Do not generate power Do not generate at more than 50% of DRM6 rated power...
- Page 33 5.4.8 Connection of temperature probe for lead-acid battery When customer using lead-acid battery, the temperature probe of the lead-acid battery is used to detect the ambient temperature of the lead-acid battery, the battery temperature cable of the SPH side connection steps are as follows: Step1: Unscrew the swivel nut from the cable gland.
- Page 34 Note: 1. If you are using a lithium battery, you do not need to install this temperature probe, the probe of the temperature cable should be attached to the surrounding environment of the lead-acid battery, and the length of this cable is 1.5m, so pay attention to the distance of battery and SPH.
- Page 35 Chart 5.39 Note: 1.If the cable such as “Dry contact” cable is not used, please do not remove the filler plug from the cable support sleeve. 2.Dry contact can give a 12V and less than 200mA source output to driver relay and so on.
- Page 36 PV Array Grounding Grounding conductor of PV panel brackets must be firmly connected to earth at PV array side and inverter side and SP side. The sectional area of grounding conductor should be equal to the sectional area of DC grounding conductor. The minimum wire diameter is 10.0mm2.
-
Page 37: Commissioning
6 Commissioning 6.1 Commissioning of SPH Electrify SPH after all installation of Part5 be finished, here are the steps: Ø Connect PV Ø Connect AC Ø Connect battery Ø Turn on AC first Ø Then turn on battery Ø Last turn on PV If PV Grid and battery are available, system would work on the “normal”... - Page 38 Ÿ Backup mode If Grid lost, system would turn to backup mode (user can disable it, refer to 6.4.4) and AC output from EPS LOAD port, all the energy from PV and battery, if the PV also lost, then only battery discharge. Mind you, SPH maximum output power is 10000W in this mode, the load which connect with EPS LOAD should less than 10000W.
- Page 39 After all the actions are done, you still have to wait for more than 5 minutes. 6.3 Country setting Growatt can provide various regulations of the machine, after customers receive the machine, according to their country/region, by LCD to set the corresponding regulations.
- Page 40 VDE0126 GT0XXXXXX1 TUNISIA (NULL) Ukraine (NULL) VDE-AR-N4105 GT0XXXXXX7 IEC62116&61727 GT0XXXXXXC General model South Africa GT1XXXXXXC(NULL) Dubai (NULL) Chile (NULL) Argentina (NULL) Uruguay (NULL) Others (NULL) CEI 0-21 GT0XXXXXX4 Italy CEI 0-16 (NULL) Hungary Hungary GT0XXXXXXC GT0XXXXXX8 GT0XXXXXX5 Ireland GT1XXXXXX3 NI_G98 (NULL) NI_G99 (NULL)
- Page 41 6.4 Display and button 6.4.1 LCD display area Normal Vb / Cb: 488.0 V 88% Chart 6.1 Location Description State Information PV input (if you connect two tracks, it will show two. Otherwise show one) SPH inverter Power flow line Grid Battery (show the SOC in five grid, Every grid represents 20%) Local load...
- Page 42 6.4.2 LED and button instruction Chart 6.2 Description Location Status ESC- button(cancel control) Down-button Enter-button UP-button Notice : LED showing status of SPH, it has two colors, one is green and another is red. Please turn to 3.1 and read the detail of LED. 6.4.3 LCD display column LCD display column is used to show the current state, basic information and fault information.
- Page 43 The A line's concluding information as follow: Ø Standby state: SPH is in standby state. No error in this state, but for other reasons, make it in a wait state. Ø Normal state: SPH is normal working state. Ø Checking state: SPH is in self-check state, if there is no error or warning, SPH will go to normal state or standby state.
- Page 44 6.4.4 work mode set up You can enter set up page by long press “enter” for 3S, in this page, you can press “enter” or “ESC” for 1S to finish the selection, the page shows like following: Press “enter” key more than 3 seconds into setup mode WorkMode WorkMode...
- Page 45 1.Under the Basic Para, you can see the setup options below after pressing Enter for 1S: Press “Enter ” key Press “Enter” key more than 1 seconds more than 1 seconds to make sure to make sure WorkMode WorkMode WorkMode English Basic Parameter Language...
- Page 46 Note: 1.When EPS Disable & Bypass: OFF, there is no output at the EPS port under any circumstances; 2.When EPS Enable & Bypass: OFF, the EPS port has no output when there is power grid, and the EPS port has output when there is no power grid, and the load needs to be switched through ATS;...
- Page 47 4.Under the Mode Change, you can see the setup options below after pressing Enter: Press “enter ” key to Press “enter ” key to make sure make sure WorkMode WorkMode Battery :Lithium Mode Change Lead -acid Chart 6.9 In the battery type, you can choose lithium battery or lead-acid battery. 5.Under the DiagnoseFun,you can run“DiagnoseFun”after the installation is completed.
- Page 48 Note: 1.After each step of the test is OK, the LCD displays PASS, wait for 10s and then proceed to the next test. 2.After detecting Fail, you need to press OK to exit. 3.When all the tests are completed, you need to press the OK key to confirm and exit. 4.Disconnect PV, EPS, Load ,Turn on BAT and Grid only, and than run the DiagnoseFun.
- Page 49 Note: 1.Setup ExportLimit ON a nd SingleExport OFF. ExportLimit c ontrol i n t otal; 2.Setup ExportLimit ON a nd SingleExport ON. ExportLimit c ontrol i n s ingle p hase; 3.LoadFstCtrl:Single Phase Enable or Three Phase Enable.If setup SiEn, ExportLimit in Export Limit is used for users to control the energy flowing to the grid.If this function is enabled,the feeding power to grid will be equal or less than the setup value.The purpose of the Fail Safe function is to ensure that should any part of the ELS fail,the Active Power...
- Page 50 8. Under the Country/Area setting, you can change the safety options of SPH after pressing Enter: WorkMode Europe Area VDE0126 … EN50438 WorkMode General Area If you need to change safety VDE0126 options , you need key password … WorkMode WorkMode Chile Country/Area...
- Page 51 10.Under the default set, you can see the setup options below after pressing Enter: Press “enter” key to Press “enter” key more make sure than 3 seconds to make sure WorkMode WorkMode Default Set Chart 6.15 Default set is “resume to default setting ”, please don't use it unless it's necessary. 6.5 Communication 6.5.1 Use of USB-A port USB-A port is mainly for firmware update.
- Page 52 6.5.2 Use of 485-1/485-2 port 485-1/485-2 port is the extended 485 interface on SPH, which needs to be used in conjunction with the RS485 Setting in the LCD menu to communicate with external devices. Chart 6.17 When set to ShineMaster mode, the wiring diagram is as follows: Grid Load Load...
- Page 53 485-3 port is mainly used for monitoring connection with computer, users can monitor, set parameters and update the software of the machine through 485-3 connection with machine and PC, using the shinebus software developed by Growatt. About ShineBus software, when you needed, please download from official website of Growatt.
- Page 54 Chart 6.22 The wiring diagram is as follows: Computer RS485 cable USB-RS485 cable Chart 6.23...
- Page 55 SPH. Note: This monitoring devices can only be used with Growatt's Shineserver / shinephone monitor platform. Wi-Fi-X / Shinelink are connect with inverter via USB interface and use computer terminal / or mobile phone for data monitoring.
-
Page 56: Start-Up And Shut Down
Start-up and shut down SPH 7 system 7.1 Start-up the SPH system Users can start-up SPH inverters through following steps: 1.Connect to PV. 2.Connect to Grid. 3.Connect to Battery. 4.Turn the switch on in turn of Grid, battery and PV. 5.When the LED turns green, the working information on LCD indicates the successful start-up of SPH inverter. -
Page 57: Attention Of The Installation Environment,Maintenance And Cleaning
SPH inverter stops working. Growatt SPH series inverter without fan so belongs to natural cooling, hot air from the top of the radiator, tie-in battery, use environment for IP65, please pay attention to the temperature of the installation environment, to ensure that the battery's safety and the normal work of the machine. -
Page 58: Fault Removal 9
1.Check the positive and negative of PV input is reversed or not. 2.Reinserted the PV terminal, Warning203 Pv1 or PV2 Circuit short please contact Growatt service center if restart can't solve the problem. Battery temperature out of Check the environment... - Page 59 Please refer to the local grid 2.Restart inverter. AC F Outrange standard for more details for 3.Please contact Growatt service the grid voltage. center if restart can't solve the problem. 1.Check the lithium Battery is open or not.
- Page 60 2.Check the wire of battery and than100 V inverter is good or not. 1.Check the warning information from lithium battery user manual. 2.Please contact Growatt service BMS Warning:XXX BMS report warning center if restart can't solve the problem. 1.Check the warning information from lithium battery user manual.
-
Page 61: Eu Declaration Of Conformity
•2014/30/EU Electromagnetic Compatibility Directive (EMC) •2011/65/EU RoHS Directive and its amendment (EU)2015/863 Shenzhen Growatt New Energy Technology Co. Ltd confirms that the Growatt inverters and accessories described in this document are in compliance with the above mentioned EU directives. The entire EU Declaration of Conformity can be found at www.ginverter.com. -
Page 62: Decommissioning 11
Decommissioning 11 11.1 Dismantling the energy storage 1.Disconnect the SPH inverter such as mentioned in section 7. 2.Disconnect the upper cable of SPH inverter. Watch out the SPH's shell heat and prevent to scald Wait 20 minutes until the SPH cooling and then to disassembly! 3.Unscrew all the connecting cable. -
Page 63: Product Specification
12 Product specification 12.1 Growatt SPH series energy storage machine product specification Model SPH 4000 SPH 5000 SPH 6000 SPH 7000 SPH 8000 SPH 10000 TL3 BH-UP TL3 BH-UP TL3 BH-UP TL3 BH-UP TL3 BH-UP TL3 BH-UP Specifications Input data(DC) Max. - Page 64 < 3% THDV < 10ms Switch time Battery data(DC) Battery voltage range 100~550V Max. charging / discharging current Continuous charging 4000W 5000W 6000W 7000W 8000W 10000W / discharging power Type of battery lithium battery / Lead-acid battery Capacity of battery 7.68~76.8kWh Efficiency Max.
-
Page 65: Dc Input Terminal Parameter
≤ 35 dB(A) Noise emission (typical) Altitude 3000m <13W Self-Consumption Topology Transformerless Cooling Natural Protection degree IP65 Relative humidity 0~100% DC connection H4 / MC4 (optional ) Connector AC connection H4 / MC4 (optional) Battery connection Interfaces Display LCD+LED RS485/CAN/USB optional RF/WIFI/GPRS/4G Warranty: 5 / 10 years... -
Page 66: Torque
2Nm(18 1bf.in) 12.4 Appendix The following chart is the energy storage machine optional appendix list, if there is a need please contact the Growatt New Energy Technology Co., Ltd or dealer orders.(P/N is only for reference,and it may be changed) Name... - Page 67 13 Certificate Growatt SPH series inverter apply within the scope of the world, So the inverter have to satisfy different countries and regions of different safety standards. Model Certificate IEC 62040, VDE-AR-N 4105, VDE 0126, UTE C 15-712, C10/C11,EN50549, CEI 0-21, CEI 0-16, IEC62116,...
- Page 68 Annex: AutoTest (only for Italy) Follow is the chart of Auto Test, refer to 6.4.4. in the set up surface of “Auto Test”. Press the “enter” key, make sure to start auto test by press “enter” key 3 seconds. The LCD will display the follow message.
- Page 69 Download Manual Shenzhen Growatt New Energy Co., Ltd. 4-13/F, Building A, Sino-German (Europe) Industrial Park, Hangcheng Blvd, Bao'an District, Shenzhen, China +86 755 2747 1942 service@ginverter.com www.ginverter.com GR-UM-226-A-03...
Need help?
Do you have a question about the SPH Series and is the answer not in the manual?
Questions and answers