Table of Contents
Advertisement
Quick Links
Advertisement
Table of Contents

Related Manuals for RAIS VISIO 3-1 NS


Summary of Contents for RAIS VISIO 3-1 NS
- Page 1 B R U G E R M A N U A L B E D I E N U N G S A N L E I T U N G U S E R M A N U A L M A N U E L D ’...
- Page 2 Foyer à durèe de combustion limitèe, homologué pour cheminée à connexions multiples. Utiliser seulement les combustibles recommandés. Hergestellt für /Produced for: ATTIKA FEUER AG, Brunnmatt 16, CH-6330 Cham / RAIS A/S, Industrivej 20, DK-9900 Frederikshavn Reference / DTI test report:...
- Page 3 Foyer à durèe de combustion limitèe, homologué pour cheminée à connexions multiples. Utiliser seulement les combustibles recommandés. Hergestellt für /Produced for: ATTIKA FEUER AG, Brunnmatt 16, CH-6330 Cham / RAIS A/S, Industrivej 20, DK-9900 Frederikshavn Reference / DTI test report: 15a B-VG...
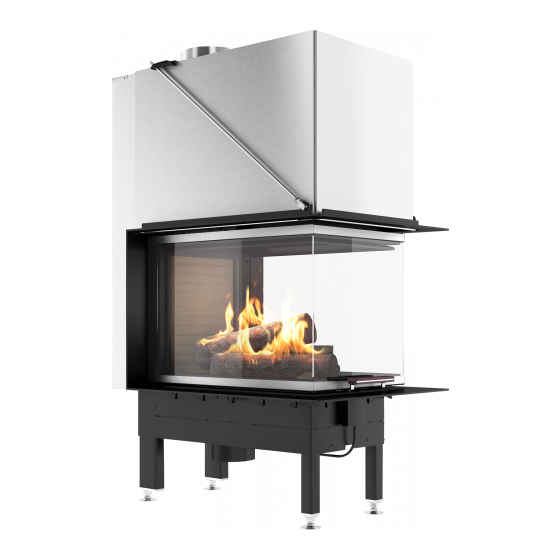
- Page 4 VISIO 3-1 NS Model Reservedelstegning / Ersatzteilzeichnung / Spare parts drawing / Dessin des pièces de rechange / Reservdelsritning 9-10 11-12 Visio 3-1 NS...
- Page 5 VISIO 3-1 DIN+ Model Reservedelstegning / Ersatzteilzeichnung / Spare parts drawing / Dessin des pièces de rechange / Reservdelsritning 9-10 11-12 Visio 3-1 DIN +...
- Page 6 Indstilling af spjæld / Einstellung der Luftklappe / Adjustment of the air damper / Réglage du volet d’air / Innstilling av spjeldet / Inställning av spjället Position 1 - Posisjion 1 Position 3 - Posisjion 3 Position 2 - Posisjion 2 Optænding og påfyldning / Anzünden und Nachlegen / Lighting and fuelling / Allumage et remplissage / Opptenning og påfylling / Upptänding och påfyllning VISIO...
- Page 7 FIRE ENVIRONMENTALLY FRIENDLY! 5 Eco-friendly advices for sensible heating - common sense both environmentally and economically. 1. Effective lighting. Use small pieces of wood (fir tree) and a suitable fire lighter, for example paraffined wood wool/saw- dust. Open the air damper, so plenty of air is fed to the stove and the gases from the heated wood can burn rapidly.
-
Page 8: Table Of Contents
CLEANING THE COMBUSTION CHAMBER ................. 30 CLEANING OF THE FLUE ......................31 INTERRUPTION OF OPERATIONS ....................32 CONVERSION OF SELF CLOSING DOOR..................34 ACCESSORIES ........................... 36 SPARE PARTS VISIO 3-1 NS MODEL ................... 37 SPARE PARTS VISIO 3-1 DIN+ MODEL ..................38... - Page 9 English RAIS/ - User manual for VISIO 3-1 N.B. The stove is always delivered as an NS model. (Norwegian model) To change the stove into a DIN + model, two things needs to be done. Remove the rubber Air restrictor in the Primary airdamper. by pulling it out.
-
Page 10: Introduction
English RAIS/ - User manual for VISIO 3-1 Introduction attika Congratulations on your new RAIS / stove. attika A RAIS / wood burning stove is more than just a heat source: it also shows that you care about design and quality in your home. -
Page 11: Warranty
For warranty claims on supplied or repaired parts refer to national/ EU laws/regulations in connection with renewed warranty periods. The current warranty conditions can be obtained from RAIS A/S. Transport safety Before you install the stove remove the transport safety. -
Page 12: Specifications
English RAIS/ - User manual for VISIO 3-1 VISIO 3-1 is an inset stove with vertically operated door. Specifications DTI ref .: 300-ELAB-2241-EN / 300-ELAB- 2241-NS / 300-ELAB-2241/300- VISIO 3-1 (NS) VISIO 3-1 (DIN+) ELAB-2241- DIN+ Rated power (kW):... -
Page 13: Distances/Measurements
English RAIS/ - User manual for VISIO 3-1 Distances/Measurements Note that the exhaust branch can rotate continuously. I: Distance from floor to centre smoke top outlet K: Distance from back side to air intake bottom (Air System) N: Distance from side to air intake bottom (Air System) -
Page 14: Convection
Make sure that the area requirements are respected, and that holes are not blocked from the outside. Discolouration of the stove walls, doors and convection outlets may occur. This is cau- sed by the rising hot air. RAIS assumes no responsibility for any installation or consequential damages. -
Page 15: Installation
European standards must be respected. Local authorities and a chimney specialist should be consulted before installation. The stove may only be installed by a qualified / competent RAIS dealer / installer or the warranty will be invalid. It is prohibited to carry out unauthorised alterations to the stove NOTE! Before the stove can be used, the local chimney sweep must be notified. -
Page 16: Chimney
English RAIS/ - User manual for VISIO 3-1 Chimney The chimney is the driving force which makes the stove function. In order for the stove to perform satisfactorily the chimney height must be sufficient to ensure the correct draught of 14 to 18 Pa so as to clear the products of combustion and prevent problems of smoke emanating into the room when firing. -
Page 17: Choice Of Installation Materials
English RAIS/ - User manual for VISIO 3-1 Choice of installation materials For non-flammable materials select panels/brick with a thermal resistance greater than 0.03 m xK/W. Thermal resistance is defined as the wall thickness (in m) divided by the wall lambda value. - Page 18 English RAIS/ - User manual for VISIO 3-1 Hole measurements (height x width x depth) min. 490,1mm x 528,2mm x 705,3mm (int. measurement). Hole measurements are for stove with inset frame.
-
Page 19: Minimum Distances To Flammable Materials
English RAIS/ - User manual for VISIO 3-1 Minimum distance to flammable materials A - Distance to furniture 700mm B - Distance to flammable floor in front of the oven 150mm C - Distance to flammable floor next to the oven... - Page 20 English RAIS/ - User manual for VISIO 3-1 To get the most out of your stove and the best possible flow of warm air out of the convection grilles, place the grates just below the non- flammable top plate.
-
Page 21: Convection
English RAIS/ - User manual for VISIO 3-1 Convection There is a minimum requirement for the convection area. This area must be observed due to danger of overheating and due to distance to flammable materials. Make sure that the stove can pull convection air in under the stove. -
Page 22: Air System
English RAIS/ - User manual for VISIO 3-1 Air system Mounting the Air-system ensures that the air control system receives fresh air from outside. To ensure that the Air- system work you have to build it, in such a way, to ensure that there cannot develop low pressure in the home. -
Page 23: Drying And Storage
• It is a good idea to bring the firewood into the house 2-3 days before you need it. Regulating the combustion air All RAIS/attika stoves are equipped with a one-handed operating lever for regulating the damper. The stove-specific regulating mechanisms can be seen in the diagrams at the front of the manual. -
Page 24: Ventilation
English RAIS/ - User manual for VISIO 3-1 By setting the interval between position 1 and 2 (see next section) ensures optimum utilisation of the energy content of the wood, as there is oxygen for combustion and for the burning of the pyrolysis gases. When the flames are a clear yellow the damper has been set correctly. -
Page 25: First Usage
English RAIS/ - User manual for VISIO 3-1 First usage A careful start pays off. Start with a small fire, so that the wood burning stove can get accustomed to the high temperature. This provides the best start and prevents any damage. -
Page 26: Control
When refuelling, open the door carefully to avoid smoke escaping. Never add wood while there are still visible flames in the oven. RAIS recommend to refill with 2-4 pieces of wood - approx. 1 ½ - 2 ½ kg - within 45 minutes (intermittent operation). -
Page 27: Warning
Advarsel Advarsel attika English RAIS/ - User manual for VISIO 3-1 Hvis brændet kun ulmer eller ryger, og der tilføres for lidt luft, udvikles der Hvis brændet kun ulmer eller ryger, og der tilføres for lidt luft, udvikles der Hvis brændet kun ulmer eller ryger, og der tilføres for lidt luft, udvikles der Warning!! uforbrændte røggasser. -
Page 28: Cleaning And Care
• Dampen a piece of paper or newspaper, dip it in the ashes and rub the sooty glass. • Rub with a piece of paper and glass becomes clean. • Alternatively use glass polish, which can buy from you RAIS distributor. Clean the exterior with a soft dry cloth or soft brush. -
Page 29: Cleaning The Glass Door Panels
English RAIS/ - User manual for VISIO 3-1 Cleaning the glass door panels Lock the door in position before cleaning. With the special key supplied with the stove, turn the latch located above the side doors. To open the side door turn the latch located in the front above and belov each side door. -
Page 30: Cleaning The Combustion Chamber
English RAIS/ - User manual for VISIO 3-1 Cleaning the combustion chamber Scrape/shovel the ashes down into the grate in center of stove. The ash tray under the grill can be removed and emptied into a non-flammable container until it has cooled. -
Page 31: Cleaning Of The Flue
English RAIS/ - User manual for VISIO 3-1 Cleaning the flue In order to gain access to the smoke flue, remove the 6 baffle plates made of vermicu- lite. Vermiculite baffle plates Remove dirt and dust, and mount the parts in reverse order. -
Page 32: Interruption Of Operations
In the case of a cold chimney or difficult weather conditions you can compensate by adding more air to the stove than usual. If your stove continues to malfunction, we recommend that you contact your RAIS distributor or chimney sweep. - Page 33 English RAIS/ - User manual for VISIO 3-1 WARNING! If incorrect, or too damp firewood is used, it can lead to excessive formation of soot in the chimney and, possibly a chimney fire: • In this case, shut off for all air supply to the stove. If the system has a valve connec- tion - air connection from the outside, it must also be closed.
-
Page 34: Conversion Of Self Closing Door
English RAIS/ - User manual for VISIO 3-1 Conversion to a self-closing door beforethe oven is built in. The door is made self-closing by dismantling some of the door's counterweights. On VISIO 1 & 3, the counterweight is changed on both sides. - Page 35 English RAIS/ - User manual for VISIO 3-1 Conversion to self-closing door after the stove has been fitted. The door is made self-closing by dismantling some of the door's counterweights. On VISIO 1 & 3, the counterweight is changed on both sides.
-
Page 36: Accessories
English RAIS/ - User manual for VISIO 3-1 Accessories Airkit No. 31 air supply via floor 00065173190 Convection grille - front Convection grates - side 511480470 - white 836480470 - white 511480490 - black 836480490 - black 511480870 - white... -
Page 37: Spare Parts Visio 3-1 Ns Model
- User manual for VISIO 3-1 Spare parts VISIO 3-1 NS model The use of spare parts other than those recommended by RAIS results in the warranty becoming void. All replaceable parts can be purchased as spare parts from your RAIS distributor. -
Page 38: Spare Parts Visio 3-1 Din+ Model
- User manual for VISIO 3-1 Spare parts VISIO 3-1 DIN+ model The use of spare parts other than those recommended by RAIS results in the warranty becoming void. All replaceable parts can be purchased as spare parts from your RAIS distributor. - Page 39 English RAIS/ - User manual for VISIO 3-1...
- Page 41 ATTIKA FEUER AG Brunnmatt 16 CH-6330 Cham Switzerland www.attika.ch RAIS A/S Industrivej 20 DK-9900 Frederikshavn Denmark www.rais.dk...
Need help?
Do you have a question about the VISIO 3-1 NS and is the answer not in the manual?
Questions and answers