Lectrosonics M2R Instruction Manual
Digital iem receiver
Hide thumbs
Also See for M2R:
- Instruction manual (20 pages) ,
- Instruction manual (20 pages) ,
- Instruction manual (32 pages)
Table of Contents
Advertisement
Quick Links
Download this manual
See also:
Instruction Manual
M2R
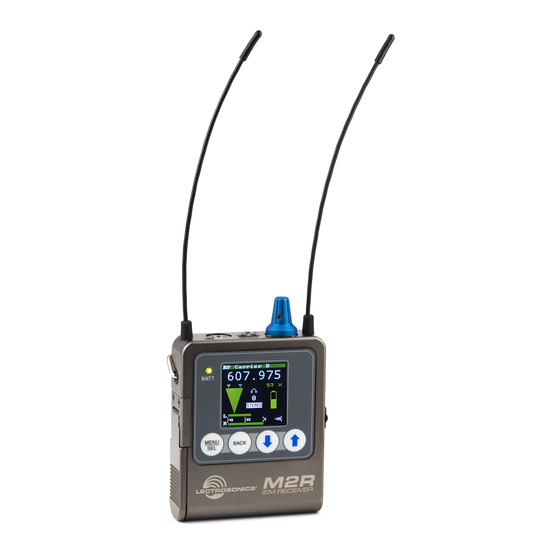
Digital IEM Receiver
Fill in for your records:
Serial Number:
Purchase Date:
INSTRUCTION MANUAL
Quick Start Summary
1) Install receiver batteries (pg. 6).
2) Power unit on with On/Off and Volume knob (pg. 4).
3) Scan for an available frequency (pg.9).
4) Sync the receiver with a transmitter (pg. 10).
5) Enable RF in transmitter (see transmitter manual).
6) Send audio (pg. 9).
Rio Rancho, NM, USA
www.lectrosonics.com
Advertisement
Table of Contents

Related Manuals for Lectrosonics M2R


Summary of Contents for Lectrosonics M2R
-
Page 1: Quick Start Summary
3) Scan for an available frequency (pg.9). 4) Sync the receiver with a transmitter (pg. 10). 5) Enable RF in transmitter (see transmitter manual). 6) Send audio (pg. 9). Fill in for your records: Serial Number: Purchase Date: Rio Rancho, NM, USA www.lectrosonics.com... -
Page 2: Table Of Contents
Table of Contents Quick Start Summary ....................................1 M2R Digital IEM Receiver ...................................3 FlexList™ ......................................3 RF Front-End with Tracking Filter ................................3 Panels and Features ....................................4 Battery Status LED ....................................5 RF Link LED ......................................5 On/Off and Volume Knob ..................................5 IR (infrared) Port ....................................5 USB Port .......................................5... -
Page 3: M2R Digital Iem Receiver
(or whatever name the user chooses for that unit), frequency, mixer settings and limiter settings. The mix is easily shared via the M2R IR port, added to the list of 16 mixes and stored until cleared by the user. The M2R allows the user to toggle between the mixes, making troubleshooting issues easy and efficient. -
Page 4: Panels And Features
Panels and Features RF Link LED Headphone IR (infrared) output port On/Off and volume knob Battery status Belt clip mounting sockets port Battery compartment door LECTROSONICS, INC. -
Page 5: Battery Status Led
Digital IEM Receiver Battery Status LED Keypad and LCD Interface When the battery status LED on the keypad glows green the batteries are good. The color changes to red at a midpoint during the runtime. When the LED begins to blink red, only a few minutes remain. The exact point at which the LED turns red will vary with battery brand and condition, temperature and power consumption. -
Page 6: Installing Batteries
Alkaline or Lithium. Polarity markings Audio level This bar graph indicates the level of the audio entering the transmitter. The “0” refers to the level reference, as chosen in the transmitter, i.e. either +4 dBu or -10 dBV. LECTROSONICS, INC. -
Page 7: Navigating The Menus
Digital IEM Receiver Navigating the Menus From the Main Window, press MENU/SEL to enter the menu, then navigate with the UP and DOWN arrows to highlight the desired setup item. Press MENU/SEL to enter the setup screen for that item. Refer to the menu map on the following page. -
Page 8: Lcd Menu Map
BACK Lock Settings? Use arrow keys to lock or Unlocked Lock/Unlock Locked unlock front panel settings BACK About M2R No selections available; About M2R for information BACK purposes only LECTROSONICS, INC. Restore factory Default Use arrow keys to accept or reject... -
Page 9: Menu Item Descriptions
Digital IEM Receiver Menu Item Descriptions When a usable frequency has been selected, press the BACK button for the option to keep your newly se- lected frequency or to revert to where it was set before Scan the scan. Use the scan function to identify a usable frequency. The area in red has not been scanned. - Page 10 1, channel 2 or both, or custom, allowing for varied width of the signal and how much level from each channel. The available modes are: • Stereo • SwapLR • Custom • Mono 1&2 • Mono Ch 2 LECTROSONICS, INC.
- Page 11 About M2R Displays general information about the M2R, including serial number and the versions for both FPGA and main firmware running in the receiver. Rio Rancho, NM...
-
Page 12: System Setup Procedures
1 and 2) Install Receiver Batteries and Power On Install the batteries according to the diagram marked Menu Item Setting on the back of the housing, power on the M2R and Flexlist Cleared select the battery type in the menu. Check the BATT... -
Page 13: Accessories
Digital IEM Receiver Accessories Specifications 26895 Operating Spectrum: 470.100 - 614.375 MHz Wire belt clip. Modulation Type: 8PSK with Forward Error CorrectionOccupied Latency: Digital Source: 1.0 ms over Dante Network Analog Source: <1.4 ms Audio Performance: Frequency Response: 20Hz - 15 KHz, - 3dB THD+N: 0.15% (1kHz @ -10 dBFS) Dynamic Range:... -
Page 14: Wireless Designer Software And Usb Driver
Launch the installer and follow the screen prompts. When the installation is complete, the confirmation screen will appear. Click on Finish to complete the installation. I Agree on the EULA (end user license agreement) must be checked to continue the installation. LECTROSONICS, INC. -
Page 15: Wireless Designer Software And Usb Driver
Digital IEM Receiver Wireless Designer Click “Open Anyway”. Another warning dialog box opens, click “Open” to launch Wireless Designer. This Software and USB Driver only needs to be done once, Wireless Designer will launch normally thereafter. Software for Mac OS X Operating Systems ®... - Page 16 LECTROSONICS, INC.
-
Page 17: Service And Repair
There are no adjustments inside that will make a malfunctioning unit start working. LECTROSONICS’ Service Department is equipped and staffed to quickly repair your equipment. In warranty repairs are made at no charge in accordance with the terms of the warranty. Out-of-warranty repairs are charged at a mod- est flat rate plus parts and shipping. -
Page 18: Limited One Year Warranty
This warranty does not apply to used or demonstrator equipment. Should any defect develop, Lectrosonics, Inc. will, at our option, repair or replace any defective parts without charge for either parts or labor. If Lectrosonics, Inc. cannot correct the defect in your equipment, it will be replaced at no charge with a similar new item.
Need help?
Do you have a question about the M2R and is the answer not in the manual?
Questions and answers