Table of Contents
Advertisement
Quick Links
Advertisement
Table of Contents

Related Manuals for Lenovo EN4023


Summary of Contents for Lenovo EN4023
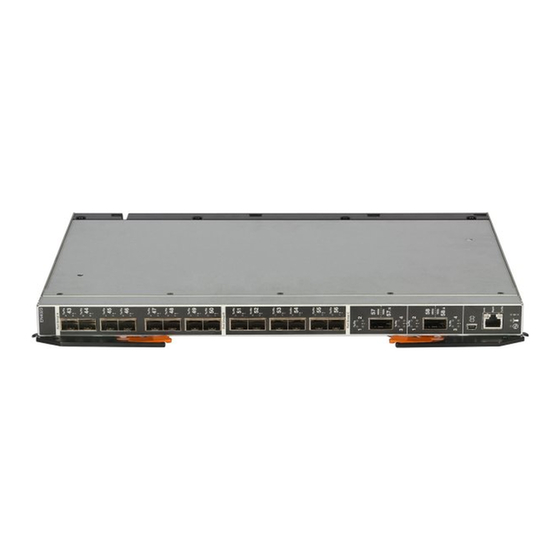
- Page 1 Lenovo Flex System EN4023 10Gb Scalable Switch User’s Guide...
- Page 3 Lenovo Flex System EN4023 10Gb Scalable Switch User’s Guide...
- Page 4 Note: Before using this information and the product it supports, read the general information in Appendix B, “Notices,” the Safety Information and Environmental Notices and User Guide documents on the Lenovo Notices for Network Devices CD, and the Warranty Information document that comes with the product.
-
Page 5: Table Of Contents
Port mapping ........26 Lenovo Flex System EN4023 10Gb Scalable Switch User’s Guide... - Page 6 Electronic emission notices......52 Lenovo Flex System EN4023 10Gb Scalable Switch User’s Guide...
- Page 7 Safety ©Copyright Lenovo 2015...
- Page 8 Lenovo Flex System EN4023 10Gb Scalable Switch User’s Guide...
-
Page 9: Safety Statements
Safety statements Safety statements... - Page 10 Safety statements Lenovo Flex System EN4023 10Gb Scalable Switch User’s Guide...
- Page 11 Safety statements Class 1 Laser Product Laser Klasse 1 Laser Klass 1 Luokan 1 Laserlaite Appareil A` Laser de Classe 1...
-
Page 12: Ul Regulatory Information
UL Regulatory Information UL Regulatory Information This device is for use only with Listed Lenovo Flex System Enterprise Chassis. Lenovo Flex System EN4023 10Gb Scalable Switch User’s Guide... -
Page 13: Lenovo Flex System En4023 10Gb Scalable Switch
See the Lenovo Flex System Installation and Service Guide that comes with your Lenovo Flex System chassis to install the switch in the chassis; then, return to this User’s Guide for the information and instructions needed to complete the installation. -
Page 14: Brocade Documentation
Lenovo Flex System chassis. • Lenovo Flex System Manager System Management Guide This document explains how to use the Lenovo Flex System Manager user interface to manage chassis components. • Lenovo Flex System network device User’s Guides... -
Page 15: Notices And Statements
Notices and statements • Network OS NETCONF Operations Guide Notices and statements Features and specifications The Lenovo Flex System EN4023 10Gb Scalable Switch supports the following features and specifications. Features • Maximum up to 64 ports • Upgrade 3 license key enables FCoE and Flex Port capabilities for storage and SAN connectivity. -
Page 16: Model Options
ISL with a speed of up to 128 Gbps (256-Gbps full-duplex) for optimal bandwidth utilization, automatic path failover, and load balancing • Internal 1-Gbps full-duplex Ethernet port to connect to the redundant Lenovo Chassis Management Modules (CMMs) •... -
Page 17: License Options
FlexPort The FlexPort feature is supported only on the Lenovo Flex System EN4023 10Gb Scalable Switch by Network OS 5.0.0 and later. This feature allows you to configure the external SFP+ ports as Ethernet ports or as Fibre Channel (FC) ports. Qualified 10 GbE SFP+ transceivers, 8 Gbps FC transceivers, or 16 Gbps FC transceivers must be installed in ports to allow Ethernet or FC configuration. -
Page 18: Switch Specifications
Environmental conditions and specifications See the documentation that comes with your Lenovo Flex System chassis for information about the environmental conditions and specifications that are supported by the system. Lenovo Flex System EN4023 10Gb Scalable Switch User’s Guide... -
Page 19: Switch Components
14 external 10-Gbps Ethernet ports The FlexPort feature allows configuration of specific Lenovo Flex System EN4023 10Gb Scalable Switch ports as 1/10 GbE or 2, 4, 8, or 16 Gbps FC ports. FlexPort is supported by Network OS 5.0.0 and later. -
Page 20: Product Name And Serial Number
The Media Access Control (MAC) address is on a label located on the top handle of the switch. You will need this information when you register the switch with Lenovo. You can register the switch at http://www.ibm.com/support/mysupport/. TABLE 4... -
Page 21: Installation Guidelines
Flex System chassis to install the switch in the chassis; then return to this User’s Guide for the information and instructions needed to complete the installation. Installation guidelines Before you install the Lenovo Flex System EN4023 10Gb Scalable Switch in the Lenovo Flex System chassis, pay attention to the following guidelines: •... -
Page 22: Handling Static-Sensitive Devices
• You have followed the reliability guidelines in the documentation that comes with the chassis. Cable requirements for the switch are described in the Lenovo System x Configuration and Options Guide at http://www.ibm.com/servers/eserver/xseries/cog/. See the documentation that comes with the compute node for cable-routing information. - Page 23 Installing the switch The chassis supports a maximum of four Lenovo Flex System EN4023 10Gb Scalable Switches and a maximum of 14 1-bay compute nodes. See the documentation that comes with your Lenovo Flex System chassis for information about switch bay locations and the components that can be installed in them that are specific to your chassis type.
- Page 24 To maintain proper airflow, make sure the ventilation holes on the front of the switch are not blocked. 9. To install another switch, repeat step 2 through step 8; otherwise, go to the next step. Lenovo Flex System EN4023 10Gb Scalable Switch User’s Guide...
-
Page 25: Installing And Removing An Sfp+ Or Qsfp Transceiver
Install any SFP+ or QSFP transceivers that you ordered with the switch. NOTE For FlexPort operation, the Lenovo Flex System EN4023 10Gb Scalable Switch also supports FC SFP+ optical transceivers. For FlexPort operation only, optical FC SFP+ transceivers support Long Wavelength (LW), Short Wavelength (SW), and Extended Long Wavelength (ELW) modules. -
Page 26: Installing A Fc Sfp
Installing a FC SFP+ For the FlexPort feature, the Lenovo Flex System EN4023 10Gb Scalable Switch only supports 8 Gbps and 16 Gbps SFP+ optical transceivers for Fibre Channel connections. FlexPort is supported by Network OS 5.0.0 and later. -
Page 27: Handling An Sfp+ Or Qsfp Transceiver
Installing and removing an SFP+ or QSFP transceiver FIGURE 5 Installing a 16 Gbps SFP+ in the upper row of port slot FIGURE 6 Installing an 8 Gbps SFP+ in the upper row of port slot Handling an SFP+ or QSFP transceiver NOTES: Before installing an SFP+ or QSFP transceiver, be aware of the following information: •... -
Page 28: Inserting An Sfp+ Or Qsfp Transceiver
Laser Klasse 1 Laser Klass 1 Luokan 1 Laserlaite Appareil A` Laser de Classe 1 Inserting an SFP+ or QSFP transceiver To insert an SFP+ or QSFP transceiver, complete the following steps: Lenovo Flex System EN4023 10Gb Scalable Switch User’s Guide... - Page 29 Installing and removing an SFP+ or QSFP transceiver 1. Read the safety information that begins on page vii “System reliability guidelines” page 9. 2. Read the information in “Handling an SFP+ or QSFP transceiver” on page 15. 3. Remove the transceiver from its static-protective package. 4.
-
Page 30: Removing Or Replacing An Sfp+ Or Qsfp Transceiver
Cabling the switch This section provides instructions for connecting and disconnecting the cables to the physical ports on the Lenovo Flex System EN4023 10Gb Scalable Switch. Connecting and disconnecting the USB console cable The mini-USB (RS-232) console port can be used for serial console management and diagnostics. -
Page 31: Connecting The Rj-45 Ethernet Cable
Cabling the switch FIGURE 9 Mini-USB connection To disconnect the USB console cable, grasp the connector and gently pull the cable from the switch. Connecting the RJ-45 Ethernet cable The RJ-45 Ethernet cable can be connected to the RJ-45 port located on the front panel. To connect the RJ-45 connector to the switch, push the connector into the port connector until it clicks into place, as shown in Figure... -
Page 32: Locating The Information Panel, Leds, And External Ports
Trunk Group A (shown as ports 43–50) The FlexPort feature allows configuration of specific Lenovo Flex System EN4023 10Gb Scalable Switch ports as 1/10 GbE or 2, 4, 8, or 16 Gbps FC ports. FlexPort is supported by Network OS 5.0.0 and later. -
Page 33: Information Leds
Trunk Group C consists of QSFP ports 57 and 58. NOTE The FlexPort feature allows configuration of specific ports on the Lenovo Flex System EN4023 10Gb Scalable Switch as 10 GbE ports or as 2 Gbps, 4 Gbps, 8 Gbps, or 16 Gbps FC ports, depending on installed SFP+ transceivers. - Page 34 LEDs for the QSFP ports. If you are using ports 57 and 58, Tx/Rx LEDs are shown as solid green when operating properly, regardless of whether or not breakout mode is configured. Lenovo Flex System EN4023 10Gb Scalable Switch User’s Guide...
- Page 35 Locating the information panel, LEDs, and external ports Tx/Rx LED Fault (!) LED FIGURE 13 QSFP port LEDs Table 5 identifies the SFP+ and QSFP port status LED information. TABLE 5 SFP+ and QSFP port status LEDs Tx/Rx LED Fault (!) LED Port status Offline (no link) Steady green...
-
Page 36: System Status Leds
During power-on self-test (POST), the switch performs internal tests and LED tests. During POST, the LEDs are lit intermittently. After POST is successfully completed, the LEDs will behave as described in Table 7 Table Lenovo Flex System EN4023 10Gb Scalable Switch User’s Guide... - Page 37 Locating the information panel, LEDs, and external ports Power LED Fault LED Location LED FIGURE 15 System status LEDs Table 7 identifies the three system LEDs. After POST is successfully completed, this is normal LED behavior. TABLE 7 System status LEDs LED icon LED name LED description...
-
Page 38: Port Mapping
CMM, see the Lenovo Flex System Chassis Management Module User’s Guide. Configuring an IP address on the switch using the CLI 1. Install the Lenovo Flex System EN4023 10Gb Scalable Switch in the appropriate bay of the Lenovo Flex System chassis. For more information, see “Installing the switch”... - Page 39 Configuring the switch system> env –T system:switch[4] 5. From the CMM, enter ifconfig to display the current IP address. See Figure FIGURE 16 Configuring the IP address using the CMM CLI 6. To configure a static IP address, from the CMM, enter ifconfig c static <IP Address>...
-
Page 40: Configuring An Ip Address On The Switch Using The Cmm Gui
Configuring an IP address on the switch using the CMM GUI For IPv4 1. Install the Lenovo Flex System EN4023 10Gb Scalable Switch in the appropriate bay of the Lenovo Flex System chassis. For more information, see “Installing the switch”... - Page 41 Configuring the switch FIGURE 18 Component IP Configuration page For IPv6 1. Install the Lenovo Flex System EN4023 10Gb Scalable Switch in the appropriate bay of the Lenovo Flex System chassis. For more information, see “Installing the switch” on page 10.
-
Page 42: Connecting To The Switch Over Ssh
The passwords that are used to access the switch are case-sensitive. To increase system security, change the password after you log in for the first time. For more information, see the Network OS Administrator’s Guide. Lenovo Flex System EN4023 10Gb Scalable Switch User’s Guide... -
Page 43: Connecting To The Switch Using The Serial Console Port
The switch will default to using the internal management port with a switch reboot. Refer to the Technical Service Bulletin (TSB) for additional instructions when connecting to the switch using the front panel Ethernet (RJ-45) port. To access the TSB, go to the Lenovo Flex System Information Center at: http://pic.dhe.ibm.com/infocenter/flexsys/information/index.jsp. -
Page 44: Initial Configuration
Passwords are case-sensitive. TABLE 10 Default user accounts and passwords User ID Password (case-sensitive) admin password user password USERID PASSW0RD (wherein the sixth character is a zero) Lenovo Flex System EN4023 10Gb Scalable Switch User’s Guide... -
Page 45: Managing The Switch
Managing the switch For more information about user accounts, user-based access, and password requirements, see the Network OS Administrator’s Guide. Managing the switch SNMP v3 authentication Two user roles are supported: • snmpadmin—Provides read-write access • snmpuser—Provides read-only access Table 11 lists user login information. -
Page 46: Resetting The Switch To Factory Defaults
ATTENTION Restoring the switch to factory defaults is disruptive. Before doing so, save the switch configuration. Use the Lenovo Chassis Management Module (CMM) to reset the switch to factory defaults. See Figure 1. Open the CMM and log in with admin privileges. -
Page 47: Removing Or Replacing The Switch
Managing the switch For more information, go to http://pic.dhe.ibm.com/infocenter/flexsys/information/index.jsp. Navigate to IBM Flex System Information > Management Devices and Solutions >IBM Flex System Chassis Management Module > Using the Web interface > Web interface options > Chassis management options. NOTE Certain configuration settings are not restored to their default values when the request to restore factory default settings is initialized from the CMM. - Page 48 Managing the switch Lenovo Flex System EN4023 10Gb Scalable Switch User’s Guide...
-
Page 49: Updating The Firmware
Management Module (CMM), or from the switch using the CLI. Determining firmware from the CMM 1. Log in to the CMM as described in the Lenovo Flex System Chassis Management Module User’s Guide. If necessary, obtain the IP address of the CMM from your system administrator. -
Page 50: Upgrading The Switch Firmware
Upgrading the switch firmware Upgrading the switch firmware After you locate the correct firmware to download to the ILenovo Flex System EN4023 10Gb Scalable Switch, you can use the firmware download interactive command to perform the download. ATTENTION The firmware download for the switch is disruptive. Make sure no traffic is flowing through the switch during the download process. - Page 51 ############################### [ 100% ] Done install Package All packages have been downloaded successfully. The command has completed successfully. EN4023# EN4023# NOTE If you are downloading firmware to the switch and you log in to the FTP server as an anonymous user (“anonymous”...
- Page 52 Upgrading the switch firmware Lenovo Flex System EN4023 10Gb Scalable Switch User’s Guide...
-
Page 53: Solving Problems
When critical errors occur, the switch does not operate. To view POST results, complete the following steps: 1. Log in to the CMM as described in the Lenovo Flex System Chassis Management Module Command-Line Interface Reference Guide. If necessary, obtain the IP address of the CMM from your system administrator. -
Page 54: Parts Listing
Lenovo Flex System EN4023 10Gb Scalable Switch 94Y5219 NOTE The optical transceivers and cables supporting your Lenovo Flex System EN4023 10Gb Scalable Switch are continually changing. For the most current information on supported components, go to the Lenovo Server Proven website at http://www-03.ibm.com/systems/info/x86servers/serverproven/compat/us/flex.html. -
Page 55: Getting Help And Technical Assistance
Appendix Getting Help and Technical Assistance ©Copyright Lenovo 2015... -
Page 56: Before You Call
Before you call Before you call Lenovo Flex System EN4023 10Gb Scalable Switch User’s Guide... -
Page 57: Using The Documentation
Using the documentation Using the documentation Getting help and information from the World Wide Web Getting Help and Technical Assistance... -
Page 58: Software Service And Support
Software service and support Software service and support Hardware service and support Lenovo Flex System EN4023 10Gb Scalable Switch User’s Guide... -
Page 59: Ibm Taiwan Product Service
IBM Taiwan product service IBM Taiwan product service Getting Help and Technical Assistance... - Page 60 IBM Taiwan product service Lenovo Flex System EN4023 10Gb Scalable Switch User’s Guide...
-
Page 61: Notices
Appendix Notices ©Copyright Lenovo 2015... -
Page 62: Trademarks
Trademarks Trademarks Lenovo Flex System EN4023 10Gb Scalable Switch User’s Guide... -
Page 63: Important Notes
Important notes Important notes Notices... -
Page 64: Electronic Emission Notices
Important notes Electronic emission notices Federal Communications Commission (FCC) statement Industry Canada Class A emission compliance statement Lenovo Flex System EN4023 10Gb Scalable Switch User’s Guide... - Page 65 Important notes Australia and New Zealand Class A statement Notices...
- Page 66 Important notes European Union EMC Directive conformance statement Germany Class A statement Lenovo Flex System EN4023 10Gb Scalable Switch User’s Guide...
- Page 67 Important notes Japan VCCI Class A statement Notices...
- Page 68 Important notes Korea Communications Commission (KCC) statement Russia Electromagnetic Interference (EMI) Class A statement People's Republic of China Class A electronic emission statement Taiwan Class A compliance statement Lenovo Flex System EN4023 10Gb Scalable Switch User’s Guide...
- Page 69 QSFP ports initial fiber-optic cable resetting guidelines configuring the switch firmware using CLI determining level using GUI downloading using SSH upgrading console port Flash Boot critical errors boot eUSB Flexport ©Copyright Lenovo 2015...
- Page 70 QSFP transceivers QSFP removal RJ-45 RJ-45 port SFP+ switch status system release levers system status reliability guidelines Lenovo documentation requirements licenses network adapters POD1 RJ-45 POD2 LEDs port status Lenovo Flex System EN4023 10Gb Scalable Switch User’s Guide...
- Page 71 RJ-45 Ethernet port RJ-45 port enabling upgrading firmware cabling USB cable connecting safety statements SDRAM serial port settings weight, switch module SFP+ installation transceivers SFP+ transceivers ports removal specifications environmental memory processor switch access SSH access static-sensitive devices, handling switch components switch components switch management...
- Page 72 Lenovo Flex System EN4023 10Gb Scalable Switch User’s Guide...
- Page 73 Part Number: 00KD347 Printed in USA...
- Page 74 (IP) P/N: 00KD347 *47C9167*...
Need help?
Do you have a question about the EN4023 and is the answer not in the manual?
Questions and answers