
Subscribe to Our Youtube Channel
Related Manuals for REED R9900


Summary of Contents for REED R9900
- Page 1 Rich Black - 20/20/20/100 R9900 Model Indoor Air Quality Only if you REALLY need them: Meter Instruction Manual reedinstruments 1.800.561.8187 information@itm.com www. .com...
-
Page 2: Table Of Contents
Table of Contents Features ..................3 Specifications ................3-4 Instrument Description ...............4-5 Operating Instructions ..............5-8 Data Hold ................... 5 Backlight ..................5 Max, Min, & Weighted Averages ..........6 Auto Power Off ................6 Alarm ..................6-7 Temperature Unit ................ 7 CO2 Calibration ................7 RH Calibration ................ -
Page 3: Features
Features • Simultaneously monitors carbon dioxide (CO ), relative humidity and temperature • Instantaneous readings are displayed on a high resolution LCD with backlight • Dew point and wet bulb temperatures can also be displayed • Displays STEL readings (Short-Term Exposure Limit) over a 15-minute period and TWA readings (Time-Weighted Average) over a period of 8 hours • Hold function freezes displayed reading • Maximum, minimum and average functions • Low drift, non-dispersive infrared CO sensor • Audible warning alarm of excessive CO concentrations • RS232 output Specifications Ranges: : 0 to 5,000 ppm; Temperature: -10 to 60°C (14 to 140°F); Humidity: 0 to 99.9% RH; Dew Point: -73.4 to 60°C; Wet Bulb: -13.3 to 60°C Resolution: : 1 ppm; Temperature: 0.1°C/°F;... -
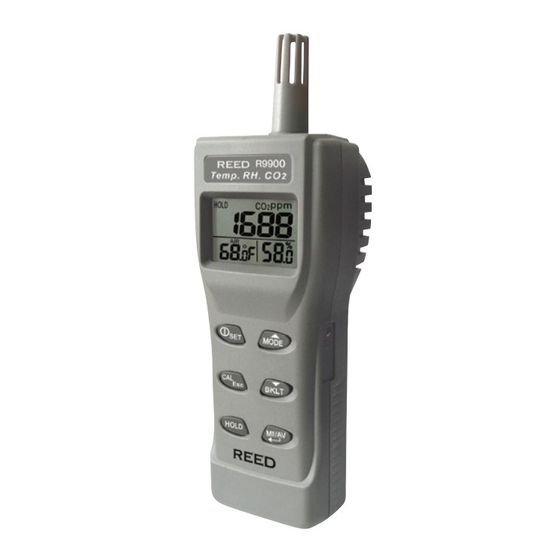
Page 4: Instrument Description
Power Supply: 4 x “AA” alkaline batteries Battery Life: 24 hours Includes: 4 AA batteries and a hard carrying case Optional accessories: 33% Calibration Salt (RHA-33) 75% calibration salt (RHA-75) Instrument Description Power/Set button Calibration/Escape button Hold button Up/Mode/Backlight button Down/Dew Point/WBT button Max/Min/Average/Enter button LCD Display Air temp/Dew Point/Wet Bulb temp in °C or °F Blue - 100/80/30/5 534 Blue Yellow - 0/27/100/0 123 Yellow concentration in ppm Red - 10/100/100/5 485 Red Yellow - 0/27/100/0 123 Yellow Relative humidity % Blue - 100/80/30/5... -
Page 5: Operating Instructions
TWA Time weighted average STEL Short-term exposure limit HOLD Readings are held on the LCD MIN/MAX Minimum/Maximum readings Low battery indicator DP Dew point temperature AIR Air temperature WBT Wet bulb temperature % Unit of relative humidity °E (C or F) Celsius/Fahrenheit Operating Instructions 1. Press the “POWER” button to turn the meter on and off. When powering on, the meter will beep and commence a 30 second warm-up. The meter will then enter the normal-measuring mode, displaying the current CO , temperature, and humidity readings. Readings will be updated every second. Note: When the meter experiences extreme environment changes (ex. from high to low temp.), it will take 30 sec for the CO sensor to respond and 30 minutes for the RH sensor. 2. Press the “DP/WBT” button to switch the temperature display from air temperature, dew point, and wet bulb. Data Hold To hold the readings that are currently being displayed on the LCD, press the “HOLD” button. The “HOLD” symbol on the LCD will indicate the function is activated. Blue - 100/80/30/5 534 Blue Backlight... -
Page 6: Max, Min, & Weighted Averages
Max, Min, & Weighted Averages While in the normal-measuring mode, press the “MAX/MIN” button to view the maximum, minimum, and weighted average readings. Each press of the “MAX/MIN” button will display the MIN, MAX, STEL (short term exposure limit), and TWA (time weighted average), in sequence and will then return to normal-measuring mode. In MIN and MAX modes, the LCD will show the minimum and maximum readings of CO2 on the main display and of the readings on the lower displays. In STEL and TWA modes, the main display will show the weighted aver- age of CO2 readings for the past 15 minutes (STEL) or 8 hours (TWA). The lower displays will continue to measure normally. NOTE: If the meter is turned on for less than 15 minutes, the STEL value will be the weighted average of readings taken since power on. This is the same for TWA values before 8 hours of activity. It takes at least 5 minutes to calculate STEL and TWA. The display will show “----” during the first 5 minutes from power on. While all readings are held unchanged, STEL and TWA will keep updating every 5 minutes. Auto Power Off This meter turns off automatically after 20 minutes of inactivity. To override the function, turn the meter off and hold down the “SET” and “HOLD” buttons for 2 seconds to turn on the meter on. “n” will appear on the LCD if indicating Auto Power Off is deactivated. NOTE: the auto power off function will be disabled during calibration mode. Alarm This meter features an audible alarm when CO2 concentrations exceed Blue - 100/80/30/5 534 Blue a set limit. To set-up the alarm, press and hold the “SET” button for two Yellow - 0/27/100/0 123 Yellow seconds. “AL” and P1.0 will appear on the LCD. Press the “ENTER” but- Red - 10/100/100/5... -
Page 7: Temperature Unit
Temperature Unit To change the temperature scale from °C to °F, press and hold the “SET” button for 2 seconds. Press the “DOWN” button and “Unit” and P3.0 will appear on the LCD. Press the “ENTER” button, and modify the tempera- ture unit by pressing the “UP” or “DOWN” buttons. Press the “ENTER” button to save the setting, or press the “ESC” button to cancel. Calibration This meter is calibrated at a standard 400ppm CO concentration. It’s sug- gested to perform manual calibration regularly to maintain good accuracy. For a more thorough calibration and for maintenance for this product, please contact REED Instruments at info@reedinstruments.com. Do not calibrate this meter in an environment with unknown CO con- centrations. Manual calibration should be done in fresh outdoor air that is well ventilated and in sunny weather. Turn on the meter and hold down the “CAL” and “MODE” buttons simultaneously. “400ppm” and “CAL” will blink on the LCD indicating you have activated manual calibration, and will blink for approximately 5 minutes. When the blinking stops, CO calibra- tion is complete, and the meter will automatically switch back to normal- measuring mode. To abort the calibration, turn off the meter at any time. Blue - 100/80/30/5 534 Blue Yellow - 0/27/100/0 123 Yellow NOTE: Ensure the batteries are with full voltage during the calibration to... -
Page 8: Rh Calibration
RH Calibration The humidity sensor can be manually calibrated with the optional 33% and 75% salt solutions. It is recommended that the ambient condition to be at 25°C and at an stable humidity for the highest accuracy. To abort the calibration at any time, turn the meter off. Do not calibrate the humid- ity without the specified calibration salt otherwise it will cause permanent damage. Contact REED Instruments at info@reedinstruments for calibra- tion salt or for service. Turn the meter on and plug the sensor probe into the 33% salt bottle. Hold down the “CAL” and “DP/WBT” button to initiate RH Calibration. “CAL” and the calibrating value of 33% (32.7% if at 25°C) will blink on the LCD along with the current temperature at the left. The meter is now calibrating and will finish when “CAL” and humidity stop blinking, which is about 60 minutes. After the 33% calibration is complete, plug the sensor probe into the 75% salt bottle. Press the “ENTER” button to initiate 75% calibration. “CAL” and the calibrating value of 75% (75.2% if at 25°C) will blink on the LCD along with the current temperature at the left. The meter is now calibrating and will finish when “CAL” and humidity stop blinking, which is about 60 minutes. To calibrate 33% only, press the “ESC” button when calibration is com- plete. To calibrate 75% only, press the “UP” or “DOWN” button after you press the “CAL” and “DP/WBT” buttons. Software This meter can link to a PC for logging and data analysis via the optional RS232 interface and software. The protocol is as follows: A. 9600 bps, 8 data bits, no parity. B. Cxxxxppm:Txxx.xC(F):Hxx.x%:dxxx.xC(F):wxxx.xC(F) LRC CRLF Description: $CO2:Air:RH:DP:WBT LRC CRLF Blue - 100/80/30/5 534 Blue Yellow - 0/27/100/0... -
Page 9: Troubleshooting
Error messages E01: CO sensor damaged E02: The value is under range E03: The value is over range E04: The data error results in DP/WB readings E07: Too low voltage to measure CO E11: Retry the humidity calibration E17: Retry CO the calibration E31: Temperature sensor damaged E34: Humidity sensor damaged For service (repairs or calibration) on this or any other REED product or information on other REED products, contact REED Instruments at info@reedinstruments.com Blue - 100/80/30/5 534 Blue Yellow - 0/27/100/0 123 Yellow Red - 10/100/100/5 485 Red Yellow - 0/27/100/0 123 Yellow Blue - 100/80/30/5... -
Page 10: Battery Replacement
Battery Replacement The low battery symbol and “Lob” will appear on the LCD when the bat- tery needs to be replaced. When the battery power is low, the meter will beep to indicate failed measurements. Press any button but the power button to turn off the beeping. Install the batteries in the battery compartment on the rear and make sure they are correct polarity and in good contact. Notes _________________________________________ ________________________________________________ ________________________________________________ ________________________________________________ ________________________________________________ ________________________________________________ ________________________________________________ ________________________________________________ ________________________________________________ ________________________________________________ ________________________________________________ Blue - 100/80/30/5 534 Blue Yellow - 0/27/100/0 123 Yellow ________________________________________________ Red - 10/100/100/5 485 Red Yellow - 0/27/100/0 123 Yellow Blue - 100/80/30/5 534 Blue reedinstruments...
Need help?
Do you have a question about the R9900 and is the answer not in the manual?
Questions and answers