Table of Contents
Advertisement
Quick Links
Download this manual
See also:
User Manual
Advertisement
Table of Contents

Subscribe to Our Youtube Channel
Related Manuals for AIC Pavo


Summary of Contents for AIC Pavo
- Page 1 Pavo Server MotherBoard User's Manual UM_Pavo_v1.2_101817...
-
Page 2: Table Of Contents
CONTENTS Safety Information �������������������������������������������������������������������������� i About This User Manual ����������������������������������������������������������������� ii Chapter 1� Product Introduction ������������������������������������������������ 1 1�1 General Information ���������������������������������������������������������������������������1 1.2 Specifications �������������������������������������������������������������������������������������2 Chapter 2� Hardware Installation ����������������������������������������������� 3 2�1 Central Processing Unit (CPU) �����������������������������������������������������������3 2�2 System Memory & SFF-8643 ���������������������������������������������������������������7 Chapter 3�... - Page 3 Copyright © 2017 AIC, Inc� All Rights Reserved� This document contains proprietary information about AIC products and is not to be disclosed or used except in accordance with applicable agreements.
-
Page 4: Safety Information
Safety Information When installing, operating, or performing maintenance on this equipment, the following safety precautions should always be observed in order to reduce the risk of fire, electric shock, and personal injury. Read and understand all instructions. • Observe warnings and instructions marked on the product. •... -
Page 5: About This User Manual
About This User Manual This document provides a detailed description of the Motherboard including: • General Features of the Product • Hardware Setup • Motherboard Settings • BIOS Configuration and Settings • BMC Configuration and Settings Product features and specifications are subject to change without notice. CAUTION : risk of explosion if battery is replaced by an incorrect type. -
Page 6: Chapter 1� Product Introduction
Chapter 1 Product Introduction Chapter 1� Product Introduction 1�1 General Information Pavo, a server grade mother board supports Xeon Processor Scalable Family Pavo User's Manual... -
Page 7: 1.2 Specifications
Chapter 1 Product Introduction 1.2 Specifications Pavo User's Manual... -
Page 8: Chapter 2� Hardware Installation
Processor heat s inks are not compatible with the Intel® Server Board S2600BP Product Family. Processor installation requires that the processor b e attached t o the processor heat sink using a specific processor carrier clip, prior to installation onto the server board. Pavo User's Manual... - Page 9 2.1.2 Processor Heat Sink Module and Processor Socket Assembly Each processor socket of the server board is pre-assembled with a loading mechanism that allows to secure the placement of the Processor Heat Sink Module (PHM) to the server board as shown below. Pavo User's Manual...
- Page 10 The PHM refers to the sub-assembly where the heat sink and processor are clipped together prior to installation onto the server board. The PHM consists of the components shown below. Processor Heat Sink Module (PHM) Sub-Assembly Processor Heatsink Module (PHM) Pavo User's Manual...
- Page 11 Failure t o tighten the heat sink screws i n the specified order may cause damage t o the processor socket assembly. Heat s ink screws should b e tightened t o 12 In-Lbs T orque o n indicated order on the top of the heat sink label. Pavo User's Manual...
-
Page 12: 2�2 System Memory & Sff-8643
ECC DRAM / Load-Reduced DIMM (LRDIMM). CPU0 CPU0 CPU1 CPU1 note : In PAVO case, the 16 lanes from CPU#0 and the 8 lanes from CPU#1 are routed to pcie slots 1. The lanes from cpu#1 are routed to pcie slots 3/4. Pavo User's Manual... -
Page 13: Chapter 2 Hardware Installation
JDIMMK1 JDIMME JDIMML JDIMMM JDIMMF JDIMMC JDIMMJ JDIMMB JDIMMH JDIMMA1 JDIMMG1 JDIMMA2 JDIMMG2 CPU0 CPU1 JDIMM_C JDIMM_J 8 DIMMs JDIMM_A1 JDIMM_G1 CPU0 CPU0 CPU1 CPU1 JDIMM_D1 JDIMM_K1 JDIMM_F JDIMM_M JDIMMD2 JDIMMK2 JDIMMD1 JDIMMK1 JDIMME JDIMML JDIMMF JDIMMM Pavo User's Manual... - Page 14 JDIMMM JDIMMC JDIMMJ JDIMMB JDIMMH JDIMM_C JDIMM_J JDIMMA1 JDIMMG1 JDIMMA2 JDIMMG2 JDIMM_B JDIMM_H JDIMM_A1 JDIMM_G1 JDIMM_A2 JDIMM_G2 CPU0 CPU0 CPU1 CPU1 JDIMM_D2 JDIMM_K2 JDIMM_D1 JDIMM_K1 JDIMMD2 JDIMMK2 JDIMM_E JDIMM_L JDIMMD1 JDIMMK1 JDIMM_F JDIMM_M JDIMME JDIMML JDIMMM JDIMMF Pavo User's Manual...
- Page 15 2.2.2 DIMM Installation Procedure Unlock a DIMM socket by pressing the retaining clips outward. Insert module vertically and press down until it snaps into place. Note: DIMM notch and socket bump must align as shown. DIMM notch Pavo User's Manual...
-
Page 16: Chapter 3� Motherboard Settings
Chapter 3 Motherboard Setting Chapter 3� Motherboard Settings This section describes the jumpers, internal connectors, and internal LEDs setting on Pavo motherboard. Motherboard layout and important jumper settings are listed as below. 3�1 Motherboard block diagram PAVO Block Diagram DDR4... -
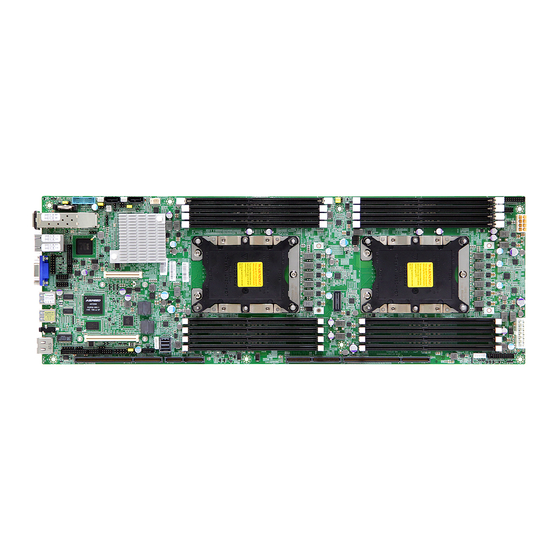
Page 17: 3�2 Motherboard Layout
Chapter 3 Motherboard Setting 3�2 Motherboard Layout Pavo User's Manual... -
Page 18: 3�3 Motherboard Content List
BMC IPMB J20, J43 BIOS Recovery Battery Socket BAT1 Mode Intruder UART SPI ROM Socket BMC RESET 20 BMC ROM Socket UID LED PCIE Hot-Plug Speaker J2001 SMB (CPU0) FLASH Security PCIE Hot-Plug J2002 override SMB (CPU1) Pavo User's Manual... -
Page 19: 3�4 Internal Connectors/Jumpers
Chapter 3 Motherboard Setting 3�4 Internal Connectors/Jumpers DDC_CLKO CLK_DP80 PCH_CS0_N AVSYNCO VGA_5V RST_PERST_N AHSYNCO PCH_ IO3 PCH_IO2 DACBO P3V3 PCH_IO1 DDC_DATAO PCH _IO0 DACGO SMB_PCH_SCL SMB_PCH_SDA DACRO P3V3_AUX ESPI_CS1 PCH_CLKRUN ESPI_RESET ESPI_ALERT0 ESPI_ALERT1 P3V3 ESPI_SMI ESPI_PME P5V_AUX ESPI_SEL Pavo User's Manual... - Page 20 Chapter 3 Motherboard Setting Internal Connectors/Jumpers Pavo User's Manual...
- Page 21 Chapter 3 Motherboard Setting Internal Connectors/Jumpers J2002 J2001 Pavo User's Manual...
- Page 22 Chapter 3 Motherboard Setting Internal Connectors/Jumpers INTRUDER Pavo User's Manual...
- Page 23 Chapter 3 Motherboard Setting Internal Connectors/Jumpers +12V +12V +12V +12V +12V +12V +12V +12V +12V +5V_AUX POWER OK PS_ON# Pavo User's Manual...
- Page 24 Normal (Default) Pin2-3 Clear CMOS (Default) Setting Setting Short FLASH Security override Pin1-2 SATA Short BIOS Recovery Mode Open Normal (Default) Pin2-3 SATA DOM Open Normal (Default) BMC Disable Pin1-2 SATA Pin2-3 SATA DOM Password Clear SPEAKER Pavo User's Manual...
-
Page 25: 3�5 Leds
NMI, etc) No critical failures detected Green (Blinking) Disk activity detected Hard Disk No disk activity detected Green (Blinking) LAN1 activity detected LAN1_TRAFFIC LAN1 is not active Green (Blinking) LAN2 activity detected LAN2_TRAFFIC LAN2 is not active Pavo User's Manual... - Page 26 No Link Linked at 10 Mbps Link Green Active Blinking Green Linked at 100 Mbps Link Green Green Active Blinking Green Green Linked at 1000 Mbps Link Green Yellow Active Blinking Green Yellow LED2 LED1 LED4 LED3 Pavo User's Manual...
- Page 27 LAN1 is not active Yellow LAN1 Link detected (Blinking) LED7 LAN1 is not Link Green LAN0 Link detected LED6 LAN0 is not Link Yellow LAN0 activity detected (Blinking) LED4 LAN0 is not active LED7 LED6 LED5 LED4 Pavo User's Manual...
- Page 28 (Only for Rack) LED3 BMC Rack LAN is not active (Only for Rack) Blinking BMC is working LED18 BMC not working LED 3 LED 3 LED 2 LED 2 LED 18 LED 18 LED 1 LED 1 Pavo User's Manual...
-
Page 29: Chapter 4. Bios Configuration And Settings
Press ESC to run the setup procedure. There will be a message “Entering SETUP” displayed on the diagnostics screen. Caution: For the official released version, the last digit of the BIOS Version must end in an "0." Pavo User's Manual... - Page 30 Chapter 4 BIOS Configuration and Settings Identify the BIOS Version Load Optimal Default setting Save the setting and exit the BIOS setup utility. Pavo User's Manual...
-
Page 31: 4�1 Updating Bios
Chapter 4 BIOS Configuration and Settings 4�1 Updating BIOS Important Notes: To identify the current BIOS version, please check out on BIOS setup. Pavo User's Manual... - Page 32 H2OFFT-D utility. To use this utility, you must include the flash.bat , H2OFFT-D.exe, and bin file in the same folder. Please follow the instructions to update whole flash part: Execute flash.bat to update Flash in the DOS environment. Reboot system. Pavo User's Manual...
-
Page 33: Chapter 5. Bmc Configuration And Settings
Insert Ethernet LAN cable into the BMC LAN port. There are two methods to setup BMC IP: BMC management port 5�1 Method 1 (Use the BIOS setup) • BIOS SETUP Advanced H2O IPMI configuration Configuration IPv4 source Static Pavo User's Manual... - Page 34 Chapter 5 BMC Configuration and Settings Pavo User's Manual...
- Page 35 Chapter 5 BMC Configuration and Settings 2. Input subnet mask address. 3. Input gateway address. Pavo User's Manual...
-
Page 36: 5�2 Method 2 (Use A Dos Tool - Syscheck)
5�2 Method 2 (Use a Dos tool - Syscheck) 1. Type : sc –lanset 2. Modify IP setting Note: type 1 for selecting static IP mode or type 2 for selecting DHCP mode. 3. Input IP address Pavo User's Manual... - Page 37 Below IP address is an example using a default IP setting. User is allowed to change the IP address for realistic use. 5. Set gateway address, finish BMC IP configuration. Note: Type sc.exe –langet command to obtain BMC IP and MAC address. Pavo User's Manual...
-
Page 38: 5�3 Connect To Bmc
: The default user name and password are in lower-case characters. note : Users who login with the root user name and password will have full administrative power. The root password can be changed after login. Pavo User's Manual... - Page 39 Chapter 5 BMC Configuration and Settings 3. Information of firmware. 4. Server Health - Sensor Readings: 5. Configuration:Please refer to AIC BMC User Guide for more information on AIC BMC. Pavo User's Manual...
- Page 40 Chapter 5 BMC Configuration and Settings Mouse Mode setting: • For Windows OS environment, set mode to absolute. • For Linux OS environment, set mode to relative. • For SLES-11 OS environment, set mode to other mode. 6. Remote Control: Pavo User's Manual...
- Page 41 Chapter 5 BMC Configuration and Settings Launch KVM: Pavo User's Manual...
-
Page 42: 5�4 Updating Bmc Firmware
A:>cd PAVOC01 A:\ PAVOC01>a.bat This is just an example. The latest BMC firmware version is available from the FAE or AIC website. 3. After update BMC firmware, please power off and then power on system. Notes: 1. DO NOT USE EMM386 IN DOS ENVIRONMENT WHEN UPDATING FIRMWARE OR YOU WILL GET A FAIL. -
Page 43: Chapter 6� Technical Support
Chapter 6� Technical Support www�aicipc�com • TAIWAN Tel: +886 3 433 9188 Fax: +886 3 287 1818 Email : sales@aicipc�com�tw • CHINA Tel: +86�21�54961421, +86�21�54961422 Fax: Extension: 608 Email Technical Support: support@aicipc�com • AMERICA - West coast Tel: +1�909�895�8989 Fax: +1�909�895�8999 Email : sales@aicipc�com •...
Need help?
Do you have a question about the Pavo and is the answer not in the manual?
Questions and answers