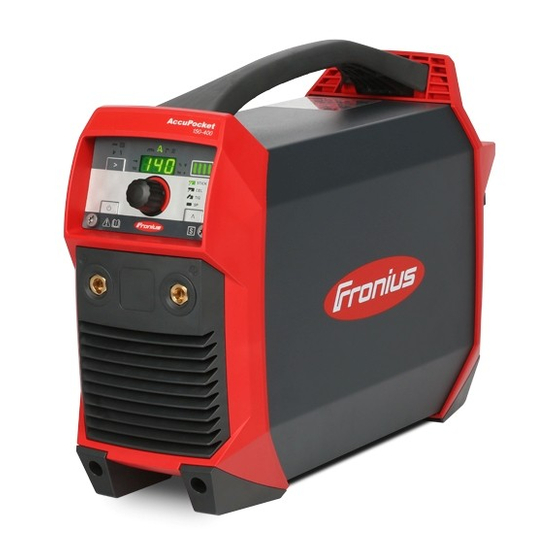
Fronius AccuPocket 150/400 Operating Instructions Manual
Rod electrode power source
Hide thumbs
Also See for AccuPocket 150/400:
- Operating instructions & parts list manual (76 pages) ,
- Quick reference (2 pages)

Related Manuals for Fronius AccuPocket 150/400


Summary of Contents for Fronius AccuPocket 150/400
- Page 1 / Perfect Charging / Perfect Welding / Solar Energy Operating Instructions AccuPocket 150/400 Spare parts list Rod electrode power source 42,0426,0176,EN 018-14042015...
- Page 3 Thank you for the trust you have placed in our company and congratulations on buying this high-quality Fronius product. These instructions will help you familiarise yourself with the product. Reading the instructions carefully will enable you to learn about the many different features it has to offer.
-
Page 5: Table Of Contents
Contents Safety rules ..............................Explanation of safety symbols ......................General ..............................Proper use ............................Operating environments........................Obligations of the operator........................Obligations of personnel ........................Protecting yourself and others ......................Noise emission values .......................... Danger from toxic gases and vapours ....................Danger from flying sparks ........................ - Page 6 Preparations............................Setting the gas pressure - on the welding torch with gas cut-off valve ..........TIG welding............................Igniting the arc ............................TIG Comfort Stop..........................The Setup menu ............................Accessing the Setup menu ........................Changing welding parameters ......................Exiting the Setup menu......................... Parameters for MMA welding........................
-
Page 7: Safety Rules
Safety rules Explanation of DANGER! Indicates immediate and real danger. If it is not avoided, death or se- safety symbols rious injury will result. WARNING! Indicates a potentially dangerous situation. Death or serious injury may result if appropriate precautions are not taken. CAUTION! Indicates a situation where damage or injury could occur. -
Page 8: Proper Use
Proper use The device is to be used exclusively for its intended purpose. The device is intended solely for the welding processes specified on the rating plate. Any use above and beyond this purpose is deemed improper. The manufac- turer shall not be held liable for any damage arising from such usage. Proper use includes: carefully reading and following all the instructions given in the operating instructions... -
Page 9: Obligations Of Personnel
Obligations of Before using the device, all persons instructed to do so undertake: personnel to observe the basic instructions regarding safety at work and accident prevention to read these operating instructions, especially the "Safety rules" section and sign to confirm that they have understood them and will follow them. Before leaving the workplace, ensure that people or property cannot come to any harm in your absence. -
Page 10: Noise Emission Values
Noise emission The device generates a maximum sound power level of <80 dB(A) (ref. 1pW) values when idling and in the cooling phase following operation at the maximum per- missible operating point under maximum rated load conditions according to EN 60974-1. It is not possible to provide a workplace-related emission value during welding (or cutting) as this is influenced by both the process and the environment. -
Page 11: Dangers From Welding Current
With a faulty battery, liquid may leak out of the device. Avoid contact with the liquid Hand the device over to a Fronius Service Partner for repair Clean and check any parts that have come into contact with the liquid Do not operate or store the device in a potentially explosive atmosphere. -
Page 12: Meandering Welding Currents
Devices with mechanically undamaged rechargeable batteries may be re- turned to the relevant Fronius Service Partner for repair or battery replace- ment. As soon as it becomes evident that the rechargeable battery has been me- chanically damaged (e.g. -
Page 13: Emc Measures
EMC measures In certain cases, even though a device complies with the standard limit values for emissions, it may affect the application area for which it was designed (e.g. when there is sensitive equipment at the same location, or if the site where the device is installed is close to either radio or television receivers). -
Page 14: Danger From Shielding Gas Cylinders
Danger from Shielding gas cylinders contain gas under pressure and can explode if dam- shielding gas cyl- aged. As the shielding gas cylinders are part of the welding equipment, they inders must be handled with the greatest of care. Protect shielding gas cylinders containing compressed gas from excessive heat, mechanical impact, slag, naked flames, sparks and arcs. -
Page 15: Safety Measures In Normal Operation
Safety measures Only operate the device if all safety devices are fully functional. If the safety in normal opera- devices are not fully functional, there is a risk of tion injury or death to the operator or a third party, damage to the device and other material assets belonging to the operator, inefficient operation of the device. -
Page 16: Safety Symbols
Safety symbols Devices with the CE mark satisfy the essential requirements of the low-voltage and electromagnetic compatibility directive (e.g. relevant product norms from the EN 60 974 series). Devices with the CSA test mark satisfy the requirements of the relevant stand- ards in Canada and the USA. -
Page 17: General
General Device concept AccuPocket power sources have the follo- wing features: Operation without mains electricity Compact dimensions Robust plastic housing Good reliability even under harsh ope- rating conditions Carrying strap for easy transport on construction sites etc. Safely protected controls Bayonet latching connection sockets During welding, an electronic regulator adapts the power source characteristic to suit the welding electrode. -
Page 18: Application Areas
Application areas MMA welding TIG welding with gas-valve torch Hybrid mode When the charger feeds power to a battery while it is in use, we call this hybrid mode. Hybrid mode based on the example of AccuPocket 150/400 In hybrid mode the battery: discharges according to its operating load is simultaneously recharged by the charger This means it can go on working for much longer than if it only discharges, and prolongs... - Page 19 Features of hybrid mode: ActiveCharger QUICK CHARGING indicator 1000 Mains indicator lit The battery is charged at the maximum CHARGING possible charging power QUICK CHARGING NOTE! Hybrid mode is indicated by the same indicators as quick charging mode, as the battery is COMPLETED charged at the maximum possible charging power.
-
Page 20: Using Rechargeable Devices
WARNING! Improper handling can cause injuries or damage. Do not open the device. The device may only be opened by Fronius service engineers. If you need a replacement battery, hand the device over to a Fronius Service Part- ner. Storage and... -
Page 21: Before Commissioning
Proper use The power source is intended exclusively for MMA welding and TIG welding. The integrated battery must only be charged with the Fronius ActiveCharger 1000. Any other use is deemed improper. The manufacturer is not liable for damage resulting from such use. - Page 22 Connect the power source to the battery charging system The battery capacity indicator flashes to indicate the present state of charge; the battery is being charged The COMPLETED indicator lights up on the battery charging system when the battery is fully charged On the power source, all segments of the battery capacity indicator are lit The power source is now ready for use...
-
Page 23: Control Elements And Connections
Control elements and connections Safety WARNING! Operating the equipment incorrectly can cause serious injury and damage. Do not use the functions described until you have thoroughly read and understood the following documents: these operating instructions all the operating instructions for the system components, especially the safe- ty rules NOTE! Due to software updates, you may find that your device has certain func- tions that are not described in these operating instructions or vice versa. -
Page 24: Control Panel
Control panel (11) (10) Setting value indicator shows which setting value is selected: Arc-force dynamic Welding current SoftStart / HotStart function TIG pulsing (only with TIG version) Unit indicator shows the unit of the value that is currently being changed with the adjusting dial (8): Percent Voltage (volts) - Page 25 On/Off button for switching the power source on and off. The button must be pressed for at least 2 seconds before it responds (to protect against accidental operation) Adjusting dial for continuous adjustment of the selected setting value (4) TAC indicator lights up when the tacking function is activated (only on TIG devices during the TIG welding process) (10)
-
Page 26: Battery Protection Functions
Battery protection functions General The battery protection functions serve to: increase the service life of the battery protect the battery from long-term damage increase the reliability of the device Deep discharge The device has a deep discharge protector to warn the user if the state of charge of the protection battery is too low. -
Page 27: Temperature Monitoring
Temperature Temperature monitoring prevents the battery from being charged or discharged if it is out- monitoring side the permitted temperature range. If the battery falls below the permitted temperature range: "cold" appears on the temperature indicator neither welding nor charging is possible After approx. -
Page 28: Mma Welding
MMA welding Preparations Press the On/Off button for at least 2 seconds to turn off the power source the indicators go off Plug the grounding (earthing) cable into the (+) or (-) current socket, depending on the type of electrode, and latch it in place Use the other end of the grounding (earthing) cable to establish a connection to the workpiece Plug the electrode holder cable into the (+) or (-) current socket, depending on the type... -
Page 29: Arc-Force Dynamic
NOTE! The maximum HotStart current is limited to 180 A. Examples: (set welding current = 100 A) 100 % starting current = 100 A function deactivated 80 % starting current = 80 A SoftStart 135 % starting current = 135 A HotStart 200 % starting current = 180 A... - Page 30 Arc-force dynamic = 20 arc-force dynamic with 40 A current increase harder, more stable arc Set welding current = 100 A / arc-force dynamic = 60 arc-force dynamic theoretically with 120 A current increase actual increase is just 80 A as the maximum current limit is reached!
-
Page 31: Tig Welding
TIG welding General NOTE! Do not use pure tungsten electrodes (colour-coded green) if the TIG weld- ing process has been selected. Connecting the WARNING! If gas cylinders topple over, there is a risk of very serious injury and gas cylinder damage. -
Page 32: Tig Welding
TIG welding Select TIG welding with the welding process button the TIG welding indicator lights up Press the setting value button until the welding current indicator lights up Select the current using the adjusting dial Carry out welding Igniting the arc Welding torch with gas cut-off valve Place the gas nozzle down on the ignition location, ensuring there is a gap of approx. -
Page 33: Tig Comfort Stop
TIG Comfort Stop Activating and setting the TIG Comfort Stop function is described in "The Setup menu" sec- tion. Welding During welding, raise the welding torch The arc length is increased significantly Lower the welding torch The arc length is decreased significantly This triggers the TIG Comfort Stop function Keep the welding torch at the same height The welding current continually decreases (downslope) until the arc goes out... - Page 34 Downslope: The downslope time t is 0.5 seconds and cannot be adjusted. down Gas post-flow: The gas post-flow is carried out manually in standard versions and can be altered in the Setup menu via the "GPo" value in TIG versions.
-
Page 35: The Setup Menu
The Setup menu Accessing the Use the welding process button to select the process whose Setup parameters Setup menu are to be changed: MMA welding MMA welding with cellulose electrode TIG welding Press the setting value and welding process buttons together –... -
Page 36: Parameters For Tig Welding
Parameter Description Range Unit Software version The full version number of the currently installed software is contained in a number of displays and can be retrieved by turning the adjusting dial. Automatic switch-off (time Shut down) 300 - 900 Seconds If the device is not used or operated for a specified period of time, it switches off automatically. - Page 37 Parameter Description Range Unit Factory setting (FACtory) This can be used to reset the device to its factory settings. Cancel reset Reset the parameters for the selected weld- ing process to their factory settings Reset the parameters for all welding process- es to their factory settings Resetting of the selected value to its factory set- ting must be confirmed by pressing the adjusting...
-
Page 38: Vrd Safety Device (Optional)
VRD safety device (optional) General VRD is an additional safety device that prevents, as far as possible, output voltages that may pose a danger to persons. VRD = Voltage Reduction Device. Function The welding circuit resistance is greater than the minimum human body resistance (greater than or equal to 200 Ohm): VRD is active Open circuit voltage is limited to 14 V... -
Page 39: Care, Maintenance And Disposal
WARNING! Improper handling can cause injuries or damage. Do not open the device. The device may only be opened by Fronius service engineers. If you need a replacement battery, hand the device over to a Fronius Service Part- ner. General Under normal operating conditions, the device requires only a minimum of care and main- tenance. -
Page 40: Troubleshooting
WARNING! Improper handling can cause injuries or damage. Do not open the device. The device may only be opened by Fronius service engineers. If you need a replacement battery, hand the device over to a Fronius Service Part- ner. Indicated errors Overtemperature "hot"... -
Page 41: No Function
Make a note of the error numbers shown in the display, and of the serial number and con- figuration of the power source, and contact our after-sales service team with a detailed de- scription of the error. E02 / E03 / E05 / E06 Cause: Internal temperature sensor fault on ACCUPLT / ACCUPLT-TIG PC board Remedy:... - Page 42 Battery is not charged Device is connected to the charger, charger is connected to the mains, no "Charging" in- dicator on the power source Cause: Device is too hot Remedy: Check/reduce ambient temperature, allow battery to cool down Cause: Device temperature too low Remedy: Check/increase ambient temperature No welding current...
-
Page 43: Faulty Operation
Faulty operation Poor ignition properties during MMA welding Cause: Incorrect welding process selected Remedy: Select "MMA welding" or "MMA welding with Cel electrode" process Cause: Starting current too low; electrode sticking during ignition Remedy: Increase starting current using HotStart function Cause: Starting current too high;... -
Page 44: Technical Data
Technical data Explanation of Duty cycle (D.C.) is the proportion of time in a 10-minute cycle at which the device may be the term "duty cy- operated at its rated output without overheating. cle" NOTE! The D.C. values specified on the rating plate are based on an ambient temperature of 40°C. -
Page 45: Operating Environments
40 °C (104 °F) 50% D.C. 100 A 40 °C (104 °F) 100% D.C. 65 A Open circuit voltage 91 V Reduced open circuit voltage 14 V (only with VRD option) Protection class IP 23 Type of cooling Mark of conformity CE, S Dimensions (l x w x h) 435 x 160 x 310 mm... -
Page 47: Appendix
Appendix... -
Page 48: Spare Parts List: Accupocket
Spare parts list: AccuPocket... - Page 50 FRONIUS INTERNATIONAL GMBH Froniusplatz 1, A-4600 Wels, Austria Tel: +43 (0)7242 241-0, Fax: +43 (0)7242 241-3940 E-Mail: sales@fronius.com www.fronius.com www.fronius.com/addresses Under http://www.fronius.com/addresses you will find all addresses of our Sales & service partners and Locations...
Need help?
Do you have a question about the AccuPocket 150/400 and is the answer not in the manual?
Questions and answers
E.17 code flashing