Advertisement
Quick Links
Advertisement

Subscribe to Our Youtube Channel
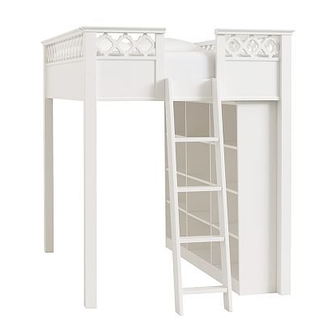
Summary of Contents for PB TEEN ELSIE LOFT BED
- Page 1 ELSIE LOFT BED ASSEMBLY INSTRUCTION Date: 2015-July-15 Rev: www.pbteen.com Page 1 of 12...
- Page 2 04-000066-6 Date: 2015-July-15 Rev: www.pbteen.com Page 2 of 12...
- Page 3 Important Safety Instructions: Please read all instructions carefully before assembling this bookcase. For your safety, assembly by two or more adults is strongly recommended. Keep these instructions for future use. Use only vendor-supplied hardware to assembly this item. Using unauthorized hardware could jeopardize the structural integrity of the item.
- Page 4 Hardware included: I – Ball Tip Allen J – Wrench K – Allen Bolt L – Allen Bolt M – Allen Bolt 88x 10 x2(mm) 4 x 95 x 30(mm) 5/16”x120x 15(mm) 1/4”x50x 13(mm) 1/4 ”x15x 13(mm) 8pcs 4pcs 14pcs N –...
- Page 5 Assembly Instruction Steps: 1a. Remove the wooden cleats that are attached to the side of the Headboard (A) using a Philip Head Screwdriver in an anti-clockwise direction as shown below. 1b. Lay the Headboard (A) down on a soft, scratch-free surface such as a rug or carpet as seen in the illustration below.
- Page 6 3. Insert the Bolt (N) – (8sets) into the pre-drilled holes on the Left Left Outer Post & Right Right Inner Post (C) & Left Outer Post and Right Left Inner Post (D) and tighten in by turning in a clockwise direction as shown below.
- Page 7 5. Using 2x hardware, insert the Flat Washer (S) followed by Spring Washer (R) and Allen Bolt (L) into the pre-drilled holes on the top of the Headboard (A) and through into the pre-drilled holes of the Left Left Outer Post & Right Right Inner Post (C) and Left Outer Post and Right Left Inner Post (D) as shown below.
- Page 8 7. Using 2x hardware, insert the Flat Washer (S) followed by Spring Washer (R) and Allen Bolt (L) into the pre-drilled holes on the top of the Footboard (B) and through into the pre-drilled holes of the Left Left Outer Post & Right Right Inner Post (C) and Left Outer Post and Right Left Inner Post (D) as shown below.
- Page 9 9. With the help of 2 adults or more, with the help of locating wood dowels, align 1x Guardrail (E) to the pre-drilled holes of the Headboard and Footboard that was assembled with the Posts as shown below. 10. Insert the Barrel Nut (U) – (8x) into the pre-drilled holes on the inner edges of the Guardrail (E) as shown below.
- Page 10 15. Place the Bookcase (AI found separately in its own carton packed) on your desired location as shown below. 16. Adjust the levelers found underneath the Posts to keep the Loft Bed balance as shown below. 17. With the help of 2 adults or more, lift it up and move it to the position where the Bookcase is underneath the Loft bed as shown below.
- Page 11 20. Place the Center Support Rail onto the Mending Plate (V) that was installed to the Headboard and Footboard (A&B) as shown below. 21. Secure the Mending Plate (V) to the Center Support Rail (F) by inserting the Allen Bolt (M) into the hole underneath the Mending Plate (V) and through into the pre-drilled hole underneath the Center Support Rail (F).
- Page 12 24. Assembly is completed. Care Instructions: Dust often using a clean, soft, dry and lint-free cloth. Blot spills immediately and wipe with a clean, damp, cloth. We do not recommend the use of chemical cleansers, abrasives or furniture polish on our lacquered finish.


Need help?
Do you have a question about the ELSIE LOFT BED and is the answer not in the manual?
Questions and answers