Advertisement
Assembly Instructions
Before you begin, please make sure all parts and proper quantities
are included. Any parts damaged during shipment must be reported
within 15 days of receipt. To report information regarding damage, to
purchase parts or accessories, or if you have any questions, please
contact us at:
www.spectrumfurniture.com
715-723-6750, 800-235-1262
Thank you for purchasing Spectrum products!
(1) worksurface
(2) leg
(2) 026011
1/4-20 x 2" FHMS
(10) 1/4-20 x 5/8" PHMS
026064 (black)
043493 (putty)
(4) 041289
1/4-20 x 1-3/4" PHMS
1. Attach legs to worksurface
1. Place worksurface face down onto a non-abrasive surface.
2. Align the legs with the mounting holes, and install 1/4-20 x 1-3/4" PHM
screws into the legs as shown. Figure 1A.
3. Install 1/4-20 x 1-3/4" PHM screws into the legs as shown, but do not
tighten the screws completely yet.
For 60" & 72" desks only:
Orient and attach the chair rail brackets to the center of the work-
surface as shown in Figure 1B with (2) 1/4-20 x 5/8" PHM screws.
chair rail bracket #1
chair rail bracket #2
flip-top
Important
(1) chair rail
(1) cord channel /
modesty panel
(4) 025068
5/16-18 x 1" glide
(1) 025069
glide wrench
(2) 052463
unit-to-unit bracket
1/4-20 x 5/8" PHMS
(2 required)
worksurface
Figure 1B
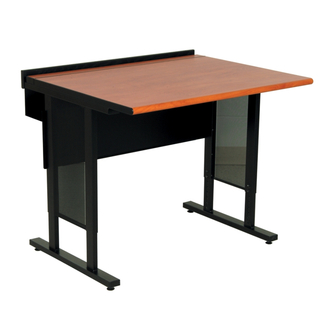
Evolution Desk 24"D
38912 - 36"W
38915 - 60"W
38916 - 72"W
(for 60", and 72" desks only)
(1) 057922
chair rail bracket #1
(1) 057890
chair rail bracket #2
(3) 043771
1/4-20 x 2" FHMS
The side of the leg without
the end cap should be
facing the flip-top on the
worksurface
flip-top
The legs should be
attached with the side
panels flush with the legs.
38912ADJ - 36"W
38915ADJ - 60"W
38916ADJ - 72"W
Phillips
screwdriver
glide wrench
1/4-20 x 1-3/4"
PHMS
(4 required)
worksurface
Figure 1A
057859R6 Page 1 of 4
Advertisement
Table of Contents

Related Manuals for Spectrum Industries Evolution 38912


Summary of Contents for Spectrum Industries Evolution 38912
- Page 1 Assembly Instructions Important Before you begin, please make sure all parts and proper quantities are included. Any parts damaged during shipment must be reported within 15 days of receipt. To report information regarding damage, to purchase parts or accessories, or if you have any questions, please contact us at: www.spectrumfurniture.com 715-723-6750, 800-235-1262...
- Page 2 2. Install modesty panel / cord channel, and glides 1. Orient the modesty panel/cord channel as shown and attach to the legs with (4) 1/4-20 x 5/8” PHM screws. Figure 2A. Note: If you are assembling a 60, or 72” desk, slide the cord channel over the chair rail brackets.
- Page 3 3. Attach chair rail chair rail 1. Carefully stand the desk upright-this will require at least two people. 2. Attach the chair rail with (2) 1/4-20 x 2” FHM screws as shown. Figure 3. The chair rail should extend above the worksurface, and the countersunk holes should be on the outside.
- Page 4 Warranty Statement WE WILL MAKE IT RIGHT FOR YOU! Spectrum is committed to provide complete customer satisfaction. Each of our products is manufactured from the best materials available and each product is stringently monitored throughout the production process through our P.A.C.E. program (Product Assurance to meet Customer Expectations). We expressly warrant that Spectrum products will be of good quality and workmanship and free from defect for the period set out in the warranty table below from the date of delivery.
Need help?
Do you have a question about the Evolution 38912 and is the answer not in the manual?
Questions and answers