Table of Contents
Advertisement
Advertisement
Table of Contents

Related Manuals for Fox F28-186A


Summary of Contents for Fox F28-186A
- Page 1 BANDSAW (FOX model F28-186A)
-
Page 5: Table Of Contents
BANDSAW Index Safety instructions General safety instructions Specific safety instructions for bandsaws Environment protection Symbols Electrical connections Recommended use Technical specifications Noise conditions Removal of package Machine description Assembly of the bandsaw Bandsaw fastening Workbench assembly Assembly of fence’s rail... -
Page 6: Safety Instructions
SAFETY INSTRUCTIONS CAUTION: Besides following the instructions mentioned in this manual, when using electric equipment you must always observe all safety precautions to prevent risk of fire, electric shock and personal injury. Read this instruction manual before use and keep it carefully. Working with an electric machine can be dangerous if you do not follow suitable safety measures. -
Page 7: General Safety Instructions
16. Do not force the machine. You can obtain better and safer results if you use the machine at the cutting pressure for which it has been designed. 17. Use the suitable tool. Do not use a small tool for an intensive job. Fox example, do not use a circular saw to cut branches or stumps. - Page 8 23. Use the machine, the tools and accessories in the way and for the purposes mentioned i this manual. Different uses and parts can cause possible risks for the operator. 24. Get the machine repaired by a qualified person. This electric tool is in compliance with local safety regulations.
-
Page 9: Specific Safety Instructions For Bandsaws
SPECIFIC SAFETY INSTRUCTIONS FOR BANDSAWS ALWAYS DISCONNECT the bandsaw from the socket before any repair, maintenance or cleaning task and while changing the blade. DO NOT USE the bandsaw until it is not completely assembled or installed according to this instruction manual. START the bandsaw only after removing any object (tools, waste material, etc.) from the workbench. -
Page 10: Environment Protection
ENVIRONMENT PROTECTION INFORMATION FOR USERS “Implementation of Directives 2011/65/UE 2012/19/UE, relative to reducing the use of hazardous substances in electric and electronic appliances and the disposal of waste”, please take note of the following: The crossed out wheelie bin symbol found on the appliance or the packaging indicates that the product must be disposed separately from ordinary household waste when it reaches the end of its working life. -
Page 11: Electrical Connections
Product in compliance with relative CE regulations. Serial number / year of production ELECTRICAL CONNECTION ELECTRICAL CONNECTIONS Use 230 V 50 Hz alternate voltage equipped with a earthing conductor to supply your machine. Ensure that the power supply corresponds to this voltage, that it is protected by a differential and magnetothermal switch, and that the earthing system is efficient. -
Page 12: Recommended Use
EXTENSION CABLES Only use three conductors extension cables, with a plug with two plugs and a earthing contact and sockets with two holes and a earth corresponding to the plug of the tool. When using an electric tool at a remarkable distance from the power supply, use an extension cable with sufficient dimensions to transport the current which the tool needs. -
Page 13: Noise Conditions
NOISE CONDITIONS The noise emitted, measured in conformity with the standards EN 3744 and EN 11201 is: - Sound pressure level pA = 92,7 dB(A) with load - Sound power level WA = 102,3dB(A) with load - Uncertainty of measurement K = 3 dB We recommend you to use ear protection devices. -
Page 14: Machine Description
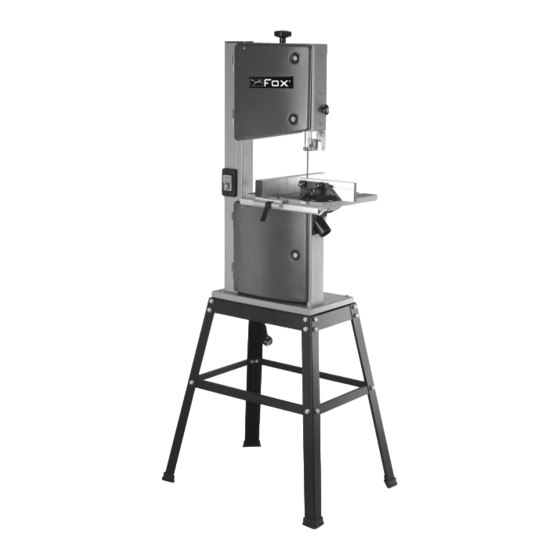
Front side of the machine FIG.1 1. Door of the upper flywheel 2. Knob for the adjustment of bandsaw’s tensioning FIG.5 3. Blade’s upper flywheel 4. Knob locking for the protection blade 5. Protection 6. Bandsaw’s saw blade 7. Workbench 8. -
Page 15: Assembly Of The Bandsaw
ASSEMBLY OF THE SAW BLADE WARNING Do not start the bandsaw before fastening the machine, assembling and adjusting the workbench, checking belt tension and safety devices. Only after performing these tasks you can connect the saw to the power supply. Otherwise the bandsaw could start suddenly and cause personal injuries. -
Page 16: Assembly Of The Rip Fence
Assembly of the rip fence FIG.4 The rip fence can be assembled on the left and on the right of the saw blade. You can lock the guide by lowering the lever (A). Connection of the dust collection device DANGER! The dust of certain kind of wood, as for example oak, beech or ash-tree has been proved to be especially dangerous for human health. -
Page 17: Flywheels' Doors
Flywheels’ doors FIG.6 III. By opening the doors (22) you can get at the flywheels-pulleys to change the blade, remove the sawdust which has piled up, change the speed by moving the belt on the pulleys. When using the machine, these doors are safety devices that isolate moving parts that could be dangerous. -
Page 18: Saw Blade's Tension
Saw blade’s tension FIG.8 WARNING! A too high tension can break the saw blade. If the tension is too low, the saw blade can slip from the driving wheel and stop. Saw blade’s tension must be adjusted according to the different width of the saw blades in order to obtain a correct alignment, efficiency and suitable life’s length. -
Page 19: Adjustment Of Workbench's Inclination
Adjustment of workbench’s inclination FIG.2 The workbench can be moved from 0 and 45°. To move it, loosen the lock screw (37), move the workbench to the desired angle and tighten the screw (37). VI. Rip fence FIG.4 The rip fence (33) can be assembled both on the left and on the right of the saw blade. Choose the position by using a graduated scale, place the guide and lock it by lowering the front lever VII. -
Page 20: Assembly Of The Blade And Adjustments
3. Place the rip fence according to the type of cutting you want to carry out, or choose the outline of the support for the piece to be cut. 4. Position and lock the upper blade guide at a distance of 3 mm over the workpiece. 5. -
Page 21: Adjustment Of The Saw Blade
Adjustment of the saw blade FIG.13 The saw blade must be perfectly centred on the rubber coatings of the flywheels. If it is not the case, you must change the upper flywheel inclination: 1. Loosen the lock nut (57). 2. Turn the adjustment screw (58): ... -
Page 22: Maintenance
7. Push the two wheels (29) in the direction of the saw blade until they come in contact with the saw blade (saw blade musn't get stuck). 8. Tighten hex head screws (38). 9. Make the upper wheel (7) rotate clockwise by hand in order to place the wheels correctly (they must touch lightly the saw blade). -
Page 23: Malfunctions
MALFUNCTIONS DANGER! Before performing any tasks after a failure: - Switch off the machine. - Remove the plug from the socket. - Wait for the saw blade to stop. After any intervention, replace all safety devices and check them. The engine does not work A possible tension reduction has made the minimum voltage relay start. -
Page 24: After Sales Service
All the tools and accessories are made and checked by using the safest and most modern productive methods. However, if a tool gets damaged, it must be repaired by an authorised after sales centre. You can sending a request to the e-mail address info@fox-machines.com. - Page 25 EXPLODED VIEW...
- Page 26 Art. / Item Art. / Item Art. / Item Art. / Item F28186A-1 F28186A-55 F28186A-109 F28186A-2 F28186A-56 F28186A-110 F28186A-3 F28186A-57 F28186A-111 F28186A-4 F28186A-58 F28186A-112 F28186A-5 F28186A-59 F28186A-113 F28186A-6 F28186A-60 F28186A-114 F28186A-7 F28186A-61 F28186A-115 F28186A-8 F28186A-62 F28186A-116 F28186A-9 F28186A-63 F28186A-117 F28186A-10 F28186A-64 F28186A-500 F28186A-11...
- Page 27 WIRING DIAGRAM...
- Page 28 Via del Lavoro, 4 40023 Castel Guelfo - (BO) ITALY hereby declares that the machine: VERTICAL BANDSAW Art: F28-186A manufactured in: (see label) conforms to the provisions of Machinery Directive 2006/42/EC and all provisions of implementation. furthermore it also conforms to the following provisions and relative implementation; 2006/95/EC, 2004/108/EC, 2011/65/UE,2012/19/UE.
Need help?
Do you have a question about the F28-186A and is the answer not in the manual?
Questions and answers