Table of Contents
Advertisement
Advertisement
Table of Contents

Related Manuals for Fox F36-522E


Summary of Contents for Fox F36-522E
-
Page 1: Table Saw
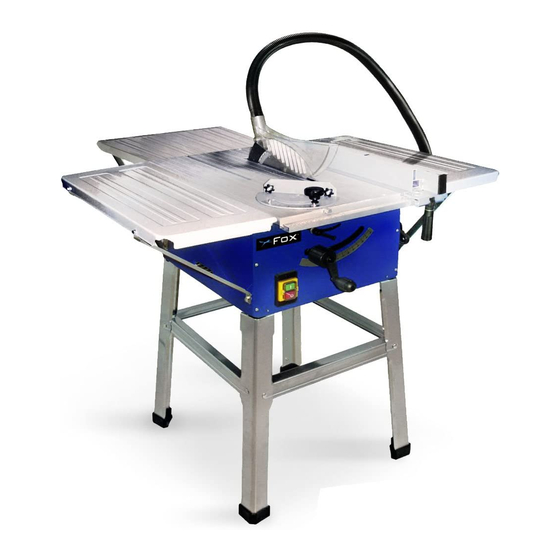
TABLE SAW FOX Model F36-522E... -
Page 2: Table Of Contents
Table saw FOX MODEL F36-522E TABLE OF CONTENTS Safety instructions…………………………………………………………………………………………… Page 3 Specific safety instructions for saws………………………………………………………………………. Page 5 Specifications………………………………………………………………………………………………… Page 8 Noise information……………………………………………………………………………………………. Page 8 Electrical connections………………………………………………………………………………………. Page 9 Earthing instructions………………………………………………………………………………………… Page 9 ... -
Page 3: Safety Instructions
ATTENTION : - Read the instructions for use carefully before using the machine - This device meets current safety standards for electrical machines. - Incorrect use may result in injury. Anyone not familiar with the instructions for use should not use the machine. - Page 4 parts. Non-slip shoes are particularly recommended when working outside. Keep long hair tied up. 9. Always wear safety glasses. Also wear a mask if operating the machine creates dust. 10. Do not mistreat the power cord. Never use the power cord to pull out the plug. Keep the power cord away from heat, oil and sharp edges.
-
Page 5: Specific Safety Instructions For Saws
SPECIFIC SAFETY INSTRUCTIONS FOR SAWS Do not use the saw until it is completely assembled and installed according to the instructions in this manual. If you are not completely familiar with operating saws, obtain help from a qualified person. Replace table insert when worn. Use only saw blades recommended by the manufacturer, which conform to EN 847-1. - Page 6 When working with a long workpiece, use an additional support such as a saw blade to prevent the blade from grabbing the work. When cutting round wood, use clamps that prevent the workpiece from turning on the table. There must be no nails or other foreign bodies in the part of the workpiece you want to cut. Never load the machine so much that it slows down and overheats.
- Page 7 Never use the fence as a cut-off gauge when crosscutting. Keep these instructions safe.
-
Page 8: Specifications
SPECIFICATIONS Motor : 1500W – 240V (2hp) Blade diameter : 250mm Bore diameter : 30mm Speed : 5500rpm Max. cutting capacity at 90° : 71mm Max. cutting capacity at 45° : 51mm Dimensions (h x l x d) : 1100x444x625mm Dimensions inc extensions (h x l x d) : 1100x944x935mm Weight :... -
Page 9: Electrical Connections
ELECTRICAL CONNECTIONS EXTENSION CORDS Before using an extension cord, ensure the insulation is not cut or worn. Immediately repair or replace a damaged or frayed cord. Length of the extension cord: up to 15m Dimension of the wire: 3 x 2.5mm ATTENTION : Extension cords must be removed from the work area or located so that they will not get caught in parts, tools or other objects while using the tool. -
Page 10: Environmental Protection
ENVIRONMENTAL PROTECTION The crossed-out wheeled bin means that within the European Union the product must be taken to separate collection at the product end-of-life. This applies to your device but also to any enhancements marked with this symbol. Do not dispose of these products as unsorted municipal waste. -
Page 11: Recommended Use
RECOMMENDED USE This machine has been manufactured for longitudinal and cross cutting of wood and similar materials. The blade can be tilted from 0° to 45° and at 0° it can cut up to 73mm, while if the blade is tilted it can cut up to a width of 60mm. Do not cut wood wider than 73mm. - Page 12 assembled the table saw, in order to use it you must place it on a perfectly plane surface, in a covered, clean, empty and well-ventilated environment, with a medium level lighting. IMPORTANT : Before use, ensure you have removed the transport protection inside the machine.
-
Page 13: Installation And Assembly
INSTALLATION AND ASSEMBLY * Installation of side extension of the table The support consists of four table legs with cross braces which must be fitted . Tools required : -2 ring spanners ,size 10 (one is needed for counter tightening ). -1 Allen key 4 mm 1. - Page 14 2. Slide the parallel guide 7 with one of the two rais K over the slide plate J . 2. Fix the parallel guide in the desired position by tightening the wing nuts 6a. 4. Push the fixing block 6 onto the profiled rail with the scale 13,and fix by pushing down the fixing lever 4 . MITRE ANGLE GUIDE The mitre angle guide 11 consists of two parts : a guide plate A (use the removable fence from the parallel guide ) and the angled adjuster B which must be assembled together...
- Page 15 RIP FENCE BLADE GUARD Danger! Risk of injury! The saw blade must be lowered as much as possible to avoid injuries. Using the handle crank 2 for height adjustment, lower the saw blade low enough that hole A in riving knife 9 is still accessible.
- Page 16 DUST EXTRACTION Insert one end of the extraction hose onto the nozzle of saw blade protector 7 and the other end in the extraction nozzle 15. Attach a suitable vacuum cleaner to the dust extraction nozzle 15. MAINTENANCE Before any intervention on the machine (installation, adjustment, blade replacement…) always make sure that the machine is unplugged.
-
Page 17: Replacing The Blade
REPLACING THE BLADE The saw blade has to meet the technical specification. Check saw blade for flaws(cracks, broken teeth, bending) before installation. Do not use faulty saw blades. The saw blade teeth must point in cutting direction(down). Always wear suitable gloves when handling saw blades. Warning When installing or changing saw blade, always disconnect saw from power source, unplug! Remove the two screws with Crosshead Screwdriver, take off the table... -
Page 18: Operation
OPERATION Correct working position: In front of the machine standing out of the line of cutting(danger zone) Work piece handling Hands placed flat on the work piece outside the cutting area. Feed the work piece towards the saw blade in the direction of the saw line. Push the work piece steadily forward; complete the cut as a single movement. -
Page 19: Troubleshooting
TROUBLESHOOTING The saw does not start: The power socket is not supplying power correctly The power cable is faulty The motor is damaged or the carbon brushes must be replaced Machine vibrations: The inclination lock handle is not tightened ... -
Page 20: Dart Tool Group Guarantee
FOX Power Tools and accessories which, upon examination, prove to be defective in workmanship or material. The warranty period for the FOX branded products is one year for parts and labour and three years for parts only. The guarantee does not include repair, labour or parts requiring replacement because of misuse, abuse, or normal wear and tear. -
Page 21: Declaration Of Conformity
KIRKCALDY, UK, KY1 3PD Tel. +44 (0) 1592 652946 Fax: +44 (0) 1592 654854 Declares that the: TABLE SAW (F36-522E) is in compliance with the regulations included in the Directives: CEE 2006/42-2004/108-2006/95 Person authorized to create the technical file: Robert Paterson 21.08.2015...
Need help?
Do you have a question about the F36-522E and is the answer not in the manual?
Questions and answers