Table of Contents
Advertisement
Advertisement
Table of Contents

Related Manuals for Fox F36-527


Summary of Contents for Fox F36-527
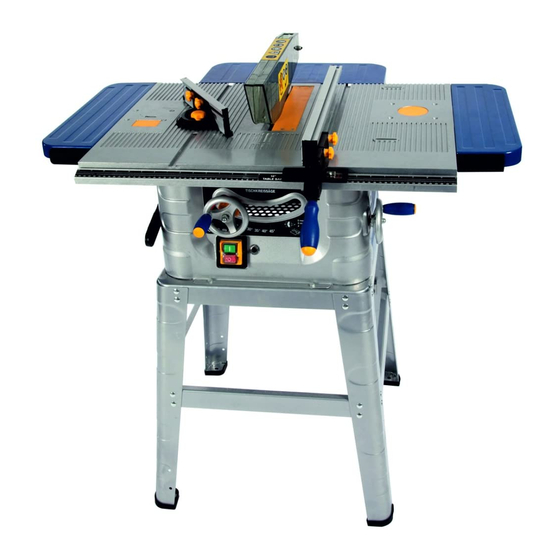
- Page 1 10" TABLE SAW FOX Model F36-527...
-
Page 2: Table Of Contents
10" Table Saw FOX MODEL F36-527 TABLE OF CONTENTS Safety instructions…………………………………………………………………………………………… Page 3 Specific safety instructions for saws………………………………………………………………………. Page 5 Specifications………………………………………………………………………………………………… Page 8 Noise information……………………………………………………………………………………………. Page 8 Electrical connections………………………………………………………………………………………. Page 9 Earthing instructions………………………………………………………………………………………… Page 9 ... -
Page 3: Safety Instructions
ATTENTION : - Read the instructions for use carefully before using the machine - This device meets current safety standards for electrical machines. - Incorrect use may result in injury. Anyone not familiar with the instructions for use should not use the machine. - Page 4 8. Wear appropriate clothing. Avoid loose clothing, and remove jewellery which could become caught in moving parts. Non-slip shoes are particularly recommended when working outside. Keep long hair tied up. 9. Always wear safety glasses. Also wear a mask if operating the machine creates dust. 10.
-
Page 5: Specific Safety Instructions For Saws
SPECIFIC SAFETY INSTRUCTIONS FOR SAWS Do not use the bandsaw until it is completely assembled and installed according to the instructions in this manual. If you are not completely familiar with operating saws, obtain help from a qualified person. Replace table insert when worn. Use only saw blades recommended by the manufacturer, which conform to EN 847-1. - Page 6 When working with a long workpiece, use an additional support such as a saw blade to prevent the blade from grabbing the work. When cutting round wood, use clamps that prevent the workpiece from turning on the table. There must be no nails or other foreign bodies in the part of the workpiece you want to cut. Never load the machine so much that it slows down and overheats.
- Page 7 Move the rip fence out of the way when crosscutting. Feed the work into the blade AGAINST the direction of rotation only. Never use the fence as a cut-off gauge when crosscutting. Keep these instructions safe.
-
Page 8: Specifications
SPECIFICATIONS Motor : 1500W – 240V (2hp) Blade diameter : 250mm Bore diameter : 30mm Speed : 4500rpm Max. cutting capacity at 90° : 80mm Max. cutting capacity at 45° : 55mm Dimensions (h x l x d) : 1100x725x520mm Dimensions inc extensions (h x l x d) : 1100x1170x705mm Weight :... -
Page 9: Electrical Connections
ELECTRICAL CONNECTIONS EXTENSION CORDS Before using an extension cord, ensure the insulation is not cut or worn. Immediately repair or replace a damaged or frayed cord. Length of the extension cord: up to 15m Dimension of the wire: 3 x 2.5mm ATTENTION : Extension cords must be removed from the work area or located so that they will not get caught in parts, tools or other objects while using the tool. -
Page 10: Environmental Protection
ENVIRONMENTAL PROTECTION The crossed-out wheeled bin means that within the European Union the product must be taken to separate collection at the produc tend-of life. This applies to your device but also to any enhancements marked with this symbol. Do not dispose of these products as unsorted municipal waste. -
Page 11: Unpacking And Cleaning
UNPACKING AND CLEANING Unpack your saw carefully, taking care with the loose parts. Note : if any parts are damaged or missing, do not connect the machine to the power and do not switch it on until the missing/damaged parts are replaced. Do not throw away the cardboard box until you are sure the machine is working correctly. -
Page 12: Before Using The Machine
BEFORE USING THE MACHINE The table saw is designed for the cutting of timber and plastic suitable for the size of the machine. The machine is not to be used for cutting firewood. The machine is only to be used for the purpose for which it was designed. Any use other than those mentioned will be considered misuse. -
Page 13: Assembling, Adjusting And Using The Machine
ASSEMBLING, ADJUSTING AND USING THE MACHINE CAUTION Always remove the plug from the power source before carrying out any maintenance, cleaning or assembly work on the table saw. When assembling the stand we advise you only loosely tighten the screws until the stand is fully assembled. NOTE : the stand legs are not identical. - Page 14 Fitting the rear table extension 1. Use the 3 x M6 x 12mm screws each with a plain washer and a spring washer to attach the rear extension to the table top. 2. Use 2 x black cross head screws with matching washers to attach the rear extension supports to the rear extension.
- Page 15 Fitting the push stick clamps 1. Use the 4 3.2mm x 10mm long screws provided to attach the push stick clamps to the left hand side of the table saw. 2. Insert the push stick into the clamps. NOTE : Always return the push stick to its storage place after use. Adjusting the laser line 1.
- Page 16 3. Lift the fence locking lever and slide the fence to the required position. 4. Re-tighten the fence locking lever. Using the mitre fence Slide the mitre fence into the table top slot. Slacken the knob on the mitre fence. Turn the mitre fence to select the required angle.
- Page 17 Cutting an extremely narrow workpiece Longitudinal cuts in an extremely narrow workpiece with a width of 30mm or less must always be made with the help of a push block. A push block is not supplied. You can purchase one from your nearest specialist dealer or make one yourself. Warning : worn push blocks must be replaced immediately.
- Page 18 10. Re-fit and re-set the riving knife and the saw blade guard. 11. Before using the saw again, check that all safety devices are in good working order. IMPORTANT : after replacing the saw blade, make sure the saw blade runs freely by turning the blade by hand.
-
Page 19: Parts Diagram
PARTS DIAGRAM... -
Page 20: Parts List
PARTS LIST... -
Page 23: Dart Tool Group Guarantee
Power Tools and accessories which, upon examination, prove to be defective in workmanship or material. The warranty period for the FOX branded products is one year for parts and labour and three years for parts only. The guarantee does not include repair, labour or parts requiring replacement because of misuse, abuse, or normal wear and tear. -
Page 24: Declaration Of Conformity
KIRKCALDY, UK, KY1 3PD Tel. +44 (0) 1592 652946 Fax: +44 (0) 1592 654854 Declares that the: 10” TABLE SAW (F36-527) is in compliance with the regulations included in the Directives: CEE 2006/42-2004/108-2006/95 Person authorized to create the technical file: Robert Paterson 06.05.2011...
Need help?
Do you have a question about the F36-527 and is the answer not in the manual?
Questions and answers
Hi, i am looking for a replacement handle 36527-50 for my table saw as it has broken