Table of Contents
Advertisement
Quick Links
LAUNCH
Precaution on Operation
The appliance is a sophisticated electronic device, never have it clashed
when in use.
Main unit screen may flash at the moment of engine ignition, which is
normal.
You may unplug the main unit if the program can not be actuated or
confused screen occurs. Plug again to continue the operation.
Make sure the appliance is properly connected to the DLC to avoid
communication interruptions.
During operation, keep the screen upward and leveled.
Be careful when plugging and unplugging the main cable and diagnostic
connector. Tighten the screw before operation to avoid unexpected
disconnecting and/or damage to the port.
Handle with care. Avoid collision. Unplug the power after operation.
After the operation, the stylus shall be inserted into the slot on the main
unit, and put away the cable and connector, etc accessories to the box to
avoid the lost.
Unplug the power cable by holding the connector, not the cable itself.
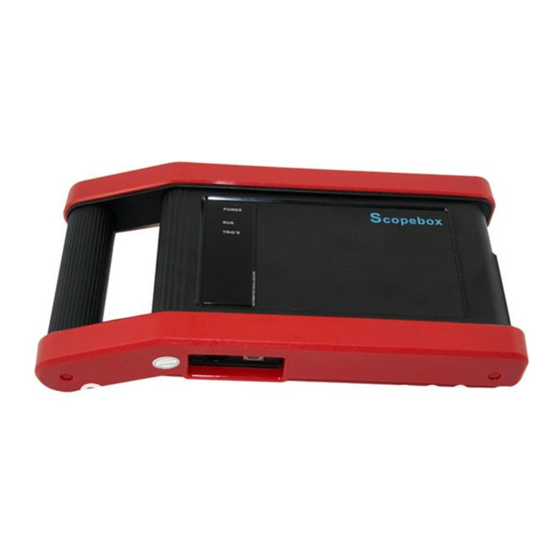
X431 PAD Scopebox User's Manual
Advertisement
Table of Contents

Related Manuals for Launch X431 Scopebox


Summary of Contents for Launch X431 Scopebox
- Page 1 LAUNCH X431 PAD Scopebox User’s Manual Precaution on Operation The appliance is a sophisticated electronic device, never have it clashed when in use. Main unit screen may flash at the moment of engine ignition, which is normal. You may unplug the main unit if the program can not be actuated or confused screen occurs.
-
Page 2: Table Of Contents
LAUNCH X431 PAD Scopebox User’s Manual Table of Contents 1 FOREWORD ..................1 1.1 I ................1 NTRODUCTIONS 1.2 P ..............1 RODUCT FEATURES 1.3 P ..............2 RODUCT FUNCTION 1.4 T .............. 2 ECHNICAL PARAMETERS 2 STRUCTURE AND ACCESSORIES ..........3 2.1 S... -
Page 3: Foreword
X-431 PAD is a new generation of sophisticated and integrated automotive diagnostic product with colorful screen and powerful functions developed by LAUNCH, and Scopebox is an optional function box for X-431 PAD, including automotive oscilloscope and automotive ignition waveform. Automotive oscilloscope can make the auto repair technician quickly judged... -
Page 4: Product Function
LAUNCH X431 PAD Scopebox User’s Manual Detect, display and store all the electrical signal of five parameters, namely amplitude, frequency, shape, pulse width, and array. 1.3 Product function Provides specialized automotive oscilloscope function and supports ignition waveform analysis. 1.4 Technical parameters Scopebox: 4 channels, highest sampling frequency 200MHZ, max storage depth 64MSa, 8-bit resolution. -
Page 5: Structure And Accessories
LAUNCH X431 PAD Scopebox User’s Manual 2 Structure and Accessories 2.1 Scopebox structure Fig 2-1 Scopebox Structure Diagram Table 2-1 shows the ports and indicators for X-431 PAD Scopebox Name Description Channel 1 Channel 2 Channel 3 Channel 4 External trigger... -
Page 6: Scopebox Accessories
LAUNCH X431 PAD Scopebox User’s Manual Power indicator Oscilloscope power indicator, which will be steady red after the oscilloscope is powered on Operating The indicator will be steady green after the indicator oscilloscope operated. Communication After the data communication, the indicator will indicator blink (Green). - Page 7 LAUNCH X431 PAD Scopebox User’s Manual 6-way universal guide line for 4-channel oscilloscope BNC to 4mm connector test cable Pin connector for 4-channel oscilloscope...
-
Page 8: Automotive Oscilloscope
LAUNCH X431 PAD Scopebox User’s Manual 3 Automotive Oscilloscope 3.1 Connection X-431 PAD Scopebox should work with the X431 PAD main unit. 1. Firstly, power on the main unit (Connect one end of the power adaptor into the power interface of main unit, and the other end to the DC 12V power supply. -
Page 9: Operations
LAUNCH X431 PAD Scopebox User’s Manual Fig.3-1 Button descriptions: [Autoset]: It indicates auto trigger setting. Based on the characteristics of measured signal, the oscilloscope will automatically set the horizontal baseline, vertical sensitivity and trigger condition so that the waveform can be displayed. - Page 10 LAUNCH X431 PAD Scopebox User’s Manual display area; B. Select from Vertical settings. Note: For better comparison and identification, each channel and waveform are marked in different colors. Fig.3-2 <2> Channel attributes setting Channel attributes can be set via horizontal settings and vertical settings.
-
Page 11: Trigger Setting
LAUNCH X431 PAD Scopebox User’s Manual Options descriptions: Time/DIV: click << or >> to adjust; Y-T Format: click << or >> to adjust. It includes 3 options: Normal, Scan and Scroll (from right to left). Vertical Settings User can make some settings directly by clicking << or >> next to options. - Page 12 LAUNCH X431 PAD Scopebox User’s Manual in most applications. Edge trigger only detects the edges, polarities, and voltage of signal. When the voltage of measured signal varies as identical as the preset one (rising edge or falling edge), and the value becomes same as trigger voltage, the oscilloscope will be triggered and capture the waveform.
-
Page 13: Auto Calibration
LAUNCH X431 PAD Scopebox User’s Manual <3> Trigger source Trigger source means which channel signal will be measured as trigger object. Before making settings to trigger mode and voltage of certain channel, you have to choose the target channel. 3.3.3 Auto calibration This option enables you to obtain a precise measurement of measured signal. -
Page 14: Display Settings
LAUNCH X431 PAD Scopebox User’s Manual input. Moreover, calibration may take several minutes and please be patient to wait. 3.3.4 Display settings Click “View” and then [Display settings] to enter the setting screen. See Fig. 3-9. Fig. 3-9 Click “Vectors” or “Dots” to define display mode. Check/uncheck the box before Grid to open/close grid display. -
Page 15: File Management
LAUNCH X431 PAD Scopebox User’s Manual Fig. 3-11 Fig. 3-12 Horizontal Measure is for voltage (see Fig. 3-11) and vertical measure is for timebase (see Fig. 3-12). Options descriptions: [A Line / B Line move up / down]: fine adjustment for voltage. A line is a solid line and B line is a dotted line;... - Page 16 LAUNCH X431 PAD Scopebox User’s Manual Fig.3-13 Click [Record] to start recording, and the Record button becomes Stop button. Click [Stop] to stop recording. While recording, the recorded pages will be shown on the screen. <2> Import waveform for playback The Import function enables you to import the stored waveform file for playback and review.
-
Page 17: View The Software Version
LAUNCH X431 PAD Scopebox User’s Manual corresponding folder to perform delete operation. <3> Print waveform This option allows you to print out the latest collected data while the oscilloscope stops collecting data. While printing, the oscilloscope should be in stop mode. -
Page 18: Automotive Ignition Waveform
LAUNCH X431 PAD Scopebox User’s Manual 4 Automotive Ignition waveform The ignition system is the system which has greatest impact on the performances of gasoline engine, as the statistical data shows that nearly half of the failures are caused by poor work of electrical system. And the performance tests of engine often start from the ignition system. - Page 19 LAUNCH X431 PAD Scopebox User’s Manual Four-stroke in-line four-cylinder: 1—2—4—3, or 1—3—4—2 Four-stroke in-line six-cylinder: 1—5—3—6—2—4, or 1—4—2—6—3—5 Four-stroke in-line eight-cylinder: 1—8—4—3—6—5—7—2 Five-cylinder: 1-2-4-5-3 V 6 engine: generally speaking, based on the person sitting on the driver cab, if the right side cylinder numbers on the right side, from the front to the back are as follows: 1, 3, 5;...
- Page 20 LAUNCH X431 PAD Scopebox User’s Manual Fig. 4-1 1) Contact break point: the primary circuit of ignition coil cut off, the secondary voltage was sensed and increased sharply 2) Ignition voltage: secondary coil voltage overcome the damper of high voltage line, the contact breaker gap and the spark plug gap to release...
-
Page 21: Secondary-Simultaneous Ignition Analysis
LAUNCH X431 PAD Scopebox User’s Manual energy after the spark; Section c shows the make contact magneting period of primary coil. Seen from the waveform, the amplitudes of breaker contact closed angle, break angle and breakdown voltage and spark voltage are very clear, besides, the spark delay period and two oscillations can also be tested. -
Page 22: Secondary-Direct Ignition Analysis
LAUNCH X431 PAD Scopebox User’s Manual Fig. 4-3 below shows the valid and invalid ignition waveforms. Under the working status of valid ignition, the breakdown voltage and spark voltage are higher because the cylinder is filled with fresh combustible mixture gas, which has a lower ionization level and vice versa. - Page 23 LAUNCH X431 PAD Scopebox User’s Manual Fig. 4-4 Fig. 4-5 shows the normal secondary (the upper one) and (the lower one) primary ignition waveform of direct ignition system. Beause the on/off of primary circuit is not opening/closing of mechanical contact, but the conduction of transistor.
-
Page 24: Waveform Analysis Mode
LAUNCH X431 PAD Scopebox User’s Manual Fig. 4-5 4.4 Waveform analysis mode The ignition secondary single-cylinder waveform test is mainly used to: Analyze the ignition dwell angle of single cylinder.(ignition coil charging time) Analyze the capability of ignition coil and secondary high tension circuit (from ignition line to ignition voltage line). - Page 25 LAUNCH X431 PAD Scopebox User’s Manual of engine mechanical parts, fuel system components, and ignition system components. Different parts of the waveform can specify that some components and systems on the specific cylinder have faults. Refer to the instructions for various parts of waveform for the related component working status of specific waveform section.
- Page 26 LAUNCH X431 PAD Scopebox User’s Manual rich. Too long combustion line (usually greater than 2ms) represents the mixing ratio is rich, whereas too short of combustion line (usually less than 0.75ms) represents the mixing ratio is lean. Ignition coil oscillation:...
- Page 27 LAUNCH X431 PAD Scopebox User’s Manual Fig. 4-7 The waveform on Fig. 4-8, shows the accidental pumping during contact closing period. The irregular beating is caused by insufficient spring force. Fig. 4-8 The curve on Fig. 4-9 shows the contact angle is too small during the magnetizing period, which is caused by too large contact gap.
- Page 28 LAUNCH X431 PAD Scopebox User’s Manual Fig.4-10 Fig. 4-11 shows the fault of low-voltage waveform in electronic ignition system. The voltage does not rise during magnetizing, which indicates that the effect of limitation of the circuit failed and no components on distributorless ignition system can be adjusted.
- Page 29 LAUNCH X431 PAD Scopebox User’s Manual...
- Page 30 LAUNCH X431 PAD Scopebox User’s Manual Fig 4-12...
- Page 31 LAUNCH Android-based Scopebox User’s Manual 1 Foreword 1.1 Introductions The scopebox is an optional add-on module for Launch’s Android-based diagnostic tool, including automotive oscilloscope and automotive ignition waveform. Automotive oscilloscope can make the auto repair technician quickly judge the faults on automotive electronic equipment and wiring, and the oscilloscope sweep speed is far greater than the signal frequency of such vehicles, usually 5-10 times of the measured signal.
- Page 32 LAUNCH Android-based Scopebox User’s Manual amplitude, frequency, shape, pulse width, and array. 1.3 Product function Provides specialized automotive oscilloscope function and supports ignition waveform analysis. 1.4 Technical parameters Scopebox: 4 channels, highest sampling frequency 200MHZ, max. storage depth 64MSa, 8-bit resolution.
- Page 33 LAUNCH Android-based Scopebox User’s Manual 2 Structure and Accessories 2.1 Scopebox structure Fig 2-1 Scopebox Structure Diagram Table 2-1 shows the ports and indicators for the scopebox. Name Description Channel 1 Channel 2 Channel 3 Channel 4 External trigger External trigger signal Fixed signal Generate a square signal with fixed 1K frequency.
- Page 34 LAUNCH Android-based Scopebox User’s Manual Power indicator It keeps steady red after the scopebox is powered Running It remains steady green after the scopebox is indicator running. Communication It blinks in process of data communication. indicator Power interface Connect to power supply via the power adapter.
- Page 35 LAUNCH Android-based Scopebox User’s Manual 6-way universal guide line for 4-channel oscilloscope BNC to 4mm connector test cable Pin connector suite for 4-channel oscilloscope...
- Page 36 Android-based Scopebox User’s Manual 3 Automotive Oscilloscope 3.1 Connection The scopebox should work with the Launch’s Android-based diagnostic tool. 1. Firstly, power on the diagnostic tool. 2. Then plug one end of ground cable of the scopebox into external trigger channel (GND), the other end should be grounded.
- Page 37 LAUNCH Android-based Scopebox User’s Manual Descriptions Signal display area Horizontal Settings: Controls the time base. Vertical Settings: Controls the amplitude of the displayed signal. Trigger Settings: Controls the start event of the sweep. Channel Selection Button Function Menu [Auto]: It indicates auto trigger setting. See Chapter 3.3.2.
- Page 38 LAUNCH Android-based Scopebox User’s Manual 3.3 Operations 3.3.1 Channel selection and attributes setting <1> Channel selection There are two ways available for channel selection: (See Fig. 3-2) A. Select from the channel tab shown at the bottom of the waveform display area;...
- Page 39 LAUNCH Android-based Scopebox User’s Manual Fig. 3-3 Options descriptions: Menu Comments/Settings Time/DIV Horizontal scale. If the waveform acquisition is stopped (using the button), the Time/DIV selector expands or compresses the waveform. Y-T format The conventional oscilloscope display format. It shows the voltage of a waveform record (on the vertical axis) as it varies over time (on the horizontal axis).
- Page 40 LAUNCH Android-based Scopebox User’s Manual Fig. 3-4 Options descriptions: Menu Comments/Settings Channel To select the channel source. It is defined as “Volts/Division” and mainly used to Volts/DIV change the resolution. Trigger coupling determines what part of the signal Coupling passes to the trigger circuit. AC, DC and Ground are included: AC: Blocks the DC component of the input signal;...
- Page 41 LAUNCH Android-based Scopebox User’s Manual OFF: Restore to the original display of the waveform. Trigger setting Trigger indicates that when certain waveform meets the conditions that are predefined according to the requirements, the scopebox acquires the waveform and its adjacent section, and then presents it on the screen.
- Page 42 LAUNCH Android-based Scopebox User’s Manual display becomes stable on the screen. Normal: This mode allows the scopebox to acquire a waveform only when it is triggered. If no trigger occurs, the scopebox keeps waiting, and the previous waveform, if any, will remain on the display.
- Page 43 LAUNCH Android-based Scopebox User’s Manual waveform only when it is triggered. If no trigger occurs, the scopebox keeps waiting, and the previous waveform, if any, will remain on the display. Single: In this mode, it only acquires the waveform that generates for the first time the trigger conditions are met, and then stops after finishing capture.
- Page 44 LAUNCH Android-based Scopebox User’s Manual Fig. 3-6 Check the box before the channel to select it. To deselect it, just uncheck it. After choosing the desired channel(s), tap [Start] to start calibration and [Start] button will be temporarily invalid during calibrating. Tap [Stop] to stop calibrating.
- Page 45 LAUNCH Android-based Scopebox User’s Manual Fig. 3-7 Tap < or > to select the desired reference value for time/DIV and volts/DIV. To show or hide the REF, just check/uncheck the box before On/Off. <3> Display settings and then [Display settings] to enter the setting screen. See Fig. 3-8.
- Page 46 LAUNCH Android-based Scopebox User’s Manual Fig. 3-9 <2> Horizontal / Vertical measure Horizontal Measure / Vertical Measure are used to measure voltage parameter and time parameter respectively. Drag A line upwards or downwards to control voltage. Move A line left or right to fine-tune timebase. A line is a solid line and B line is a dotted line.
- Page 47 LAUNCH Android-based Scopebox User’s Manual Note: If no desired channel is selected, the system will take the current source as the default channel. <3> Clear measure and then [Clear Measure], the system will clear the measurement result on screen. 3.3.5 File management <1>...
- Page 48 LAUNCH Android-based Scopebox User’s Manual Fig.3-11 Tap [Start] to start recording with a minimum record length of 10 frames, and [Stop] to stop recording. While recording, the recorded pages will be shown on the screen. <4> Load waveform for playback The Import function enables you to import the stored waveform file for playback and review.
- Page 49 LAUNCH Android-based Scopebox User’s Manual Fig.3-12 Select the file first, and then tap to open the waveform file. Tap to stop it. starting the playback and tap Fig.3-13 To delete the waveform file, tap to return to the previous screen.
- Page 50 LAUNCH Android-based Scopebox User’s Manual 3.3.6 Expert Reference <1> Expert Reference By default, it appears blank. As a matter of fact, Expert reference database is generated by doing the following: 1. Open and edit a snapshot; 2. Select “Joint the expert database” (refer to the following illustration), and then tap to save the waveform being displayed on the screen as REF.
- Page 51 LAUNCH Android-based Scopebox User’s Manual Fig. 3-15 3.3.7 Exit the application to exit the current application.
- Page 52 LAUNCH Android-based Scopebox User’s Manual 4 Automotive Ignition waveform The ignition system is the system which has greatest impact on the performances of gasoline engine, as the statistical data shows that nearly half of the failures are caused by poor work of electrical system. And the performance tests of engine often start from the ignition system.
- Page 53 LAUNCH Android-based Scopebox User’s Manual actual engine ignition sequence) Four-stroke in-line four-cylinder: 1-2-4-3, or 1-3-4-2 Four-stroke in-line six-cylinder: 1-5-3-6-2-4, or 1-4-2-6-3-5 Four-stroke in-line eight-cylinder: 1-8-4-3-6-5-7-2 Five-cylinder: 1-2-4-5-3 V 6 engine: Generally speaking, based on the person sitting on the driver cab, if the right side cylinder numbers on the right side, from the front to the back are as follows: 1, 3, 5;...
- Page 54 LAUNCH Android-based Scopebox User’s Manual Fig. 4-1 1) Contact break point: The primary circuit of ignition coil cut off, the secondary voltage was sensed and increased sharply 2) Ignition voltage: Secondary coil voltage overcome the damper of high voltage line, the contact breaker gap and the spark plug gap to release...
- Page 55 LAUNCH Android-based Scopebox User’s Manual energy after the spark; Section c shows the make contact magnetic period of primary coil. Seen from the waveform, the amplitudes of breaker contact closed angle, break angle and breakdown voltage and spark voltage are very clear, besides, the spark delay period and two oscillations can also be tested.
- Page 56 LAUNCH Android-based Scopebox User’s Manual Fig. 4-3 below shows the valid and invalid ignition waveforms. Under the working status of valid ignition, the breakdown voltage and spark voltage are higher because the cylinder is filled with fresh combustible mixture gas, which has a lower ionization level and vice versa.
- Page 57 LAUNCH Android-based Scopebox User’s Manual Fig. 4-4 Fig. 4-5 shows the normal secondary (the upper one) and (the lower one) primary ignition waveform of direct ignition system. Because the on/off of primary circuit is not opening/closing of mechanical contact, but the conduction of transistor.
- Page 58 LAUNCH Android-based Scopebox User’s Manual Fig. 4-5 4.4 Waveform analysis mode The ignition secondary single-cylinder waveform test is mainly used to: Analyze the ignition dwell angle of single cylinder.(ignition coil charging time) Analyze the capability of ignition coil and secondary high tension circuit (from ignition line to ignition voltage line).
- Page 59 LAUNCH Android-based Scopebox User’s Manual of engine mechanical parts, fuel system components, and ignition system components. Different parts of the waveform can specify that some components and systems on the specific cylinder have faults. Refer to the instructions for various parts of waveform for the related component working status of specific waveform section.
- Page 60 LAUNCH Android-based Scopebox User’s Manual rich. Too long combustion line (usually greater than 2ms) represents the mixing ratio is rich, whereas too short of combustion line (usually less than 0.75ms) represents the mixing ratio is lean. Ignition coil oscillation: Observe at least two oscillation waveforms after the combustion line, which will be better if more than three oscillation waveforms, as it represents the ignition coil and capacitor (on Platinum or ignition system) are normal.
- Page 61 LAUNCH Android-based Scopebox User’s Manual Fig. 4-7 The waveform on Fig. 4-8, shows the accidental pumping during contact closing period. The irregular beating is caused by insufficient spring force. Fig. 4-8 The curve on Fig. 4-9 shows the contact angle is too small during the magnetizing period, which is caused by too large contact gap.
- Page 62 LAUNCH Android-based Scopebox User’s Manual Fig.4-10 Fig. 4-11 shows the fault of low-voltage waveform in electronic ignition system. The voltage does not rise during magnetizing, which indicates that the effect of limitation of the circuit failed and no components on distributorless ignition system can be adjusted.
- Page 63 LAUNCH Android-based Scopebox User’s Manual...
- Page 64 LAUNCH Android-based Scopebox User’s Manual Fig 4-12...
- Page 65 1.1 Introductions X-431 GDS is a new generation of sophisticated and integrated automotive diagnostic product with colorful screen and powerful functions developed by LAUNCH, and Scopebox is an optional function box for GDS, including automotive oscilloscope and automotive ignition waveform.
- Page 66 LAUNCH X431 GDS Scopebox Manual time of signal), the shape (the appearance of signal), the pulse width (the duty cycle or the time range of signal), and the array (the repetition characteristic of signal), which can be tested, displayed, saved by the automotive oscilloscope. Via the waveform analysis can further detect the circuit fault on sensors, actuators, circuits, and electronic control units, etc.
- Page 67 LAUNCH X431 GDS Scopebox Manual 2 Structure and Accessories 2.1 Scopebox structure Fig 2-1 Scopebox Stru cture Diagram Table 2-1 shows the ports and indicators for X-431 GD S Scopebox No. Name Description Channel 1 Channel 2 Channel 3 Channel 4...
- Page 68 LAUNCH X431 GDS Scopebox Manual Fixed signal Generate a square signal with fixed 1K generator frequency Power indicator Oscilloscope power indicator, which will be steady red after the oscilloscope is powered on Operating The indicator will be steady green after indicator the oscilloscope operated.
- Page 69 LAUNCH X431 GDS Scopebox Manual Table 2-2 Accessory checklist Name Picture Secondary ignition pickup for 4-channel oscilloscope Crocodile clips for 4-channel Oscilloscope Direct ignition e xtension cord 6-way universal guide line for 4-channel oscilloscope BNC to 4mm connector test cable...
- Page 70 LAUNCH X431 GDS Scopebox Manual 3 Automotive Oscilloscope 3.1 Connection X-431 GDS Scopebox should work with the X431 GDS main unit. 1. Firstly, power on the main unit (Connect one end of the power adaptor into the power interface of main unit, and the other end to the DC 12V power supply.
- Page 71 LAUNCH X431 GDS Scopebox Manual Fig.3-1 Button descriptions: [System]: includes show desktop, Wi-Fi setting, current version and exit the program. [Help]: displays help files. [File]: supports import waveform, store waveform, store graphics, record waveform, print waveform, show/hide the grid, display cached interface, turn pages, and clear.
- Page 72 LAUNCH X431 GDS Scopebox Manual 3.3 Operations 3.3.1 Channel selection and attributes setting <1> Channel selection There are two ways available for channel selection. A. Select from the channel menu; B. Select via each channle attribute button. See Fig. 3-2.
- Page 73 LAUNCH X431 GDS Scopebox Manual by one level and – means to decrease time-base by one level. D. Channel phase selection: normal phase or reverse phase. E. Channel coupling modes selection: DC, AC, or Ground. See Fig. 3-3 and Fig. 3-4 for channel 1 & channel 4 attributes setting interfaces respectively.
- Page 74 LAUNCH X431 GDS Scopebox Manual Fig.3-4 Channel 4 attributes setting 3.3.2 Trigger setting <1> Trigger source Single channel trigger and alternation trigger are included. [Single channel trigger]: collects all channels data by triggering one channel; [Alternation trigger]: Each channel collects data separately based on its own channel triggering, only for AUTO mode.
- Page 75 LAUNCH X431 GDS Scopebox Manual Fig.3-5 Single channel trigger Fig.3-6 Alternation trigger <2> Trigger channel To set trigger mode and voltage for one channel, please select this channel first. See button [Trigger].
- Page 76 LAUNCH X431 GDS Scopebox Manual <3> Trigger type Includes edge trigger and pulse trigger, see button [Time base]. [Edge trigger]: Touch [edge] to select rising edge or falling edge; [Pulse trigger]: Touch button [pulse] to select. There are 6 modes available.
- Page 77 LAUNCH X431 GDS Scopebox Manual Fig.3-7 In Fig. 3-7, the yellow inverted triangle is the horizontal hold-off pointer. Button [Hold-off 50%] can coarsely tune the horizontal trigger, and make fine adjustment in the horizontal trigger hold-off zone. <6> Auto calibration Click [Auto calibrated] button, the oscilloscope will perform automatic calibration.
- Page 78 LAUNCH X431 GDS Scopebox Manual Fig .3-8 3.3.3 Channel measurement <1> Timebase measurement Fig.3-9...
- Page 79 LAUNCH X431 GDS Scopebox Manual Button descriptions: [Timebase]: used to select mode. When it is displayed as timebase, it is in time measurement mode; [A line]: enables you to select A\B measurement line. The currently selected line is a solid line;...
- Page 80 LAUNCH X431 GDS Scopebox Manual [A line]: enables you to select A\B measurement line. The currently selected line is a solid line; [Up/Down]: fine adjutment button for voltage. 3.3.4 Expert settings This option is specially designed to measure related vehicle sensors.
- Page 81 LAUNCH X431 GDS Scopebox Manual 3.3.4 File management <1> Store picture This option is designed to save the currently displayed waveforms as graphic file. It can be performed when the oscilloscope stops collecting data. Touch [File], then select [Store picture] from the pull-down list. See Fig.
- Page 82 LAUNCH X431 GDS Scopebox Manual Fig.3-13 <3> Record waveform This function is used to record waveforms that are collected by oscilloscope at a period, and save it as data file which can be played back in future. It can be performed when the oscilloscope stops collecting data.
- Page 83 LAUNCH X431 GDS Scopebox Manual Fig.3-14 [Record/Stop]: starts / stops recording. While recording, the recorded pages will be shown on the screen. <4> Import waveform for playback The Import function enables you to import the stored waveform file for playback and review. It only works when the oscilloscope stops collecting data.
- Page 84 LAUNCH X431 GDS Scopebox Manual Fig.3-15 To delete a waveform file, please select it first, then touch [Delete] button. Click [OK] button to open the waveform file, then use channel attributes setting to adjust the waveform display, or touch [File]...
- Page 85 LAUNCH X431 GDS Scopebox Manual Fig.3-16 <5> Print waveform This option allows you to print the currently displayed waveform out through a specific printer. Before printing, make sure that the oscilloscope stops collecting data and the printer is properly connected.
- Page 86 LAUNCH X431 GDS Scopebox Manual Fig.3-17 <6> Show / hide the Grid Click [File]>[Grid] button to show/hide grid. See Fig. 3-18. Fig.3-18...
-
Page 87: System Settings
LAUNCH X431 GDS Scopebox Manual <7> Display and Clear cached waveforms This osicilloscope stores 10 pages of cached waveform data. While in data collection stop mode, click [File], and then choose [Pre Pg.]/[Next Pg.]/[Empty] from the pull-down menu to operate the cached data. - Page 88 LAUNCH X431 GDS Scopebox Manual Fig.3-20 Button description: [Show Desktop]: to return to main menu screen [Wi-Fi setting]: to configure Wi-Fi connection [Version]: display the version information [Exit program]: to exit this program View version information In main menu, click [System], and then select [Version] to view the...
- Page 89 LAUNCH X431 GDS Scopebox Manual Fig.3-21 3.3.6 View help file In main menu, click [Help] to enter a screen similar to Fig. 3-22. Fig.3-22...
- Page 90 LAUNCH X431 GDS Scopebox Manual 4 Automotive Ignition waveform The ignition system is the system which has greatest impact on the performances of gasoline engine, as the statistical data shows that nearly half of the failures are caused by poor work of electrical system.
- Page 91 LAUNCH X431 GDS Scopebox Manual ignition is invalid. X-431 GDS can test and analyze the primary/secondary signal for various engine ignition systems. In main menu, click "Engine ignition waveform" - "Configuration" to enter the interface shown as Fig. 4-1: Fig.4-1...
- Page 92 LAUNCH X431 GDS Scopebox Manual subject to the actual engine ignition sequence) Four-stroke in-line four-cylinder: 1—2—4—3, or 1—3—4—2 Four-stroke in-line six-cylinder: 1—5—3—6—2—4, or 1—4—2—6—3—5 Four-stroke in-line eight-cylinder: 1—8—4—3—6—5—7—2 Five-cylinder: 1-2-4-5-3 V 6 engine: generally speaking, based on the person sitting on the driver cab, if the right side cylinder numbers on the right side, from the front to the back are as follows: 1, 3, 5;...
- Page 93 LAUNCH X431 GDS Scopebox Manual Fig.4-2 1) Contact break point: the primary circuit of ignition coil cut off, the secondary voltage was sensed and increased sharply 2) Ignition voltage: secondary coil voltage overcome the damper of high voltage line, the contact breaker gap and the spark plug gap to release magnetizing energy, 1-2 section is the breakdown voltage;...
- Page 94 LAUNCH X431 GDS Scopebox Manual 6) Contact point close: The current flow into primary coil, the primary coil oscillates due to the mutual inductance. Primary ignition waveform Section a shows the voltage oscillation on the primary circuit due to the magnetic induction of spark in the duration;...
- Page 95 LAUNCH X431 GDS Scopebox Manual Fig.4-3 4.3 Primary-direct ignition analysis The Figure 4-4 shows the normal secondary (the upper one) and (the lower one) primary ignition waveform of direct ignition system. Beause the on/off of primary circuit is not opening/closing of mechanical contact, but the conduction of transistor.
- Page 96 LAUNCH X431 GDS Scopebox Manual Fig.4-4 4.4 Secondary-distributor ignition analysis Connections: Plug the BNC end of secondary ignition pickup into CH1/CH2/CH3/CH4 channel of Scopebox, then connect the high-voltage clip to high-voltage line, and crocodile clips to ground. After properly connected, power on and confirm the cylinder number...
- Page 97 LAUNCH X431 GDS Scopebox Manual Fig.4-5 Tips: Common ignition sequence (the specific sequence is subject to the actual engine ignition sequence) Four-stroke in-line four-cylinder: 1—2—4—3, or 1—3—4—2 Four-stroke in-line six-cylinder: 1—5—3—6—2—4, or 1—4—2—6—3—5 Four-stroke in-line eight-cylinder: 1—8—4—3—6—5—7—2 Five-cylinder: 1-2-4-5-3 V 6 engine: generally speaking, based on the person sitting on the driver cab, if the right side cylinder numbers on the right side, from the front to the back are as follows: 1, 3, 5;...
- Page 98 LAUNCH X431 GDS Scopebox Manual 4, 6; and cylinder numbers on the left side, from the front to the back are as follows:1, 3, 5; then the ignition sequence is: 1-6-5-4- 3-2. The Figure 4-6 below shows the normal ignition waveform of distributor ignition system, the upper one is the secondary waveform, and the lower one is the primary waveform.
- Page 99 LAUNCH X431 GDS Scopebox Manual 1) Contact break point: the primary circuit of ignition coil cut off, the secondary voltage was sensed and increased sharply 2) Ignition voltage: secondary coil voltage overcome the damper of high voltage line, the contact breaker gap and the spark plug gap...
- Page 100 LAUNCH X431 GDS Scopebox Manual the breakdown voltage is over 15kv; the spark voltage is about 9kV, the spark period is greater than 0.8ms. If these values or waveform are abnormal, it means there is fault or the system needs to be adjusted.
- Page 101 LAUNCH X431 GDS Scopebox Manual secondary-simultaneous ignition will be shown as Figure 4-8. Fig.4-8 Fig. 4-9 below shows the valid and invalid ignition waveforms. Under the working status of valid ignition, the breakdown voltage and spark voltage are higher because the cylinder is filled with fresh combustible mixture gas, which has a lower ionization level and vice versa.
- Page 102 LAUNCH X431 GDS Scopebox Manual Fig.4-9 4.6 Secondary-direct ignition analysis Connection: 1) When the high-voltage wire is exposed, plug the BNC end of secondary ignition pickup into CH1/CH2/CH3/CH4 channel of Scopebox, then connect the high-voltage clip to high-voltage line, and crocodile clips to ground.
- Page 103 LAUNCH X431 GDS Scopebox Manual ground. Connections are shown in Fig. 4-10: Fig.4-10 The secondary direct ignition interface is shown as the following Fig. 4-11.
- Page 104 LAUNCH X431 GDS Scopebox Manual Fig.4-11 Fig. 4-12 shows the normal secondary (the upper one) and (the lower one) primary ignition waveform of direct ignition system. Beause the on/off of primary circuit is not opening/closing of mechanical contact, but the conduction of transistor. The primary...
- Page 105 LAUNCH X431 GDS Scopebox Manual Fig.4-12 4.7 Waveform analysis mode The ignition secondary single-cylinder waveform test is mainly used a. Analyze the ignition dwell angle of single cylinder.(ignition coil charging time) b. Analyze the capability of ignition coil and secondary high tension circuit (from ignition line to ignition voltage line).
- Page 106 LAUNCH X431 GDS Scopebox Manual system). e. Find the spark plug that causes misfire of the cylinder (from combustion line). This test can provide very meaningful information about the combustion quality for each cylinder. If necessary, this test can also be performed during driving.
- Page 107 LAUNCH X431 GDS Scopebox Manual Ignition line: Observe the height consistence of flashover voltage. Too high flashover voltage (even out of the oscilloscope screen) represents a high resistance existed in the ignition secondary circuit (for example, open circuit, or damaged spark plug or high voltage line, or too large...
- Page 108 LAUNCH X431 GDS Scopebox Manual Ignition coil oscillation: Observe at least two oscillation waveforms after the combustion line, which will be better if more than three oscillation waveforms, as it represents the ignition coil and capacitor (on Platinum or ignition system) are normal.
- Page 109 LAUNCH X431 GDS Scopebox Manual amplitude became lower, which is evidently caused by capacitor leakage. Fig 4-14 The waveform on Fig. 4-15, shows the accidental pumping during contact closing period. The irregular beating is caused by insufficient spring force. Fig.4-15 The curve on Fig.
- Page 110 LAUNCH X431 GDS Scopebox Manual Fig.4-16 A lot of clutter will be displayed on the horizontal section of primary waveform if contact has poor grounding, as shown below figure 4-17. Fig.4-17 Fig. 4-18 shows the fault of low-voltage waveform in electronic ignition system.
- Page 111 LAUNCH X431 GDS Scopebox Manual Fig.4-18 The secondary waveform is also affected by the spark plug, the combustion process, mixture gas composition, the engine thermal state of the ignition coil, etc., which is more complicated. The following lists a large number of measured secondary faulty waveform for reference.
- Page 112 LAUNCH X431 GDS Scopebox Manual...
- Page 113 LAUNCH X431 GDS Scopebox Manual Fig.4-19...
Need help?
Do you have a question about the X431 Scopebox and is the answer not in the manual?
Questions and answers