Table of Contents
Advertisement
Quick Links
Important Safety Precautions
Important: To avoid personal injury, property damage, or accidental damage to
the product, read all of the information in this section before using the product.
Never collide, throw, or puncture the tool, and avoid falling, extruding and
bending it.
Do not insert foreign objects into or place heavy objects on your device.
Sensitive components inside might cause damage.
Do not use the tool in exceptionally cold or hot, dusty, damp or dry
environments.
In places using the tool may cause interference or generate a potential risk,
please turn it off.
This tool is a sealed unit. There are no end-user serviceable parts inside. All
internal repairs must be done by an authorized repair facility or qualified
technician. If there is any inquiry, please contact the dealer.
Never place the tool into apparatus with strong electromagnetic field.
Keep the tool far away from magnetic devices because its radiations can
damage the screen and erase the data stored on the tool.
DANGER: Do not attempt to replace the internal rechargeable lithium battery.
Contact the dealer for factory replacement.
CAUTION: Please use the included battery and charger. Risk of explosion if
the battery is replaced with an incorrect type.
Precautions on Using This Tool
Before using this tool, please read the following safety information carefully.
Always perform automotive testing in a safe environment.
If the VCI (Vehicle Communication Interface) device is not in use for a long
period of time, it is suggested to unplug the connector from vehicle's DLC to
conserve battery power.
Wear an ANSI-approved eye shield when testing or repairing vehicles.
The vehicle shall be tested in a well-ventilated work area, as engines produce
various poisonous compounds (hydrocarbon, carbon monoxide, nitrogen
oxides, etc.)
Do not connect or disconnect any test equipment while the ignition is on or
the engine is running.
Put blocks in front of the drive wheels and never leave the vehicle unattended
(c) Launch & Diagtools. Tel. +37167704152, +37129416069. www.diagtools.lv
X-431 EURO TAB II User Manual
i
Advertisement
Table of Contents

Related Manuals for Launch X-431 EURO TAB II


Summary of Contents for Launch X-431 EURO TAB II
- Page 1 Do not connect or disconnect any test equipment while the ignition is on or the engine is running. Put blocks in front of the drive wheels and never leave the vehicle unattended (c) Launch & Diagtools. Tel. +37167704152, +37129416069. www.diagtools.lv...
- Page 2 When reconnecting the ECU harness connector, be sure it is attached firmly, otherwise electronic elements, such as ICs inside the ECU, can be damaged. (c) Launch & Diagtools. Tel. +37167704152, +37129416069. www.diagtools.lv...
-
Page 3: Table Of Contents
....................1 EATURES 1.3 T ............... 2 ECHNICAL PECIFICATIONS 1.3.1 Display tablet ..................2 1.3.2 VCI device ..................3 ............4 2 KNOWLEDGE OF X-431 EURO TAB II 2.1 D ..................5 ISPLAY ABLET 2.2 D ) ..............7 OCKING TATION PTIONAL 2.3 VCI D... - Page 4 6.15 S ..............63 USPENSION ALIBRATION ................64 7 SOFTWARE UPDATE 7.1 U & APP ........... 64 PDATE IAGNOSTIC OFTWARE 7.2 S ............64 REQUENTLY SED SOFTWARE 7.3 R ................65 ENEW UBSCRIPTION (c) Launch & Diagtools. Tel. +37167704152, +37129416069. www.diagtools.lv...
- Page 5 & A ..............92 TRUCTURE CCESSORIES 12.2.1 Scopebox structure ............... 92 12.2.2 Scopebox accessories ..............93 12.3 C & I ..............96 ONNECTION NITIAL 12.3.1 Probe Compensation..............96 12.3.2 Connection ..................97 (c) Launch & Diagtools. Tel. +37167704152, +37129416069. www.diagtools.lv...
- Page 6 14.12.4 Clear Cache ................132 14.12.5 About ..................132 14.12.6 Diagnostic Software Auto Update ..........132 14.12.7 Login/Exit from current account ..........133 ................134 15 OTHER MODULES 15.1 E ....................134 MAIL (c) Launch & Diagtools. Tel. +37167704152, +37129416069. www.diagtools.lv...
- Page 7 IEWER 15.3.1 TeamViewer QuickSupport ............135 15.3.2 TeamViewer ................136 15.4 S OTA U ............... 137 YSTEM PGRADE 15.5 F ..................138 XPLORER 15.6 S ................138 YNCHRONIZATION ..................... 139 16 FAQ (c) Launch & Diagtools. Tel. +37167704152, +37129416069. www.diagtools.lv...
-
Page 8: Introduction
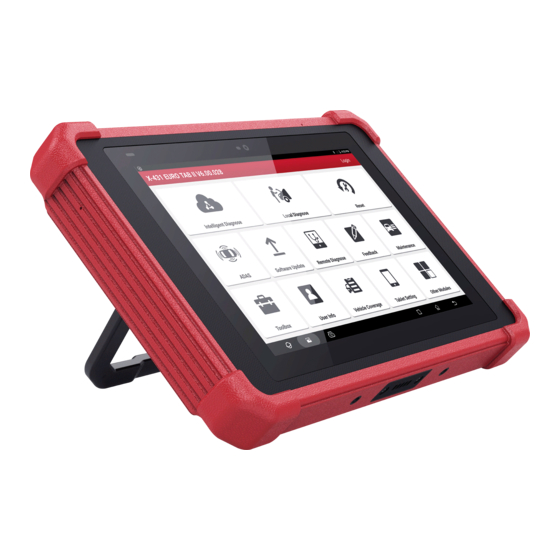
Featuring customized Android operating system, 2.0GHz 8-core CPU and 10.1” sunlight readable capacitive display screen with a resolution of 1920 x 1200 pixels, X-431 EURO TAB II has functions of vehicle diagnosis, oscilloscope, ignition, sensor, multimeter, browser and battery test etc. -
Page 9: Technical Specifications
2. ADAS calibration: Optional. This function needs to be activated before normal use and only works with the LAUNCH-specific ADAS calibration tool. 3. Web browser: Users can make online search and visit any website. 4. File Manager: Lets you manage files or downloaded files stored in memory card efficiently. -
Page 10: Vci Device
DC 9V ~ 36V 256MB Type B x 1 Bluetooth BLE 4.0 + EDR Wi-Fi 2.4G/5GHz Dual Frequency ≤ 6.6W Power -10 ℃ ~ 50 ℃ Working Temp. Dimension 200mm x 75mm x 40mm (c) Launch & Diagtools. Tel. +37167704152, +37129416069. www.diagtools.lv... -
Page 11: Knowledge Of X-431 Euro Tab
X-431 EURO TAB II User Manual 2 Knowledge of X-431 EURO TAB II There are two main components to the X-431 EURO TAB II system: Display Tablet – the central processor and monitor for the system (See Chapter “2.1”). -
Page 12: Display Tablet
Power/Screen Lock To turn the tablet on/off with long press, or Button lock the screen with short press. To adjust the volume. Volume Buttons *Note: Press and hold [POWER] and [VOL -] (c) Launch & Diagtools. Tel. +37167704152, +37129416069. www.diagtools.lv... - Page 13 It illuminates red while the tablet is charging. Charging LED Once charging is finished, it will illuminate solid green. 10.1" Capacitive Touch Screen Ambient Light Sensor Front View Fig. 2-5 Rear View (c) Launch & Diagtools. Tel. +37167704152, +37129416069. www.diagtools.lv...
-
Page 14: Docking Station (Optional)
Type C Charging Port -- Use the power adaptor to supply power to the docking station through connection to AC outlet. Power LED -- Illuminates solid green when it is powered up. (c) Launch & Diagtools. Tel. +37167704152, +37129416069. www.diagtools.lv... -
Page 15: Vci Device
BT: Blue indicates the device is working in Bluetooth mode. I/O: It lights up when the device is connected to the diagnostic tool via data cable. Wireless: It lights up when the device works in wireless communication mode. (c) Launch & Diagtools. Tel. +37167704152, +37129416069. www.diagtools.lv... -
Page 16: Package List
Power adaptor For charging the tablet. A piece of paper bearing Product S/N and Activation Code, which is needed for Password envelope product registration. (c) Launch & Diagtools. Tel. +37167704152, +37129416069. www.diagtools.lv... - Page 17 X-431 EURO TAB II User Manual Optional. For connecting to Non-OBD II Non-16pin adaptor vehicle DLC. cable kit (c) Launch & Diagtools. Tel. +37167704152, +37129416069. www.diagtools.lv...
-
Page 18: Initial Setup
2. To turn the tablet off, press and hold the POWER button until an option menu appears. Tap “Power Off”. 3.3 Screen Layout On-screen keys and status bar are as follows: Fig. 3-1 (c) Launch & Diagtools. Tel. +37167704152, +37129416069. www.diagtools.lv... -
Page 19: Adjusting Screen Brightness
The handset supports multiple languages. To change the language of the tablet, please do the following: 1. On the Home screen, tap Tablet Settings -> Language. 2. Tap the desired language from the list and the system will change to the chosen language. (c) Launch & Diagtools. Tel. +37167704152, +37129416069. www.diagtools.lv... -
Page 20: Network Setup
If the selected network is encrypted, you have to enter the right security key (network password). When this tool is in range, it will connect to the previously linked network automatically. (c) Launch & Diagtools. Tel. +37167704152, +37129416069. www.diagtools.lv... -
Page 21: Getting Started
*Note: If “VIN Scan” or “Intelligent Diagnosis” is selected to diagnose a vehicle, this step shall not apply. 4.2 Register & Download Diagnostic Software 4.2.1 User registration After the tablet is initialized, a screen similar to the following appears. (c) Launch & Diagtools. Tel. +37167704152, +37129416069. www.diagtools.lv... - Page 22 A. If you are a new user, tap “New Registration” to enter sign-up page. See Fig. 4-3. Fig. 4-3 In Fig. 4-3, fill in the information in each field (Items with * must be filled). After inputting, tap “Register”, a screen similar to the following will appear: (c) Launch & Diagtools. Tel. +37167704152, +37129416069. www.diagtools.lv...
- Page 23 “Activate VCI” in “User Info”. For details, please refer to Chapter 14.3. Tap “Activate” to finish your registration. A popup displays to ask you to update the diagnostic software. Fig. 4-6 (c) Launch & Diagtools. Tel. +37167704152, +37129416069. www.diagtools.lv...
-
Page 24: Home Screen
C. If you forgot the password, tap “Retrieve password” and then follow on-screen instructions to set a new password. 4.2.2 Home screen It mainly includes the following items: Fig. 4-7 (c) Launch & Diagtools. Tel. +37167704152, +37129416069. www.diagtools.lv... - Page 25 Includes Camera, Browser, Oscilloscope, Ignition, Toolbox Sensor, Multimeter, Battery etc. To manage VCI, diagnostic reports & records, change User Info password, configure printer, sample data and logout / (c) Launch & Diagtools. Tel. +37167704152, +37129416069. www.diagtools.lv...
-
Page 26: Vehicle Menu Layout
*Note: Before using this function, the corresponding diagnostic software and Auto search file need to be downloaded on your tool first while downloading the diagnostic software. All Tab: Displays all the vehicle makes in the vehicle menu. (c) Launch & Diagtools. Tel. +37167704152, +37129416069. www.diagtools.lv... -
Page 27: Diagnostics Toolbar
To obtain stable communication, you are strongly recommended to perform the vehicle diagnosis via data cable. In this case, the data cable is required to connect the VCI device and the tablet. (c) Launch & Diagtools. Tel. +37167704152, +37129416069. www.diagtools.lv... -
Page 28: Connections
A vehicle not equipped with an OBD II management system supplies communication through a DLC connection, and in some cases supplies 12V power through the cigarette lighter receptacle or a connection to the vehicle battery. (c) Launch & Diagtools. Tel. +37167704152, +37129416069. www.diagtools.lv... - Page 29 DC-IN jack of the VCI device. Fig. 4-11 B. Battery Clamps Cable: Connect one end of the battery clamps cable to vehicle’s battery, and the other end to the power jack of OBD I adaptor. (c) Launch & Diagtools. Tel. +37167704152, +37129416069. www.diagtools.lv...
-
Page 30: Vehicle Connection (For Commercial Vehicle/ Gasoline & Diesel Version)
A. For OBD II vehicle, directly plug the VCI device into the vehicle’s DLC (OBD II extension cable is recommended). B. For non-OBD II vehicle, follow either of the ways to proceed: Fig. 4-11 (c) Launch & Diagtools. Tel. +37167704152, +37129416069. www.diagtools.lv... -
Page 31: Diagnosis
• A stable network connection is required for this function. Follow the steps below to proceed. 1. Tap “Intelligent Diagnose” on the home screen. Fig. 5-1 2. The system starts connecting the VCI and decoding the VIN. (c) Launch & Diagtools. Tel. +37167704152, +37129416069. www.diagtools.lv... - Page 32 • Tap “View record” to view the details of the current diagnostic report. • To perform other functions, tap “Quick access” to directly go to the function selection screen. Choose the desired one to start a new diagnostic session. (c) Launch & Diagtools. Tel. +37167704152, +37129416069. www.diagtools.lv...
- Page 33 Place the VIN inside the viewfinder rectangle to scan it. The most recognizable location for this number is in the top left corner on the vehicle’s dashboard. Other locations include the driver’s door or post, and the firewall under the hood. (c) Launch & Diagtools. Tel. +37167704152, +37129416069. www.diagtools.lv...
-
Page 34: Local Diagnosis
No signs or spaces are allowed in the VIN. Tap “SKIP” to go to Diagnostics main menu screen. 5.2 Local Diagnosis Tap “Local Diagnose” to enter the vehicle selection page. (c) Launch & Diagtools. Tel. +37167704152, +37129416069. www.diagtools.lv... - Page 35 (Camera Scan) and manual input (INPUT VIN) are available. In Fig. 5-7, tap “VIN Scan”, the screen displays as follows: Fig. 5-8 Camera Scan: In this mode, you need to place the VIN inside the viewfinder rectangle to scan it. (c) Launch & Diagtools. Tel. +37167704152, +37129416069. www.diagtools.lv...
- Page 36 • In case the handset failed to identify it, tap to enter it manually. • Tap to toggle between the different display mode. After scanning, the screen automatically displays the result. (c) Launch & Diagtools. Tel. +37167704152, +37129416069. www.diagtools.lv...
- Page 37 Tap “INPUT VIN”, input the VIN and tap “Confirm”. The system will automatically identify the vehicle model and directly navigate to the function selection page. Fig. 5-11 B) Manual Selection Tap a corresponding diagnostic software logo, and then follow the on-screen (c) Launch & Diagtools. Tel. +37167704152, +37129416069. www.diagtools.lv...
- Page 38 Introduction: Tap to check the software function list. Note: Tap to read some precautions on using the current diagnostic software. Confirm: Tap it to go to next step. 2). Select test item: Select the desired test item to proceed. (c) Launch & Diagtools. Tel. +37167704152, +37129416069. www.diagtools.lv...
-
Page 39: Health Report (Quick Test)
Tap “Health Report”, the system starts scanning the ECUs. Once the scanning is complete, a screen similar to the following appears: Fig. 5-14 In the above figure, the tested system with fault code appears in red and the (c) Launch & Diagtools. Tel. +37167704152, +37129416069. www.diagtools.lv... - Page 40 Post-Repair report and Diagnostic Scan. No matter which type you saved the report as, the report type will be appended as a tag on the upper right corner of the diagnostic report for easier identification. (c) Launch & Diagtools. Tel. +37167704152, +37129416069. www.diagtools.lv...
- Page 41 *Note: To facilitate the comparison of the pre-repair and post-repair reports and get accurate test result, please make sure you saved the right type of the diagnostic report. To save the report as a common diagnostic report, select “Diagnostic Scan”. (c) Launch & Diagtools. Tel. +37167704152, +37129416069. www.diagtools.lv...
- Page 42 • You have saved a pre-repair report of the currently tested vehicle, and • You have already made some repairs and service and cleared the DTCs after the pre-repair reported is generated. Otherwise, no differences exist between the pre- and post- repair reports. (c) Launch & Diagtools. Tel. +37167704152, +37129416069. www.diagtools.lv...
-
Page 43: System Scan
This option allows you to quickly scan which systems are installed on the vehicle. In Fig. 5-13, tap “System Scan”, the system start scanning the systems. Once the scanning is complete, the screen will display the result. (c) Launch & Diagtools. Tel. +37167704152, +37129416069. www.diagtools.lv... -
Page 44: System Selection
In Fig. 5-13, tap “System Selection”, the screen displays as follows: Fig. 5-20 Swipe the screen from the bottom to view the vehicle system on the next page. Tap the desired system (take “ECM” for example) to jump to the test function (c) Launch & Diagtools. Tel. +37167704152, +37129416069. www.diagtools.lv... - Page 45 This information can be found in the vehicle’s service manual. In Fig. 5-21, tap “Read Fault Code”, the screen will display the diagnostic result. (c) Launch & Diagtools. Tel. +37167704152, +37129416069. www.diagtools.lv...
- Page 46 DTC to set manifests itself. In Fig. 5-21, tap “Clear Fault Code”, a confirmation dialog box pops up on the (c) Launch & Diagtools. Tel. +37167704152, +37129416069. www.diagtools.lv...
- Page 47 Select All: Tap it to select all items of the current page. To select certain data stream item, just check the box before the item name. (c) Launch & Diagtools. Tel. +37167704152, +37129416069. www.diagtools.lv...
- Page 48 Combine – this option is mostly used in graph merge status for data comparison. In this case, different items are marked in different colors. On-screen Buttons: : Tap it to view the waveform graph of the current data stream item. (c) Launch & Diagtools. Tel. +37167704152, +37129416069. www.diagtools.lv...
- Page 49 Parameter Identification Data (PID). Graph: Tap it to view the waveform. Fig. 5-26 • Combine: This option is mostly used in graph merge status for data (c) Launch & Diagtools. Tel. +37167704152, +37129416069. www.diagtools.lv...
- Page 50 DS sampling will be imported into the “Standard Range”(See below) column for your comparison. *Note: Before executing this function, you have to sample the values of data stream items and save it as a sample DS file. (c) Launch & Diagtools. Tel. +37167704152, +37129416069. www.diagtools.lv...
- Page 51 Tap it to start recording the sample data (*Only data stream items with measurement units will be recorded), and the screen displays as below: (c) Launch & Diagtools. Tel. +37167704152, +37129416069. www.diagtools.lv...
- Page 52 “Save” to save it as a sample DS file. All DS files are stored under the “Data Stream Sample” file in “User Info.” E. Actuation Test This option is used to access vehicle-specific subsystem and component tests. (c) Launch & Diagtools. Tel. +37167704152, +37129416069. www.diagtools.lv...
-
Page 53: Remote Diagnosis
Each time when an operation is successfully executed, “Completed” displays. 5.3 Remote Diagnosis This option aims to help repair shops or technicians launch instant messaging and remote diagnosis, making the repair job getting fixed faster. Tap “Remote Diagnosis” on the Home screen, the screen appears blank by default. -
Page 54: Add Friends
In the search bar, input the partner’s username and tap “Search” button next to the search bar to starts searching from Launch’s golo business database. The partner must be the users who have registered their Launch’s diagnostic tools. They may be the following: ... - Page 55 Contact tab. • If a technician sent you a friend request, you can tap “Agree” to confirm and his/her name will appear in the friend list (Contact). Or tap “Ignore” to ignore (c) Launch & Diagtools. Tel. +37167704152, +37129416069. www.diagtools.lv...
-
Page 56: Start Instant Messaging
5.3.3 Start instant messaging *Note: The I/M (Instant Messaging) function is open to all users who had Launch’s diagnostic tool equipped with this module. After adding your friends, tap the desired one’s photo to enter a screen similar to the following: Fig. -
Page 57: Launch Remote Diagnosis (Device-To-Device)
5.3.4 Launch remote diagnosis (Device-To-Device) The tablet is allowed to launch remote diagnosis with other diagnostic tools (including but not limited to the X-431 EURO TAB II) of Launch family, which are equipped with this module. * Note: Before performing this operation, please make sure the following no matter which side sends the remote request: ... - Page 58 Once you received the report from the partner, tap “View Report” to view details. All diagnostic reports are saved under the “Remote Diagnostic Reports” tab of “My Reports” in “User Info”. (c) Launch & Diagtools. Tel. +37167704152, +37129416069. www.diagtools.lv...
- Page 59 X-431 EURO TAB II User Manual Cancel To cancel this operation. (c) Launch & Diagtools. Tel. +37167704152, +37129416069. www.diagtools.lv...
-
Page 60: Launch Remote Diagnosis (Device-To-Pc)
X-431 EURO TAB II User Manual 5.3.5 Launch remote diagnosis (Device-To-PC) Except that the remote diagnosis can be done between different Launch’s diagnostic tools that come loaded with the module, user also can ask for remote control from PC client technician. - Page 61 2. Notify the partner of the PC client website http://remote.x431.com/cn/. When the partner opens the link, the PC displays as below: *Note: Before processing remote diagnosis, please make sure the tablet is properly connected to the vehicle. Fig. 5-39 (c) Launch & Diagtools. Tel. +37167704152, +37129416069. www.diagtools.lv...
-
Page 62: How To View Diagnostic History
The operations in remote diagnosis are same as those in local diagnosis. Once the session is complete, a remote diagnostic report will be automatically generated. 5.4 How to View Diagnostic History? Generally once a vehicle diagnosis is performed, the tablet will record the every (c) Launch & Diagtools. Tel. +37167704152, +37129416069. www.diagtools.lv... -
Page 63: How To Feedback Diagnostic Logs
Tap “Feedback”, the following 3 options will be displayed on the left column of the screen. A. Feedback Tap a tested vehicle model to enter the feedback screen. 1) Tap “Choose File” to open the target folder and choose the desired diagnostic logs. (c) Launch & Diagtools. Tel. +37167704152, +37129416069. www.diagtools.lv... - Page 64 Tap it to display all diagnostic feedback logs which have not been submitted successfully due to network failure. Once the handset gets a stable network signal, it will be uploaded to the remote server automatically. (c) Launch & Diagtools. Tel. +37167704152, +37129416069. www.diagtools.lv...
-
Page 65: Special (Reset) Function (Only For Passenger Vehicle/Gasoline & Diesel Version)
While using manual reset, users just follow the on-screen instructions to select appropriate execution options, enter correct data or values, and perform necessary actions, the system will guide you through the complete performance for various service operations. (c) Launch & Diagtools. Tel. +37167704152, +37129416069. www.diagtools.lv... -
Page 66: Oil Reset Service
The brake pad and brake pad wear sensor are replaced. b) The brake pad indicator lamp is on. c) The brake pad sensor circuit is short, which is recovered. d) The servo motor is replaced. (c) Launch & Diagtools. Tel. +37167704152, +37129416069. www.diagtools.lv... -
Page 67: Steering Angle Calibration
Delphi engine, the MIL turns on after the engine is started. The diagnostic device detects the DTC P1336 'tooth not learned'. In this case, you must use the diagnostic device to perform tooth (c) Launch & Diagtools. Tel. +37167704152, +37129416069. www.diagtools.lv... -
Page 68: Immo Service
After the ECU or injector is replaced, injector code of each cylinder must be confirmed or re-coded so that the cylinder can better identify injectors to accurately control fuel injection. (c) Launch & Diagtools. Tel. +37167704152, +37129416069. www.diagtools.lv... -
Page 69: Battery Maintenance System Reset
This function enables you to make initial settings to throttle actuators and returns the “learned” values stored on ECU to the default state. Doing so can accurately control the actions of regulating throttle (or idle engine) to adjust the amount of air intake. (c) Launch & Diagtools. Tel. +37167704152, +37129416069. www.diagtools.lv... -
Page 70: Gearbox Matching
2. When replacing the body height sensor in the air suspension system, or control module or when the vehicle level is incorrect, you need to perform this function to adjust the body height sensor for level calibration. (c) Launch & Diagtools. Tel. +37167704152, +37129416069. www.diagtools.lv... -
Page 71: Software Update
“Retry” to try again. Once download is finished, the software packages will be installed automatically. 7.2 Set Frequently Used software To easily locate and quickly update some frequently used software, you can use (c) Launch & Diagtools. Tel. +37167704152, +37129416069. www.diagtools.lv... -
Page 72: Renew Subscription
1. Tap “Renewal” on the update page to navigate to the renewal type selection screen. 2. Select “PayPal”, and then follow the on-screen instructions to finish the transaction. 3. After payment, go to update center to update the diagnostic software. B. Using Subscription Renewal Card (c) Launch & Diagtools. Tel. +37167704152, +37129416069. www.diagtools.lv... - Page 73 2. Select “Subscription Renewal Card”. 3. Input the 24-digit password of Subscription Renewal Card and then “Submit” to finish the renewal. 4. Go to the update center to update the diagnostic software. (c) Launch & Diagtools. Tel. +37167704152, +37129416069. www.diagtools.lv...
-
Page 74: Adas
To ensure normal use of the calibration function of the diagnostic software, you need to activate the pin card to unlock the calibration function on the X-431 EURO TAB II tablet first. Follow the steps below to activate it. - Page 75 3. Scratch or scrap the designated area on the included Activation Card to reveal the password, and input the 24-digit password to activate it. 4. Now the ADAS function becomes accessible and is ready for use. (c) Launch & Diagtools. Tel. +37167704152, +37129416069. www.diagtools.lv...
-
Page 76: Sensorbox (Toolbox)
It features automotive sensor simulation test and multimeter test function. Sensorbox Parameters Scope Precision ±5% Voltage range -5V~+5V Max output current 70mA Predefined frequency range 0~150Hz Square-wave signal pulse frequency 0~15KHz Square-wave signal duty ratio 10%~90% Multimeter Parameters Scope (c) Launch & Diagtools. Tel. +37167704152, +37129416069. www.diagtools.lv... -
Page 77: Structure & Accessories
Table 9-1 shows the ports and indicators for the sensorbox Name Description Indicator (green) for receiving data from the Data receiving LED diagnostic tool. Data sending LED Indicator (green) for sending data to the (c) Launch & Diagtools. Tel. +37167704152, +37129416069. www.diagtools.lv... -
Page 78: Sensorbox Accessories
Below formulates the Sensorbox accessories: Picture Name Sensor test cable Sensor probes Data cable Connects the Sensorbox and diagnostic tool so that the sampled signal can be displayed on the diagnostic tool. Power adaptor (c) Launch & Diagtools. Tel. +37167704152, +37129416069. www.diagtools.lv... -
Page 79: Sensor Simulation
3. Plug one end of the sensor test cable (black) into the “COM” interface of the sensorbox, and then the other end to the test probe or electronic control converting cable. 4. Connect one end of the sensor test cable (red) into the “VΩHz” interface of (c) Launch & Diagtools. Tel. +37167704152, +37129416069. www.diagtools.lv... -
Page 80: Simulation Test
After selecting or inputting the desired voltage based on the working characteristics of sensor, tap the button, then the tablet will begin to output the simulation voltages. Please note the red probe is (c) Launch & Diagtools. Tel. +37167704152, +37129416069. www.diagtools.lv... - Page 81 In Fig. 9-3, tap “Predefined waveform simulation” to enter the screen shown as Fig. 9-4. (c) Launch & Diagtools. Tel. +37167704152, +37129416069. www.diagtools.lv...
- Page 82 HO2S: Heated Oxygen Sensor IAT: Intake Air Temperature Sensor MAF: Mass Air Flow Sensor MAP: Manifold Absolute Pressure Sensor TP: Throttle Position Sensor VAF: Volume Air Flow Sensor VSS: Vehicle Speed Sensor (c) Launch & Diagtools. Tel. +37167704152, +37129416069. www.diagtools.lv...
- Page 83 , the tablet will output a waveform as desired. Warning: Just draw a complete periodic waveform (when it is output, the system (c) Launch & Diagtools. Tel. +37167704152, +37129416069. www.diagtools.lv...
-
Page 84: Precautions On Checking Vehicle Sensor
When checking whether there is open in the line, disconnect the CEU and the relevant sensor at first, then measure the resistance among the ports of sensor in order to determine whether open-circuit / contact fault exists or not. (c) Launch & Diagtools. Tel. +37167704152, +37129416069. www.diagtools.lv... - Page 85 (signal GND); the red one is the input terminal for voltage, resistance, and frequency test and output terminal for simulation voltage, simulation frequency and oxygen sensor. Please choose the correct probes to match the different terminals. (c) Launch & Diagtools. Tel. +37167704152, +37129416069. www.diagtools.lv...
-
Page 86: Multimeter (Toolbox)
The operation method on Resistance Test and Frequency Test is identical to that of Voltage Test. Here take Voltage test as an example for demonstration. Tap “Voltage Test”, a screen similar to Fig. 10-2 appears: Fig. 10-2 (c) Launch & Diagtools. Tel. +37167704152, +37129416069. www.diagtools.lv... -
Page 87: Test Sample
“Resistance measurement” to test the Resistance between two terminals of coolant temperature sensor at different water temperature. Compared the measured value with the standard value, if the Resistance is not (c) Launch & Diagtools. Tel. +37167704152, +37129416069. www.diagtools.lv... - Page 88 The tested voltage shall be in inverse proportional with the coolant temperature. When the harness of coolant temperature sensor is disconnected, the voltage shall be about 5V if the ignition switch is ON. (c) Launch & Diagtools. Tel. +37167704152, +37129416069. www.diagtools.lv...
-
Page 89: Batterybox (Toolbox)
Deutsche Industry Normen 26A17 ~ 245H52 Japanese Industry Standard 100 ~ 1700 Europe Norm 100 ~ 1200 National Electrical Commission 100 ~ 1200 Chinese National Standard 100 ~ 1700 Society of Automotive Engineers (c) Launch & Diagtools. Tel. +37167704152, +37129416069. www.diagtools.lv... -
Page 90: Test Environment
In this case, battery voltage is generally lower Bad cell than 11V, mainly resulting from internal circuitry damage, such as short circuit, open circuit, dummy weld etc. (c) Launch & Diagtools. Tel. +37167704152, +37129416069. www.diagtools.lv... -
Page 91: Batterybox Structure & Accessories
B-shaped data that the signal can be displayed on the tool. I/O port Connect the Kelvin clip to battery for battery Battery connector test. Status LED 11.3.2 Test accessories Fig. 11-2 Kelvin clip (c) Launch & Diagtools. Tel. +37167704152, +37129416069. www.diagtools.lv... -
Page 92: Connections & Operations
Battery test and charging system & actuation system test can be done in this mode. 1. Battery test Enter battery test main menu, and select a desired test environment as shown in Fig. 11-4. Fig. 11-4 (c) Launch & Diagtools. Tel. +37167704152, +37129416069. www.diagtools.lv... - Page 93 6. Select a testing standard except for JIS and tap , a screen similar to Fig. 11-6 will appear. Users can adjust capacity size by tapping on < or > or by dragging the slider on the bar. (c) Launch & Diagtools. Tel. +37167704152, +37129416069. www.diagtools.lv...
- Page 94 While performing this test, the battery’s charging voltage value and starting voltage can be obtained in case of engine starting and accelerating. Based on the data, the system will judge whether battery’s charging and actuation status is (c) Launch & Diagtools. Tel. +37167704152, +37129416069. www.diagtools.lv...
-
Page 95: Outside The Vehicle Test
For the purpose of getting accurate test results, unless otherwise special required, all loads need to be power off such as headlamp, engine etc. before testing battery. The operating time required for charging system and actuation system test (c) Launch & Diagtools. Tel. +37167704152, +37129416069. www.diagtools.lv... - Page 96 CCA occurs if the clip is out of position, or oil, dust attaches on the pole. The gear and main body of clip should be fully matched with battery poles. (c) Launch & Diagtools. Tel. +37167704152, +37129416069. www.diagtools.lv...
- Page 97 2. Testing the battery separately generates an exact test result. The battery box is a very useful auxiliary tool for quick test. If any problems were found, test it separately for getting an exact test result. (c) Launch & Diagtools. Tel. +37167704152, +37129416069. www.diagtools.lv...
-
Page 98: Oscilloscope (Toolbox)
(the repetition characteristic of signal), which can be tested, displayed, saved by the automotive oscilloscope. Via the waveform analysis can further detect the circuit fault on sensors, actuators, circuits, and electronic control units, etc. (c) Launch & Diagtools. Tel. +37167704152, +37129416069. www.diagtools.lv... -
Page 99: Structure & Accessories
Connect to the diagnostic tool via data B-shaped data I/O cable so that the signal can be displayed Port on the tool. To provide power to it via the power Power interface adaptor or battery clamps cable. (c) Launch & Diagtools. Tel. +37167704152, +37129416069. www.diagtools.lv... -
Page 100: Scopebox Accessories
Each lead has 6 blades wired to 6 sockets, allowing Leads you to insert it between a plug and socket pair, other ends are 6 (4 mm) sockets which can be connected to the BNC to 4mm Test Lead. (c) Launch & Diagtools. Tel. +37167704152, +37129416069. www.diagtools.lv... - Page 101 It allows the Scopebox to measure fuel injector and 20:1 Attenuator primary ignition waveforms. *Note: Please note this attenuator should be not used for any high voltage measurements other than fuel injectors and primary ignition. (c) Launch & Diagtools. Tel. +37167704152, +37129416069. www.diagtools.lv...
- Page 102 2). Please try to keep an instance of 2 inch from other high-voltage line to avoid the interference. (Coil-on-Plug) Extension Cord Coil-on-Plug extension cord (including earth cord) allows you to take accurate secondary ignition measurements on secondary-direct (Coil-on-Plug) (c) Launch & Diagtools. Tel. +37167704152, +37129416069. www.diagtools.lv...
-
Page 103: Connection & Initial Use
Channel of the Scopebox. 2. Follow Steps 1-2 in Item 2 "Connection" mentioned below to connect the Scopebox and diagnostic tool. Launch the App and open "Scope" to run it. 3. From the "Vertical Setting" menu, select the corresponding channel and set the Probe attenuation to 1:10. -
Page 104: Connection
*Warning: To avoid electric shock while using the probe, make sure the insulated cable is perfect, and do not touch the metallic portions of the probe head while it is connected with a high-voltage source. 12.3.2 Connection For different applications, the connection methods may vary. (c) Launch & Diagtools. Tel. +37167704152, +37129416069. www.diagtools.lv... - Page 105 4. Connect the black terminal and signal wire (its other end connected to the red 4mm connector) of the 6-way breakout lead to the GND and signal terminal of the vehicle sensor. B. While testing Secondary-distributor ignition analysis/Secondary-simultaneous (c) Launch & Diagtools. Tel. +37167704152, +37129416069. www.diagtools.lv...
- Page 106 Then plug the BNC end of secondary ignition pickup into CH1/CH2/CH3/CH4 channel of Scopebox, and then connect the high-voltage clip to high-voltage line, and crocodile clips to ground. The connection is as follows: (c) Launch & Diagtools. Tel. +37167704152, +37129416069. www.diagtools.lv...
-
Page 107: Initial Interface Introduction
X-431 EURO TAB II User Manual Fig. 12-5 For detailed operations, please refer to Chapter 13. 12.3.3 Initial interface introduction Fig. 12-6 displays the initial interface of the Scopebox. (c) Launch & Diagtools. Tel. +37167704152, +37129416069. www.diagtools.lv... - Page 108 A “B” icon indicates that the channel is bandwidth limited. Working mode Horizontal trigger position marker Edge trigger level marker Displays the trigger information, including the edge trigger slope, source and level. Sample rate Horizontal Settings Panel: Controls the time base. (c) Launch & Diagtools. Tel. +37167704152, +37129416069. www.diagtools.lv...
-
Page 109: Operations
A. Select from the channel tab shown at the bottom of the waveform display area B. Select from Vertical settings *Note: For better comparison and identification, each channel and waveform are marked in different colors. (c) Launch & Diagtools. Tel. +37167704152, +37129416069. www.diagtools.lv... - Page 110 (on the vertical axis) as it varies over time (on the horizontal axis). Vertical Settings The trigger determines when the Scopebox starts to acquire data and display a (c) Launch & Diagtools. Tel. +37167704152, +37129416069. www.diagtools.lv...
- Page 111 When using a probe, the Scopebox allows you to select the attenuation factor for the probe. The attenuation Probe factor changes the vertical scaling of the Scopebox so that the measurement results reflect the actual voltage levels at the probe tip. (c) Launch & Diagtools. Tel. +37167704152, +37129416069. www.diagtools.lv...
- Page 112 When forcing invalid triggers, the Scopebox can not synchronize the waveform, and then waveform seems to roll across the display. If valid triggers occur, the display becomes stable on the screen. (c) Launch & Diagtools. Tel. +37167704152, +37129416069. www.diagtools.lv...
- Page 113 Single: In this mode, it only acquires the waveform that generates for the first time the trigger conditions are met, and then stops after finishing capture. (c) Launch & Diagtools. Tel. +37167704152, +37129416069. www.diagtools.lv...
-
Page 114: Auto
[Calibration], a dialog box similar to Fig. 12-11 will appear. Fig. 12-11 Check the box before the channel to select it. To deselect it, just uncheck it. After choosing the desired channel(s), tap [Start] to start calibration and [Start] button (c) Launch & Diagtools. Tel. +37167704152, +37129416069. www.diagtools.lv... -
Page 115: Measure
Select “Vectors” or “Dots” to display waveforms as vectors or dots. Check / uncheck the box before Grid to turn on/off grid display. 12.4.4 Measure <1> Channel source and then [Source], a screen similar to Fig. 12-14 will appear. (c) Launch & Diagtools. Tel. +37167704152, +37129416069. www.diagtools.lv... - Page 116 *Note: If no desired channel is selected, the system will take the current source as the default channel. <3> Clear measure and then [Clear Measure], the system will clear the measurement result on screen. (c) Launch & Diagtools. Tel. +37167704152, +37129416069. www.diagtools.lv...
-
Page 117: File Management
The Import function enables you to import the stored waveform file for playback and review. During replaying, the Scopebox stops collecting data automatically. , then select [Waveform replay] from the pop-up menu to enter: (c) Launch & Diagtools. Tel. +37167704152, +37129416069. www.diagtools.lv... -
Page 118: Expert Reference
1. Open and edit a snapshot; 2. Select “Joint the expert database” (refer to the following illustration), and then to save the waveform being displayed on the screen as REF. (c) Launch & Diagtools. Tel. +37167704152, +37129416069. www.diagtools.lv... - Page 119 : To load and recall the selected file. : To delete the selected file. : To edit the selected file. <2> Base Reference Preset waveforms of some sensors are available for your reference. Fig. 12-20 (c) Launch & Diagtools. Tel. +37167704152, +37129416069. www.diagtools.lv...
-
Page 120: Automotive Ignition Waveform (Toolbox)
• Battery clamps cable: Plug one end of the power adaptor into the Power interface of the Scopebox, and then clamp the other two terminals to the vehicle's battery (Red to +, and Black to -) respectively. (c) Launch & Diagtools. Tel. +37167704152, +37129416069. www.diagtools.lv... - Page 121 The secondary waveform A section is contact open period; B section is make contact period, which is the magnetizing field of ignition coil. (c) Launch & Diagtools. Tel. +37167704152, +37129416069. www.diagtools.lv...
- Page 122 Section b shows the damped oscillation generated by remaining magnetic field energy after the spark; Section c shows the make contact magneting period of primary coil. (c) Launch & Diagtools. Tel. +37167704152, +37129416069. www.diagtools.lv...
-
Page 123: Secondary-Simultaneous Ignition Analysis
3. Connect the BNC connector of the secondary ignition pick-up to any channel of the Scopebox, and clamp the crocodile clips and high-voltage clips onto the vehicle ground and high-voltage line respectively. The connection is as follows: (c) Launch & Diagtools. Tel. +37167704152, +37129416069. www.diagtools.lv... - Page 124 Fig. 13-3 (c) Launch & Diagtools. Tel. +37167704152, +37129416069. www.diagtools.lv...
-
Page 125: Secondary-Direct Ignition Analysis
Then plug the BNC end of secondary ignition pickup into CH1/CH2/CH3/CH4 channel of Scopebox, and then connect the high-voltage clip to high-voltage line, and crocodile clips to ground. The connection is as follows: (c) Launch & Diagtools. Tel. +37167704152, +37129416069. www.diagtools.lv... - Page 126 The primary voltage has no obvious oscillations within the duration, but the voltage increases during the magnetization process due to current limiting, and this change can cause corresponding fluctuations of secondary voltage line as a result of induction of ignition coil. (c) Launch & Diagtools. Tel. +37167704152, +37129416069. www.diagtools.lv...
-
Page 127: Waveform Analysis Mode
Test methods and conditions: Start the engine or drive the vehicle according to the driving performance fault or (c) Launch & Diagtools. Tel. +37167704152, +37129416069. www.diagtools.lv... - Page 128 The waveform shown on Fig. 13-6, appears a lot of clutter on the contact break (c) Launch & Diagtools. Tel. +37167704152, +37129416069. www.diagtools.lv...
- Page 129 The irregular beating is caused by insufficient spring force. Fig. 13-8 The curve on Fig. 13-9 shows the contact angle is too small during the magnetizing period, which is caused by too large contact gap. (c) Launch & Diagtools. Tel. +37167704152, +37129416069. www.diagtools.lv...
- Page 130 The following lists a large number of measured secondary faulty waveform for reference. Since various factors lead to the failures, Fig. 13-12 just shows the major possible factors for the failures. (c) Launch & Diagtools. Tel. +37167704152, +37129416069. www.diagtools.lv...
- Page 131 X-431 EURO TAB II User Manual (c) Launch & Diagtools. Tel. +37167704152, +37129416069. www.diagtools.lv...
- Page 132 X-431 EURO TAB II User Manual Fig 13-12 (c) Launch & Diagtools. Tel. +37167704152, +37129416069. www.diagtools.lv...
-
Page 133: User Info
• To change the filename of report, tap “Rename”. If user records the running parameters while reading data stream, it will be saved as .x431 file and appear under Diagnostic Record tab. (c) Launch & Diagtools. Tel. +37167704152, +37129416069. www.diagtools.lv... - Page 134 X-431 EURO TAB II User Manual Fig. 14-2 Tap the desired one to enter: Fig. 14-3 Select the desired data stream items and tap “Confirm” to jump to the playback page: (c) Launch & Diagtools. Tel. +37167704152, +37129416069. www.diagtools.lv...
-
Page 135: Vci
Once you choose the VCI device that belongs to other account, you have to log out, and then input the right account to continue. 14.3 Activate VCI This item lets you activate a new VCI device. (c) Launch & Diagtools. Tel. +37167704152, +37129416069. www.diagtools.lv... -
Page 136: Fix Connector Firmware/System
This item is used to detect the voltage of the currently tested vehicle when the VCI is plugged into the vehicle’s DLC. 14.8 My Order This item allows you to check the status of all your orders. (c) Launch & Diagtools. Tel. +37167704152, +37129416069. www.diagtools.lv... -
Page 137: Subscription Renewal Card
• Tap > next to “Free Upgrade Period” to check the due date of all diagnostic software. 14.11 Change Password This item allows you to modify your login password. 14.12 Settings It enables you to make some application settings and view software version information etc. (c) Launch & Diagtools. Tel. +37167704152, +37129416069. www.diagtools.lv... -
Page 138: Units
2. For initial use, you are suggested to reset the printer: Press and hold [MODE] & [FEED] for 8 seconds, the following resetting command will be printed out: at + default = 1 (c) Launch & Diagtools. Tel. +37167704152, +37129416069. www.diagtools.lv... -
Page 139: Clear Cache
App. 14.12.5 About The software version information and disclaimer are included. 14.12.6 Diagnostic Software Auto Update This option is used to set to turn the automatic diagnostic software update function ON/OFF. (c) Launch & Diagtools. Tel. +37167704152, +37129416069. www.diagtools.lv... -
Page 140: Login/Exit From Current Account
*Note: Removing software may completely delete the software from the tablet. If some software is not used and the tablet runs out of space, you can use this feature to remove it. To re-download it, go to “Update” -> “All Software”. (c) Launch & Diagtools. Tel. +37167704152, +37129416069. www.diagtools.lv... -
Page 141: Other Modules
15.2 Browser 15.2.1 Open browser On the Home screen, tap Browser to launch the browser. You can choose the desired homepage or input the website address to browse. Fig. 15-1 Return to the previous page. -
Page 142: Download Files
This app allows you to request a remote support from a partner. Follow the steps below to proceed: 1. On the Home screen, tap Other modules -> TeamViewer QuickSupport. The TeamViewer interface displays and the device ID is generated and shown. (c) Launch & Diagtools. Tel. +37167704152, +37129416069. www.diagtools.lv... -
Page 143: Teamviewer
For more information, please refer to the associated TeamViewer documents. 15.3.2 TeamViewer This app enables you to remotely control a partner's device. 1. On the Home screen, tap Other modules -> TeamViewer. The TeamViewer interface displays. (c) Launch & Diagtools. Tel. +37167704152, +37129416069. www.diagtools.lv... -
Page 144: System Ota Upgrade
2. Tap “Check the Latest Version”. Once a newer version is found, follow the on-screen instructions to download and install the update file. 3. Be patient to wait until the update is done. (c) Launch & Diagtools. Tel. +37167704152, +37129416069. www.diagtools.lv... -
Page 145: File Explorer
1. Use the data cable to connect the tablet and a computer. 2. Swipe the screen from the top, tap “USB connected”. 3. Tap “TURN ON USB STORAGE”. Now you can copy files between the tablet and the computer. (c) Launch & Diagtools. Tel. +37167704152, +37129416069. www.diagtools.lv... -
Page 146: Faq
Disable GPS function if GPS service is not in use. 5. How to reset the tablet? *Warning: Resetting may cause data loss. Before doing so, please make sure important data and information has been backed up. (c) Launch & Diagtools. Tel. +37167704152, +37129416069. www.diagtools.lv... - Page 147 Each tablet is allowed to bind multiple VCI devices. If you intend to use one of the VCI devices to diagnose / test a (c) Launch & Diagtools. Tel. +37167704152, +37129416069. www.diagtools.lv...
- Page 148 Please follow below steps to proceed in case you forgot the login password: 1. Tap [Login] button on the upper right corner of the screen. 2. Tap “Retrieve password”. 3. Input product S/N and follow the on-screen prompts to set a new password. (c) Launch & Diagtools. Tel. +37167704152, +37129416069. www.diagtools.lv...
- Page 149 The exclusive remedy for any automotive meter found to be defective is repair or replacement, and LAUNCH shall not be liable for any consequential or incidental damages.
- Page 150 (c) Launch & Diagtools. Tel. +37167704152, +37129416069. www.diagtools.lv...
Need help?
Do you have a question about the X-431 EURO TAB II and is the answer not in the manual?
Questions and answers