Table of Contents
Advertisement
Quick Links
Advertisement
Table of Contents

Subscribe to Our Youtube Channel
Related Manuals for Smappee Smappee Plus

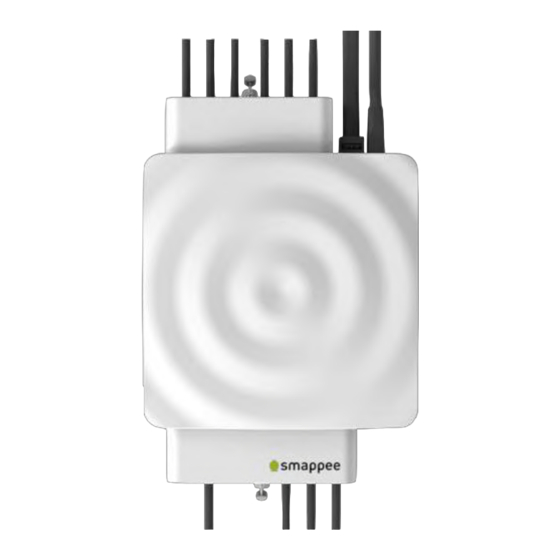
Summary of Contents for Smappee Smappee Plus
- Page 1 English Version 1.6.2 B Date: 20-Jun-2017 © 2013-2017 Smappee NV. All rights reserved. Specifications are subject to change without notice. All product names are trademarks of their respective companies. Smappee Plus Installation Manual Page 1 of 32 Version 1.6.2 B, 20-06-2017, rev 4...
- Page 2 Welcome to Smappee Smappee Plus Installation Manual Page 2 of 32 Version 1.6.2 B, 20-06-2017, rev 4...
-
Page 3: Table Of Contents
Overview over the Installation Steps Step-by-Step The table below provides a global overview over all steps for installing the Smappee. Please follow these steps carefully and in the provided sequence. Step Title Page Hardware and Physical Installation Error! Not a valid bookmark self-reference. - Page 4 Do not open the equipment or touch any of its electronic circuitry. Do not attempt to repair or service any part of the Smappee Plus. Only use the cables which were delivered with the Product. Do not use the Product if damaged.
-
Page 5: The Connectors And Inputs Of The Smappee
The connectors and Inputs of the Smappee Overview This section explains the connectors of the Smappee Plus. Accessing the Connectors To get full access to all connectors, you should remove the two covers. For removing the covers, insert a screwdriver at the sides of the covers and carefully pull up the cover. - Page 6 The Green 8-Pin Connector Block The Smappee is delivered with a green 8-Pin connector block. It is used to: connect the Smappee power supply measure the voltage of the power phases You can find more details in the following sections.
-
Page 7: Connecting The Power Supply
The Smappee is powered by the green 8-pin connector block. Important: Always turn the main power off before performing the next steps! Do NOT power-on the Smappee unless this manual specifically asks you to do so. Connecting the wires Instructions: 1. -
Page 8: Connecting The Voltage Measurement Wires
Connecting the Voltage Measurement Wires Overview! Smappee measures the various voltages and phases of the individual Phase wires and the Neutral wire of the electrical installation. These wires need to be connected to the inputs of the green 8-pin connector block. - Page 9 Phase cable L1 to the input L1 Phase cable L2 to the input L2 Phase cable L3 to the input L3 Smappee Plus Installation Manual Page 9 of 32 Version 1.6.2 B, 20-06-2017, rev 4...
- Page 10 Verify the Correctness of Installation After finalizing the full Smappee installation, and while testing the Smappee measurements, you should specifically verify the correct wiring of the 8-pin connector block. These checks will be explained at a later step during the installation, at section "Checklist for Correct Configuration", on page 29.
-
Page 11: Connecting The Current Transformers (Cts)
We strongly recommend monitor afterwards (for example oven phase 1). Once the current transformers have been installed around the cables, now route them back to the Smappee Plus. Smappee Plus Installation Manual Page 11 of 32... -
Page 12: Current Transformer Variants
Current Transformer Variants The table shows the current transformers that can be used with the Smappee Plus. Smappee supports only the CTs listed below. No other CTs should be used! Name/type Picture Specs Current Transformer MC: 50A SCT01-T10/50A MAX OV : 333 mV MAX cable Ø: 10 mm... -
Page 13: Preparing The Internet Connection
Preparing the Internet Connection Overview Now you should choose the method to connect the Smappee to the internet. There are three alternative connection methods available: Ethernet cable (recommended) external Wi-Fi USB module external 3G/4G internet USB dongle This section will prepare the Smappee for connecting to the Internet at a later point during the installation steps. -
Page 14: Initial Power-On Of The Smappee Monitor
Initial Power-On of the Smappee Monitor Introduction Your Smappee Plus monitor is now nearly ready for the first power-on. Please complete a number of checks, before you power-on the Smappee. Important: The Smappee Plus is not yet completely installed and insulated. -
Page 15: Login To The Smappee App
Login to the Smappee App Overview The Smappee App is required to activate your monitor and link it to your user account in the Smappee cloud. Before you continue the installation, make sure you are logged in correctly: with a correct user name ... -
Page 16: Connect To Internet And Cloud
Connect to Internet and Cloud Overview Now, you connect your Smappee Plus to your account on the App/Smappee cloud. If you use Wi-Fi as the network connection method, you also provide the Wi-Fi network name (SSID) and Wi-Fi password. The installation process is largely guided by the Smappee App. You should follow the instructions on the screen. - Page 17 After starting the installation (see previous paragraph), continue with these steps: 1. Follow the instructions, until you reach the screen "We will now configure your Smappee by asking you a few questions about your installation". 2. Once you reach this step, please hold for a moment and perform a check.
-
Page 18: Troubleshooting Internet And Cloud Access
"1 W" Issues with Local Network (Ethernet or Wi-Fi) If your Smappee Plus is connected by Ethernet or Wi-Fi make sure that the site system administrator is aware of the installation. They may need to change settings in the network and firewalls. - Page 19 Smappee is trying to open an Wi-Fi hotspot access point. Please wait a few seconds. The light will turn Orange Steady in a few moments. Colors of 4G dongle If your Smappee Plus is connected by 4G dongle, please check the colors of the dongle. Color Description Any steady Successfully connected.
-
Page 20: Configure The Current Transformers
Configure the Current Transformers Overview The current transformers of your Smappee need to be carefully configured in order to get correct measurements. The following sections explain: where you can modify the configuration what configuration settings you should use. ... -
Page 21: Where To Modify The Ct Configuration
App, during installation This method will be automatically started as part of each installation in the App. Once you have successfully connected Smappee to your account, the App will automatically start the configuration steps. Smappee Plus Installation Manual Page 21 of 32... - Page 22 The app allows you to change the configuration. Expert Portal The Expert Portal is a website on the Smappee device that is intended for advanced installers. Within the expert portal, you find a menu item "Channel Configuration", where you can configure the current transformers.
-
Page 23: Configuration Settings For
The table shows the settings for the configuration of each CT. Setting Description Input Number of the Input connector on the Smappee. Name Provide a name for this specific input. Note: You should carefully select an unmistakable name, since it is used in many user-facing locations on the websites and the App. - Page 24 During the configuration it is helpful to view the real-time values of the active and reactive power. The app displays these values the configuration settings screen. Smappee Plus Installation Manual Page 24 of 32 Version 1.6.2 B, 20-06-2017, rev 4...
-
Page 25: Configure The Smappee In The Expert Portal
Configure the Smappee in the Expert Portal Overview In the Expert Portal, you can diagnose and configure the electrical parameters of the individual Current Transformers. Expert Portal for Advanced Users The expert portal is intended to be used by advanced users. We recommend not to change any setting in the expert mode unless you know what you are doing. - Page 26 Network connection settings. Data Log Log of instantaneous values. Home Control Not used in the Smappee Plus. Configuration menu In the Configuration menu, select the type of electrical network. In most cases, "Star" is the correct selection: three phase networks with neutral ("Star") ...
-
Page 27: Diagnose The Smappee In The Expert Portal
The following table explains the parameters of the Real-Time Data. Parameter Explanation Info Input on the Smappee. Channel Measured channel. In Smappee Plus, this is identical to the Info column. Current Current measured on that CT (Ampere). Active power Active Power (Watt). - Page 28 Connected Current Transformers This block shows on which inputs there is a Current Transformers connected. It helps to detect bad connections. Smappee Plus Installation Manual Page 28 of 32 Version 1.6.2 B, 20-06-2017, rev 4...
-
Page 29: Checklist For Correct Configuration
At this moment, the installation should meet the following criteria: Check Description Details on The Smappee has been correctly powered on, according to the page 14 instructions and checks. The Smappee is connected to the Internet and the Smappee page 16 cloud. - Page 30 The correct configuration in the "Channel Configuration" page 23 menu. Once all checks are successfully completed, you may finish up the installation work. Please see the next page for the final steps. Smappee Plus Installation Manual Page 30 of 32 Version 1.6.2 B, 20-06-2017, rev 4...
-
Page 31: Mounting And Enclosing
Cover Mount the cover cap on the Smappee Plus to cover all electrical connections. If you used a voltage-rated multicore cable, you can also you an internal wire strap to fixate the cable under the covering cap. -
Page 32: Final Remarks
Support During Installation In case of problems during performing an installation, please carefully read this user manual. If this does not resolve the problem, you should contact Smappee Support. Non-Urgent support Please send an email to support@smappee.com.
Need help?
Do you have a question about the Smappee Plus and is the answer not in the manual?
Questions and answers