Table of Contents
Advertisement
Advertisement
Table of Contents

Subscribe to Our Youtube Channel
Related Manuals for Borri B8031


Summary of Contents for Borri B8031
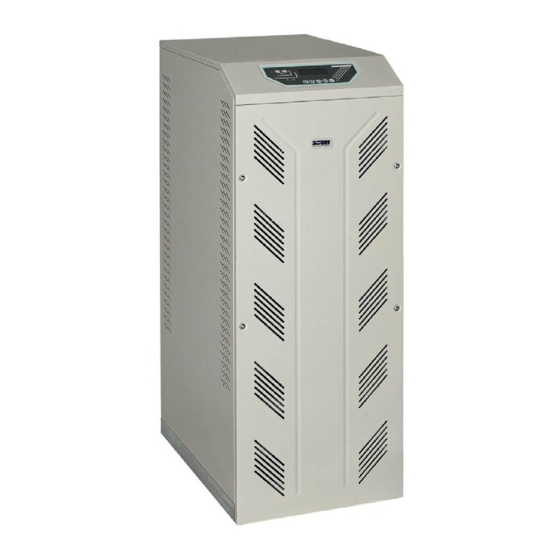
- Page 1 UPS OPERATING MANUAL B8031 10 ÷ 20kVA B8033 10 ÷ 40kVA...
- Page 5 UPS OPERATING MANUAL Index of sections Code 1 – UPS GENERAL DESCRIPTION AND INSTALLATION JUD408311 2 – FRONT PANEL JUD408312 3 – START-UP, SHUT-DOWN AND MANUAL BYPASS JUD408313 4 – REMOTE CONNECTION OF THE UPS JUD408314 JUD408310 Rev. C JSE410399 28/03/2008...
-
Page 7: Table Of Contents
Ups general description & installation UPS GENERAL DESCRIPTION AND INSTALLATION Index INTRODUCTION................. 4 ENVIRONMENT....................4 1.1.1 Packing .....................4 1.1.2 Lead battery....................4 1.1.3 Treatment of UPS at the end of life cycle..........4 SAFETY RULES ....................4 1.2.1 Safety of persons ..................4 1.2.2 Product safety ..................5 1.2.3 Special precautions .................5 UPS GENERAL DESCRIPTION............ - Page 8 Picture 7 – Base plan..........................13 Picture 8 – Dimensions and distances from the walls ................14 Picture 9 – Terminal board B8031 10-15-20kVA..................16 Picture 10 – Terminal board B8033 10-15-20kVA..................17 Picture 11 – Terminal board B8033 30-40kVA................... 17 Picture 12 –...
- Page 9 Ups general description & installation Picture 18 – Cabling of BCB fuse holder....................25 Picture 19 – Fuses positioning on the fuseholder BCB................26 Picture 20 – Base plan of the external battery cabinet................28 Picture 21 – Dimensions of the external battery cabinet................28 Picture 22 –...
-
Page 10: Introduction
Ups general description & installation INTRODUCTION Congratulation for the choice of an BORRI Industrial Power Solutions product for the safety of your devices. To use at the best the performances of your B8000 UPS we suggest you to read with attention the present manual. -
Page 11: Product Safety
Ups general description & installation CAUTION If primary powers isolators are installed in other area from UPS area. You must stick the following warning label on them. “ISOLATE UNINTERRUPTIBLE POWER SUPPLY (UPS) BEFORE WORKING ON THIS CIRCUIT” Dangerous voltage levels are present within the UPS. It should be opened exclusively by qualified service personnel. - Page 12 Ups general description & installation Unusual operating conditions may justify special design or protection measures: harmful smoke, dust, abrasive dust, humidity, vapor, salt air, bad weather or dripping, explosive dust and gas mixture, extreme temperature variations, bad ventilation, conductive or radiant heat from other sources, strong electromagnetic fields, radioactive levels higher than those of the natural environment, fungus, insects, vermin, etc.,...
-
Page 13: Ups General Description
Ups general description & installation UPS GENERAL DESCRIPTION 2.1 TYPOLOGY All UPS covered by this manual are on-line, double conversion; the inverter supplies always energy to the load, whether mains is available or not (according to the battery autonomy time). WARNING The UPS output is energized even during mains failure, therefore in compliance with the prescriptions of EN 62040-1, the installer will have to identify the line or the plugs... -
Page 14: System Description
Ups general description & installation 2.2 SYSTEM DESCRIPTION 2.2.1 Rectifier It converts the three phase voltage of the mains into continuous DC voltage. It uses a three phase - low harmonics - fully-controlled IGBT’s bridge. It’s designed to supply the inverter at full load and the battery at the maximum recharging current. -
Page 15: Front Panel
Ups general description & installation 2.2.6 Front panel The front panel of the UPS, consisting of a four row alphanumeric displays plus 5 function keys, allows the complete monitoring of the UPS status. The mimic diagram helps to understand the operating status of the UPS. For more information see the chapter “FRONT PANEL”. -
Page 16: Operating Status
Ups general description & installation 2.3 OPERATING STATUS The following paragraphs show all the possible operating status of the UPS. 2.3.1 Normal operation The inverter is supplied by the rectifier; the load, through the static switch, is supplied directly by the inverter output. Picture 2 –... -
Page 17: Rectifier Failure Or Mains Failure
Ups general description & installation 2.3.3 Rectifier failure or mains failure The inverter is supplied by the battery for the required autonomy time; the load, through the static switch, is supplied directly by the inverter output. Picture 4 – Rectifier failure or mains failure 2.3.4 Manual bypass The load is supplied by the mains through the manual bypass;... -
Page 18: Installation
The UPS can be lifted and handled using a pallet truck or a forklift. - UPS up to 40 kVA The UPS’s up to 40 kVA (B8031 series 10-20kVA and B8033 series 10-40kVA) can be handled by means of the four wheels fixed on the bottom. The UPS technical data are shown on a label fixed on the rear. -
Page 19: Positioning And Installation
UPS (kVA) B8000 B8031/B8033 L1 – mm P1 – mm L2 – mm B8031 ( kVA) Weight w/o battery – kg Weight with battery – kg Static load – kg/m B8033 ( kVA) Weight w/o battery – kg Weight with battery – kg Static load –... -
Page 20: Dimensions And Distances
Ups general description & installation 3.3.2 Dimensions and distances Picture 8 – Dimensions and distances from the walls UPS (kVA) B8031/B8033 B8033 L – mm P – mm H – mm 1200 X (min.) – mm Y (min.) – mm ADD. -
Page 21: Electrical Connection
To protect the output against electrical shock, use the following residual current devices: B8033: DEVICE AS TYPE B (IEC/TR 60755/A2) B8031: DEVICE AS TYPE A (IEC 61081-1 or IEC 61091-1) The connection cables section is shown in the following tables. B8031 UPS (kVA) -
Page 22: Terminal Board
Input fuses (A) Bypass Rectifier 4x10 4x25 4x25 Input cables (mm Bypass 4x10 4x25 4x25 Output cables (mm Battery cables (mm 3x16 3x16 3.4.1 Terminal board Picture 9 – Terminal board B8031 10-15-20kVA 16 of 31 JUD408311 Rev.D JSE410920 22/07/08... -
Page 23: Picture 10 – Terminal Board B8033 10-15-20Kva
Ups general description & installation Picture 10 – Terminal board B8033 10-15-20kVA Picture 11 – Terminal board B8033 30-40kVA 17 of 31 JUD408311 Rev.D JSE410920 22/07/08... -
Page 24: Battery
2-3 months they can be subject to irreparable damage. IMPORTANT The B8031 and B8033 from 10 kVA to 20 kVA, have internal batteries. Servicing of batteries should performed by qualified personnel only. Replace the batteries with the same number of block and capacity. -
Page 25: Battery Connection And Positioning
Ups general description & installation 3.5.1 Battery connection and positioning 3.5.1.1 3,3Ah 12V battery connection and positioning – B8000 10kVA Remove the four screws to open the front cover and access the battery trays. Remove the cardboard cover protection from the batteries, see picture 12. Picture 12 –... -
Page 26: Picture 13 – 3,3Ah Battery Connection
Ups general description & installation Connect the wires as shown on the picture 13. Picture 13 – 3,3Ah battery connection WARNING The cable terminations, for the connection to the battery trays, are marked with BLACK PVC-sleeve for the connection to the negative pole and with RED PVC-sleeve for the connection to the positive pole. -
Page 27: Picture 14 – 3,3Ah Battery Connected
Ups general description & installation After the connection re-insert the battery trays as shown in pictures 14. Picture 14 – 3,3Ah battery connected Put back and fix the front cover with the four screws. WARNING After the battery installation, before closing BCB, check the voltage polarity in the top and bottom of the BCB circuit breaker. -
Page 28: 7Ah / 9Ah 12V Battery Connection And Positioning-B8000 10-15-20Kva
Ups general description & installation 3.5.1.2 7Ah / 9Ah 12V battery connection and positioning–B8000 10-15-20kVA Remove the four screws to open the front cover and access the battery trays. Remove the cardboard cover protection from the batteries, see picture 15. Picture 15 –... -
Page 29: Picture 16 – 7Ah/9Ah Battery Connection
Ups general description & installation Connect the wires as shown on the picture 16. Picture 16 – 7Ah/9Ah battery connection WARNING The cable terminations, for the connection to the battery trays, are marked with BLACK PVC-sleeve for the connection to the negative pole and with RED PVC-sleeve for the connection to the positive pole. -
Page 30: Picture 17 – 7Ah/9Ah Battery Connected
Ups general description & installation After the connection re-insert the battery trays as shown in picture 17. Picture 17 – 7Ah/9Ah battery connected Put back and fix the front cover with the four screws. 24 of 31 JUD408311 Rev.D JSE410920 22/07/08... -
Page 31: Picture 18 - Cabling Of Bcb Fuse Holder
Ups general description & installation WARNING After the battery installation, before closing BCB, check the voltage polarity in the top and bottom of the BCB circuit breaker. In case of not directly supplied cabling, please connect the cables to the battery breaker as shown in the below picture. -
Page 32: Fuses Positioning Bcb - B8000 10-15-20Kva
Ups general description & installation 3.6 FUSES POSITIONING BCB – B8000 10-15-20KVA After that the battery is correctly connected, insert the fuses and the neutral tube on the fuseholder (BCB), as shown in the picture 19. Picture 19 – Fuses positioning on the fuseholder BCB 26 of 31 JUD408311 Rev.D JSE410920 22/07/08... -
Page 33: As553 External Battery
Ups general description & installation 3.7 AS553 EXTERNAL BATTERY The battery cabinet can be used to increase the autonomy of the UPS “B8000 10-15- 20kVA” line for which the battery can be installed internally. IMPORTANT With the external battery the internal battery is never present. The battery cabinet is necessary for the UPS 30-40kVA. -
Page 34: Dimensions And Weights
Ups general description & installation 3.7.1 Dimensions and weights The dimensions and weights of the external battery cabinet are indicates here under. Picture 20 – Base plan of the external battery cabinet Picture 21 – Dimensions of the external battery cabinet CABINET AS553 L –... -
Page 35: 7Ah/9Ah/12Ah 12V Battery Connection And Positioning
Ups general description & installation 3.7.2 7Ah/9Ah/12Ah 12V battery connection and positioning Remove the six screws to open the front cover and access the battery trays. Remove the cardboard cover protection from the batteries, see picture 22. Picture 22 – Cardboard 7Ah/9Ah/12Ah battery protection Connect the wires as shown on the picture 23. -
Page 36: Picture 24 - 7Ah/9Ah/12Ah Battery Connected
Ups general description & installation After the connection re-insert the battery trays as shown in picture 24. Picture 24 – 7Ah/9Ah/12Ah battery connected Put back and fix the front cover with the six screws. WARNING After the connection of the batteries, connect battery cabinet to the UPS as indicated on 3.7.3 paragraph before to close BCB. -
Page 37: Connections
Ups general description & installation 3.7.3 Connections The following picture shows the electrical connection between the UPS and the external battery cabinet. Picture 26 – Battery cabinet and UPS connections For the connection above mentioned you can use the cables supplied in the battery cabinet. - Page 39 Front panel FRONT PANEL Index INTRODUCTION................. 3 DESCRIPTION..................3 MIMIC DESCRIPTION ..................3 ALARMS AND OPERATING STATUS.............5 LCD DISPLAY MANAGEMENT ............8 DEFAULT ......................8 MAIN MENU .....................8 MEASURES ......................9 3.3.1 Input ......................11 3.3.2 Output .....................12 3.3.3 Bypass ....................13 3.3.4 Inverter ....................14 3.3.5 AC/DC......................14 3.3.6...
- Page 40 Parallel (Option)..................26 3.6.4 Mod-Bus (Option) .................. 28 3.6.5 Firmware ....................28 MENU STRUCTURE..................29 Index of pictures Picture 1 - Front panel B8031 and B8033 ....................3 Picture 2 - Structure Menu.......................... 29 2 of 29 JUD408312 Rev.B JSE410920 22/07/08...
- Page 41 The front panel of the UPS, consisting of a four-row alphanumeric display plus 5 function keys, allows the complete monitoring of the UPS status. The mimic flow helps to understand the operating status of the UPS. Picture 1 - Front panel B8031 and B8033 DESCRIPTION 2.1 MIMIC DESCRIPTION Picture1 shows the mimic present on the display, with the names of the circuit breakers/isolator switches of the UPS.
- Page 42 Front panel ⇒ LED 6 Lit-up orange = Emergency line static switch closed. Load retransfer blocked. Otherwise Off ⇒ LED 7 Lit-up green = OCB circuit breaker close. Otherwise Off ⇒ LED 8 Lit-up orange = Manual By-pass Circuit breaker closed. Otherwise Off.
- Page 43 Front panel 2.2 ALARMS AND OPERATING STATUS The alphanumeric display offers a complete diagnostic of the system by showing 28 alarms and 6 operating status descriptions. Each alarm is associated to a code that allows it to be stored in the events history. Rectifier input mains failure A1 MAINS FAULT Possible causes: 1) Central system black-out (mains failure)
- Page 44 Front panel exceeding 200%) Possible causes: 1) Problems on the load 2) Distribution problems downstream of the UPS A12 STOP MAX CURRENT Inverter bridge stopped for max current Possible causes: 1) Short circuits for more than 5 sec. at the UPS output 2) Distribution problems downstream of the UPS It is possible, after having verified the status of the UPS, to reset this alarm by...
- Page 45 Front panel A19 OCB OPEN UPS output breaker open A20 OVERLOAD Inverter overload (load exceeding 100%). The thermal image protection is started A21 THERMAL IMAGE Intervention of the electronic protection due to excessive load A22 BYPASS SWITCH Closure of the commutation switch which forces the load to bypass (maintenance) Intervention of the emergency power off switch A23 EPO PRESSED...
- Page 46 Front panel A38 INV LOAD Active only in ECO-MODE Inverter feed load LCD DISPLAY MANAGEMENT 3.1 DEFAULT >> B8031 << >> B8033 << xxx kVA xxx kVA XXX V XXX YYY ZZZ V 1Ph UPS 3Ph UPS The default screen appears on the LCD panel when the UPS is in normal operation (with no alarm present);...
- Page 47 Front panel < NAME > SPECIAL menu. It is accessed pressing the key (see 3.5), pressing the keys SPECIAL other menu are scrolled down. < NAME > INFO menu. accessed pressing the key (see 3.6), pressing the keys INFO other menu are scrolled down. 3.3 MEASURES The following pictures shows the structure of the MEASURES menu.
- Page 48 Front panel < MEASURES > DC measures. It is accessed pressing the key (see 3.3.5), pressing the keys AC/DC other sub-menu scrolled down. < MEASURES > BATTERY measures. accessed pressing the key (see 3.3.6), pressing the keys BATTERY the other sub-menu are scrolled down.
- Page 49 Front panel 3.3.1 Input INPUT VOLT/CURR Pressing the key the following parameter is shown, while the key leads to the previous screen. XXX YYY ZZZ V xx.x yy.y zz.z A INPUT FREQUENCY Pressing the key the following parameter is shown, while the key leads to the previous screen.
- Page 50 Front panel 3.3.2 Output OUTPUT VOLT/CURR Pressing the key the following parameter is shown, while the key leads to the previous screen. XXX YYY ZZZ V xx.x yy.y zz.z A OUTPUT POWER Pressing the key the following parameter is shown, while the key leads to the previous screen.
- Page 51 Front panel 3.3.3 Bypass BYPASS VOLTAGE Pressing the key the following parameter is shown, while the key leads to the previous screen. XXX YYY ZZZ V BYPASS FREQUENCY Pressing the key the following parameter is shown, while the key leads to the previous screen. XX.X Hz <...
- Page 52 Front panel 3.3.4 Inverter INVERTER VOLT/CURR Pressing the key the following parameter is shown, while the key leads to the previous screen. XXX YYY ZZZ V xx.x yy.y zz.z A INVERTER FREQUENCY Pressing the key the following parameter is shown, while the key leads to the previous screen.
- Page 53 Front panel 3.3.6 Battery BATTERY VOLT/CURR Pressing the key the following parameter is shown, while the key leads to the previous screen. POS: XXX V xx.x A NEG: YYY V yy.y A BATTERY TYPE Pressing the key the following parameter is shown, while the key leads to the previous screen.
- Page 54 Front panel 3.4 ALARMS This menu, when selected, shows the status of the equipment and the current alarms are shown (see list below). Each time an alarm occurs, the display goes to this menu to indicate the alarms present; the audible alarm can be silenced pressing the key .
- Page 55 Front panel 3.4.2 History < HISTORY > Pressing the key the following alarm is shown; pressing the key exit the history, leading to the alarm/status ALARMS menu screen (see 3.4). Date Time < HISTORY > Pressing the key the following alarm is shown;...
- Page 56 Front panel < HISTORY > Reset alarm (MAINS FAULT) on 25/12/05 at 23:12. The position of this event in the A01* list is the third. The total events 25-12-2005 23:12 stored in the history are six. 18 of 29 JUD408312 Rev.B JSE410920 22/07/08...
- Page 57 Front panel 3.4.3 List of alarms and status List of alarms List of status MAINS FAULT BOOSTER OK INPUT WRONG SEQ BOOSTER STOPPED BOOSTER FAULT DC VOLTAGE FAULT BATTERY IN TEST BATTERY OK BCB OPEN BATTERY DISCHAR BATTERY AUT END BATTERY FAULT SHORT CIRCUIT INVERTER OK...
- Page 58 Front panel 3.5 SPECIAL IMPORTANT When entering the SPECIAL menu a password is required, as the operations which are allowed needs to be carried out by competent personnel. For each operation a confirmation is required. ENTER PASSWORD: Password entering; if wrong the main menu screen is shown again.
- Page 59 Front panel < SPECIAL > BATTERY TEST. It is accessed pressing the key (see 3.5.5), pressing the keys BATTERY TEST other sub-menu scrolled down. < SPECIAL > RESET HISTORY. It is accessed pressing the key (see 3.5.6), pressing the keys RESET HISTORY other sub-menu...
- Page 60 Front panel 3.5.3 UPS Language < SELECT LANGUAGE > The language can be modified with the key and they are confirmed pressing 2 – ENGLISH Pressing the key leads to the special menu (see 3.5). 3.5.4 UPS Test < UPS TEST > Pressing the key causes commutation...
- Page 61 Front panel 3.6 INFO < INFO > SERIAL NUMBERS. Pressing (see 3.6.1), and then can look trough the sub-menu. SERIAL NUMBERS < INFO > DEVICE TYPE. Pressing (see 3.6.2)and then can look trough the sub-menu. DEVICE TYPE < INFO > PARALLEL.
- Page 62 Front panel 3.6.1 Serial Number < UPS SERIAL NUMBER> The UPS serial number set by the Supplier. Pressing you can enter the << XXXXXXXXX >> next parameter; pressing come back to the main menu. < OEM SERIAL NUMBER > Customized Serial Number. Pressing you can enter the next parameter while pressing...
- Page 63 Front panel 3.6.2 DEVICE Type It indicates UPS’ input /output. < DEVICE Type> You can see if the l’UPS is Threephase/ Threephase 3/3 or Threephase / Singlephase 3/1. Pressing you can enter the next parameter; pressing can come back to the previous menu It indicates the UPS topology: <...
- Page 64 Front panel 3.6.3 Parallel (Option) The Parallel menu is active only of the UPS is in Parallel Configuration, otherwise you can not see it on the LCD display. < PARALLEL > It indicates the UPS n position referring to the total number N of UPS belonging to the Parallel System.
- Page 65 Front panel < PARALLEL > indicates, paralell system, the number of packets recevied through the channel B of CAN B MSG: XXXXX the CAN-BUS. Pressing the key the following parameter is shown, while the key leads to the previous screen. <...
- Page 66 Front panel 3.6.4 Mod-Bus (Option) < MODBUS > indicates RS485 port address MOD-BUS Comunication System (Option). ADDRESS 101 Please see the Option Manual for further information. Pressing you can enter the next parameter; pressing can come back to the previous menu.
- Page 67 Front panel 3.7 MENU STRUCTURE Picture 2 - Structure Menu (*)The Parallel menu is active only of the UPS is in Parallel Configuration, otherwise you can not see it on the LCD display. 29 of 29 JUD408312 Rev.B JSE410920 22/07/08...
- Page 69 Start-up, shut-down & manual bypass START-UP, SHUTDOWN & MANUAL BYPASS Index INTRODUCTION................. 2 START-UP PROCEDURE ..............2 START-UP BASIC TROUBLESHOOTING............3 SHUTDOWN PROCEDURE ............... 4 MANUAL BYPASS PROCEDURE............. 4 START-UP FROM MANUAL BY-PASS..........5 Descrizione Data Emesso Controllato Approvato Lingua Pagina di Pag.
- Page 70 Start-up, shut-down & manual bypass INTRODUCTION Before carrying out whatever procedure described in this chapter, read carefully the instructions, in order to avoid possible damages to persons or thing due to wrong manoeuvre. START-UP PROCEDURE WARNING Before switching on the UPS, make sure: 1) the emergency power off “EPO”...
- Page 71 • Check the input voltage. • Check the rectifier protection fuses F1-F2-F3; they are inside the breaker RCB on B8031 and B8033. 2) After the step #2 the unit doesn’t switch to step #3 and shows the alarm A1 –...
- Page 72 Start-up, shut-down & manual bypass • If an external battery cabinet is installed check the interconnections between the auxiliary contact of the battery breaker (in the external cabinet) and the terminals Bac1-Bac2 of the UPS. SHUTDOWN PROCEDURE Nr. ACTION LCD DISPLAYING UPS OPERATION Open OCB A30 GENERAL ALARM...
- Page 73 Start-up, shut-down & manual bypass START-UP FROM MANUAL BY-PASS Before the start-up from manual by-pass (after a maintenance or repairing) check that the “NORMAL-BYPASS” switch is in BYPASS position. LCD DISPLAYING ACTION UPS OPERATION BLANK Close RCB UPS START UP The rectifier is supplied and the DC voltage increases up to the nominal WAIT PLEASE...
- Page 75 Remote connection of the UPS REMOTE CONNECTION OF THE UPS Index REMOTE CONNECTIONS BY RS232 OR USB ......... 2 INTRODUCTION....................2 CONNECTION RS232 PORT ................2 CONNECTION BY USB PORT.................3 REMOTE CONNECTION BY RS485 (OPTIONAL)......3 DESCRIPTION....................3 REMOTE CONNECTION BY SRC (OPTIONAL) ....... 3 DESCRIPTION....................3 Index of pictures Picture 1 –...
- Page 76 Remote connection of the UPS REMOTE CONNECTIONS BY RS232 OR USB 1.1 INTRODUCTION The B8031 and B8033 UPS is provided with a RS232 port and an USB port as standard. Picture 1 – RS232-USB Ports 1.2 CONNECTION RS232 PORT The UPS can be connected to a monitoring Device/Software through a RS232 standard port with a RS232 standard cable (Male-Female DB9).
- Page 77 REMOTE CONNECTION BY RS485 (OPTIONAL) 2.1 DESCRIPTION When required it’s possible to install on the B8031 and B8033 UPS the optional card RS485 SLOT_REM. Through the RS485 interface the UPS can be remotely monitored up to 400m. The protocol implemented on the RS485 port is a MOD-BUS RTU standard protocol.
Need help?
Do you have a question about the B8031 and is the answer not in the manual?
Questions and answers