
Related Manuals for Gefen EXT-UHD600A-44


Summary of Contents for Gefen EXT-UHD600A-44
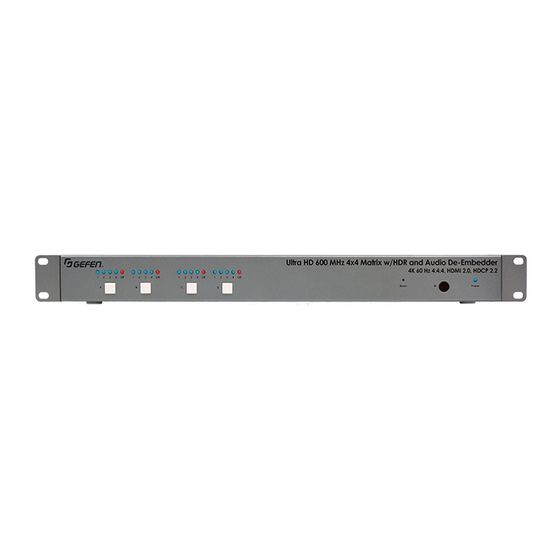
- Page 1 *Preferred 600 MHz 4K ULTRA 4x4 Matrix w/HDR and Audio De-Embedder EXT-UHD600A-44 User Manual Version A1...
- Page 2 Important Safety Instructions Read these instructions. Keep these instructions. Heed all warnings. Follow all instructions. Do not use this product near water. Clean only with a dry cloth. Do not block any ventilation openings. Install in accordance with the manufacturer’s instructions.
- Page 3 Warranty Information For the latest warranty coverage information, refer to the Warranty and Return Policy under the Connect section of the Gefen Web site at http://www.gefen.com/connect/warranty-and- return-policy...
-
Page 4: Technical Support
Contacting Gefen Technical Support Technical Support (707) 283-5900 (800) 472-5555 8:00 AM to 5:00 PM Monday - Friday, Pacific Time Email support@gefen.com http://www.gefen.com Mailing Address Gefen Core Brands, LLC c/o Customer Service 1800 S McDowell Blvd Petaluma, CA 94954 USA... - Page 5 © 2017 Core Brands, LLC. All Rights Reserved. All trademarks are the property of their respective owners. Gefen® is a registered trademark of Core Brands, LLC. Gefen and Core Brands, LLC reserve the right to make changes in the hardware, packaging, and any accompanying documentation without prior written notice.
- Page 6 Licensing This product uses software that is subject to open source licenses, including one or more of the General Public License Version 2 and Version 2.1, Lesser General Public License Version 2.1 and Version 3, BSD, and BSD-style licenses. Distribution and use of this product is subject to the license terms and limitations of liability provided in those licenses.
- Page 7 IP control via Telnet, UDP, and the built-in web server interface • IR remote control • Gefen Syner-G™ software simplifies initial IP configuration and EDID Management • Field-updatable firmware via web server interface • 1 U tall enclosure, rack ears included •...
-
Page 8: Packing List
The Ultra HD 600 MHz 4x4 Matrix w/ HDR and Audio De-Embedder ships with the items listed below. If any of these items are not present in the box when you first open it, immediately contact your reseller or Gefen. •... -
Page 9: Table Of Contents
Table of Contents Getting Started Introduction......................2 Front Panel ....................2 Rear Panel ....................3 IR Remote Control ..................4 Installing the Batteries ................... 6 Setting the IR Channel .................. 7 Installation ......................8 Connection Instructions ................. 8 Application Diagram ..................9 Network Configuration using Syner-G ............ - Page 10 Table of Contents Advanced Operation Using Telnet, UDP, and RS-232 ................68 Telnet Configuration ..................68 UDP Configuration ..................68 RS-232 Configuration .................. 69 Commands ......................70 Discovery Service ..................70 Input Status ....................70 Manage EDID ....................70 Network Settings ..................71 Output Status ....................
- Page 11 This page left intentionally blank.
- Page 12 This page left intentionally blank.
-
Page 13: Getting Started
600 MHz 4K ULTRA 4x4 Matrix w/HDR and Audio De-Embedder Getting Started... -
Page 14: Introduction
Introduction Page Title Front Panel Ultra HD 600 MHz 4x4 Matrix w/HDR and Audio De-Embedder 4K 60 Hz 4:4:4, HDMI 2.0, HDCP 2.2 Reset Power EXT-UHD600A-44 Out A Out B Out C Out D USB Power IR In/Ext In 1... -
Page 15: Rear Panel
IP Control 24V DC Name Description IR In / Ext Connect an IR extender (Gefen part no. EXT-RMT-EXTIRN) or an electrical IR cable from an automation system to this port. In (1 - 4) Connect up to four 4K Ultra HD source devices to the matrix using these HDMI ports. -
Page 16: Ir Remote Control
Introduction IR Remote Control Mute Mute Volume Volume Mask Mask Output Output Preset Preset Lock Lock Down Down Input Input RMT-44A RMT-44A Name Description Output buttons (A - D) Press these buttons to select the desired input when performing routing operations. Each button corresponds to an Out port (A - D) on the rear panel of the matrix. - Page 17 Introduction Name Description Lock Press this button to toggle between locking and unlocking the buttons on the front panel. Preset Press this button to select the desired preset. See Routing Presets (page 20) for more information. Mask Press this button to mask the desired output.
-
Page 18: Installing The Batteries
Introduction Installing the Batteries Remove the back cover the IR remote control unit. Insert two 1.5V AAA-type batteries, as shown, within the battery compartment. Mute Volume Mask Output Preset Lock Down Input RMT-44A Replace the back cover. Warning! Risk of explosion if battery is replaced by an incorrect type. Dispose of used batteries according to the instructions. -
Page 19: Setting The Ir Channel
Introduction Setting the IR Channel Use the following DIP switch settings to set the IR channel of the IR remote control. In order for the included IR remote control to communicate with the matrix, the IR remote control must be set to the same channel as the matrix. Channel 1 (default): Channel 2: DIP1 = OFF... -
Page 20: Installation
► IR Control (Optional) Connect an IR extender (Gefen part no. EXT-RMT-EXTIRN) or an electrical IR cable from an automation system to the IR In / Ext port on the rear panel of the matrix. Connecting an IR extender is useful if the IR sensor on the front panel will be hidden from view. -
Page 21: Application Diagram
IR Out De-Embeddeed Audio EXT-RMT-EXTIRN IR Extender Power Source for Streaming Sources Ultra HD 600 MHz 4x4 Matrix w/HDR and Audio De-Embedder (Web Interface, Telnet, or UDP) 4K Ultra HD Automation Displays Controller with RS-232 Interface EXT-UHD600A-44 page | 9... -
Page 22: Network Configuration Using Syner-G
Network Configuration using Syner-G Launch the Gefen Syner-G application. Download the application here: http://www.gefen.com/support/download.jsp Select the matrix (EXT-UHD600A-44) from the list of products. Under the Device Settings section, select either Static or DHCP from the IP Mode drop-down list. ►... - Page 23 Installation Click the Save button at the bottom of the screen. The matrix will automatically reboot and use the new network settings. Use the IP address of the matrix to access the built-in web interface or start a Telnet session. See the following for more information: ►...
- Page 24 This page left intentionally blank.
-
Page 25: Basic Operation
600 MHz 4K ULTRA 4x4 Matrix w/HDR and Audio De-Embedder Basic Operation... -
Page 26: Using The Ir Extender
There may be situations where the IR sensor is blocked by a cabinet or other mounting device. In this case, the included IR extender (Gefen part no. EXT-RMT-EXTIRN) can be connected to the IR In/Ext port on the rear panel of the matrix. The sensor on the IR extender behaves exactly like the sensor on the front panel of the matrix. -
Page 27: Viewing The Routing Status
LED indicators 1 through 4 represent each input on the matrix. If one of these LED indicators are illuminated, then that means that the input is active. EXT-UHD600A-44 The “Off” LED indicates that the output is turned off (masked). Refer to... -
Page 28: Routing Inputs To Outputs
For this example, we will route Input 4 to Output B. Ultra HD 6 Select output 2 by pressing button B. The LED for 2 is illuminated, indicating that Input 2 is currently routed to Output B. EXT-UHD600A-44 Ultra HD 6 Out A Out B... -
Page 29: Using The Ir Remote Control
Select the desired output. In this example, we will select Output B. The LED indicator for Input 4 is now illuminated. Input 4 is now routed to Output B. Input 4 is selected Ultra HD page | 17 EXT-UHD600A-44 Out A Out B... -
Page 30: Masking / Unmasking Outputs
Masking / Unmasking Outputs When masking outputs through the front panel, the IR remote control must be used. Outputs can also be masked by using the built-in web interface. See Routing Inputs and Masking Outputs (page 31) for more information. When an output is masked, the signal is blocked at the output. -
Page 31: Locking / Unlocking The Matrix
Locking / Unlocking the Matrix To prevent an accidental routing change, the front-panel buttons on the matrix can be locked. Locking the matrix disables the front-panel controls, IR, and the built-in web interface. Point the included IR remote control toward the IR sensor on the matrix and press the Lock button. -
Page 32: Routing Presets
Routing Presets Routing presets can be recalled using the IR remote control. For information on creating presets, see Routing Presets (page 34). Press the Preset button on the IR remote control. This will cause all the output buttons (A, B, C, D), on the front panel of the matrix, to start flashing. Mute Volume Mask... -
Page 33: Volume Control
Volume Control Increasing / Decreasing Volume Use the included IR remote to adjust the output volume. Press the Volume button on the IR remote. This will cause all the output buttons (A, B, C, D), on the front panel of the matrix, to start flashing. Output buttons Volume button Mute... - Page 34 Ultra Volume-up command received for Output B • When the Dn button is pressed, the Input 3 LED indicator, for that output, EXT-UHD600A-44 will flash to acknowledge that the matrix has received the volume-down command. Out A Ultra IR In/Ext...
-
Page 35: Muting / Unmuting Audio
Volume Control • When the Up button is pressed, all Input (1, 2, 3, 4) and Off LED indicators, for that output, will flash to acknowledge that the matrix has received the volume-up command. • When the Dn button is pressed, the Input 3 LED indicator, for that output, will flash to acknowledge that the matrix has received the volume-down command. -
Page 36: The Web Interface
The Web Interface Introduction to the Web Interface The Ultra HD 600 MHz 4x4 Matrix w/HDR and Audio De-Embedder includes a built-in web interface. We recommend that the web interface be used to control the matrix as it provides easy management of all features used by the matrix. ►... - Page 37 The Web Interface • Administrator The Administrator username provides full access to all features within the web interface. The default password for the Administrator user name is Admin. All passwords are case-sensitive. For information on changing the default password, see Configuring Network Settings (page 52).
- Page 38 The Web Interface ► Tabs and Sub-tabs The web interface is organized into tabs, in the top-portion of the screen. Clicking on a tab will display a different screen. The Setup and Manage EDID tab have their own set of tabs, which we will refer to as “sub-tabs”, as shown below.
- Page 39 The Web Interface • If a button is “grayed-out”, then this means that the setting is not available. This usually requires that another setting must be enabled before setting a “sub-set” of that feature. For example, note that both the Login Message on Connect buttons are dis- abled in the illustration, below: In order to change this setting, the TCP Access must be enabled.
- Page 40 The Web Interface Active / Good Columns or rows that are highlighted in green, indicate that an active source or sink is connected to the that input / output. Error Although a rare occurrence, this indicates an error (e.g. HDCP, etc.) with the source or sink device.
-
Page 41: Locking The Matrix
The Web Interface Locking the Matrix Locking the matrix disables the front-panel controls, IR routing, and the built-in web interface. This is useful in preventing an accidental change to matrix settings by inadvertently pressing any of the front-panel buttons. Information Locking the Matrix Controller will also disable routing and other operations within the Web Interface. -
Page 42: Viewing The Routing Status
The Web Interface Viewing the Routing Status Click the Routing tab. Locate the desired output from the rows on the left, then read across until a routing indicator (red square) is encountered. Note the column where the red square is located. Each column identifies an input and each row represents an output. -
Page 43: Routing Inputs And Masking Outputs
The Web Interface Routing Inputs and Masking Outputs ► Routing Inputs Click the Routing tab. Located the desired output, from the rows on the left side of the screen. Click the desired input. Use the column, with the input names, as a guide when selecting the input. - Page 44 The Web Interface ► Placing an input in the OFF state Click the box in the first column, next to the desired output. The box, in the column, will turn black, indicating that the input is “off”. The OFF is an additional input that can be selected to simulate a source that is not present.
- Page 45 The Web Interface ► Masking Outputs Click the Routing tab. Mask the desired output by clicking the Mask button. The Mask button will turn red, indicating that the selected output is masked. To unmask the output, click the Mask button again. The button will turn gray. page | 33...
-
Page 46: Routing Presets
The Web Interface Routing Presets ► Creating / Editing a Preset Click the Routing tab. Under the Presets section, click the Preset Edit button. The preset buttons will begin to flash and the Preset Edit button will read Choose One. page | 34... - Page 47 The Web Interface Click the desired preset to edit. The selected preset will be highlighted. In this example, we will select Preset 6. Select the desired routing state for each input/output. See Routing Inputs and Mask- ing Outputs (page 31), if necessary. The preset selections for the selected preset, will be indicated by a green square, as shown below.
- Page 48 The Web Interface After the desired routing states, for input/output have been assigned, provide a name for the preset in the Preset Name field. ► To clear the preset selections for the current preset, click the Clear All button. ► To use the current routing state as the preset selection, click the Select Current button.
-
Page 49: Input And Output Status
The Web Interface Input and Output Status Provides video and audio information for all inputs and outputs. Click the Status tab within the built-in web interface. Information on each input is listed in the top portion of the screen. Information on each output is listed in the bottom portion of the screen. Input section Output section The table below outlines the information that is available for each section:... -
Page 50: Changing Input And Output Names
The Web Interface Changing Input and Output Names By default, the names of each output are Output A - Output D. The names of each input are Input 1 - Input 4. Each of these names can be changed, as desired, to suit the type of device that is connected to the input or output. -
Page 51: Video
The Web Interface Video The Video tab handles both video up-scaling and down-scaling. Important Scaling is limited to the resolutions listed on under the Video tab. Only 1080p and 4K (3840x2160) signals can be scaled up/down. Click the Setup tab within the built-in web interface. Click the Video sub-tab. -
Page 52: Audio
The Web Interface Audio The Audio tab handles how audio is output from the matrix. Click the Setup tab within the built-in web interface. Click the Audio sub-tab. Click either Fixed or Variable for each output. • Fixed In this mode, the matrix will control the audio output level. •... -
Page 53: Hpd Control
The Web Interface HPD Control HPD (Hot-Plug Detect) is an HDMI feature which senses if the HDMI cable is disconnected, from the source or sink device, and then re-initializes the HDMI link if necessary. Within the web interface, the HPD pulse can be sent to the selected input, and reset the HDMI connection without disconnecting any cables. -
Page 54: Hdcp
The Web Interface HDCP This feature allows HDCP content to either be passed-through or rejected on each input. Outputs can either follow the input status or can be set to always encode HDCP. Note that using the “Reject” feature, on an input, does not decrypt HDCP content. Click the Setup tab within the built-in web interface. - Page 55 The Web Interface For outputs, select the desired button next to the output. ► Follow Input - Click this button to have the output follow the setting used on the input. Click the Follow All button to set all outputs to Follow Input. ►...
-
Page 56: Setting The Edid Mode
The Web Interface Setting the EDID Mode The EDID Mode tab allows the desired EDID mode (internal preset, external, or custom) to be set for each input. Click the Manage EDID tab within the built-in web interface. Click the EDID Mode sub-tab. Select the desired EDID mode for each input using the drop-down list. - Page 57 The Web Interface ► Using a Custom EDID The Custom - User-defined setting is used to store a custom EDID in the selected input. To use a custom EDID, follow the instructions below: Select Custom - User-defined from the drop-down list of the desired input. Copy or upload an EDID to the input that is using the Custom mode.
-
Page 58: Copying Edid Data
The Web Interface Copying EDID Data The EDID Copy tab allows an EDID to be copied from an input or output (sink device) to any input. In order to copy an EDID to an input, the input must be set to Custom - User- defined mode and then unlocked. - Page 59 The Web Interface After the input or output is selected, click the button for the corresponding input where the EDID will be copied. One or more inputs can be selected at a time. Click the Copy button. The Copy can only be pressed when both an output or input (the source) and an input (destination) are selected.
-
Page 60: Getting Edid Information
The Web Interface Getting EDID Information The EDID Info tab allows the EDID information, from an input or sink device, to be displayed. Click the Manage EDID tab within the built-in web interface. Click the EDID Info sub-tab. Select the desired input or output from the Choose EDID drop-down list. The EDID information for the selected input or output will be displayed. -
Page 61: Uploading And Downloading Edid Data
The Web Interface Uploading and Downloading EDID Data The Upload / Download tab allows EDID data from an input, output, or one of the internal EDID presets, to be downloaded and saved as a file on your computer. An EDID file can also be uploaded to any (unlocked) input. - Page 62 The Web Interface The following dialog will be displayed: Click the Save File button to save the EDID file to your computer. • Mac OS X The file will automatically be saved under Macintosh HD\Users\[username]\Downloads. • Windows OS The file will be saved under C:\Users\[username]\Downloads.
- Page 63 The Web Interface ► Uploading an EDID Click the Manage EDID tab within the built-in web interface. Click the Upload/Download tab. Set the input, where the EDID file will be uploaded, to Custom mode. Setting the EDID Mode (page 44) for more information.
-
Page 64: Configuring Network Settings
The Web Interface Configuring Network Settings Once the matrix is configured on the network using Gefen Syner-G, the network settings can be changed within the built-in web interface. To access the network settings, click the Network tab in the built-in web interface. - Page 65 The Web Interface ► TCP / Telnet Settings For details on configuring TCP, see Using Telnet, UDP, and RS-232 (page 68). • TCP Access: Click the Enable button to allow Telnet access to the matrix. Otherwise, click the Disable button. •...
- Page 66 The Web Interface • User Name: This field is static and cannot be changed. Telnet sessions are restricted to Admin users. • Old Password: Enter the old (current) password in this field. The factory-default password is admin. • New Password: Enter the new password in this field. •...
- Page 67 The Web Interface ► UDP Settings For details on configuring UDP, see Using Telnet, UDP, and RS-232 (page 68). • UDP Access: Click the Enable button to use the UDP protocol with the matrix. Otherwise, click the Disable button. • UDP Port: Enter the TCP listening port in this field.
- Page 68 The Web Interface ► Web Login Settings • Username: To change the password for the Administrator, click the Administrator. Otherwise, click the Operator button. • New Password: Enter password for the selected username (above), in this field. Passwords are case-sensitive. •...
- Page 69 IP settings from within Gefen Syner-G, click the Read / Write button. • Product Description: EXT-UHD600A-44 is the default product description. This name will be used to identify the matrix when using the Gefen Syner-G software. page | 57...
-
Page 70: System Settings
The Web Interface System Settings The System tab provides controls for various other matrix features. Each of these controls is described below. ► Main RS-232 Feedback • Click the Off button to disable RS-232 feedback. • Click the On button to enable RS-232 feedback. ►... - Page 71 The Web Interface ► Download Current Configuration to PC Saves the current matrix configuration to a file on your computer. Click the Download button. The following dialog box will be displayed: page | 59...
- Page 72 The Web Interface Click the Save File button to save the configuration file to your computer. • Mac OS X The file will automatically be saved under Macintosh HD\Users\[username]\Downloads • Windows OS The file will be saved under C:\Users\[username]\Downloads ► Restore / Upload Configuration File Uploads the selected matrix configuration, from a file on your computer, to the matrix.
- Page 73 ► Firmware Update Uploads and applies the latest firmware file to the matrix. Download the latest firmware from the Gefen web site. Click the Browse... button. Select the firmware file on your computer. The firmware must be a .bin file and will have the following naming convention: EXT-UHD600A-44([version])(PACK).bin.
- Page 74 The Web Interface After a few moments, the following message box will be displayed within the web interface: After the update process completes, the matrix will automatically reboot. page | 62...
- Page 75 The Web Interface ► Setting the IR Channel Sets the IR channel for the matrix. The matrix must be set to the same IR channel as the included IR remote control, in order for the IR remote control to communicate with the matrix. Click the desired IR channel for the matrix by clicking one of the IR Channel buttons (1 - 4).
- Page 76 The Web Interface ► Performing a Factory Reset This feature restores the matrix to original factory-default settings. Important Performing this function will erase all current setting in your matrix. IP settings will be retained. To save the configuration, before continuing, refer to the section Download Current Configuration to PC.
- Page 77 The Web Interface ► Rebooting the matrix Clicking this button will reboot the matrix. Click the Reboot button. The following message box will be displayed: ► Click the OK button to continue with the reboot procedure. ► Click the Cancel button to abort the reboot procedure and return to the web interface.
- Page 78 This page left intentionally blank.
-
Page 79: Advanced Operation
600 MHz 4K ULTRA 4x4 Matrix w/HDR and Audio De-Embedder Advanced Operation... -
Page 80: Using Telnet, Udp, And Rs-232
IP address of the matrix. After correct settings have been used in the terminal program, information similar to the following will be displayed: Welcome to EXT-UHD600A-44 Telnet telnet-> Type #help for a list of commands or refer to the tables on the following pages. -
Page 81: Rs-232 Configuration
Using Telnet, UDP, and RS-232 RS-232 Configuration Selected the desired COM port. Configure the RS-232 port to the following settings. Note that Only TxD, RxD, and GND pins are used. Description Setting 19200 Baud rate Data bits None Parity Stop bits None Hardware flow control Connect to the RS-232 port. -
Page 82: Commands
Commands Discovery Service Command Description #get_device_desc Returns the current device-description string #get_discovery Returns the current state of the discovery service #get_discovery_mode Returns the “discovery” mode #get_showme Returns the “show me” state #set_device_desc Sets the description of the matrix #set_discovery Enables or disables the discovery service #set_discovery_mode Sets the “discovery”... -
Page 83: Network Settings
Commands Network Settings Command Description #get_gateway Returns the gateway IP address of the matrix #get_ip_address Returns the IP address of the matrix #get_ip_mode Returns the IP mode of the matrix #get_ipconfig Returns the matrix IP configuration #get_mac_addr Returns the MAC address of the matrix #get_netmask Returns the subnet mask of the matrix #get_remote_udp_access... -
Page 84: Output Status
Commands Output Status Command Description #gets_output_hdcp Returns the HDCP state of the specified output #gets_output_hpd Returns the HPD state of the specified output #gets_output_mode Returns the video mode of the specified output #gets_output_rsense Returns the output Rsense Presets Command Description #get_preset_name Returns the name of the specified preset #set_preset_name... -
Page 85: Setup
Commands Setup Command Description #get_audio_output Returns the audio mode for the specified output(s) #get_input_hdcp Returns the HDCP handshake more on an input #get_io_name Returns the name of the specified input #get_output_hdcp Returns the HDCP setting of the specified output #get_video_scaling Returns the scaling setting for the specified output #send_hpd Sends an HPD signal to the specified input... - Page 86 Telnet, then IP settings will be preserved. To reset all, including IP settings, this command must be issued using RS-232. Syntax #factory_reset Parameters None Example #factory_reset RESET TO FACTORY DEFAULTS EXT-UHD600A-44 V1.00 OUT:ABCD IN:1234 Related Commands #reboot page | 74...
- Page 87 Commands #get_audio_output Returns the analog audio mode for the specified output(s). The value returned is one of the following: Type Description Fixed Variable Syntax #get_audio_output out Parameters Parameters Type: CHAR / INTEGER The alphabetic identifier of the output (A - D). Specify 0 to query all outputs; results are returned in output order A - D.
- Page 88 Commands #get_button_brightness Returns the current brightness of the buttons on the front panel of the matrix. Syntax #get_button_brightness Parameters None Example #get_button_brightness BUTTON_BRIGHTNESS 50 Related Commands #get_led_brightness #set_button_brightness #set_led_brightness page | 76...
- Page 89 Commands #get_custom_edid Downloads the customer EDID from the specified input. Syntax #get_custom_edid input Parameters Parameters input Type: INTEGER The number of the HDMI input (1 - 4). Example #get_custom_edid 1 00FFFFFFFFFFFF001CA6000000000000... Related Commands #get_edid_lock #get_edid_mode #get_external_edid #get_input_edid #get_internal_edid #get_output_edid #send_custom_edid #set_edid_copy #set_edid_lock #set_edid_mode...
- Page 90 Commands #get_device_desc Returns the description of the matrix. Syntax #get_device_desc Parameters None Example #get_device_desc DEVICE DESCRIPTION IS EXT-UHD600A-44 Related Commands #set_device_desc page | 78...
- Page 91 Commands #get_discovery Returns the discovery mode setting. The value returned is one of the following: Value Description “Discovery” mode is disabled “Discovery” mode is enabled Syntax #get_discovery Parameters None Example #get_discovery DISCOVERY 1 Related Commands #set_discovery #set_showme page | 79...
- Page 92 Commands #get_discovery_mode Returns the current “discovery” mode. The value returned is one of the following: Value Description Read only Read / Write Syntax #get_discovery_mode Parameters None Example #get_discovery_mode #get_discovery_mode 1 Related Commands #get_discovery #set_discovery #set_discovery_mode page | 80...
- Page 93 Commands #get_edid_lock Returns the current “EDID Lock” state of the specified input. The value returned is one of the following: Value Description EDID unlocked EDID locked Syntax #get_edid_lock input Parameters input Type: INTEGER The number of the HDMI input (1 - 4) to query. Example #get_edid_lock 1 EDID_LOCK 1 0...
- Page 94 Commands #get_edid_mode Returns the EDID mode of the specified input. The value returned is one of the following: Value Description Internal 720p 2Ch Internal 720p Multi-Ch Internal 1080p 2Ch Internal 1080p Multi-Ch Internal UHD 2Ch Internal UHD Multi-Ch External (Output A) Custom Syntax #get_edid_mode input...
- Page 95 Commands #get_external_edid Returns the modified external EDID. Syntax #get_external_edid Parameters None Example #get_external_edid 00FFFFFFFFFFFF001CA6000000000000... Related Commands #get_custom_edid #get_edid_lock #get_edid_mode #get_input_edid #get_internal_edid #get_output_edid #send_custom_edid #set_edid_copy #set_edid_lock #set_edid_mode page | 83...
- Page 96 Commands #get_feedback Returns the feedback status. Syntax #get_feedback Parameters None Example #get_feedback FEEDBACK 1 Related Commands #factory_reset #get_firmware_version #get_ir_channel #get_led_brightness #help #reboot #set_feedback #set_ir_channel #set_lcd_brightness page | 84...
- Page 97 Commands #get_firmware_version Returns the current firmware version of the matrix. Syntax #get_firmware_version Parameters None Example #get_firmware_version FIRMWARE VERSION IS 1.0 Related Commands #factory_reset #get_feedback #get_ir_channel #get_led_brightness #help #reboot #set_feedback #set_ir_channel #set_lcd_brightness page | 85...
- Page 98 Commands #get_gateway Returns the gateway address of the matrix. Syntax #get_gateway Parameters None Example #get_gateway GATEWAY 10.5.64.1 Related Commands #get_web_port #get_ip_address #get_ip_mode #get_ipconfig #get_mac_addr #get_netmask #set_gateway #set_web_port #set_ip_address #set_ip_mode #set_netmask page | 86...
- Page 99 Commands #get_input_edid Returns the current EDID from the specified input. Syntax #get_input_edid input Parameters input Type: INTEGER The number of the HDMI input (1 - 4) to query. Example #get_input_edid 00FFFFFFFFFFFF001CA6000000000000... Related Commands #get_custom_edid #get_external_edid #get_edid_lock #get_edid_mode #get_internal_edid #get_output_edid #send_custom_edid #set_edid_copy #set_edid_lock #set_edid_mode...
- Page 100 Commands #get_input_hdcp Returns the HDCP handshake mode of the specified input. Syntax #get_input_hdcp Parameters input Type: INTEGER The number of the HDMI input (1 - 4) to query. Set this parameter to 0 to return the HDCP handshake mode of all inputs in numerical order. Example #get_input_hdcp 1 INPUT_HDCP 1 2...
- Page 101 Commands #get_internal_edid Returns the specified preset internal EDID. Syntax #get_internal_edid edidps Parameters edidps Type: INTEGER The number of the EDID preset. EDID Description UHD 600 4K 2CH UHD 600 4K MULTICH UHD 300 4K 2CH UHD 300 4K MULTICH 1080P 2CH 1080P MULTICH Example #get_internal_edid 1...
- Page 102 Commands #get_io_name Returns the name given to the specified input or output. Syntax #get_io_name inout Parameters input Type: INTEGER or CHARACTER The number of the HDMI input (1 - 4) to query. Example #get_io_name 1 IO_NAME 1 Bluray Related Commands #set_io_name page | 90...
- Page 103 Commands #get_ip_address Returns the current IP address of the matrix. Syntax #get_ip_address Parameters None Example #get_ip_address IP_ADDRESS 10.5.64.81 Related Commands #get_gateway #get_web_port #get_ip_mode #get_ipconfig #get_mac_addr #get_netmask #set_gateway #set_web_port #set_ip_address #set_ip_mode #set_netmask page | 91...
- Page 104 Commands #get_ip_mode Returns the current IP mode of the matrix. The value returned is one of the following: Value Description Static mode DHCP mode Syntax #get_ip_mode Parameters None Example #get_ip_mode IP_MODE 0 Related Commands #get_gateway #get_web_port #get_ip_address #get_ipconfig #get_mac_addr #get_netmask #set_gateway #set_web_port #set_ip_address...
- Page 105 Commands #get_ipconfig Returns the current IP configuration of the matrix. In addition to providing the MAC address and the broadcast IP address, this command also provides the same information as executing the #get_ip_address, #get_netmask, #get_gateway, #get_mac_addr ommands. Syntax #get_ipconfig Parameters None Example #get_ipconfig...
- Page 106 Commands #get_ir_channel Returns the IR channel of the matrix. Syntax #get_ir_channel Parameters None Example #get_ir_channel IR_CHANNEL 1 Related Commands #set_ir_channel page | 94...
- Page 107 Commands #get_led_brightness Returns the brightness level of the LED indicators on the front panel. Syntax #get_led_brightness Parameters None Example #get_led_brightness LED_BRIGHTNESS 60 Related Commands #set_led_brightness page | 95...
- Page 108 Commands #get_mac_addr Returns the MAC address of the matrix. Syntax #get_mac_addr Parameters None Example #get_mac_addr MAC ADDRESS IS: 00:1C:91:04:90:03 Related Commands #get_gateway #get_web_port #get_ip_address #get_ip_mode #get_ipconfig #get_netmask #set_gateway #set_web_port #set_ip_address #set_ip_mode #set_netmask page | 96...
- Page 109 Commands #get_mask Returns the mask state for the specified output(s). Syntax #get_mask output Parameters output Type: CHAR / INTEGER The alphabetic identifier of the output (A - D). Specify 0 to query all outputs; results are returned in output order A - D. Example #get_mask a MASK A 0...
- Page 110 Commands #get_mute Returns the audio muting status for the specified output(s). Syntax #get_mute output Parameters output Type: INTEGER The alphabetic identifier of the output (A - D). Specify 0 to query all outputs; results are returned in output order A - D. Example #get_mute A #get_mute 0...
- Page 111 Commands #get_netmask Returns the current subnet mask of the matrix. Syntax #get_netmask Parameters None Example #get_netmask NETMASK 255.255.255.0 Related Commands #get_gateway #get_web_port #get_ip_address #get_ip_mode #get_ipconfig #get_mac_addr #set_gateway #set_web_port #set_ip_address #set_ip_mode #set_netmask page | 99...
- Page 112 Commands #get_output_edid Returns the downstream EDID from the specified output. Syntax #get_output_edid output Parameters output Type: CHAR The alphabetic identifier of the output (A - D). Example #get_output_edid a 00FFFFFFFFFFFF001CA6000000000000... Related Commands page | 100...
- Page 113 Commands #get_output_hdcp Returns the HDCP setting of the specified output. The value returned is one of the following: Value Description Follow input Always encode Syntax #get_output_hdcp output Parameters output Type: CHARACTER The identifier of the HDMI output (A - D) to query. Specify 0 to query all outputs; results are returned in output order A - D.
- Page 114 Commands #get_preset_name Returns the name of the specified preset. Syntax #get_preset_name preset Parameters preset Type: INTEGER The identifier of the preset name (1 - 16) to query. Example #get_preset_name 5 PRESET_NAME 5 Kitchen Related Commands #set_preset_name page | 102...
- Page 115 Commands #get_remote_udp_access Returns the remote UDP access state. The value returned is one of the following: Value Description Remote UDP access disabled Remote UDP access enabled Syntax #get_remote_udp_access Parameters None Example #get_remote_udp_access REMOTE_UDP_ACCESS 0 Related Commands #get_remote_udp_ip #get_remote_udp_port #get_udp_access #get_udp_port #set_remote_udp_access #set_remote_udp_ip #set_remote_udp_port...
- Page 116 Commands #get_remote_udp_ip Returns the remote UDP IP address. Syntax #get_remote_udp_ip Parameters None Example #get_remote_udp_access REMOTE_UDP_IP 192.168.1.255 Related Commands #get_remote_udp_access #get_remote_udp_port #get_udp_access #get_udp_port #set_remote_udp_access #set_remote_udp_ip #set_remote_udp_port #set_udp_access #set_udp_port page | 104...
- Page 117 Commands #get_remote_udp_port Returns the remote UDP listening port. Syntax #get_remote_udp_port Parameters None Example #get_remote_udp_port REMOTE_UDP_PORT 50008 Related Commands #get_remote_udp_access #get_remote_udp_ip #get_udp_access #get_udp_port #set_remote_udp_access #set_remote_udp_ip #set_remote_udp_port #set_udp_access #set_udp_port page | 105...
- Page 118 Commands #get_showme Returns the “showme” state. Value Description Reject HDCP 2.2 and below Syntax #get_showme Parameters input Type: INTEGER The number of the HDMI input (1 - 4) to query. Example #get_showme Related Commands page | 106...
- Page 119 Commands #get_telnet_access Returns the Telnet access state. Use the #set_telnet_access command to enable or disable Telnet access. Syntax #get_telnet_access Parameters None Example #get_telnet_access TELNET_ACCESS 1 Related Commands #get_telnet_port #get_telnet_message #set_telnet_access #set_telnet_port #set_telnet_message page | 107...
- Page 120 Commands #get_telnet_login Returns the status of the Telnet login process. Syntax #get_telnet_login Parameters None Example #get_telnet_login TELNET_LOGIN 0 Related Commands page | 108...
- Page 121 Commands #get_telnet_message Returns the Telnet welcome message. Use the #set_telnet_message to create a custom welcome message. Syntax #get_telnet_message Parameters None Example #get_telnet_message TELNET WELCOME SCREEN IS ENABLED Related Commands #get_telnet_access #get_telnet_port #set_telnet_access #set_telnet_port #set_telnet_message page | 109...
- Page 122 Commands #get_telnet_port Returns the Telnet listening port. Syntax #get_telnet_port Parameters None Example #get_telnet_port TELNET_PORT 23 Related Commands #get_telnet_access #get_telnet_message #set_telnet_access #set_telnet_port #set_telnet_message page | 110...
- Page 123 Commands #get_udp_access Returns the UDP access state. Use the #set_udp_access command to enable or disable UDP access. The value returned is one of the following: Value Description UDP access disabled UDP access enabled Syntax #get_udp_access Parameters None Example #get_udp_access UDP_ACCESS 0 Related Commands #get_remote_udp_access #get_remote_udp_ip...
- Page 124 Commands #get_udp_port Returns the local UDP listening port. Syntax #get_udp_port Parameters None Example #get_udp_port UDP_PORT 50007 Related Commands #get_remote_udp_access #get_remote_udp_ip #get_remote_udp_port #get_udp_access #set_remote_udp_access #set_remote_udp_ip #set_remote_udp_port #set_udp_access #set_udp_port page | 112...
- Page 125 Commands #get_video_scaling Returns the current video scaling state. The value returned is one of the following: Value Description Scaling disabled Scaling enabled Syntax #get_video_scaling output Parameters output Type: CHAR / INTEGER The alphabetic identifier of the output (A - D). Specify 0 to query all outputs; results are returned in output order A - D.
- Page 126 Commands #get_vol Returns the analog output volume level for the specified output(s). Syntax #get_vol output Parameters output Type: CHAR / INTEGER The alphabetic identifier of the output (A - D). Specify 0 to query all outputs; results are returned in output order A - D. Example #get_vol a VOL A 100...
- Page 127 Commands #get_web_port Returns the HTTP listening port of the matrix. Syntax #get_web_port Parameters None Example #get_web_port HTTP_PORT 80 Related Commands #get_gateway #get_ip_address #get_ip_mode #get_ipconfig #get_mac_addr #get_netmask #set_gateway #set_web_port #set_ip_address #set_ip_mode #set_netmask page | 115...
- Page 128 Commands #gets_input_hdcp Returns the HDCP mode of the specified input. The value returned is one of the following: Value Description Reject HDCP 2.2 and below HDCP 1.4 and below Syntax #gets_input_hdcp input Parameters input Type: INTEGER The number of the HDMI input (1 - 4) to query. Specify 0 to query all inputs; results are returned in input order 1 - 4.
- Page 129 Commands #gets_input_hpd Returns the HPD state of the specified input. The value returned is one of the following: Value Description HPD low HPD high Syntax #gets_input_hpd input Parameters input Type: INTEGER The number of the HDMI input (1 - 4) to query. Specify 0 to query all inputs; results are returned in numerical order.
- Page 130 Commands #gets_input_mode Returns the video mode of the specified input. Syntax #gets_input_mode input Parameters input Type: INTEGER The number of the HDMI input (1 - 4) to query. Specify 0 to query all inputs; results are returned in input order 1 - 4. Example #gets_input_mode 1 INPUT_MODE 1 C...
- Page 131 Commands #gets_input_signal Returns the active signal status of the specified input. Syntax #gets_input_signal input Parameters input Type: INTEGER The number of the HDMI input (1 - 4) to query. Specify 0 to query all inputs; results are returned in input order 1 - 4. Example #gets_input_signal 1 INPUT_SIGNAL 1 Y...
- Page 132 Commands #gets_output_hdcp Returns the HDCP status of the specified output. The value returned will be one of the following: Value Description Encrypted (HDCP 1.4) Encrypted (HDCP 2.2) Unencrypted Fail Syntax #gets_output_hdcp output Parameters output Type: CHAR / INTEGER The alphabetic identifier of the output (A - D). Specify 0 to query all outputs; results are returned in output order A - D.
- Page 133 Commands #gets_output_hpd Returns the HPD status of the specified output. The value returned will be one of the following: Value Description HPD low HPD high Syntax #gets_output_hpd output Parameters output Type: CHAR / INTEGER The alphabetic identifier of the output (A - D). Specify 0 to query all outputs; results are returned in output order A - D.
- Page 134 Commands #gets_output_mode Returns the video output mode of the specified output. The value returned will be one of the following: Value Description DVI signal detected HDMI signal detected Syntax #gets_output_mode output Parameters output Type: CHAR / INTEGER The alphabetic identifier of the output (A - D). Specify 0 to query all outputs; results are returned in output order A - D.
- Page 135 Commands #gets_output_rsense Returns the Rsense state of the specified output(s). The value returned will be one of the following: Value Description Rsense low Rsense high Syntax #gets_output_rsense output Parameters output Type: CHAR / INTEGER The alphabetic identifier of the output (A - D). Specify 0 to query all outputs; results are returned in output order A - D.
- Page 136 Commands #help Returns a list of available commands. The commands listed are specific to either the Sender or Receiver unit. Syntax #help Parameters None Example #help [HELP] #HELP [VOLUME] #GET_MUTE #GET_VOL #SET_MUTE #SET_VOL [ROUTING] #GET_MASK #LOCK_MATRIX #SET_MASK page | 124...
- Page 137 Commands #lock_matrix Locks or unlocks the matrix. This command locks the front panel and the built-in web interface of the matrix. Note that if the matrix is locked, settings can still be changed using the command set. Syntax #lock_matrix state Parameters state Type: INTEGER...
- Page 138 Commands #reboot Reboots the matrix. Syntax #reboot Parameters None Example #reboot UNIT WILL REBOOT SHORTLY Related Commands #factory_reset page | 126...
- Page 139 Commands #send_custom_edid Uploads a custom EDID to the specified input. The input must first be set to CUSTOM MODE. Syntax #send_custom_edid input Parameters input Type: INTEGER The numeric identifier of the input (1 - 4). Example #send_custom_edid 1 SEND_COMPLETE page | 127...
- Page 140 Commands #send_hpd Sends an HPD (Hot-Plug Detect) pulse to the specified input. Syntax #send_hpd input Parameters input Type: INTEGER The identifier of the HDMI input (1 - 4) where the HPD pulse will be sent. Set this parameter to 0 to send the HPD pulse to all inputs. Example #send_hpd 1 HPD SENT...
- Page 141 Commands #set_audio_output Sets the analog audio mode for the specifed output(s). Syntax #set_audio_output output audtype Parameters output Type: CHAR / INTEGER The alphabetic identifier of the output (A - D). Set this parameter to 0 to set all outputs to the same audio mode (Feedback lists all analog audio modes for outputs in order A - D).
- Page 142 Commands #set_button_brightness Sets the brightness level of the buttons on the front panel of the matrix. Syntax #set_button_brightness level Parameters level Type: INTEGER Accepts a number within the range of 1 - 100. Example #set_button_brightness 60 BUTTON_BRIGHTNESS 60 Related Commands #get_button_brightness page | 130...
- Page 143 Commands #set_device_desc Sets the matrix identifier string. Syntax #set_device_desc name Parameters name Type: STRING The device description. This value cannot exceed 30 characters in length. Example #set_device_desc matrix202 DEVICE DESCRIPTION IS SET TO matrix202 Related Commands #get_device_desc page | 131...
- Page 144 Commands #set_discovery Enables or disables the “discovery” feature. This feature is enabled by default. Syntax #set_discovery state Parameters state Type: INTEGER Accepts a number from the table below, specifying the desired state: state Description Disables “Discovery” mode Enables “Discovery” mode If set to disabled, then the Syner-G Software Suite will be unable to detect the matrix on a network.
- Page 145 Read / write mode When set to read-only mode, the IP settings for the matrix will be displayed within the Gefen Syner-G Software Suite but cannot be changed. In order to both display and allow changes to the IP settings within Gefen Syner-G, set this feature to read/write mode.
- Page 146 Commands #set_edid_copy Copies the EDID from output or input to the selected input for use in custom EDID mode. In order for an EDID to be copied, the destination input port must be set to Custom mode and must not be locked. See Copying EDID Data (page 46) for more information.
- Page 147 Commands #set_edid_lock Locks to unlocks the EDID when using Custom EDID mode. This command only works if the specified input is set to Custom. See the #set_edid_mode command. Syntax #set_edid_lock input state Parameters input Type: INTEGER This parameter must be the identifier of an HDMI input (1 - 4). state Type: INTEGER Accepts a number from the table below, specifying the desired state:...
- Page 148 Commands #set_edid_mode Sets the EDID mode for the specified input. Syntax #set_edid_mode input mode Parameters input Type: INTEGER This parameter must be the identifier of an HDMI input (1 - 4). mode Type: INTEGER Accepts a number from the table below, corresponding to the desired EDID. mode Description Internal 720p 2Ch...
- Page 149 Commands #set_feedback Enables or disables unsolicited RS-232 feedback. Syntax #set_feedback state Parameters state Type: INTEGER Accepts a number from the table below, specifying the desired state: state Description Disable RS-232 feedback Enable RS-232 feedback Example #set_feedback 1 SET_FEEDBACK 1 page | 137...
- Page 150 Commands #set_gateway Sets the gateway address for the matrix. The gateway address will be changed only if the matrix is in static IP mode. If the matrix is using DHCP mode, then the gateway address is automatically assigned by the DHCP server. The matrix must be rebooted after executing this command.
- Page 151 Commands #set_input_hdcp Sets the HDCP mode on the specified input. Syntax #set_input_hdcp input mode Parameters input Type: INTEGER Accepts the number of an HDMI input (1 - 4). Set this parameter to 0 to apply the HDCP setting to all inputs (Feedback lists all HDCP settings for inputs in order 1 - 4).
- Page 152 Commands #set_io_name Sets the name of the specified input. Syntax #set_io_name inout name Parameters inout Type: INTEGER or CHARACTER This parameter can accept either the number of an HDMI input (1 - 4) or the identifier or an HDMI output (A - D). Only one input or output can be specified at one time.
- Page 153 Commands #set_ip_address Sets the IP address of the matrix. The matrix must be rebooted after executing this command. Syntax #set_ip_address addr Parameters addr Type: IP ADDRESS The desired IP address of the matrix. This address must be entered in dot-decimal notation. Example #set_ip_address 10.5.64.81 IP_ADDRESS 10.5.64.81...
- Page 154 Commands #set_ip_mode Sets the IP mode of the matrix. The matrix must be rebooted after executing this command. Syntax #set_ip_mode mode Parameters mode Type: INTEGER Accepts a number from the table below, corresponding to the desired IP mode. mode Description Static DHCP Auto...
- Page 155 Commands #set_ir_channel Sets the IR channel of the matrix. In order to use the included IR remote control with the matrix, both the matrix and the IR remote control must be set to the same IR channel. Syntax #set_ir_channel irch Parameters irch Type: INTEGER...
- Page 156 Commands #set_led_brightness Sets the brightness level of the LED indicators on the front panel of the matrix. Syntax #set_led_brightness level Parameters level Type: INTEGER Accepts a number within the range of 0 - 100. The value of 100 represents the brightest setting of the display. Example #set_led_brightness 75 LED_BRIGHTNESS 75...
- Page 157 Commands #set_mask Sets the masking for the specified output(s). Syntax #set_mask output state Parameters output Type: CHAR / INTEGER The alphabetic identifier of the output (A - D). Set this parameter to 0 to set all outputs to the same masking state (Feedback lists all output masking states in order A - D).
- Page 158 Commands #set_mute Sets the audio muting state for the specified output(s). Syntax #set_mute output Parameters output Type: CHAR / INTEGER The alphabetic identifier of the output (A - D). Set this parameter to 0 to set all outputs to the same muting state (Feedback lists all output muting states in order A - D).
- Page 159 Commands #set_netmask Sets the network mask address. The matrix must be rebooted after executing this command. Syntax #set_netmask addr Parameters addr Type: ADDRESS The desired subnet mask of the matrix. This address must be entered in dot-decimal notation. Example #set_netmask 255.255.255.0 NETMASK 255.255.255.0 REBOOT TO APPLY SETTINGS Related Commands...
- Page 160 Commands #set_output_hdcp Sets the HDCP mode on the specified output. Syntax #set_output_hdcp output mode Parameters output Type: CHARACTER Accepts the identifier of an HDMI output (A - D). Set this parameter to 0 to set all outputs to the same HDCP mode (Feedback lists all HDCP mode for outputs in order A - D).
- Page 161 Commands #set_preset_name Assigns a name to the specified preset. Syntax #set_present_name preset name Parameters preset Type: INTEGER Accepts the identifier of a Preset (1 - 16). name Type: STRING The name of the preset. The name must not exceed 12 characters in length. No special characters (e.g.
- Page 162 Commands #set_remote_udp_access Enables or disables remote UDP access. Syntax #set_remote_udp_access state Parameters state Type: INTEGER Accepts a number from the table below, corresponding to the desired state. state Description Disable remote UDP access Enable remote UDP access Example #set_remote_udp_access 0 REMOTE_UDP_ACCESS 0 Related Commands #get_remote_udp_access...
- Page 163 Commands #set_remote_udp_ip Sets the remote UDP IP address of the matrix. Syntax #set_remote_udp_ip addr Parameters addr Type: IP ADDRESS The desired remote UDP IP address of the matrix. The address must be entered in dot-decimal notation. Example #set_remote_udp_ip 192.168.1.251 REMOTE_UDP_IP 192.168.1.251 Related Commands #get_remote_udp_access #get_remote_udp_ip...
- Page 164 Commands #set_remote_udp_port Sets the remote UDP listening port for the matrix. Syntax #set_remote_udp_port port Parameters port Type: INTEGER The desired remote UDP port (0 - 65535) of the matrix. Example #set_remote_udp_port 50008 REMOTE_UDP_PORT 50008 Related Commands #get_remote_udp_access #get_remote_udp_ip #get_remote_udp_port #get_udp_access #get_udp_port #set_remote_udp_access #set_remote_udp_ip...
- Page 165 Commands #set_showme Enables or disables the “Show Me” feature. If the “Show Me” feature is enabled, then all the buttons (with the exception of the Power button), will flash slowly. This feature allows the matrix to be visually identified on the network and is useful when multiple matrix units are being used.
- Page 166 Commands #set_telnet_access Enables or disables Telnet access on the matrix. Syntax #set_telnet_access state Parameters state Type: INTEGER Accepts a number from the table below, corresponding to the desired state. state Description Disable Telnet access Enable Telnet access Example #set_telnet_access 1 TELNET_ACCESS 1 Related Commands #get_telnet_access...
- Page 167 Commands #set_telnet_login Enable or disable the Telnet login process. When disabled, login credentials are not required. Syntax #set_telnet_login state Parameters state Type: INTEGER Accepts a number, from table below, corresponding to the desired state. state Description Disable login process Enable login process Example #set_telnet_login Related Commands...
- Page 168 Commands #set_telnet_message Enables or disables the Telnet welcome message. Syntax #set_telnet_message state Parameters state Type: INTEGER Accepts a number, from table below, corresponding to the desired state. state Description Disable welcome message Enable welcome message Example #set_telnet_message Related Commands #get_telnet_access #get_telnet_port #get_telnet_message #set_telnet_access...
- Page 169 Commands #set_telnet_port Sets the Telnet listening port on the matrix. Syntax #set_telnet_port port Parameters port Type: INTEGER The desired remote Telnet listening port (0 - 65535) of the matrix. Example #set_telnet_port 23 TELNET_PORT 23 Related Commands #get_telnet_access #get_telnet_port #get_telnet_message #set_telnet_access #set_telnet_message page | 157...
- Page 170 Commands #set_udp_access Enables or disables UDP access. Syntax #set_udp_access state Parameters state Type: INTEGER Accepts a number, from table below, corresponding to the desired state. state Description Disable UDP access Enable UDP access Example #set_udp_access 0 UDP_ACCESS 0 Related Commands #get_remote_udp_access #get_remote_udp_ip #get_remote_udp_port...
- Page 171 Commands #set_udp_port Sets the local UDP listening port. Syntax #set_udp_port port Parameters port Type: INTEGER The desired UDP listening port (0 - 65535) of the matrix. Example #set_udp_port 50007 UDP_PORT 50007 Related Commands #get_remote_udp_access #get_remote_udp_ip #get_remote_udp_port #get_udp_access #get_udp_port #set_remote_udp_access #set_remote_udp_ip #set_remote_udp_port #set_udp_access page | 159...
- Page 172 Commands #set_video_scaling Enables or disables video scaling for the specified output. Outputs A and C can downscale a 2160p source to 1080p. Outputs B and D can upscale a 1080p source to 2160p. Syntax #set_video_scaling output state Parameters output Type: CHAR / INTEGER The alphabetic identifier of the output (A - D).
- Page 173 Commands #set_vol Sets the analog output volume level for the specified output(s). Syntax #set_vol output level Parameters output Type: CHAR / INTEGER The alphabetic identifier of the output (A - D). Set this parameter to 0 to set all outputs to the same volume level (Feedback lists all volume levels for outputs in order A - D).
- Page 174 Commands #set_web_port Sets the HTTP listening port for the matrix. Syntax #set_gateway port Parameters port Type: INTEGER The desired HTTP listening port for the matrix. Example #set_gateway 192.168.1.1 GATEWAY 192.168.1.1 Related Commands #get_gateway #get_web_port #get_ip_address #get_ip_mode #get_ipconfig #get_mac_addr #get_netmask #set_gateway #set_ip_address #set_ip_mode #set_netmask...
- Page 175 Commands Recalls the specified routing preset. Syntax p preset Parameters preset Type: INTEGER The number of a preset (1 - 16). Example p 10 P 10 Related Commands page | 163...
- Page 176 Commands Routes the specified input to the one or more specified outputs. Syntax r input output [...output] Parameters input Type: INTEGER / CHAR The number of an HDMI input (1 - 4). This parameter also accepts a character argument of “X”. The “X” argument is not case-sensitive. If “X” is specified, then no input is selected.
- Page 177 Commands Returns the routing state for all inputs / outputs. “X” will be displayed when the output is selected to input off. Syntax Parameters None Example S A 1 B 2 C 3 D X Related Commands page | 165...
- Page 178 This page left intentionally blank.
-
Page 179: Appendix
600 MHz 4K ULTRA 4x4 Matrix w/HDR and Audio De-Embedder Appendix page | 167... -
Page 180: Network Cable Diagram
Network Cable Diagram Front of RJ-45 Connector 1 2 3 4 5 6 7 8 Gefen recommends the TIA/EIA-568-B wiring option. Use the table below when field-terminating cable for use with Gefen products. Color Description Orange / White TD+ (Transmit Data, positive differential signal) -
Page 181: Default Settings
Remote UDP Access Disabled Default Administrator Password Admin Default Operator Password Operator Gefen Syner-G Discovery Enabled Gefen Syner-G Discovery Mode Read / Write Gefen Syner-G Show Device Hide Me Description Setting Output Names Output A - Output D A/V Input Names... -
Page 182: Internal Edid Profiles
Internal EDID Profiles 720p 2-channel audio Video data block 1280x720p @ 60Hz (16:9) 1280x720p @ 50Hz (16:9) 640x480p @ 60Hz (4:3) 720x480p @ 60Hz (16:9) 720x480p @ 60Hz (4:3) 1440x480p @ 60Hz (4:3) 1440x480p @ 60Hz (16:9) 720x576p @ 50Hz (4:3) 1440x480i @ 60Hz (4:3) 1440x480i @ 60Hz (16:9) 720x576p... - Page 183 Internal EDID Profiles 1080p 2-channel audio Video data block 640x480p @ 60Hz (4:3) 720x480p @ 60Hz (16:9) 720x480p @ 60Hz (16:9) 1280x720p @ 60Hz (16:9) 1920x1080i @ 60Hz (16:9) 1440x480i @ 60Hz (4:3) 1440x480i @ 60Hz (16:9) 1440x480p @ 60Hz (4:3) 1440x480p @ 60Hz (16:9) 720x576p...
- Page 184 Internal EDID Profiles 1080p Multichannel audio Video data block 640x480p @ 60Hz (4:3) 720x480p @ 60Hz (16:9) 720x480p @ 60Hz (16:9) 1280x720p @ 60Hz (16:9) 1920x1080i @ 60Hz (16:9) 1440x480i @ 60Hz (4:3) 1440x480i @ 60Hz (16:9) 1440x480p @ 60Hz (4:3) 1440x480p @ 60Hz (16:9) 720x576p...
- Page 185 Internal EDID Profiles 4K 2-channel audio Video data block 720x480p @ 60Hz 1280x720p @ 60Hz (16:9) 1920x1080i @ 60Hz (16:9) 1440x480i @ 60Hz (16:9) 1920x1080p @ 60Hz (16:9) 720x576p @ 50Hz (16:9) 1280x720p @ 50Hz (16:9) 1920x1080i @ 50Hz (16:9) 1440x576i @ 50Hz (16:9) 1920x1080p @ 50Hz (16:9)
- Page 186 Internal EDID Profiles 4K multichannel audio Video data block 720x480p @ 60Hz 1280x720p @ 60Hz (16:9) 1920x1080i @ 60Hz (16:9) 1440x480i @ 60Hz (16:9) 1920x1080p @ 60Hz (16:9) 720x576p @ 50Hz (16:9) 1280x720p @ 50Hz (16:9) 1920x1080i @ 50Hz (16:9) 1440x576i @ 50Hz (16:9) 1920x1080p @ 50Hz (16:9)
-
Page 187: Specifications
Specifications Supported Formats Resolutions (max.) • 4096 x 2160 at 60 Hz (4:4:4) • 3860 x 2160 at 60 Hz (4:4:4) • 1080p Full HD • 1920 x 1200 (WUXGA) Connectors, Controls, and Indicators HDMI Input Connectors • 4 x Type A 19-pin female, locking HDMI Output Connectors •... - Page 188 Specifications Physical Rack-mount requirements • Standard 19” rack, 1U high Dimensions (excluding rack ears and • 17.25” x 1.75” x 6.3” connectors, W x H x D) (440mm x 45mm x 160mm) Net Unit Weight • 3.5 lbs (1.5 kg) Shipping Weight •...
- Page 189 This page left intentionally blank.
- Page 190 *Preferred 1800 S McDowell Blvd. Petaluma CA 94954 (707) 283-5900 (800) 472-5555...
Need help?
Do you have a question about the EXT-UHD600A-44 and is the answer not in the manual?
Questions and answers