ClearOne COLLABORATE PRO 300 User Manual
Hide thumbs
Also See for COLLABORATE PRO 300:
- Quick start manual (9 pages) ,
- User manual (102 pages) ,
- Quick start manual (9 pages)
Table of Contents
Advertisement
Quick Links
Advertisement
Table of Contents

Related Manuals for ClearOne COLLABORATE PRO 300


Summary of Contents for ClearOne COLLABORATE PRO 300
- Page 1 ® COLLABORATE RO 300 SER UIDE ...
- Page 2 © 2015 ClearOne Inc. - All rights reserved. No part of this document may be reproduced in any form or by any means without written permission from ClearOne. ...
-
Page 3: Table Of Contents
TABLE O F C ONTENTS Chapter 1 : Introduction ....................... 6 IN THIS CHAPTER .............................. 6 COLLABORATE PRO 300 OVERVIEW ........................ 6 MAIN FEATURES .............................. - Page 4 CALL STATE INDICATIONS ........................... 3 3 USING CALL TONES .............................. 3 4 DATA SHARING .............................. 3 5 Chapter 5 : Quick Dialing M ethods ................... 3 9 ...
- Page 5 Chapter 8 : Web Access a nd Management ................ 6 6 IN THIS CHAPTER .............................. 6 6 ACCESSING COLLABORATE PRO VIA BROWSER ..................... 6 6 ...
-
Page 6: Chapter 1 : Introduction
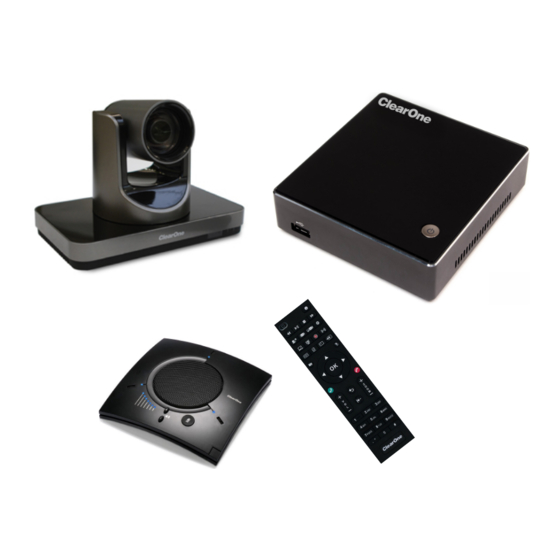
OLLABORATE Pro software. Various accessories, such as a PTZ camera, ClearOne CHAT 150C and DataPoint – can be installed and integrated a s part of the COLLABORATE Pro 300 system. 6 | C O L L A B O R A T E P R O : U s e r G u i d e ... - Page 7 ...
-
Page 8: Main Features
Display on-screen r unning text to all participants via Web management d uring a call Support ClearOne C HAT 150C. Far End mute indicator ... -
Page 9: Comparison Table
COMPARISON TABLE The following table specifies the differences between the various models of COLLABORATE Pro. COLLABORATE Pro 300 Series COLLABORATE Pro 600 Series COLLABORATE Pro 900 Series Max Tx 1080/30 1080/60 ... -
Page 10: Chapter 2 : Getting Started
Chapter 2 : Getting Started IN THIS CHAPTER Once the COLLABORATE Pro 300 unit is installed, connected a nd turned on, it is ready for use. This chapter describes the following basic operations: ... -
Page 11: Navigation Arrows And Additional Buttons
Alphanumeric K eypad Command B uttons Navigation arrows and Additional Buttons LPHANUMERIC EYPAD The remote control includes an alphanumeric k eypad with buttons from 0 to 9. In the Dot button you can find the following signs: '.'',', '*', '#', '^', '@', '$', ':', '=', '-', '_'. - Page 12 Button Image Button Name Command Recording N/A Streaming N/A Settings Open the settings menu Mute Video Temporarily disable the local video camera and its transmission Delete ...
-
Page 13: Using The On-Screen Menu
USING THE ON-SCREEN MENU The on-screen menu enables you to navigate COLLABORATE Pro options prior to and during a videoconference call. The main menu is accessed using the remote control (see Using the Remote Control). - Page 14 To access a category/option: Press OK when the category/option i s selected (highlighted in orange).
-
Page 15: System Icons
SYSTEM ICONS The following icons indicate the different behaviors of the system. Icon Image Meaning Mute Speaker Mute Microphone Far End Microphone Mute No Network ... -
Page 16: Displaying System Information
DISPLAYING SYSTEM INFORMATION Whenever t he COLLABORATE Pro unit is turned on, you can view the system status details. Different details are displayed when the unit is in idle state or in an ongoing videoconference session. - Page 17 MAC Address – MAC address of the COLLABORATE Pro unit IP Address – IP Address of the COLLABORATE Pro unit, as automatically assigned by the DHCP server or as manually configured via Settings>Admin>IP. You can use this IP Address to access and manage the unit via a browser (see Accessing COLLABORATE Pro ...
- Page 18 COLLABORATE SETUP When system is loaded for the first time (after restore defaults), the setup wizard is displayed on screen in order to configure the basic settings: 1. General: ...
- Page 19 Obtain Address from DHCP Server – Select the checkbox t o obtain an IP Address from a DHCP server. IP Address – Set the IP Address for this system. If using a DHCP server, the ...
- Page 20 Enter your organization proxy server address. For any assistance use your organization’s network manager. 4. License: ...
-
Page 21: Chapter 3 : Configuration B Asics
Chapter 3 : Configuration B asics IN THIS CHAPTER This chapter explains the basic configuration options and includes the following sections: Configuring the Audio ... -
Page 22: Configuring The Camera
To configure the audio settings: 3. In the Audio Settings window, set the following properties of the selected audio input. USB devices can be used if the system supports external USB hardware. • Audio Input – Verify CHAT 150C is your audio input device. ... -
Page 23: Controlling The Camera
To configure the camera settings: 2. In the Camera Settings window, select the correct options from the Source. NOTE: COLLABORATE Pro supports P TZ cameras o nly. 2. Optional: S et the percentage (%) of Color, Contrast, B rightness, a nd Hue. You can leave the default settings of these parameters ... -
Page 24: Lan Settings
To configure the basic display settings: 1. Display Mode (Configured automatically) – Single Mode – Both videoconference p arties are displayed on a single screen. o ... - Page 25 2. In the System Settings window, set the following options and parameters Obtain Address from DHCP Server – Select the checkbox t o obtain an IP Address from a DHCP server. ...
-
Page 26: Wi-Fi Settings
Wi-Fi SETTINGS You can use “Collaborate Share” feature via external Wi-Fi network while your system is located in the corporation LAN network. To access the Wi-Fi settings: 1. Press OK on the remote control. The main menu appears. ... -
Page 27: Software Updates
Once Wi-Fi was set and connected ,verify that the “Collaborate Share” sender is located with the same Collaborate Pro 300 WiFi network. Load “Collaborate Share” sender application and select the Collaborate Pro 300 receiver from the list. ... - Page 28 To configure the updates settings: 1. Automatic Check For Updates – Choose this option for often update check. If an update is available, you will get a proper message on screen and you can choose to update or ...
-
Page 29: Chapter 4 : Video Collaboration
Chapter 4 : Video Collaboration IN THIS CHAPTER This chapter explains the video collaboration basics and options using COLLABORATE Pro, and includes the following sections: Starting Calls ... -
Page 30: Starting Lan Calls
STARTING LAN CALLS You can start a manual call to a network IP Address that you type in the New Call bar. To start a call using the manual dialer: 1. Select Conference > SIP / H.323 Call. The New Call bar appears. ... -
Page 31: Auto-Answering Calls
When the call is answered o n the far end, the system switches to the Call mode. AUTO-ANSWERING CALLS The auto-answer o ption is found in the Call Settings window (see Call Settings). When the auto-answer ... -
Page 32: Using Picture-In-Picture (Pip) Modes
UAL ODE Two screens: one showing the output of the local video camera, and a second screen showing the output of the remote video camera. When Secondary Display Used For Data Only is checked, the conference will be in a single mode. -
Page 33: Call State Indications
CALL STATE INDICATIONS Various call states are represented b y icons on the screen when videoconferencing is taking place. GUI Icon Indication The current call is encrypted ... -
Page 34: Using Call Tones
GUI Icon Indication Successful COLLABORATE Central registration Unsuccessful gatekeeper registration Successful gatekeeper registration Currently on Audio session. SIP registration. SIP Registration failed. USING CALL TONES ... -
Page 35: Data Sharing
DATA SHARING Data Sharing can be accessed via the menu or via Data on the remote control. Data Sources are selected inside the Presentation menu. Press Data a second time to stop the data sharing. - Page 36 W HARING IRELESS You can view and share your PC desktop or any open application via network using Collaborate Share feature. To define wireless settings, please follow the Presentation settings. To view and share wireless: 1.
- Page 37 Play Resume the paused shared Full view Switch the Collaborate share to full view Compact view Switch the Collaborate share to normal view ...
- Page 38 Sharing Data with Audio When sharing a PC, Collaborate Pro is mixing the audio channels into one channel so the data audio as well as unit microphone could be heard. During the sharing, the volume buttons control ...
-
Page 39: Chapter 5 : Quick Dialing Methods
Chapter 5 : Quick Dialing Methods IN THIS CHAPTER This chapter describes the different quick dialing methods that are available in COLLABORATE Pro, and includes the following sections: Using the Contacts ... - Page 40 CONTACTS SING THE VIA THE EW ALL AR You can select the Contacts from the New Call bar. To select the Contacts via the New Call bar: 1. Select SIP / H.323 Call or Spontania Meeting on the main menu. The New Call bar, appears.
-
Page 41: Using The Recent Calls
1. In the Contacts, select the contact you want to delete, select Delete and then press OK. The following message is displayed: "Are you sure?" 2. Select Yes to delete, or No to cancel. ... -
Page 42: Using Directory
press OK. The following message is displayed when clearing all: "Are you sure?" 3. Select Yes to delete, or No to cancel. USING Directory The Directory i s an external directory which can be used for calling. If you are registered in the Directory, you can view the Directory ... -
Page 43: Chapter 6 : Advanced Settings
Chapter 6 : Advanced Settings IN THIS CHAPTER This chapter covers the advanced s ettings for COLLABORATE Pro, and includes the following sections: Preference Settings ... -
Page 44: Preference Settings
PREFERENCE SETTINGS The preference s ettings define general system properties. To configure preference s ettings: 1. Select Settings>General> Preference. The preference S ettings window appears. ... -
Page 45: Security Settings
SECURITY SETTINGS To configure security s ettings: 1. Select Settings>General>Security. The Security S ettings window appears. ... -
Page 46: Call Settings
CALL SETTINGS In the Call Settings window you can define miscellaneous t echnical s ettings that affect how video collaboration c alls are performed by default. To configure call settings 1. -
Page 47: Presentation Settings
PRESENTATION SETTINGS To configure the presentation settings: 1. Select Settings>General> Presentation. The Presentation Settings window appears. 2. In the Presentation Settings window the following properties can be configured: ... -
Page 48: Admin Settings
ADMIN SETTINGS To configure Admin settings: 1. Select Settings>Advanced>Admin. The Admin S ettings window appears. ... -
Page 49: Directory Properties
, t he Directory S ettings provide a way to register with a Directory. NOTE: Directory s ettings are available o nly in COLLABORATE Pro systems that are not managed by a ClearOne COLLABORATE Central. To configure the Directory settings: ... -
Page 50: H.323 Protocol Settings
NOTE: For more information a bout ClearOne’s C OLLABORATE 5 0 | C O L L A B O R A T E P R O : U s e r ... - Page 51 Central server, its installation a nd configuration, refer to the COLLABORATE Central User Guide. To configure a connection t o a COLLABORATE Central server or to a gatekeeper s erver: 1. Select Settings>Advanced>H.323.
- Page 52 Tunneling (not available w hen working with a gatekeeper) - This selection o should be selected manually f or ClearOne P roprietary T unneling. T he default tunneling p ort is configured by the System Administrator (see NetPoint/ ...
-
Page 53: Sip Protocol Settings
NOTE: The COLLABORATE Central >Invite option is available o n the menu only when COLLABORATE Central mode is active. 2. Type in the participant COLLABORATE Central alias/IP number, and select Invite. The call is connected. - Page 54 2. In the SIP Settings window, set the following options and parameters: Use Proxy –...
-
Page 55: Firewall Settings
FIREWALL SETTINGS The Firewall Network Settings contain your system's identification configuration on the local network. NAT helps protect a LAN from exposure to unwanted t raffic by providing one single external address to remote users. NAT uses a system of local and external addresses to hide a LAN's users from other networks. -
Page 56: Spontania Settings
Tunneling Port – The default tunneling p ort is 443. Tunneling i s available only when working with COLLABORATE Central. Use HTTP Proxy – If your organization uses Proxy server, configure in the Proxy ... -
Page 57: Chapter 7 : Spontania
Chapter 7 : Spontania IN THIS CHAPTER Spontania is a unified group video conference and collaboration software. It provides a full range of real-time communication and collaboration. STARTING / JOINING A SPONTANIA MEETING ... -
Page 58: Spontania Settings
SPONTANIA SETTINGS During a Spontania meeting you can change the settings according to your permissions. 1. Audio Settings: ... - Page 59 2. Camera Settings: Source Choose one or more cameras to share in the meeting. : ...
- Page 60 4. Call Settings (Available only for moderator): Application: shows the general configuration of quality for the signal transmission in the participants’ a pplication sharing service. It is divided into 3 fields: ...
-
Page 61: Presentation
Wireless Layout: Choose wireless sharing layout: o Automatic: All senders will be displayed and arranged in the same size. o ... -
Page 62: Participants
Start Recording (Moderator only) – Start recording the current meeting. Hand Raise - Request permission to speak during the session. ... -
Page 63: End Meeting
Icon - appears on the left of each user’s name. It shows the quality of connection for that user. To activate any of the Spontania communication and collaboration services for a participant, ... -
Page 64: Descriptions Of The Telnet Api (Spontania)
DESCRIPTIONS OF THE TELNET API (SPONTANIA) The Telnet commands allow you to communicate with a remote computer that is using the Telnet protocol. You can run telnet without parameters in order to enter the telnet context, indicated by the Telnet prompt (telnet>). - Page 65 Start camera movement pan, Direction: camerastart camerastart u tilt, zoom in different direction u – up camerastart u p d – down l – left ...
-
Page 66: Chapter 8 : Web Access A Nd Management
Chapter 8 : Web A ccess and Management IN THIS CHAPTER This chapter explains how to access COLLABORATE Pro via a browser and use the Web- based GUI for viewing sessions/files, and configuring the unit from a remote location or via the ... -
Page 67: Downloading Collaborate Share
from your LAN. To access COLLABORATE Pro via a browser: 1. Open your browser. 2. In the browser’s address bar, type the direct IP Address of the COLLABORATE Pro unit. The COLLABORATE Pro Web login page appears. For example: http://172.100.100.25 ... -
Page 68: Importing/Exporting The License
2. Copy and paste the license key (a long text-based string) that you received from ClearOne i nto the License Key text box, and then click Apply. Once the license key is applied, you can view which features/functionalities a re ... -
Page 69: Sending Running Text In A Call
License Key – The generated license code supplied by ClearOne. SENDING RUNNING TEXT IN A CALL During a video collaboration c all, you can type and send a text message to the person(s) with ... -
Page 70: Performing System Upgrade
2. Click Browse a nd then select the ClearOne-provided f ile that contains the newer software version. 3. Click Upgrade. T he system upgrade is performed and then the system reboots. ... -
Page 71: Performing System Backup
PERFORMING SYSTEM BACKUP The Backup option, using the remote controller, takes a snapshot o f the current COLLABORATE Pro configuration. I t is recommended to take backup snapshots every time a configuration change is made. ... -
Page 72: Performing System Restore From Backup File
4. Using the remote control to enter letters and numbers, e nter the Backup name and click on the Create b utton to create the backup file of the configuration. 5. -
Page 73: Performing System Restore From Ftp
4. Select the Restore button. The Restore screen will appear ... - Page 74 3. Select the FTP Updates b utton. The FTP Updates s creen will appear ...
-
Page 75: Access To System Recovery With Usb Device
ACCESS TO SYSTEM RECOVERY WITH USB DEVICE In addition to web server, you can reach recovery mode with designated USB device. 1. Connect Recovery USB and a keyboard to the system. 2. Restart you system (Settings > Power > Restart). 3. -
Page 76: Chapter 9 : Telnet C Ommands
Chapter 9 : Telnet Commands The Telnet commands allow you to communicate with a remote computer that is using the Telnet protocol. You can run telnet without parameters in order to enter the telnet context, indicated by the Telnet prompt (telnet>). - Page 77 Key Description Arguments Example Stop camera movement Direction: camerastop camerastop s z spt – stop pan tilt sz – stop zoom ...
- Page 78 sharelaptop Sharelaptop start Share DataPoint when it is Parameter: connected to the unit. start stop sharewireless sharewireless start Start wireless sharing when Parameter: ...
- Page 79 remotecontrol remotecontrol 1 Commit a remote control 1 Status command 2 Data 3 Phone Book 4 Help 5 Near Far 6 Camera Control 7 Preset Recall 8 Preset Set ...
-
Page 80: Chapter 10: Specifications
Chapter 10: Specifications The following are the COLLABORATE Pro specifications. Video Specifications Transmission Speed SIP / H.323: 64 Kbps - 4Mbps Video Standards H.261, H.263, H.263+/++, H.264 ... - Page 81 AES is NIST validation Firewall traversal using NetPoint H.460 protocol and ClearOne Tunneling proprietary protocol NAT – Network Address Translation Supports restricted access to users via admin ...
- Page 82 Environmental 0 - 40°C temperature 15 - 80% humidity Universal Power Supply: o Input 100~240VAC@1.8A o Frequency 50/60 Hz PS Output / Appliance Input: 19VDC@6.32A Max ...
-
Page 83: Chapter 1 1: Network Requirements
Chapter 1 1: Network Requirements IN THIS CHAPTER In order to operate a videoconferencing via the network, some network settings must be set by your network manager. - Page 84 The Collaborate Pro can be registered to NetPoint firewall traversal server. The NetPoint server allows end points behind firewalls to communicate with other end points, both in WAN and behind other firewalls (NetPoint server address can be provided by ClearOne representative). ...
Need help?
Do you have a question about the COLLABORATE PRO 300 and is the answer not in the manual?
Questions and answers