Table of Contents
Advertisement
To the sales shop/installer:
After installing, please give
this manual to the user
without fail.
Cooker Hood
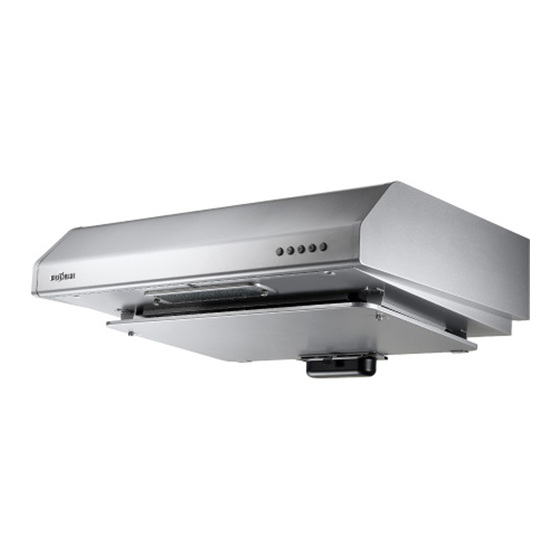
FS-700/890V
FS-890R
Installation Manual
TABLE OF CONTENTS
Safety Precautions ...........................2, 3
Preparation ...........................................4
Name of Parts ...............................................4
Dimensions ....................................................5
Installation ......................................6~12
Preparation and Check before Mounting .......6
Cooker Hood Mounting .................................9
Assembly .....................................................10
Operation Check ..........................................11
Thank you very much for your purchase of our cooker hood.
Before installing the cooker hood, please read this Manual thoroughly.
Keep this manual in a convenient place for future reference.
(Discharge Type)
(Circulation Type)
(Illustration: FS-890V/890R)
1F03 1281
*1F031281*
Advertisement
Chapters
Table of Contents

Subscribe to Our Youtube Channel
Related Manuals for Fujioh FS-700


Summary of Contents for Fujioh FS-700
- Page 1 Cooker Hood FS-700/890V (Discharge Type) FS-890R (Circulation Type) Installation Manual (Illustration: FS-890V/890R) TABLE OF CONTENTS Safety Precautions ......2, 3 Preparation ...........4 Name of Parts ..........4 Dimensions ............5 Installation ........6~12 Preparation and Check before Mounting ..6 Cooker Hood Mounting .........9 Assembly .............10 Operation Check ..........11...
- Page 2 Read the following safety instructions before mounting, and install the cooker hood properly and securely. These instructions are for correct installation of the product to prevent any risk of hazards or damages inflicting on you or others. The instructions are classified into 2 categories as "WARNING" and "CAUTION" depending on their emergency and severity.
- Page 3 CAUTION Mount the product securely after selecting a solid place. Mounting cautioned Dropping may result in injury. The air must not be discharged into a flue that is used for Improper exhausting fumes from appliances burning gas or other fuels discharge (not applicable to appliances that only discharge the air back into the room).
- Page 4 Preparation Name of Parts Body Power plug Push-button switch Lamp cover Slot filter Oil tray Rectifier panel Accessories Washer-head wood screw (∅5.1×45) (4) Hanger (2) FS-700/890V only Exhaust port (1) Soft tape (1)
-
Page 5: Dimensions
FS-890V Length : 1m or more FS-890R Cooker hood mounting hole detailed Body Mounting Hole:2-∅9 FS-700 Power plug Length : 1m or more Body Mounting Hole:2-∅9 Standard Mounting Height Mount the cooker hood at a place where more than 800mm between the surface of the gas range and the bottom of the cooker hood is cleared. -
Page 6: Installation
Installation Preparation and Check before Mounting CAUTION 1. Mount the cooker hood carefully and avoid contact with any metal parts (the lath in the wall or the like) of the building. 2. Never embed the body of the cooker hood in the wall. Otherwise, leakage current in the wall, if any, flows to the body of the cooker hood. - Page 7 Catch Removing slot filter (FS-700: 1 filter, FS-890V/890R: 2 filters) To remove the filters, for each filter, hold the knob, push the filter downwards, and then pull forwards. Catch...
- Page 8 Hanger Firmly fix the hangers by fastening truss head machine screws (M5×10). Fixing the exhauset port (FS-700/890V only) The fixing screws are supplied with attaching to the top plate. Soft tape Firmly fix the exhaust por t by fastening fixing screws (M4×8).
-
Page 9: Installation
Washer-head Wood screw Connection of duct and exhaust port Flexible tube duct (FS-700/890V only) Exhaust port Connect ∅150 flexible tube duct or the like with the exhaust port. Make the exhaust port secure and air-tight using non-flammable tape such as aluminium tape, etc. -
Page 10: Assembly
Assembly Attaching hood cover Hood cover Hook the rear of the hood cover on the catches, then raise its front. With holding the hood cover, fix it using 5 (M4×10) screws and 1 (M4×10 with washer) screw. Note Make sure that a M4×10 screw and washer are M4×10 used at the position shown in the diagram. -
Page 11: Operation Check
Operation Check Power supply Connect the power plug to the wall outlet (220V/230V/240V AC). Operation check 1) While operating the cooker hood by pushing the applicable control switches, check the air flow or presence of abnormal vibration or the like. 2) The lamp is turned ON and OFF when the LIGHT control switch is pushed, refer to the operation manual for details. - Page 13 抽油 煙 機 FS-700/890V (排煙式) FS-890R (循環式) 安裝 手 冊 (圖示 :FS-890V/890R ) 內容目錄 安全措施..........2, 3 準備............4 . 零件的名稱............4 . 尺寸..............5 安裝............6 . 安裝前的準備和檢查......... 6 . 安裝抽油煙機............ 9 .
- Page 14 請在安裝前仔細閱讀下述安全事項,正確安全地安裝抽油煙機。 下述安全事項是為了正確地安裝本產品,以免使您和其他人遭受危險或負傷。 . 安全事項根據緊急性和重要性的程度分為“警告”和“注意”2 類。 . 請予以重視並嚴格按照說明指示操作。 警 告 知會如果不遵守將有機會發生死亡或受重傷的危險。 注 意 知會如果不遵守將有機會發生受傷或人體損害的危險。 安 全 表示禁止。所述的行為(如果有)是絕對不能做的。 措 (左圖:禁止拆卸) 例 施 表示強制執行。所述的行為(如果有)是必須做的。 (左圖:把插頭從牆上的插座中拔出) 警 告 不要嘗試拆卸、修理、或改裝。 禁止拆卸 . 必須請技術人員操作,否則會有起火、觸電、或異常事故發生。 修理或改裝 不要連接到高於 220V/230V/240V 電壓的電源上。 禁止使用 . 會有導致起火、觸電的危險。 ...
- Page 15 注 意 選擇牢固的地方安全地安裝本產品。 安裝時注意 . 落下會造成傷害。 空氣不得排入用於排放燃氣或其他燃料設備廢氣的煙道。 禁止 (只將空氣排放到室內的家電除外) 不當排氣 安 爐具上支架的表面與抽油煙機最低部分的最小距離限度。 全 如果抽油煙機安裝在燃氣爐具上方時,這個距離應至少在 80 厘米以上。 安裝時注意 措 如果燃氣爐具的安裝說明指定一個更高的距離時,請酌情考慮。 施 在拔出插頭時,請拿著插頭拔,不要拉電線部分。 拿住插頭 拔出 . 電線容易破損,會有導致起火或觸電的危險。 抽油煙機 專用 長期不使用時務必把插頭從牆上的插座中拔出, 或切斷電源開關。 拔出插頭 . 可能因絕緣體的劣化而導致起火或觸電的危險。 絕對不要在浴室等潮濕的地方使用本產品。 (浴室請使用排氣扇。 ) 禁止使用...
- Page 16 準 備 零件的名稱 機體 電源插頭 按鍵開關 準 燈罩 備 過濾網 排風扇 儲油盤 整流板 附 件 華司頭木螺絲 ( ∅ 5.1×45) (4) 掛具(2) 僅限 FS-700/890V 排氣口. ( 1) 軟帶. ( 1)...
- Page 17 尺 寸 (單位 :.mm) 電源插頭 FS-890V 線長:1米以 FS-890R 抽油煙機安裝孔詳細尺寸 準 備 機體裝配孔:. 2-∅9 FS-700 電源插頭 線長:1米以 機體裝配孔:. 2-∅9 標準安裝高度 抽油煙機的安裝必須保持爐具的表面與抽油煙機的底部相距 800mm 以上。 (800mm 性能最佳。 ) (單位 :.mm)...
- Page 18 安 裝 安裝前的準備和檢查 注 意 .1.. 仔細安裝抽油煙機,避免與建築裡的任何金屬部分(牆壁裡的鋼筋等)接觸。 .2.. 絕對不要把抽油煙機的機體嵌入牆裡。否則如果牆裡有電流會傳到抽油煙機主機上。 .3.. 空氣不得排入用於排放燃氣或其他燃料設備廢氣的煙道。 安 . . (只將空氣排放到室內的家電除外) 裝 .4.. 爐具上支架的表面與抽油煙機最低部分的最小距離限度。 . . 如果抽油煙機安裝在燃氣爐具上方時,這個距離應至少在 80 厘米以上。 . . 如果燃氣爐具的安裝說明指定一個更高的距離,請酌情考慮。 .5.. 使用小於抽油煙機寬度的燃氣爐具。 .6.. 避免使用改變規格的抽油煙機,例如開關被改裝等。 .7.. 不要把抽油煙機安裝在潮濕的地方或其他潮濕的室內,以免引起觸電或破損。 .8.. 不要把抽油煙機安裝在環境溫度超過 40 度的地方,以免引起產品功能異常。 .9.. 為了保護雙手不受傷,安裝時請戴上手套。 . 1 0.. 如果電源線破損,須由製造商或其服務代理商或具有相同資格的人員更換,以避免 造成傷害。...
- Page 19 檢查附件配件 把主機和附件配件( ,排氣口等)從包裝箱中取出,檢查有無短缺。 螺絲 注 按照圖示把抽油煙機放在墊布等保護物上以避免 刮傷地板。 裝配螺絲 整流板 拆取整流板 鬆開安裝在整流板上的裝配螺絲,把整流板稍 安 稍向上抬起,讓裝配螺絲從裝配槽孔和機體扣 拴上取下。 裝 扣拴 取下過濾網 (FS-700:1 個過濾網 , FS-890V/890R:2 個過濾網 ) 在拆下過濾網時,各個過濾網都要一邊抓住旋鈕, 一邊往下推,然後拉出來。 扣拴 過濾網 拆取機罩 機罩 M4x10 把固定機罩的 5 個(M4x10)螺絲和 1 個 (M4x10 有墊圈)螺絲鬆開並取下。 M4x10 (有墊圈)...
- Page 20 固定掛具 把提供的固定螺絲安裝到頂板上。 擰 緊 構 架 頭 機 械 螺 絲 ( M5×10), 掛具 把掛具固定牢。 安 裝 固定排氣口(僅限 FS-700/890V) 把提供的固定螺絲安裝到頂板上。 擰緊構架頭機械螺絲 (M4×8),把排氣口固定牢。 軟帶 之後,把提供的軟帶裝貼到排氣口周圍。 注 在安裝排氣口時,請注意排氣口擋板的開口方向。如果排氣口安裝不正確可能 導致排氣功能降低、產生異常噪音等不良現象。 正 確 錯 誤...
- Page 21 請參照第 5 頁“尺寸”, 把華司頭木螺絲 ( Φ5.1×45) 插入安裝牆面上的掛具的左右兩個鍵孔中。請在牆面和 螺絲頭之間預留 5mm 的空間用來掛抽油煙機。 注 鍵孔 華司頭木螺絲 安裝工序需要因應不同環境配合適當零配件安裝 (請參照第 4 頁) ,需要時可另行加裝其他零配件。 安 裝配抽油煙機 裝 華司頭木螺絲 1).把配抽油煙機的鍵孔掛到華司頭木螺絲上, 並擰緊螺絲。 2). 把 2 個華司頭木螺絲插入抽油煙機的後部並 擰牢固。 華司頭木螺絲 連接導管和排氣口 軟管 (僅限 FS-700/890V) 排氣口 連接 Φ150 軟管或排氣口的同類導管。確保 排氣口的安全,用鋁箔膠帶等(非提供品) 不然性膠帶把導管的接口密封起來。 注 不然性膠帶(鋁箔膠帶等) 排氣口越長,通風性能越低。...
- Page 22 組 裝 機罩 安裝機罩 把機罩的後部掛到扣拴上,然後抬起前方。 一邊拿住機罩,一邊用 5 個(M4x10)螺絲 和 1 個(M4x10 有墊圈)螺絲固緊。 注 請參照示意圖確認 M4x10 螺絲和墊圈的使用位置。 M4x10 M4x10 (有墊圈) 安 安裝過濾網 裝 把過濾網的後部放到扣拴上,往後上方推, 然後向前滑動直到過濾網固定到位。 扣拴 安裝整流板 用兩手抓牢整流板,把整流板的後部放到 扣拴的前方和有裝配導孔的線軌中。然後 向後滑動整流板銜接安裝導孔並與扣拴咬 裝配導孔 合。擰緊裝配螺絲,安裝好整流板。 注 必須保證整流板的安全安裝,如果有鬆動可能 會發生滑落事故。 扣拴 整流板 儲油盤 安裝儲油盤 抓住把手把儲油盤放入抽油煙機的滑道, 然後往裡面推到底。...
- Page 23 運行檢查 電源 把電源插頭插入牆上的插座(220V/230V/240V 交流電) 。 運行檢查 1) .打開控制開關讓抽油煙機開始運行,檢查空氣流通狀況是否存在異常振動等異常現象。 安 裝 2) . 按照明控制鍵,檢查燈是否正常開關。 本手冊如有錯漏或更改,恕不另行通知。 一切翻譯以英文版本為準。...
-
Page 25: Table Of Contents
Cooker Hood FS-700/890V (Discharge Type) FS-890R (Circulation Type) Operation Manual (Illustration: FS-890V/890R) TABLE OF CONTENTS Safety Precautions ......2, 3 Cautions on Use ........4 Preparation ..........5 Name of Parts ..........5 Prior to Use ............ 5 Switches ............5 Care and Maintenance .....6~10 Caution for Maintenance ........ -
Page 26: Safety Precautions
Read the following safety instructions before operating, and use the cooker hood properly and securely. These instructions are for correct operation of the product to prevent any risk of hazards or damages inflicting on you or others. The instructions are classified into 2 categories as "WARNING" and "CAUTION" depending on their emergency and severity. - Page 27 CAUTION Mount the product securely after selecting a solid place. Mounting cautioned Dropping may result in injury. When disconnecting the power plug, hold the plug itself. Disconnect Don’t pull the cord anyway. by holding The cord may be damaged, and fire or electric shock may the plug result in.
-
Page 28: Cautions On Use
Cautions on Use Operate the cooker hood without fail when During operation, pay attention to sufficient air using cooking wares. supply. Otherwise, it may be cause of the cooker hood Provide adequate air intake slots on the wall damage or failure by increased temperature. -
Page 29: Preparation
Preparation Name of Parts Body Power plug Push-button switch Lamp cover Slot filter Oil tray (Illustration: FS-890V/890R) Rectifier panel Prior to Use Check that the oil tray is set in the right position correctly. * If the oil tray is not set correctly, oil won't be collected properly. For setting the oil tray, see page 9. Switches Button ..Push to stop FAN Button ..For light cooking... -
Page 30: Care And Maintenance
Care and Maintenance Clean the cooker hood as many times as possible (especially, clean the slot filter once every month) as it will become very dirty. For a family size of 4 to 5 people and cooking twice a day, clean the filter once every two weeks. -
Page 31: Detaching Cleaning Parts
Slot Filter (FS-700: 1 filter, FS-890V/890R: 2 filters) To remove the filters, for each filter, hold the knob, push the filter backwards, and then pull downwards. -
Page 32: Cleaning
Note When cleaning the rectifier panel, perform it on a flat surface in order not to deform it. As for cleaning of the fan, please consult Fujioh/Agent. -
Page 33: Attaching Cleaned Parts
Attaching Cleaned Parts Slot Filter Place the rear of the slot filter on the catch, then push it back and upward to install firmly. Catch Rectifier Panel Holding the rectifier panel with both hands, place the rear of the panel in front of the catches and in line with the mounting Mounting guide hole guide holes. -
Page 34: Replacing The Light Bulb
Replacing the Light Bulb Note Before replacing the lamp, be sure to disconnect the power plug from the wall receptacle, or switch off the breaker. A 40 Watt mini-light bulb has been mounted to this cooker hood. Prior to replacing the light bulb, purchase a bulb (in the base diameter 14mm), rated 220V/230V/240V 40 Watt or below. -
Page 35: Other Information
Specifications Rated Voltage Frequency Power Power Consumption Air Flow Noise Revolution (Hz) Consumption (W) with Lamp (W) (dB) 220V FS-700V 230V 240V 220V FS-890V 230V 240V 220V FS-890R 230V 240V *Power consumption, air-flow, and noise level are measured according to JIS C9603. LIGHT Me Lo Circuit Diagram... -
Page 36: Repair And Warranty
Repair and Warranty When requesting repair: • If any abnormality occurs while the cooker hood is in operation, switch off the cooker hood to run, check the following points, disconnect the power plug from the receptacle and consult the shop from which you have purchased your cooker hood. (1) Whether the fuse in the circuit breaker has been burnt out? (2) Whether the power plug is not in proper contact with the receptacle? When consulting the shop, inform the shop the type/model of cooker hood requiring repair and... - Page 37 抽油煙機 FS-700/890V (排煙式) FS-890R (循環式) 操作手冊 (圖示 :FS-890V/890R ) 內容目錄 安全措施 ..........2, 3 使用注意事項 ..........4 準備 ............5 零件的名稱............5 使用前..............5 開關..............5 保養和維護........... 6~10 維修注意事項............. 6 拆卸清潔配件............. 7 清潔..............8 安裝清潔後的配件.
- Page 38 請在安裝前仔細閱讀下述安全事項,正確安全地安裝抽油煙機。 .下述安全事項是為了正確地安裝本產品,以免使您和其他人遭受危險或負傷。 . 安全事項根據緊急性和重要性的程度分為“警告”和“注意”2 類。 . 請予以重視並嚴格按照說明指示操作。 警 告 知會如果不遵守將有機會發生死亡或受重傷的危險 注 意 知會如果不遵守將有機會發生受傷或人體損害的危險。 安 全 表示禁止。所述的行為(如果有)是絕對不能做的。 . (左圖:禁止拆卸) 措 例 施 . 表示強制執行。所述的行為(如果有)是必須做的。 . (左圖:把插頭從牆上的插座中拔出) 警 告 少於4個 本抽油煙機用於安裝在 1 個不超過有 4 個電熱元件或燃燒器的爐盤上方, 燃燒器 總電力在 7.0kW 以下。 (7.0kW)...
- Page 39 注 意 選擇牢固的地方安全地安裝本產品。 安裝時注意 . 落下會造成傷害。 在拔出插頭時,請拿著插頭拔,不要拉電線部分。 拿住插頭 拔出 . 電線容易破損,會有導致起火或觸電的危險。 安 全 措 長期不使用時務必把插頭從牆上的插座中拔出, 施 或切斷電源開關。 拔出插頭 . 可能因絕緣體的劣化而導致起火或觸電的危險。 絕對不要在浴室等潮濕的地方使用本產品。 (浴室請使用排氣扇。 ) 禁止使用 . 會有導致起火或觸電的危險。 安全地安裝排風扇或其他配件。 裝配時注意 . 會有導致起火或觸電的危險。 ...
-
Page 40: 使用注意事項
使用注意事項 使用炊具時務必打開抽油煙機。 在運行時,注意空氣流通。 . 否則會因昇溫過高導致抽油煙機損壞或不能使用。 . 在抽油煙機對面的牆上提供讓足夠空氣流通的進 氣口,或是把房間門敞開一些。否則會出現通風 不夠,或異常噪音 / 振動的現象 使 用 注 意 事 項 不要在沒有使用炊具的情況下打開燃氣爐灶。 保持燃氣熱水器距離抽油煙機 50 厘米以上。 抽油煙機的機體會被烤熱,引起故障。 燃氣熱水器周圍溫度會變得很高,保持 50 厘米以 上的距離。絕對不要把抽油煙機安裝在燃氣熱水 器上方。否則會因高溫而造成破損或不能使用。 距離保持50厘米以上 與電磁烹調爐一起使用時,可能會因側風的影響 不要在整流板拆下的狀態下使用抽油煙機。 而導致抽油煙性能減弱。同時,如果在低溫環境... -
Page 41: 零件的名稱
準 備 零件的名稱 機體 電源插頭 按鍵開關 燈罩 準 過濾網 備 排風扇 儲油盤 (圖示:FS-890V/890R) 整流板 使用前 請檢查儲油盤安裝的位置是否正確。 * 如果儲油盤的安裝不正確,將無法正常起作用。儲油盤的安裝請參考第 9 頁。 開 關 . 按鍵 ..停止排氣扇 . 按鍵 ..弱檔(蒸汽等) . 按鍵 ..中檔(輕炒蔬菜等) . -
Page 42: 保養和維護
保養和維護 抽油煙機容易髒,請盡量經常清潔抽油煙機(特別是過濾網每月一次) 。 如果是 4 到 5 個人的家庭,每天做飯 2 次,則過濾網需要兩個星期清潔一次。 如果抽油煙機長期不清潔,附著的油垢會硬化很難擦掉。 維修注意事項 抽油煙機 保 在清潔抽油煙機之前,請把電源插頭從插座中拔出, 專用 或切斷電源開關。 養 和 維 電源開關 護 為了安全,在清潔過濾網等時始終戴上橡膠手套。 特別注意不要讓電機、開關、插頭等電器部分沾水。 不要使用任何種類的液體清潔電器部分,以免引起 故障。 不要使用溶劑,如稀釋劑,揮發油,拋光粉等清潔 噴塗表面、面板等部分,以免使這些部分失去光澤 或留下擦痕。 • 不要用硬刷子等清潔用具,以免受到損傷。... -
Page 43: 拆卸清潔配件
拆卸清潔配件 儲油盤 儲油盤 抓住儲油油的把手向後滑。 注 儲油盤可能已經充滿油,在取下時請注意。 保 養 和 整流板 維 鬆開安裝整流板的裝配螺絲,稍稍向前移 裝配螺絲 動整流板,讓裝配螺絲從裝配導孔和機體 護 扣拴中脫出。 注 為了不讓整流板滑落,請用雙手抓牢。 如果滑落可能會造成受傷、碰損或彎曲 變形等危險和事故。 扣拴 整流板 過濾網(FS-700:1個過濾網 , FS-890V/890R:2個過濾網) 在拆下過濾網時,各個過濾網都要一邊 抓住旋鈕,一邊往後推,然後向下拉出。 注 在取下過濾網時抓牢,以免滑落引起受傷。 過濾網 扣拴... - Page 44 清 潔 過濾網和儲油盤 把過濾網和儲油盤放在溫水中性洗滌液中浸泡 30-40 分鐘後,用牙刷等清洗掉污物。 中性洗滌劑 注 保 .FS-890V/890R 機型的過濾網可以分解成 2 部分, 養 更容易清洗。為了分解過濾網,按逆時針方向轉動 旋鈕,拉動旋鈕側打開過濾網罩。 和 *.在重新安裝時請務必保證先把過濾網組裝牢固。 維 護 .因使用頻度的不同,在較短的使用時間內儲油量可 能很少(這不是產品的缺陷或故障) 。 過濾網分解 (僅限 FS-890V/890R) 外殼和整流器 用在中性洗滌劑中浸泡過並擰乾的布擦拭抽油煙機的外殼 和整流板,之後再用乾布徹底擦乾水分。 中性洗滌劑 注 在清潔時,請把整流板放在平坦的地方,以免變形。 排風扇 清潔排風扇請向 Fujioh 或者代理商諮詢。...
-
Page 45: 安裝清潔後的配件
安裝清潔後的配件 過濾網 把過濾網的後部放到扣拴上,往後上方推, 固定到位。 扣拴 保 養 和 維 護 整流板 用兩手抓牢整流板,把整流板的後部放 到扣拴的前方和有安裝導孔的線軌中。 然後向後滑動整流板銜接安裝導孔並與 裝配導孔 扣拴咬合。 擰緊裝配螺絲,安裝好整流板。 注 必須保證整流板的安全安裝,如果有鬆動 整流板 扣拴 可能會發生滑落事故。 儲油盤 儲油盤 抓住把手把儲油盤放入抽油煙機的滑道, 然後往裡面推到底。 注 如果儲油盤安裝得不正確,可能會導致儲油流出 造成損傷等事故。 *. 清潔作業結束後,務必把電源還原;把電源插頭插到牆上的插座裡,或打開電源開關。... -
Page 46: 更換燈泡
更換燈泡 更換燈泡之前,必須把電源插頭從牆上的插座裡拔下來,或者切斷電源開關。 注 本抽油煙機使用的是 40 瓦的迷你燈泡。 在更換燈泡之前,需要事先購買一隻額定為 220V/230V/240V 的 40 瓦以下(含 40 瓦)的燈泡 (基座直徑 14 毫米) 。 注 更換時,務必使用與電源電壓相同的燈泡。 保 養 鬆 緊 鬆 緊 和 維 打開燈罩 護 鬆開 2 個固定螺絲,取下燈罩。 燈罩 安裝 更換燈泡 逆時針旋轉燈泡取下,更換一個新的燈泡。 拆卸 注 為了避免燒傷,請等燈泡溫度降低後再更換。 重新裝上燈罩 重新裝上燈罩,並用螺絲固定好。... -
Page 47: 線路圖
規 格 風 速 噪 音 額定電壓 (V) 迴 轉 頻 率 (Hz) 功 耗 (W) 點燈時的耗電功率 (W) (dB) 220V FS-700V 230V 240V 220V 其 FS-890V 他 230V 信 息 240V 220V FS-890R 230V 240V * 功耗、風速和噪音為依據 JIS.C9603 的測定值。 輕 高 中 低 關 線路圖 按鍵開關 連接器 燈. -
Page 48: 維修和保修
維修和保修 需要維修時: . 當 抽油煙機運行時出現任何異常,請關掉開關,檢查以下各點,從插座上拔掉電源插頭, .與您購買抽油煙機的銷售店聯繫查詢。 (1) . . 斷路器中的保險絲是否已被燒毀? (2) . 電源插頭是否正確地插在插座上? 在與銷售店查詢時,請知會需要修理的抽油煙機類型 / 型號以及購買的日期。 其 . 最短維修配件提供期限為抽油煙機停止生產後 5 年。 他 信 息 維修配件是指維持抽油煙機性能的配件。 但是,具有相同功能的維修配件或更換配件將繼續提供 4 年。 維修後功能可以得以維持,竭誠為您提供維修服務。 . . 抽油煙機中使用的零部件可能會因改善性能而變更,恕不另行通知。 . . 本手冊如有錯漏或更改,恕不另行通知。 . . 一切翻譯以英文版本為準。 製造商:...
Need help?
Do you have a question about the FS-700 and is the answer not in the manual?
Questions and answers