
Related Manuals for Kilotech Abacus AB30


Summary of Contents for Kilotech Abacus AB30
- Page 1 Owner’s Manual Contents subject to change without notice Version 01.02 01/2016 Ce manuel est disponible en français à www.kilotech.com...
-
Page 2: Table Of Contents
TABLE OF CONTENTS TABLE OF CONTENTS ........................2 Introduction ..........................3 General Precautions ........................4 Specifications ..........................5 Unpacking and setup ......................... 6 Contents ............................ 6 Communication ports ........................ 7 Control box (optional) ........................ 7 Signal Output port ............................. 7 Display and keypad ........................ -
Page 3: Introduction
Introduction Thank you for choosing a Kilotech Scale. We appreciate your business and hope that you will enjoy using your scale. Should you require support, please contact your local dealer from whom you have purchased. Happy Weighing! -
Page 4: General Precautions
Avoid placing the scale near a It could cause a fluctuation to the indicator reading. heater. Always make sure to use a Kilotech approved adapter. Do not drop the scale or apply a sudden shock. Do not drag the scale. -
Page 5: Specifications
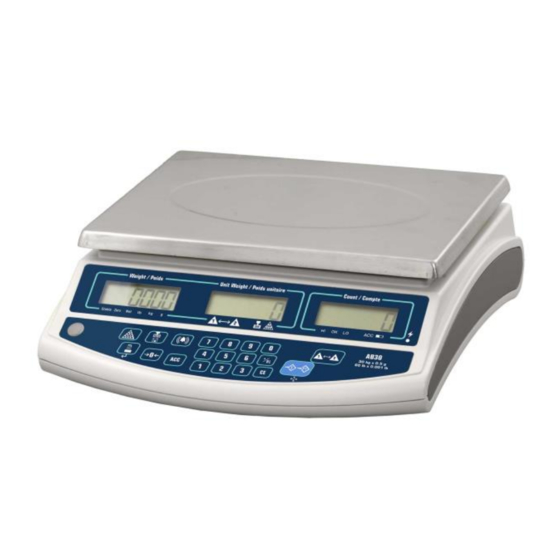
Specifications Product Number 851212 Product Name Abacus AB30 Capacity 30 kg/ 60 lb Graduation 0.5 g / 0.001 lb Weighing Modes g/kg, lb Display 19 mm high, 6 digits, 7 segment LCD. Back Light LED Backlight: colors change in check-weighing and... -
Page 6: Unpacking And Setup
Unpacking and setup Remove the scale from the box and place it on a firm, level surface. Avoid locations with rapid temperature changes, excessive dust, moisture, air currents, vibrations, electromagnetic fields, heat or direct sunlight. Adjust the leveling feet until the bubble is centered in the circle of the level indicator (located on the front panel). -
Page 7: Communication Ports
Communication ports The AB-30 has connectors that are located at the left side of the bottom housing. Bidirectional RS-232, which can be connected to PC, printer, or control box 9-pins connector for a remote platform. Location of the connectors Remote platform RS232 or Control box* ... -
Page 8: Display And Keypad
Display and keypad Faceplate Symbols on Display Stable annunciator Zero annunciator Net weight annunciator Weight unit annunciator Weight unit annunciator Weight unit annunciator Local /remote platform annunciator Unit weight error annunciator Sample weight error annunciator ... -
Page 9: Keypad
Keypad Numeric keys Decimal point key Set the backlight on or off* Clear out the displayed numeric readings Exit from setting mode Input the sampling size Short press: Confirm known unit weight of ítem to be counted Long press: Save unit weight in memory Set weight check range Recall: Total weight, count &... -
Page 10: Operations
Operations Turn on/off Make sure the scale platter is empty. The switch is located on the right side of the scale. I = on O = off. The scale will start to count down from nine to zero and will display the max capacity of the scale in the WEIGHT display. -
Page 11: Sampling
Sampling Unit Weight is not known In the example below a sample of 200.00 items at 1 gram each is used Unit Weight Weight Display Count Display Keys used Comment Display Place know amount of . items on the platter Press Input the sample quantity .... -
Page 12: Store/Program Unit Weight In Memory
Store/Program Unit Weight in Memory Unit Weight Count Weight Display Keys used Comment Display Display Provide unit weight . (See sampling) Press Long press Unit . Weight/Save Press Enter an address cell . Example: 200 To confirm press .... -
Page 13: Recall Unit Weight From Memory
Recall Unit Weight from Memory Unit Weight Count Weight Display Keys used Comment/Description Display Display . Scale is at 0 Press Enter an address cell . Example: 200 To confirm press twice . Enter an address cell Example: 200 .... -
Page 14: Tare
TARE Platter tare Unit Weight Count Weight Display Keys used Comment Display Display Place the receptacle (box, . bowl etc…) on the scale Press Press Tare to deduct the . weight of the item on the platter .... -
Page 15: Weight/Quantity Accumulation
. Scale ready to use Remove all items from the Press platter. Press the TARE key to clear the tare Weight/Quantity Accumulation Unit Weight Count Weight Display Keys used Comment/Description Display Display Place items to be weighed/ . ... - Page 16 Unit Weight Count Weight Display Keys used Comment/Description Display Display Weight display = total weight Unit weight = . number of accumulations Weight screen = Total amount of pieces Repeat until all items have been accumulated Press Press TOTAL/PRINT/ENTER key to enter into accumulation status mode ....
-
Page 17: Program High/Low Range
Program High/Low Range The Hi – Lo range can be set for check counting or weighting. Depending on the settings programmed: The scale can warn the operator by one or more features: Annunciator in count screen Changing color display ... - Page 18 To disable the High/Low feature: set the High and Low limit to zero When the backlight type is set to be “Auto” (Please refer to Page 18) The scale will use three colors for check-weight/count. Red: The weight/ count on the pan is greater than the High limit. Green: The weight/count on the pan is within the High-Low limits Yellow : The weight/count on the pan is smaller than the Low limit.
-
Page 19: Service Mode
Service mode To enter the service or programming function mode press 4x the key during count down (selft check) The menu has the following chapters: Or press to return to normal mode Auto off Unit Weight Count Weight Display Keys used Comment Display Display... -
Page 20: Backlight
Backlight Unit Weight Count Weight Display Keys used Comment Display Display To see options avalible Press Backlight type (0=auto, 1= manual backlight ) To select and go to the (Default setting: 0) next step press Unit Weight Recalculation Unit Weight Count Weight Display... -
Page 21: Baud Rate Setting
(for a label printer) 5=Series transmit Baud Rate Setting Unit Weight Count Weight Display Keys used Comment Display Display To see options avalible Press baud rate (0=1200, 1= 2400, 2=4800, . To select and go to the 3=9600 ) next step press (Default setting: 3) Label Format... -
Page 22: Check Alarm Style
Check Alarm Style Unit Weight Count Weight Display Keys used Comment Display Display To see options avalible Press Alarm style (0= Buzzer activated when readout is within limits 1= Buzzer activated when To select and go to the readout is outside limits) next step press (Default setting: 0) -
Page 23: Zero Display Range
Zero Display Range Unit Weight Count Weight Display Keys used Comment Display Display To see options avalible zero display range Press (0,1,2,3,4) (Default setting: 3). Larger number = wider range. To select and go to the next step press Stable Filter Unit Weight Count... -
Page 24: Zero Return Range
Zero Return Range Unit Weight Count Weight Display Keys used Comment Display Display To see options avalible Zero return Press (0,1,2,3,4,5) (Default setting: 0). Larger number = greater zero . To select and go to the point correction. next step press RS232 Output Format:... -
Page 25: Variables
Variables Variable Name Specifications Size Accumulated times 2 byte Net weight 7 byte Net weight(no dot) 6 byte Tare weight 7 byte Tare weight (no dot) 6 byte Gross weight 7 byte Gross weight (no dot) 6 byte Total net weight 7 byte Total net weight(no dot) 6 byte... -
Page 26: Error Codes
Error codes During the initial power-on testing it is possible the scale may show an error message. The meaning of the error messages are described below. Error Possible causes Remedy codes EPROM data loss. Recalibrate the scale. Remote platform is not connected to the scale when Connect the remote LOCAL/REMOTE key to...
Need help?
Do you have a question about the Abacus AB30 and is the answer not in the manual?
Questions and answers