Table of Contents
Advertisement
Quick Links
Advertisement
Table of Contents

Related Manuals for Kilotech KWD 750SS


Summary of Contents for Kilotech KWD 750SS
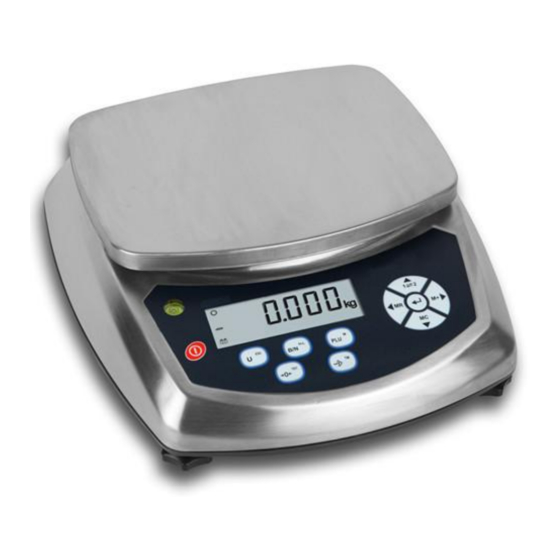
- Page 1 Operation Manual Page 1 KWD 750SS Weighing scale Operation manual...
-
Page 2: Table Of Contents
Operation Manual Page 2 INDEX 1. S a f e t y w a r n i n g s … … … … … … … … … … … … … 3 2. F e a t u r e s … … … … … … … … … … … … … … … … … . . 4 3. - Page 3 9.7 AD conversor verification function………26 9.8 RS-232C data output configuration…..…27 9.9 Print Format………………………………..27 Manuel en Français et en Espagnol disponible sur www.kilotech.com 1. Safety warnings Disconnect from supply before installation or disassembly. Although scale will withstand regular water spills, never submerge the scale and never wash the scale with high pressure device.
-
Page 4: Features
Operation Manual Page 4 The scale should only be used under proper environmental conditions and supervision as indicated in this operation manual. Do not use this scale in places where there are unstable conditions or danger of explosion. ... -
Page 5: Options
Operation Manual Page 5 IP-65 equivalent protection against liquids and dust. 20 numeric tare memory 20 limit weights for +/- control memory. 50 products memory for piece counting. Checking function for Hi/OK/Low with optical and acoustic indication ... - Page 6 Operation Manual Page 6 Change unit key. Press it to change unit. In menu mode, press it to escape from menu and return to normal mode. Gross/Net key. When using tare mode, press it to show total weight, press it again and it will show net weight. To select “weight limit”...
-
Page 7: Connections
Operation Manual Page 7 MR and left arrow key. Press it to show accumulated total weight. In menu mode, confirm the selected adjust value, and return to previous menu. M+ and right arrow key. Press it to save the value shown on the display. -
Page 8: Basic Function Operation
Operation Manual Page 8 AC/DC: Supply connector. RS-232C: Double RS-232C data output RS-232C and tare (optional) External platform connector. 7. Basic function operation 7.1 Zero adjust When scale platter is empty and it does not show zero value, press Zero key to correct it. -
Page 9: Tare Memory
Operation Manual Page 9 Tips: If there is instable or temperature differences, display may not show 0 value. In this case, press “Zero” key to correct it. Max tare range: Tare value cannot exceed the maximum scale capacity. The real scale capacity is the sum of maximum capacity minus the tare done. Real cap. -
Page 10: Auto Tare
Operation Manual Page 10 “RIGHT ARROW”, to modify it use “UP ARROW” “DOWN digit, press ARROW”. To modify any digit on the left, press “LEFT ARROW”. Follow the same procedure explained before. “ENTER” To finish, press key and tare will be saved. If we wish to keep “ENTER”... - Page 11 Operation Manual Page 11 This function allows tare function with recipient or box to be done “TARE” automatically, without pressing button. Display detects the first weight (recipient or box), then operates tare function (sets to 0), and gets ready to weight the product in the box or recipient. Afterwards, it sets to 0 and you can start again the same procedure repeatedly without pressing any button.
-
Page 12: Current Weighting
Operation Manual Page 12 To weight again, repeat the same operation. You can use it indefinitely without pressing any button. 7.4 Current weighting “ON/OFF” Switch on the scale pressing button. Display will be on in a few seconds, afterwards it will show zero value. If there is any object on the platter, display will show the object weight, except in the case its weight is very low, then scale will display zero. -
Page 13: Piece Counting Function
Operation Manual Page 13 Repeat procedure for every object to add to the total. “LEFT ARROW” To know accumulated sum value, press and display will show total accumulated value. “DOWN ARROW” To erase memory, press and accumulated value will be deleted. - Page 14 Operation Manual Page 14 If pieces are small, to increase the precision of counting it is recommended “UP ARROW”, then to place a number larger than 10. To do it, press increase the sampling value to 20, 30, 50 or 100. To decrease, press “DOWN ARROW”.
-
Page 15: Piece Counting Preset
Operation Manual Page 15 7.7 Piece Counting Preset (Saving a piece average weight) When display on piece counting mode (“PCS” on) and the stable symbol on, press “M”. “RIGHT ARROW” once, and display will show “CLUPro”. Press The two digits on the right are the 100 memory position available (from 00 to 99). -
Page 16: Weight Limit Function
Operation Manual Page 16 “UP ARROW” “DOWN ARROW” to increase and decrease the “LEFT ARROW” “RIGHT ARROW” flashing digit, use to move the digit on the right or the left. When setting desired memory position, press “ENTER” to confirm it. Scale from now will be programmed with the set piece counting memory. - Page 17 Operation Manual Page 17 “UP ARROW” To access to desired memory position, use “DOWN ARROW” to increase and decrease position number and set the desired one. To confirm, press “ENTER”. “UP ARROW” “DOWN ARROW” Select nominal value, use “LEFT increase and decrease position to find the desired one. Use ARROW”...
- Page 18 Operation Manual Page 18 the same as the superior one, but in some cases could be different, then it should be introduced. Hi/Lo mode selection Hi/Lo mode should be programmed for limit function. Scale indicates by a “BEEP” if weight is in or out the set limits. It can be programmed in two different ways: Advise when weight is within the set limits.
- Page 19 Operation Manual Page 19 One-time “BEEP” One continuous “BEEEEEEP”. “ENTER” “U”. Press to confirm introduced data, escape using Scale returns to normal use mode Limit function activation(+/-) “G/N” still it shows “Hi-Lo X”, where “X” indicates if 1) Press and hold function is enabled or unabled.
- Page 20 Operation Manual Page 20 escape. 4) Place the object on the platter, and scale will show one part of the bar on, depending on its weighting value and weight limits saved, it will show (+) or (-) symbols. In case weighting is in the limits, it will show a central value in the bar on.
-
Page 21: Advanced Functions
Operation Manual Page 21 Place the object you desire to weight on the platter indicated on the pictograph at the right bottom part of the display. Scale will show the weight in that platform. To see again the weight on the scale’s platter, press again “UP ARROW”. -
Page 22: Auto Hold Mode Function
Operation Manual Page 22 No - Backlight always on. Off - Backlight always off. Auto - Auto backlight, it turns off after scale stable symbol turns on for 5 seconds. “ENTER” “U”. Press to confirm function. To escape, press Auto Hold Mode Function To access function menu, press “PLU”, and display will show “PLU XX”. -
Page 23: Auto Tare
Operation Manual Page 23 To access function menu, press “PLU”, display will show “PLU XX”. “RIGHT ARROW” still display shows “AUt-0”. Confirm pressing Press “ENTER”. Display will show one digit at the right, according to the following table: No automatic power off Automatic power off after 1 minutes without use. -
Page 24: Stable Filter
Operation Manual Page 24 “ENTER” and escape pressing “U”. Confirm pressing Auto Tare Function When display is showing zero and without any object on the platter, place the empty recipient or box on the platter. Scale will show zero and automatically will operate Tare function, showing “0”... -
Page 25: Sound Activation
Operation Manual Page 25 To escape, press “U”. 9.6 Sound activation Keypad produces a sound when pressing keys. This sound can be unabled “M” “RIGHT ARROW” still if you desire to. To unable, press and then press display shows “bEEP” on display. “ENTER”... -
Page 26: Print Format
Operation Manual Page 26 001 – 1200 bauds 002 – 2400 bauds 004 – 4800 bauds 009 – 9600 bauds 019 – 19200 bauds 038 – 38400 bauds 057 – 56800 bauds 058 – 115000 bauds “UP ARROW” “DOWN ARROW”, select the desired option, and confirm pressing “ENTER”. - Page 27 Operation Manual Page 27 Format 3 Format 4...
- Page 28 Operation Manual Page 28 Format 5 To select the desired format, with the scale in weighting mode, press “PLU”. It will show “PLUPro”. Press “M+” still display indicates “PrnFrn”. “ENTER” Press to modify print format, from 1 to 5, in accordance with the “UP”...
- Page 29 Operation Manual Page 29 empty lines after printing. “UP” “DOWN” and arrows “RIGHT” or Select the desired value using “LEFT” to modify the next digit. Confirm the final value with “ENTER”. Display will show “Lan” message followed by a number, which is the print language.
- Page 30 Operation Manual Page 30 “DOWN ARROW” set it to zero, press in weighting mode. Important: Data output to print is compatible with LP-3. If you use another type of printer, we cannot guarantee its appropriate working.
Need help?
Do you have a question about the KWD 750SS and is the answer not in the manual?
Questions and answers