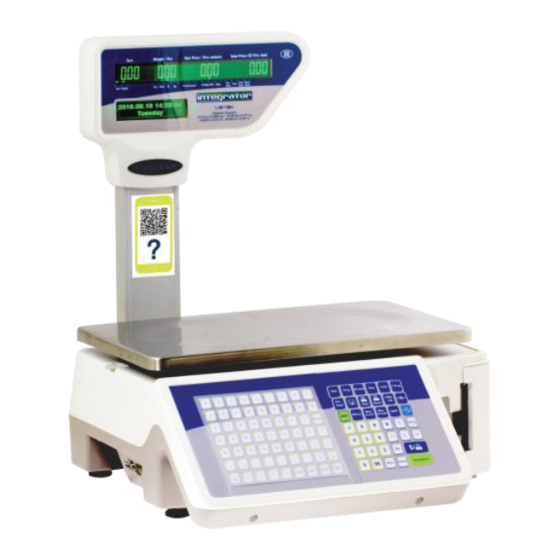
Kilotech integrator LE.3k Service Manual
Hide thumbs
Also See for integrator LE.3k:
- Operating (8 pages) ,
- Manual (7 pages) ,
- Wi-fi setup (3 pages)
Advertisement
Table of Contents
- 1 Table of Contents
- 2 Backup All Data to USB Flash Disk
- 3 Factory Restore
- 4 Firmware Update
- 5 Weight Calibration
- 6 Get into Privilege Mode
- 7 Calibration Parameter
- 8 Menu Structure
- 9 Change Price of the PLU on the Scale
- 10 Label Formats
- 11 Print Adjust
- 12 Printer Sensor Calibration (E7.11)
- 13 Spec Setting
- 14 Admin/ User Spec
- 15 Display Character Reference
- 16 Error Code
- Download this manual
Advertisement
Table of Contents

Related Manuals for Kilotech integrator LE.3k


Summary of Contents for Kilotech integrator LE.3k
- Page 1 LE.3k Service Manual Contents subject to change without notice LE.3k SERVICE MANUAL E 08032017...
-
Page 2: Table Of Contents
Table of contents Table of contents ........................2 Backup all data to USB flash disk ....................3 Factory restore........................... 3 Firmware update ........................4 Weight Calibration ........................5 Get Into Privilege Mode ..........................5 Calibration Parameter ..........................5 Menu structure .......................... 6 Change Price of the PLU on the Scale .................. -
Page 3: Backup All Data To Usb Flash Disk
Backup all data to USB flash disk Insert flash drive into scale USB port Amend Prog wait until finished Accu confirm Accu confirm Sale Note 1 Exporting data to files to USB flash drive can sometimes a lot of time. Note 2 Press any key to exit once completed. -
Page 4: Firmware Update
Firmware update To update the firmware of your scale do as follow: Request the latest version of firmware from your dealer create "JHSCALE" folder on a USB-key copy the received files into this folder insert the USB-Disk to scale Press program Press 4 Pres accu/Confirm Input number "999"... -
Page 5: Weight Calibration
Weight Calibration Get Into Privilege Mode Break the seal at the bottom of the scale. Press the key. Then power the scale on Device displays Press Accu/Confirm Device displays “P509” Press Accu/Confirm again Set Calibration Parameter Calibration Parameter windows: The calibration counter windows: The acceleration of gravity at calibration area. -
Page 6: Menu Structure
Menu structure P1.-- Fast Prog TM-Set Time Spec String ScPLU P2.-- DT-Set Dept. Class Unit Bcode Label Sales Prog- P3.-- Menu DT-Ass SK-PLU SKFPLU Delete P4.-- Commu U-Disk RS232 Ethnet USlave P5.-- HW-Ass Set-PW TMS-DF Note: Hardware information must be operated in this machine. - Page 7 Prog Scale Parameter P11 Time Menu (TM-Set) P12 Spec P13 String P14 PLU Shortcut Sale Data P21 Dept. (DT-Set) P22 Class P23 PLU P24 Unit P25 Barcode P26 Print format P27 Salesman Data Assistant P31 PLU Prog steps (DT-Ass) P32 PLU F-Prog steps P33 Delete Sale data Communications P41 USB flash disk...
-
Page 8: Change Price Of The Plu On The Scale
Change Price of the PLU on the Scale Call up the PLU by pressing it speed key or the PLU number and the PLU button Enter the new price Long press the @ price button Complete transaction Label Formats The LE.3k has 9 predefined labels barcodes. To choose a label format please do the following: Fprog + Prog Enter new label number Amend... - Page 9 Label # Image Label # Image Type 3 (862049) (40mm) Type 4 (862050) (60mm) Type 6 (862051) (56mm FR) Type 6 (862051) (56mm EN) Type 7 (862036) (80mm FR) Type 7 (862036) NFT Type 7 (862036) (80mm EN)
-
Page 10: Print Adjust
Print adjust To adjust the print height, please do the following: Fprog + Prog X key Accu confirm Increase or decrease value as needed* Amend *1 increment = 1 pixel 8 pixels = 1 mm Printer sensor calibration (E7.11) Please complete the following steps if the scale shows E7.11 while printing labels. 1. -
Page 11: Spec Setting
Spec setting The list below shows you the most commonly used spec settings. To adjust the desired spec, please do the following: Fprog + Prog X key Input spec number to be modified Accu confirm Increase or decrease value as needed Amend Spec... - Page 12 Forth segment of IP address (0 means DHCP mode) Set min weight to Default 20 when set to 4 min weight is 20 g. print: Prepack mode To set the min weight change required for the printer to rearm set Spec234 re-arm 0= Return to 0 1= Less than 1 DEGREE...
-
Page 13: Admin/ User Spec
Nutritional facts 0 for USA mode, 1 for Canada mode table type: Display setting LCD's contrast contrast: LCD's brightness 100g, ¼ lbs. key: 0 for disable, 1 for 100g, 2 for ¼ lbs., 3 for 100g and ¼ lbs. key enabled ( programmable in call mode only.) Admin/ user Spec Spec ID... - Page 14 Feed Sensor Position(0~255) admin Narrow Bar Dot Number of admin Barcode(0~9,0 means default) Wide Bar Dot Number of admin Barcode(0~19,0 means default) Font of Barcode readable admin character(0~2) Auto New Line admin 0: One line mode; 1: Auto new line mode Mode|0|0:Forbidden|1|1:Allowed ITF25 frame mode|0|0:No admin...
- Page 15 Label 2|3|3:Print Label 1 and 2|4|4:Print Label 1 and 2 as Sale Operation Quit Change Display (0: Push Any Key admin 1~99: Auto Quit Exit Specified Second For Quit; 1~99: Auto Quit For Specified Second) Allowed Zero admin 0: Forbid; 1: Allow Purchase|0|0:Forbidden|1|1:Allowed No Weigh Sale for Weight admin...
- Page 16 Spec admin 0: Forbid, 1: Allow. Fast-Prog|0|0:Forbidden|1|1:Allowe d with authentication|2|2:Allowed Fast-Pro of PLU admin cargo name Price|0|0:Forbidden|1|1:Long Push 【-@】to Modify PLU Price|2|2:Push 【-@】to Modify PLU Price|3|3:Push 【-@】to Modify PLU Price, and Long Push to Modify PLU Name Dummy PLU|0|0:Disable|1|1:Enable admin Dummy PLU admin Shortcut|0|0:Disable|1|1:Enable...
- Page 17 Number of Maximum admin 0: maximum allowed accumulate Accumulate(0~65535,0 means default) Manual Discount: Forbidden|0|0:All admin 2, Forbidden T.Price Discount Allowed|1|1:Forbidden U.Price Discount|2|2:Forbidden T.Price Discount|3|3:Forbidden All Discount Manual Discount: Lower Limit(0~255, admin Percent) Manual Discount: Upper Limit(0~255, admin Percent) Percent Discount admin 0: Subtract 1: Addition...
- Page 18 Internal Barcode 1: Flag admin Number(0~9999999) Internal Barcode 2: Format admin Group 2 interior bar code format Number(0~99) Internal Barcode 2: Flag admin Number(0~9999999) Internal Barcode 3: Format admin Group 3 interior bar code format Number(0~99) Internal Barcode 3: Flag admin Number(0~9999999) Internal Barcode 4: Format...
- Page 19 number; 1~9:Print in specified length with ’#’) Ethernet IP 1(0~255) admin Ethernet IP 2(0~255) admin When Spec153 is 0, device will connect to network by DHCP. Otherwise use appointed IP to connect the network Ethernet IP 3(0~255) admin Ethernet IP 4(0~255, 0 means DHCP admin mode) PC's Ethernet IP 1(0~255, effective...
- Page 20 Display of Kilocharacter|0|0:Not admin 1: Display based on Spec181 display|1|1:Display based on Spec181 Unit Printing of Weight|0|0:No admin 0: No printing; 1: Printing printing|1|1:Printing Unit Printing of Unit Price|0|0:No admin 0: No printing; 1: Printing printing|1|1:Printing Unit Printing of Money|0|0:No admin 0: No printing;...
- Page 21 convert Weight Switch|0|0:Not admin 2: allow Allowed|1|1:Long Press to Switch|2|2:Single Press to Switch Degrees of Zero back(0~31) admin Wide of Thermal Header(mm:0~64) admin Ignore PBS Sensor|0|0:No admin Use to eliminate error E7.12 Ignore|1|1:Ignore Ignore PDS Sensor|0|0:No admin Use to eliminate error E7.11 Ignore|1|1:Ignore Ignore PPS Sensor|0|0:No admin...
- Page 22 idle mode|2|2:Enable in PLU mode|3|3:Enable in all mode admin Digit number for auto【PLU】 (0:Disable, 1~7:Auto【PLU】after digitals number inputted) Pre-Print Function user |0|:Disable |1|:Enable Maximum Characters Take Over to admin New Line(0~31) Mode Auto Quit(0~15: +1: Batch admin Print, +2:PrePack, +4:Lock PLU, +8:Auto Print) Need Admin Password In Certain admin...
- Page 23 Total Service Fee: Input admin 4: Auto transfer, take auto price Method|0|0:Manually Call, Price Input|1|1:Manually Call, Percent Input|2|2:Manually Call, Auto Price|3|3:Manually Call, Auto Percent|4|4:Auto Call, Auto Price|5|5:Auto Call, Auto Percent Total Service Fee: Auto collect based admin number(% or price number) Service Fee: Percent Collection based admin 1: Based on price after tax...
-
Page 24: Display Character Reference
Display Character Reference... -
Page 25: Error Code
Error code Number Meaning Possible solution E0.00 Alarms for measurements E0.01 Weight is not stable when the scale Make sure there are no heavy goods on the tray and the starts up. tray is stable. E0.02 Exceed the allowed start-up zero Make sure there are no heavy goods on the tray and the range tray is on the bracket. - Page 26 E1.21 Less than smallest sale weight Weight needs to be larger than smallest sale weight. E1.22 Larger than largest sale weight Weight needs to be smaller than largest sale weight. E1.23 Discounted U.Price has to be less than Discounted in allowed range, or amend the allowed discount lower limit.
- Page 27 E2.03 Forbid F-Prog of Spec data parameters Refer to Spec082. E2.04 Forbid Re-print Refer to Spec065. E2.05 Menu quitting via pressing【Sale】【 Quit the menu by press【Cancel】sometimes. Prog】【Account】 is forbidden. E2.06 A44 report forbidden Refer to Spec141. E2.07 A6 report forbidden Refer to Spec141.
- Page 28 E6.20 PTR: Print sensor calibrate wrong Printer process do not follow general time order and finish the working, unknown print error E6.21 PTR: Communication Error Checkup the Ethernet cable E7.00 Alarms for hardware E7.01 Some keys are pressed when the scale Please confirm that no keys are pressed.
- Page 29 E7.20 The printer over time Printer process do not follow general time order and finish the working, unknown print error E7.23 PDS calibration failed, ignore PDS Try recalibrate, this failure will not affect general use E7.30 Alarm for full storage of deals records. Enter Account interface.
- Page 30 If user confirm that power is right, please set Spec235=1 to close the power detect module E8.00 Alarms for communications E8.11 USB flash disk port do not connect Please confirm that the scale used owns U-Disk port. If it with the scale. owns, and this alarm cannot be cleared after several times’...
Need help?
Do you have a question about the integrator LE.3k and is the answer not in the manual?
Questions and answers