Table of Contents
Advertisement
Quick Links
Advertisement
Table of Contents

Related Manuals for Speco O2P30X


Summary of Contents for Speco O2P30X
- Page 1 ㅋ O2P30X Full HD 30x Speed Dome IP Camera...
- Page 2 ’ ’ Directions Be careful not to cause any physical damage by dropping or throwing the camera. Especially keep t he device out of reach from children. Do not disassemble the camera. No after service is assumed when disassembled. Use only power adapters compatible with the unit. Be careful to prevent moisture or water penetration into the unit.
-
Page 3: Revision History
’ ’ Revision History Date Revision Details Apr 26 , 2016 First manual revision creation. Rev.1.3 (Apr. 2016) -
Page 4: Table Of Contents
4.1. PC Requirement ..........................17 4.2. Quick Installation Guide ........................18 4.2.1. Connect PC and O2P30X to network..................18 4.2.2. Set IP parameters on O2P30X ....................18 4.2.3. Remote video connection to O2P30X ..................19 4.2.4. Additional settings through connection to the Admin Page ............21 Troubleshooting ............................ -
Page 5: Introduction
’ ’ 6.8. Main Menu ............................28 6.9. Dome Setup ............................28 6.10. OSD Display ............................29 6.11. System Status ............................. 29 6.12. Initialize ............................... 29 6.13. Camera Setup ............................. 30 6.14. Focus Setup ............................31 6.15. Image Adjust ............................31 6.16. -
Page 6: Overview
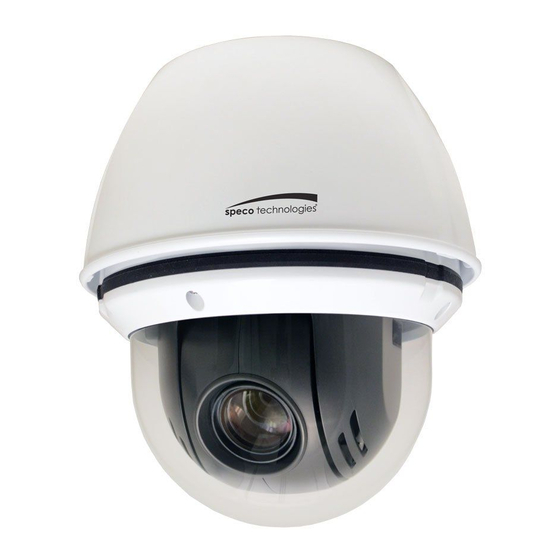
’ 1.1. Overview The ONSIP O2P30X is multi-codec (H.264, MJPEG) IP camera (or network camera) built with embedded software and hardware technology. It enables real time transmission of synchronized video of up to 1,080P and audio data. Remote clients can connect to IP Camera for the real time video/audio data through various client solutions running on PC or smart device. -
Page 7: Specifications
’ ’ 1.2. Specifications Camera Image Sensor 1/3" Panasonic CMOS image sensor Sync. System Internal Effective Pixels Number 1920 (H) x 1080 (V) 2.0 Mega Horizontal Resolution 1100 TV Lines Digital Output (YCbCr 4:2:2) / LVDS, HD Analog Component, Video Output Level Select NTSC/PAL 1.0Vp-p (75 , composite) 960x Zoom (30x Optical, 32x Digital), 4.3(W)mm~129(T)mm, Lens... - Page 8 ’ ’ Bit Rate Control Intelligent Hybrid Control (VBR+CBR) Max. Frame Rate 30fps@2MP External Terminals 32Kbps G.726 ADPCM, 64Kbps 16bit µ-law PCM ~ MIC / Line-in 2 Way-Audio 64Kbps 16bit µ-law PCM ~ Line-out IPv4/v6, TCP, UDP, IGMP, ICMP, ICMPv6, ARP, RARP, PPPoE, Network Protocols RTCP, RTP, RTSP, SDP, HTTP, HTTPS, SMTP, FTP, DHCP, UPnP, SNMP, NTP, DNS, DynDNS, SOCKS, ONVIF...
-
Page 9: Product Description
’ 2. Product Description 2.1. Contents The product package contains followings : Contents Description Remarks O2P30X main unit O2P30X O2P30X Dome Cover Accessories L-type wrench, Anchor Bolt Software & User’s Guide Default built in standard PoE module 24V AC Adaptor Power Adaptor (IEEE802.3af) -
Page 10: Product Preview
’ ’ 2.2. Product Preview O2P30X ONSIP Installer Speed Dome PC software to allocate an IP IP Camera address to the IP Camera Rev.1.3 (Apr. 2016) -
Page 11: Physical Description
’ ’ 2.3. Physical description 2.3.1. Parts Name & Functions Figure 2-1. Parts Name & Functions Part Function Description Dome Cover Do not detach protection vinyl from dome cover before finishing all installation process to protect dome cover from scratches or dust. DIP Switch Set up camera ID and protocol. -
Page 12: External Connector
’ ’ 2.3.2. External Connector Video output RS485 Audio I/O AC 24V Sensor I/O Network (LAN) RS485 Audio I/O Sensor I/O Figure 2-4. Connector for external connection Rev.1.3 (Apr. 2016) -
Page 13: Functional Description
’ ’ 2.4. Functional Description Power : Power input for supplying AC 24V power. Rated Power Input Voltage Range Current Consumption AC 24V AC24V ± 10% DC 36V~57V PoE+ (IEEE802.3at) MAX 24W Do uses more than CAT5 Cable. Caution : If IP Camera is powered by PoE+, do not plug in AC Jack with active AC power into AC power connector. - Page 14 ’ ’ Signal Description Connect (+) cable of electric power sources for Sensors to this port as shown in the SENSOR(+) circuit above. Connect output of sensors for each port as shown in the circuit above. SENSOR(-) If you want to use Alarm Input, the types of sensor must be selected in OSD menu. The sensor types are Normal Open and Normal Close.
-
Page 15: On Site Installation
’ ’ 3. On Site Installation 3.1. Installation Using the Wall Mount When installing the bracket to main body, match the main( | ) and bracket( | ). Main Body turn to the right to match the main body( | ) and bracket( || ). Rev.1.3 (Apr. - Page 16 ’ ’ 3.2. Installation Using the Pendant Mount Accessories supplied as CABLE ASSY, PIPE, PENDANT MOUNT and assemble as shown. Rev.1.3 (Apr. 2016)
-
Page 17: Getting Started
’ ’ 4. Getting Started Brief information for first time operation of O2P30X is provided in this chapter. 4.1. PC Requirement Audio/Video streaming data received from IP Camera can be displayed or stored in a PC running client programs. Minimum requirement of the PC is described below:... -
Page 18: Quick Installation Guide
OP230X) 2. In the case of using PoE, connect the PC and O2P30X to the network using one of the following ways. If your LAN Switch does not support standard PoE, connect O2P30X as shown in dotted line in Figure. -
Page 19: Remote Video Connection To O2P30X
Remote video connection to O2P30X 1. Connection through Web Viewer Web Viewer offers simplest way of video connection to O2P30X. For video connection, enter the IP address of O2P30X in the URL window of Internet Explorer as: Default port 80 can be omitted [e.g.] Port 80... - Page 20 Note : Active-X module should be installed on your PC before actual connection. If your PC is not connected to the internet, you cannot download Active-X module. Most convenient way of installing the Active-X module is installing Speco-NVR which is available from the CD or our web site.
-
Page 21: Additional Settings Through Connection To The Admin Page
’ ’ 4.2.4. Additional settings through connection to the Admin Page All the parameters of new IP camera follows factory default values. For more sophisticated target application it is needed to change parameters. The admin page can be connected through “http://IP_Address:Port_Number/admin.htm”... -
Page 22: Troubleshooting
’ ’ 5. Troubleshooting 5.1. No power is applied In case of Standard PoE+ (Power over Ethernet) Power supply through standard PoE+ is possible only when the following conditions are met. 1. Standard PoE+ is supported on the product. 2. The LAN switch supports standard PoE+. Make sure that both the IP camera and the LAN switch support standard PoE+ (IEEE 802.3at) In case of AC adaptor If PoE+ is not applied, the power and network connection should be made through separate cables. -
Page 23: Technical Assistance
’ ’ 5.3. Technical Assistance If you need any technical assistance, please contact technical support. For immediate service please provide the following information. 1 . 1 . 1 . 1 . Model name MAC address and Registration number 2 . 2 . 2 . 2 . 3 . -
Page 24: Starting Osd Menu
’ ’ 6. Starting OSD Menu Function : Using the OSD menu, Preset, Pattern, Auto scan, Tour and Alarm Input function can be configured for each application. Enter MENU : “Menu On” Key. Exit MENU : “Menu Off” Key. Control Key : Use NEAR(F-) to save values and use FAR(F+) to cancel values. 6.1. -
Page 25: Pattern
’ ’ 6.3. Pattern Pattern Function is that a camera memorizes the path(mostly curve path) by screen jog for assigned time and revives the path exactly as it memorized. 8 Patterns are available and Maximum 1200 communication commands can be stored in a pattern. Pattern can be created by one of following two methods. -
Page 26: Other Functions
’ ’ 6.5. Other Functions POWER UP ACTION This function enables to resume the last action executed before power down. Most of actions such as Preset, Pattern, Auto scan and Tour are available for this function but Jog actions are not available to resume. AUTO FLIP In case that tilt angle arrives at the top of tilt orbit (90°), zoom module camera keep moving to opposite tilt direction (190°... -
Page 27: Osd Menu
’ ’ 6.6. OSD Menu PRESET LABEL ← LABEL12345 PRESET 1 → ACTION TITLE SECTOR01 → SECTOR LABEL IMAGE FLIP ← |:1 O:- → ALARM INFORMATION CAMERA ID ← CAM 1 15/4/x1/N → P/T/Z INFORMATION PRESET LABEL The Label stored for specific Preset. IMAGE FLIP Shows that images are currently reversed by Auto Flip Function. -
Page 28: Main Menu
’ ’ 6.8. Main Menu DOME SETUP Set the system status, initialization, speed and SPEED DOME CAMERA OSD display in this submenu. ☞ < DOME SETUP> <CAMERA SET> <PRESET SET> CAMERA SET Set the zoom and image in this submenu. <AUTO SCAN SET>... -
Page 29: Osd Display
’ ’ 6.10. OSD Display You can decide whether to display items for display functions. OSD DISPLAY Select AUTO to display an item only when a change occurs. ☞ C AMERA ID PRESET ID SECTOR ID Show the camera ID. CAMERA ID COORDINATE [OFF/ ON]... -
Page 30: Camera Setup
’ ’ 6.13. Camera Setup FOCUS MODE Set the camera focusing mode. CAMERA SETUP [AUTO/ MANUAL/ Set to MANUAL for manual focusing using the ☞ F OCUS MODE SEMIAUTO DIGITAL ZOOM NEAR(F-) and FAR(F+). SEMIAUTO] IMAGE FLIP <FOCUS SETUP> <IMAGE ADJUST> SEMIAUTO Mode: This mode exchanges focus <WHITE BALANCE SETUP>... -
Page 31: Focus Setup
’ ’ 6.14. Focus Setup NEAR LIMIT Set the focus move to the limit. FOCUS SETUP [1m/ 3m/ 6m/ 10m ] ☞ N ERA LIMIT PREVIOUS PAGE EXIT[MENU OFF] 6.15. Image Adjust NOISE REDUCTION Set the level of noise reduction. IMAGE ADJUST [AUTO/ OFF/ HIGH/ MIDDLE/ ☞... -
Page 32: Auto Exposure Setup
’ ’ 6.17. Auto Exposure Setup Configures general settings of the camera exposure. AUTO EXPOSURE SETUP-GLOBAL ☞ B LC Enables/disables backlight correction DAY/NIGTH <AUTO> processing, used to enhance subject- [ON/ OFF] SLOW SHUTTER MANUAL FLICKERLESS background separation when framing with a <AE MODE SETUP>... -
Page 33: Ae Mode Setup
’ ’ 6.18. AE Mode Setup Configures general settings of the camera exposure mode. AE MODE SETUP-GLOBAL ☞ M ODE MANUAL MODE AUTO: Automatically adjusts aperture SHUTTER SPEED 1/30 IRIS LEVEL F6.8 and shutter speed. [AUTO/ MANUAL/ GAIN LEVEL -3dB SHUTTER PRI/ IRIS PRI/ BRIGHT] MANUAL: Set the SHUTTER SPEED,... -
Page 34: Preset Set
’ ’ 6.19. Preset Set PRESET NO. Select the number of the preset to be edited. PRESET SET [1~255] Selecting a preset moves the camera to its ☞ P RESET NO. position, and its attributes of LABEL and CAM CLEAR PRESET CANCEL <EDIT SCENE>... -
Page 35: Edit Label - Preset
’ ’ 6.21. Edit Label - Preset The cursor is indicated by white characters on a green background. EDIT LABEL-PRESET1 Entering a letter moves the cursor to the right. ------------ 1234567890 ABCDEFGHIJ CANCEL Select a desired letter from the Character Map below the preset label. KLMNOPQRST UVWXYZabcd efghijklmn... -
Page 36: Auto Scan Set
’ ’ 6.22. Auto Scan Set AUTO SCAN NO. Select the number of the auto scan to be edited. AUTO SCAN SET [1~8] If the selected auto scan has not yet been, its ☞ A UTO SCAN NO. 1ST POSITION PRESET1 1ST POSITION and 2ND POSITION are shown 2ND POSITION... -
Page 37: Tour Set
’ ’ 6.23. Tour Set TOUR NO. Select the number of the tour to be edited. TOUR SET If the tour selected has not yet been defined, [1~8] ☞ T OUR NO. UNDEFINED “UNDEFINED” appears under the tour number. CLEAR TOUR CANCEL <EDIT TOUR>... - Page 38 ’ ’ EDIT TOUR1 EDIT TOUR1 NO ACTION ### DWELL NO ACTION ### DWELL ☞ 1 PRESET 00:03 ☞ 1 PRESET 00:03 2 NONE 2 NONE 3 NONE 3 NONE 4 NONE 4 NONE 5 NONE 5 NONE SAVE [←→:MOVE CURSOR ] ☞...
-
Page 39: Privacy Set
’ ’ 6.25. Privacy Set Select area in image to mask. PRIVACY SET ☞ M ASK NO. Select mask number. If the selected mask has MASK NO. UNDEFINED DISPLAY [1~8] already data, camera moves as it was set. CLEAR MASK CANCEL <EDIT MASK>... - Page 40 ’ ’ 6.26. Pattern Set PATTERN NO. Select pattern number to edit. If a selected pattern PATTERN SET [1~8] number is not defined, “UNDEFINED” will be ☞ P ATTERN NO. UNDEFINED displayed under selected pattern number. CLEAR PATTERN CANCEL <EDIT PATTERN> CLEAR PATTERN Delete data in current pattern.
-
Page 41: Sector Set
’ ’ 6.29. Sector Set You can set sector and its label so as to display the sector on the screen SECTOR SET when the camera is within the corresponding area. ☞ C LEAR SECTOR CANCEL <EDIT SCENE> CLEAR SECTOR Delete all defined sector and their labels. -
Page 42: Edit Label - Sector
’ ’ Once you have finished sector editing, press the FAR(F+) to exit to the EDIT SCENE-SECTOR sector menu. SECTOR SAVED SUCCESSFULLY [FAR:SET CONTINUE] 0/0/x1/N Panning the camera counterclockwise during sector setup will prompt an EDIT SCENE-SECTOR error message. Press the FAR(F+) to return to sector setup and try again. ERROR PROGRAMMING SECTORS LAST PAN WAS PAN LEFT [FAR:SET CONTINUE]... -
Page 43: Edit Sector Label
’ ’ 6.32. Edit Sector Label The cursor is indicated by white characters on a green background. EDIT SECTOR LABEL01 Entering a letter moves the cursor to the right. [SECTOR 01 ------------ Select a desired letter from the Character Map below the sector label. 1234567890 ABCDEFGHIJ CANCEL...
Need help?
Do you have a question about the O2P30X and is the answer not in the manual?
Questions and answers