Table of Contents
Advertisement
Dannmar Equipment
646 Flinn Avenue, Suite A
Moorpark, CA 93021
Tel: 1-877-432-6627
www.dannmar.com
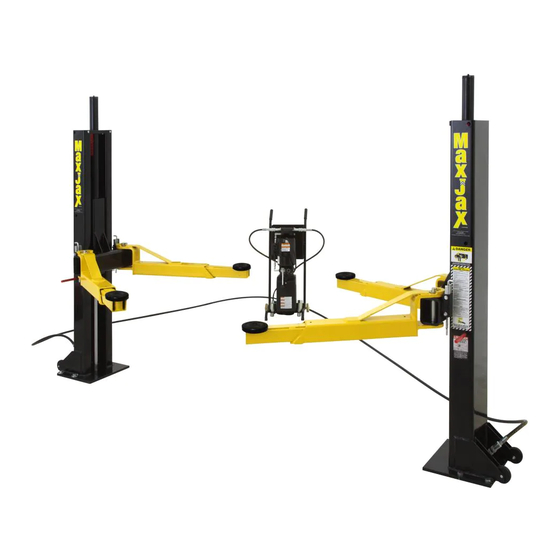
MAXJAX USER MANUAL
6,000 POUND CAPACITY
PORTABLE MID-RISE LIFT
Patent No. US 8.256.577 B2
Rev G 04-26-2016
P/N 199823
Reference ANSI/ALI ALIOM safety
requirments for installation and service of
automotive lifts before installing lift.
PLEASE READ THE ENTIRE CONTENTS OF THIS MANUAL PRIOR TO INSTALLATION AND OPERATION. BY PROCEEDING WITH
LIFT INSTALLATION AND OPERATON YOU AGREE THAT YOU FULLY UNDERSTAND AND COMPREHEND THE FULL CONTENTS
OF THIS MANUAL. FORWARD THIS MANUAL TO ALL OPERATORS. FAILURE TO OPERATE THIS EQUIPMENT AS DIRECTED MAY
CAUSE INJURY OR DEATH.
Dannmar
EQUIPMENT
R
Advertisement
Table of Contents

Subscribe to Our Youtube Channel
Related Manuals for Dannmar maxjax


Summary of Contents for Dannmar maxjax
- Page 1 Dannmar Dannmar Equipment 646 Flinn Avenue, Suite A Moorpark, CA 93021 EQUIPMENT Tel: 1-877-432-6627 www.dannmar.com MAXJAX USER MANUAL 6,000 POUND CAPACITY PORTABLE MID-RISE LIFT Patent No. US 8.256.577 B2 Rev G 04-26-2016 P/N 199823 Reference ANSI/ALI ALIOM safety requirments for installation and service of automotive lifts before installing lift.
-
Page 2: Table Of Contents
LIFT START UP / FINAL ADJUSTMENTS ............18 BLEEDING ........................19 POST INSTALLATION CHECK OFF ..............19 OPERATION ......................20 SAFE LIFT OPERATION ..................22 INSTALLATION OF MOTORCYCLE ADAPTERS* ...........25 TROUBLESHOOTING GUIDE ................26 WARRANTY INFORMATION ................29 MAINTENANCE RECORDS ..................30 * Optional equipment VISIT US ON THE WEB AT WWW.DANNMAR.COM... -
Page 3: Important Notice
Failure to comply with these instructions can result in serious bodily harm and void product warranty. 9. Dannmar Equipment will assume no liability for loss or damage of any kind, expressed or implied resulting from improper installation or use of this product. -
Page 4: Important Safety Instructions
Avoid pinch points. 19. KEEP WORK AREA CLEAN. Cluttered work areas invite injuries. 20. CONSIDER WORK AREA ENVIRONMENT. Do not expose equipment to rain. DO NOT use in damp or wet locations. VISIT US ON THE WEB AT WWW.DANNMAR.COM... - Page 5 Contact Dannmar Equipment for information pertaining to certified attachments, accessories, or modifying components.
-
Page 6: Owner / Employer Responsibilities
• I understand that Dannmar lifts are supplied with concrete fasteners meeting the criteria of the Ameri- can National Standard “Automotive Lifts Safety Requirements for Construction, Testing, and Valida- tion”... - Page 7 • I understand that Dannmar lifts are designed to be installed in indoor locations only. Failure to follow installation instructions may lead to serious personal injury or death to operator or bystander or damage to property or lift.
-
Page 8: Parts Inventory
75mm Wheels For Columns PARTS BOX 17157003 Column Top Straps 17207037 Flow Divider 17107006 Contact Lift Pads 17108041 Stackable Pad Adapters 17157002 Arm Pins 17157001 Lock Bars OPTIONAL MOTORCYCLE ADAPTER KIT 17157007 Adapter Frame Assembly VISIT US ON THE WEB AT WWW.DANNMAR.COM... -
Page 9: Max Jax Parts List
MAX JAX PARTS LIST MAX JAX ASSEMBLY ITEM NO PART NUMBER DESCRIPTION 17150002 MAX JAX POST ASSEMBLY 17154001 MAX JAX POWER UNIT STAND ASSEMBLY 17200028 M8 x 20 HEX HEAD BOLT 17201010 M8 NYLON LOCK NUT 17206016 MJ-MAORB 90~ LONG 6801-LL-06-06-NWO 17206017 MALE 90°... -
Page 10: Max Jax Assembly Diagram
* Diagram shows lift with square lift pads. New models come standard with round lift pads. Please note: All Dannmar lifts now come standard with Round Lift pads for greater durability. Call for more information. VISIT US ON THE WEB AT WWW.DANNMAR.COM... -
Page 11: Installation Instructions
INSTALLATION INSTRUCTIONS TOOLS REQUIRED ‡ Rotary Hammer Drill Or Similar (If Anchoring) ‡ Hex Key / Metric Allen Wrench Set ‡ 5/8" Masonry Bit ‡ Large Crescent Wrench ‡ 7/8" Masonry Bit ‡ Large Phillips Screwdriver ‡ Hammer ‡ Chalk Line ‡... -
Page 12: Installing The Hydraulic Cylinders
6. Install the column tie bars using the M10x45mm hex bolts, nuts and washers. (See figure 5) Fig. 2 Fig. 3 Shown with break- out to show top and bottom plate Fig. 5 Fig. 4 VISIT US ON THE WEB AT WWW.DANNMAR.COM... -
Page 13: Mounting The Hydraulic Power Unit
STEP 4 ( MOUNTING THE HYDRAULIC POWER UNIT ) Assemble cart as shown in the figured below: 1. After installing the cart wheels, attach the power unit and rubber power unit damp- ener pad to the power unit cart using the (4) 8x25mm hex bolts and nylon lock nuts. -
Page 14: Site Layout
Light duty / sport trucks 115" - 120" Typical Full size trucks 120" - 135" Typical Use the edge of the base plate to line up the posts along the chalk line Chalk line VISIT US ON THE WEB AT WWW.DANNMAR.COM... -
Page 15: Installation Of Power Drop Anchors
STEP 6 ( INSTALLATION OF POWER DROP ANCHORS ) 1. Before proceeding, double check location and measurements, Fig. 10 make certain that the base plates of each column are aligned with the chalk / crayon lines. FOLLOW PROCEDURE EXACTLY FOR PROPER FITTING AND ALIGNMENT OF ANCHORS. - Page 16 Before operating your lift, check to make sure both “A” and “B” measure- ments are equal. The lift arms must be level before operation. If your lift arms are not level, shim the columns as required. LEVEL VISIT US ON THE WEB AT WWW.DANNMAR.COM...
-
Page 17: Connecting Hydraulic Lines
STEP 7 ( CONNECTING HYDRAULIC LINES ) 1. Thread the male quick disconnect fittings onto Male Quick the rear cylinder fittings using teflon tape on the Disconnect pipe threads. (See figure 16) Fitting 2. Thread one end of the male npt hose fitting into one of the top ports of the flow divider. -
Page 18: Hydraulic Power Unit Set Up
If the motor gets hot or sounds peculiar, stop and check all electrical connections. 4. Continue pressing the raise button until the lift starts to move. VISIT US ON THE WEB AT WWW.DANNMAR.COM... -
Page 19: Bleeding
WARNING • KEEP HANDS AND FEET CLEAR of lift when operating. • Avoid pinch points. 5. Raise the lift half way until the lift arms are approximately 24" off the floor. 6. Loosen the bolts on the Arm Restraints. Adjust the Arm Re-straints so the gears mesh firmly and smoothly. -
Page 20: Operation
1. Make a visual inspection of all moving parts and check for excessive signs of wear. 2. Check condition of lift pads and adapters. 3. Check condition of arm restraints. Adjust as necessary. 4. Replace all faulty parts before lift is put back into operation. VISIT US ON THE WEB AT WWW.DANNMAR.COM... - Page 21 TO RAISE LIFT • Always follow the bleeding instructions outlined in the manual prior to using your lift. • Read operating and safety manuals before using lift. • Always lift vehicle according to manufacturer’s recommended lifting points. • Position vehicle between columns. Adjust swing arms so that vehicle is positioned with the center of gravity midway between pads.
-
Page 22: Safe Lift Operation
• Always consider potential problems that might cause a vehicle to slip, i.e., heavy cargo, undercoating, etc. • Pay attention when walking under a vehicle that is up on the hydraulic lift. VISIT US ON THE WEB AT WWW.DANNMAR.COM... - Page 23 DANGER • DO NOT leave the controls while the lift is still in motion. • DO NOT stand directly in front of the vehicle or in the bay when vehicle is being loaded or driven into position. • DO NOT go near vehicle or attempt to work on the vehicle when being raised or lowered. •...
- Page 24 DANGER The lift must be re-leveled, shimmed and blead each time the lift is reinstalled. Failure to do so may result in injury or death. VISIT US ON THE WEB AT WWW.DANNMAR.COM...
-
Page 25: Installation Of Motorcycle Adapters
STEP 15 ( INSTALLATION OF MOTORCYCLE ADAPTERS* ) *Motorcycle Adapter is an optional accessory. 1. Lower the lift all the way to the ground. 2. Swivel both arms towards the center line of the lift until they are parallel. Arms Parallel Fig. -
Page 26: Troubleshooting Guide
12. Ensure pump mounting bolts are fastened securely. Do not over-tighten; may result in damage. 13. Inlet screen clogged. Clean inlet screen or replace. 14. Check wall outlet voltages and wiring. Make sure unit and wall outlet are wired. VISIT US ON THE WEB AT WWW.DANNMAR.COM... - Page 27 MOTOR WILL NOT RUN POSSIBLE CAUSE 1. Fuse blown, (5,2,1,3,4) 2. Limit switch burned out, (1,2,3,4) 3. Microswitch burned out, (1,2,3,4) 4. Motor burned out, (1,2,3,4,6) 5. Voltage to motor incorrect, (2,1,8) REMEDY INSTRUCTION 1. Check for correct voltage. Compare supply voltage with voltage on motor name tag. Check that the wire is sized correctly.
- Page 28 10. Check if motor is wired correctly. Compare wiring of motor to electrical diagram on power unit drawing. 11. Inlet screen clogged. Clean inlet screen or replace. 12. Check wall outlet voltage and wiring. Make sure unit and wall outlet is wired properly. VISIT US ON THE WEB AT WWW.DANNMAR.COM...
-
Page 29: Warranty Information
Lift Serial #: __________ Power Unit Serial #: __________ Lift Model #: __________ Power Unit Model #: __________ Lift Manufacturing Date: __________ Power Unit Manufacturing Date: __________ WARRANTY 1. DURATION: From the date of purchase by the original purchaser. Any Dannmar MaxJax lift system: Three-Year warranty on the lift structure and other associated struc- tural components; One-Year warranty on the power unit and hydraulic cylinders, and other assembly components such as valves, hoses, fittings etc. against defects in material or workmanship under normal use and service, or from the date of shipment by Dannmar or a Dannmar distributor whichever comes first. 2. WHO GIVES THIS WARRANTY (WARRANTOR): Dannmar Inc., 646 Flinn Ave., Moorpark, CA 93021 3. WHO RECEIVES THIS WARRANTY (PURCHASER): The original purchaser (other than for purpose of resale). 4. WHAT PRODUCTS ARE COVERED BY THIS WARRANTY: Any Dannmar MaxJax lift system. 5. WHAT IS COVERED UNDER THIS WARRANTY: Manufacturer defects due to material and workmanship with the exceptions noted below. 6. WHAT IS NOT COVERED UNDER THIS WARRANTY: A. ANY INCIDENTAL, INDIRECT, OR CONSEQUENTIAL LOSS, DAMAGE, OR EXPENSE THAT MAY RESULT FROM ANY DEFECT, FAILURE, OR MALFUNC- TION OF DANNMAR INC PRODUCT. -
Page 30: Maintenance Records
___________________________________________________________________ ___________________________________________________________________ ___________________________________________________________________ ___________________________________________________________________ ___________________________________________________________________ ___________________________________________________________________ ___________________________________________________________________ ___________________________________________________________________ ___________________________________________________________________ ___________________________________________________________________ ___________________________________________________________________ ___________________________________________________________________ ___________________________________________________________________ ___________________________________________________________________ ___________________________________________________________________ ___________________________________________________________________ ___________________________________________________________________ ___________________________________________________________________ ___________________________________________________________________ ___________________________________________________________________ ___________________________________________________________________ ___________________________________________________________________ ___________________________________________________________________ ___________________________________________________________________ ___________________________________________________________________ ___________________________________________________________________ ___________________________________________________________________ ___________________________________________________________________ ___________________________________________________________________ ___________________________________________________________________ ___________________________________________________________________ ___________________________________________________________________ ___________________________________________________________________ VISIT US ON THE WEB AT WWW.DANNMAR.COM... - Page 31 MAINTENANCE RECORDS ___________________________________________________________________ ___________________________________________________________________ ___________________________________________________________________ ___________________________________________________________________ ___________________________________________________________________ ___________________________________________________________________ ___________________________________________________________________ ___________________________________________________________________ ___________________________________________________________________ ___________________________________________________________________ ___________________________________________________________________ ___________________________________________________________________ ___________________________________________________________________ ___________________________________________________________________ ___________________________________________________________________ ___________________________________________________________________ ___________________________________________________________________ ___________________________________________________________________ ___________________________________________________________________ ___________________________________________________________________ ___________________________________________________________________ ___________________________________________________________________ ___________________________________________________________________ ___________________________________________________________________ ___________________________________________________________________ ___________________________________________________________________ ___________________________________________________________________ ___________________________________________________________________ ___________________________________________________________________ ___________________________________________________________________ ___________________________________________________________________ ___________________________________________________________________ ___________________________________________________________________ ___________________________________________________________________ ___________________________________________________________________ ___________________________________________________________________ FOR TECHNICAL QUESTIONS, CALL (877)432-6627...
- Page 32 The purchaser of any DANNMAR product (Buyer) assum es the risk of verifying all m aterials or resources used or relied on. In no event will DANNMAR be liable to the Buyer or to anyone else for any decision m ade or action taken in reliance on inform ation obtained from any DANNMAR website or from any DANNMAR dealer, or third-party website, or any online or published catalog.
- Page 33 Agreem ent, including statem ents m ade by sales persons. No em ployee of DANNMAR or any other party is authorized to m ake any warranty in addition to those m ade in the Agreem ent.
- Page 34 DANNMAR has made any attempt to service or modify the tool prior to its return to DANNMAR under this Warranty. In no event will either party be liable for any damage caused by the other party’s failure to fulfill its responsibilities, under these terms and conditions.
- Page 36 FOR PARTS OR SERVICE CONTACT: Dannmar Equipment, Inc. 646 Flinn Ave. Suite A Moorpark, CA. 93021 Tel: 877-432-6627 Fax: 805-530-1909 www.dannmar.com...
Need help?
Do you have a question about the maxjax and is the answer not in the manual?
Questions and answers