Table of Contents
Advertisement
Quick Links
Advertisement
Table of Contents

Subscribe to Our Youtube Channel
Related Manuals for KanexPro MXHD1616A


Summary of Contents for KanexPro MXHD1616A
- Page 1 MXHD1616A HDMI 16x16 Matrix Switcher...
-
Page 2: Table Of Contents
MXHD1616A Setup Guide Table of Contents 1) Introduction 2 2) Specifications 3... - Page 3 • Fast-switch up to 16 x HDMI/DVI sources to 16 x HD displays • Supports bandwidth up to 10 2 Gbps • Built-in EDID & HDCP internal management • HDCP 1 3 complaint • Supports 3D pass-through • Supports High Speed HDMI Specifications (Deep Color, Lip Sync, and HD lossless audio) • Supports full HD 1080p (1920x1080@60Hz) • Computer resolutions up to WUXGA (1920x1200@60Hz) • Supports DDC transmission • Automatic gain compensation and equalization up to 100ft (30m) • Audio breakaway switching for corresponding video • Supports Dolby digital-true HD, DTS-HD • CEC protocol pass-through • Front-panel LEDs for input/output signal presence • Control through, IR, RS-232 and front-panel buttons • Full RS-232 control-perfect for incorporating third party control systems • 2U rack mountable aluminum enclosure • Internal Universal power for worldwide compatibility (100Volt-240Volt AC, 50/60Hz) • Backed by KanexPro’s 3-year full parts & labor warranty Note: On Some Models Ethernet/ Aux port is optional...
-
Page 4: Specifications
Specifications Input: 16 x HDMI Video Inputs/Output: Output: 16 x HDMI Input Connector: HDMI 1 3 Input Level: T M D S 2 9/3 3V Input Empedance: 75 Ohms Output Connector: HDMI 1 3 Output Level: T M D S 2 9V/3 3V Output Impedance: 75 Ohms Gain: 0dB Video General: Bandwidth: 340Mhz (10 2 Gbps) Video Signal: HDMI (or DVI-D) Max Pixel Clock: 165Mhz Resolution: Up to 1920x1200 or 1080p @ 60Hz Switching Speed: 200ns (Max ) Consumer Electoncs Control (CEC): Supports CEC wired infrared data pass-through using the HDMI 1 3 standard HDCP: Complaint with High-Bandwidth Digital Content Protection (HDCP) using DVI and High Speed HDMI 1 3 Standards EDID & DCC Management: Supported Extended Display Identification (EDID) & Display Data Channel (DCC) data using DVI & HDMI Standards... -
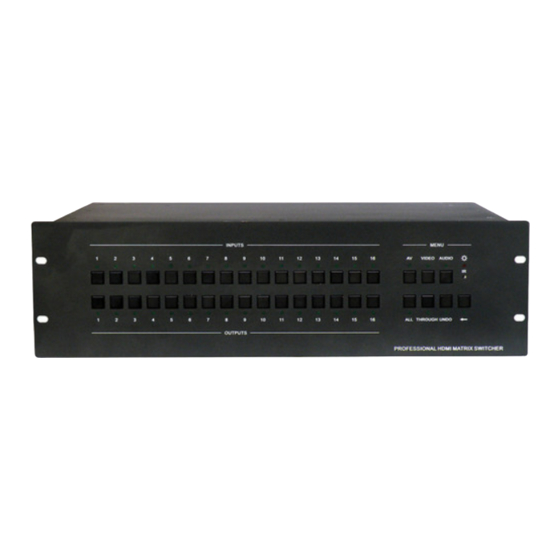
Page 5: Unit Layout
Unit Layout External Connection RS-232 Communication Port • Besides the front control panel, the HDMI matrix switcher can be controlled by far-end control system or through the Ethernet control via the RS-232 communication port • With the RS-232 port, the HDMI matrix switcher can be controlled by several kinds of control systems • This RS-232 communication port is a female 9-pin D connector The definition of its pins is as the table below No. Pin Function N/u Unused Tx Transmit Rx Receive N/u Unused Gnd Ground N/u Unused N/u Unused N/u Unused N/u Unused... -
Page 6: Connection With Computer
Connection with Computer • When the switcher connects to the COM1 or COM2 of the computer with control software, users can control it by that computer • To control the switcher, users may use the public COM software Please refer the details in Communi cation Protocol and Command Codes PIN Function Function 1 T M D S Data2- 13 T M D S Data3+ 2 T M D S Data2+ 14 +5V Power 3 T M D S Data 2/4 Shield 15 Ground (for +5V) 4 T M D S Data 4- 16 Hot Plug Detect 5 T M D S Data 4+ 17 T M D S Data 0... -
Page 7: Operation Of The Edid Management
Before connection, please read the command or relevant demand in the user manual care- fully In some cases, maybe there is balanced in source signal end but unbalanced in the destination end If in a nonstandard case, it is done to connect balanced for the balanced end and unbalanced for unbalanced end But if in a standard one, the converter must be used to switch the signals as the same, balanced or unbalanced Operation of the EDID management MXHD matrix series switchers are manufactured with full EDID management built-in the database The EDID management can automatically handshake, or through manual exchange and factory restore EDID Automatic Handshake: • The MXDV matrix switcher has built-in EDID data, which can communicate with the displays and video source automatically When the displays or video sources are connected to the MXDV matrix switcher, they will share the EDID/DDC information with the matrix switcher • The MXHD1616A EDID database includes most popular displaying data, but not all the dis play data because of the capability and firmware limitation So, we can manually refresh the EDID data to update the EDID database EDID Handshake Priority: • The EDID refresh ports have the priority grade, ranging from output 1 to output 8 in priority order It means the output 1 is the most prior to exchange the EDID data, and then the output 2 is the second prior to exchange the EDID data And, the output 8 is the least prior • When the user carries the EDID erase/refresh function, it will detect the output priority and exchange the EDID data with the available most prior output port... -
Page 8: Operation Of The Control Panel
EDID Management by RS232 Commands • When you need to refresh the EDID data of the MXHD1616A matrix switcher, we can manually exchange the EDID data by sending the RS232 command “EDIDMOn ” (Please notice the text- transform, and the dot in behind ) • When the “EDIDMOn ” is sent, the MXHD1616A matrix switcher will copy the EDID data from the most prior output port It means the MXHD1616A will erase the old EDID data, and fully copy the EDID data from the displayer, which is connected to the most prior output port • When we send the “EDIDMInit ” to the MXHD1616A matrix switcher, it will recover the factory default EDID data • When the “EDIDMOn ” or “EDIDMInit ” is correctly sent, all the connected displayers will be blank for 2~3 seconds and recover again And, the MXHD1616A matrix switcher will send out a RS232 feedback command “EDIDMOn ” or “EDIDMInit ” • If all these symbols works, it means the action is taken EDID Management by Buttons • When you need to recover the ex-factory default EDID data set, we can send the RS232 command or press the buttons of the front panel/IR remote to make it work • Keep pressing the button “<-” for 30 seconds, all the LED of “<-” will be on for 10 seconds It enters the EDID setting status • And, pressing “Input 2” button and “Undo” button All the outputs will be blank for 3 seconds, to... - Page 9 “All ” • The button to transfer one input channel to all output channels • Example: To transfer input1 to all outputs • Operation: Press buttons in this order: “1”, “All” “Though” • The button to transfer input to the corresponding output • Example: To transfer input 2 to output 2 • Operation: Press the button in this order: “2”, “Though” “ <---” • Backspace button: To backspace the latest input button • Example: To cancel input 3 • Operation: Press button in this order: “3”, “<--- ” “UNDO” • Undo button: To resume to the status before the command just performed • Example: To cancel you latest switching status: input 3 through output 5 • Operation: Press the button in this order: “3” input area, “5” output area, “UNDO” Command Format of the Switching Operation • With the front control panel, the switcher could be control directly and rapidly by pressing the but- tons under below format • “Menu” +“Input Channel” +“Output Channel 1” • “Menu”: “AV”, “Audio”, “Video” • “Input Channel”: Fill with the number of input channel to be controlled • “Output Channel”: Fill with the number of output channels to be controlled Video Audio 1 Press the button for switching mode “AV” for the switching mode of the...
-
Page 10: Using The Remote Control
Using the Remote Control • With the infrared remote controller, the matrix switcher can be controlled remotely The function buttons on the remote controller are the same with the ones on the front control panel; the remote controller shares the same control operation and command format with the control panel The Inputs Channels, from 0-9, and “10+” for more Menu, for switching source and function The outputs channels, from 0-9, and “10+” for more... -
Page 11: Communication Protocol & Command Codes
Communication Protocol & Command Codes Communication Protocol: Baud rate: 9600 Data bit: 8 Stop bit: 1 Parity bit: None Format: ASCII Command Functions Command Codes Types /*Type; Inquire the models information. /%Lock;L ock the keyboard of the control panel on the Matrix. /%Unlock;U nlock the keyboard of the control panel on the Matrix. /^Version;... - Page 12 Note: 1 [x1], [x2], [x3] and [x4] are the symbols of input or output channels ranged according to the model of the matrix switcher If the symbols exceed the effective range, it would be taken as a wrong command 2 In above commands, “[”and “]” are symbols for easy reading and do not need to be typed in actual operation 3 Please remember to end the commands with the ending symbols “ ” and “;” Detail Examples: 1. Transfer signals from an input channel to all output channels: [x1] All. Example: To transfer signals from the input channel No 3 to all output channels Run Command: “3All ” 2. Transfer all input signals to the corresponding output channels respectively: All#. Example: If this command is carried out on an MVG1616-A matrix switcher, the status of it will be: 1->1, 2->2, 3->3, 4->4…16->16 3.
-
Page 13: Troubleshooting & Maintenance
Troubleshooting & Maintenance 1) When the output image in the destination device connected to the HDMI Matrix (MXHD1616A) has ghost image, such as the projector output with ghost image, please check the projector’s setting or try another high quality HDMI cord 2) When there is a color loss or no video signal output, please make sure the cable connection is proper and tight No kinks and the cable quality is good 3) When the remote controller doesn’t works: A Maybe the battery is run out of, please change a new one B Maybe the controller is broken, please ask the dealer to fix it 4) When user cannot control the HDMI Matrix by computer through its COM port, please check the COM port number in the software and make sure the COM port is in good condition 5) If there is not “beep” sound when switching the I/O signal, please make sure the beeper is switched- on If so, the beeper inside the matrix may be broken Please send it to the dealer for fixing 6) When switching, the beeper beeps but without any output image: A Check with oscilloscope or multi-meter if there is any signal at the input end If there is no signal input, it may be the input connection cord broken or the connectors loosen B Check with oscilloscope or multi-meter if there is any signal at the output end If there is no signal output, it may be the output connection cord broken or the connectors loosen C Please make sure the destination device is exactly on the controlled output channel... -
Page 14: Warranty
TO THE MAXIMUM EXTENT PERMITTED BY APPLICABLE LAW, KANEXPRO DISCLAIM ALL OTHER WARRANTIES, EITHER EXPRESS OR IMPLIED, INCLUDING, BUT NOT LIMITED TO IMPLIED WARRANTIES OF MERCHANTABILITY AND FITNESS FOR A PARTICULAR PURPOSE, WITH REGARD TO THE PRODUCT AND ANY RELATED WRITTEN MATERIALS THIS LIMITED WARRANTY GIVES CUSTOMER SPECIFIC LEGAL RIGHTS CUSTOMER MAY HAVE OTHER RIGHTS DEPENDING ON THE JURISDICTION D. NO LIABILITY FOR DAMAGES TO THE MAXIMUM EXTENT PERMITTED BY APPLICABLE LAW, IN NO EVENT SHALL KANEXPRO BE LIABLE FOR ANY DAMAGES WHATSOEVER (INCLUDING WITHOUT LIMITATION, SPECIAL, INCIDENTAL, CONSEQUENTIAL, OR INDIRECT DAMAGES FOR PERSONAL INJURY, LOSS OF BUSINESS PROFITS, BUSINESS INTERRUPTION, LOSS OF BUSINESS INFORMATION, OR ANY OTHER PECUNIARY LOSS) ARISING OUT OF THE USE OF OR INABILITY TO USE THIS PRODUCT, EVEN IF KANEXPRO HAS BEEN ADVISED OF THE POSSIBILITY OF SUCH DAMAGES Brea, California KanexPro com MPN: HD8PSPM All trademarks, logo marks, and trade names used are the registered or unregistered trademarks of KanexPro or third parties. - Page 15 Brea, California KanexPro.com...
Need help?
Do you have a question about the MXHD1616A and is the answer not in the manual?
Questions and answers