Eaton i-on30R Administration And User Manual
I-kp01; key-k01; key-kp01; key-kpz01; key-rkpz; i-rk01; key-fkpz
Hide thumbs
Also See for i-on30R:
- Installation instructions (2 pages) ,
- Engineering manual (156 pages)

Related Manuals for Eaton i-on30R


Summary of Contents for Eaton i-on30R
- Page 1 (Next Generation) Security System Administration and User Guide Issue 2 Control unit software version 5.01...
-
Page 2: Compliance Statement
OBLIGATION OF EATON. THE CONTENTS OF THIS DOCUMENT SHALL NOT BECOME PART OF OR MODIFY ANY CONTRACT BETWEEN THE PARTIES. In no event will Eaton be responsible to the purchaser or user in contract, in tort (including negligence), strict liability or other-wise for any special, indirect, incidental or consequential... -
Page 3: Table Of Contents
Radio Hold Up Alarms (HUA) ..........9 About Users ............... 10 User access codes ............12 Installer access ..............13 Eaton SecureConnect™ ..........13 Chapter 2: Setting and Unsetting ....... 14 Introduction ............... 14 Using a keypad ............14 Setting the system ............14 Quick-setting the system using a keypad ...... - Page 4 Entering and exiting the user menu ......33 Entering text .............. 33 Omitting zones ............34 Using shunt groups ............. 35 About shunt groups ............35 Activating or deactivating a shunt group ......36 Managing users ............36 Changing your access code or assigned devices ....37 Adding users ..............
-
Page 5: Chapter 1: Introduction
Chapter 1: Introduction About this guide This guide explains how to operate and administer an i-on Next Generation alarm system as a user. The guide describes the devices you can use to carry out these tasks, how to perform functions such as setting and unsetting the system, how to manage alarms and the options available from the user menu to carry out tasks such as omitting zones, adding users and viewing the log. -
Page 6: Partitioned Mode
Introduction Partitioned mode Partitioned mode is useful if the system is installed at a site where it is necessary for different groups of users to have independent control to set and unset different areas of the building, such as certain offices in a building used by several companies. -
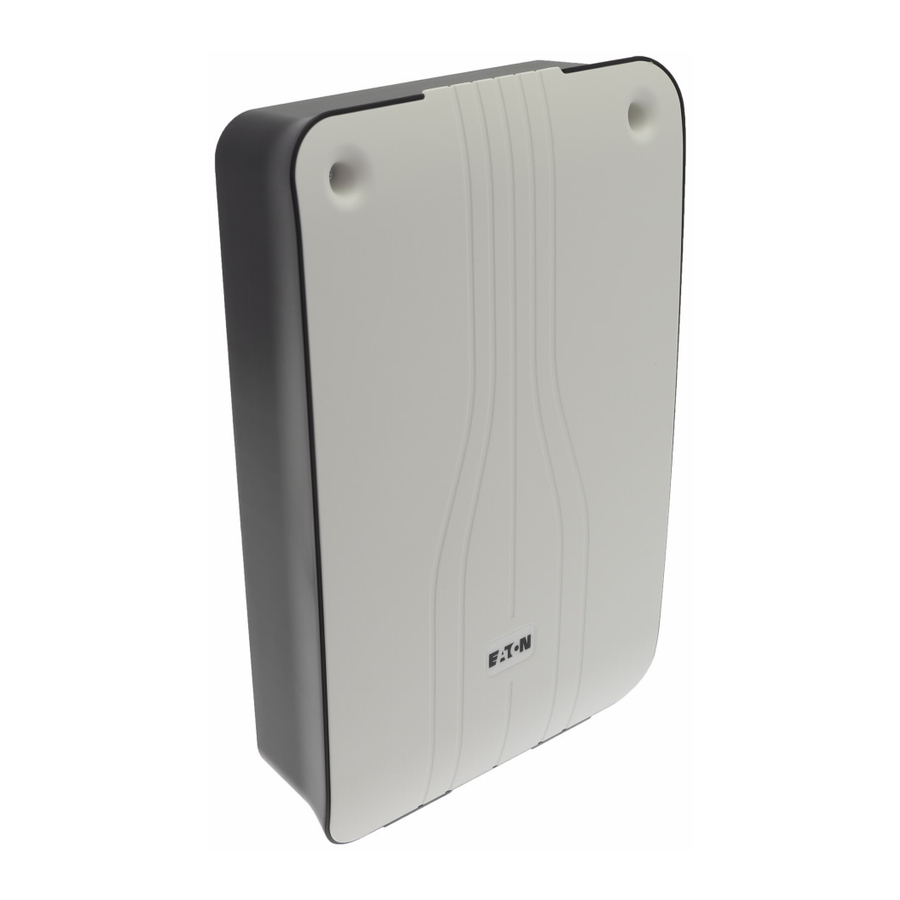
Page 7: System Components
Introduction System Components An i-on Next Generation alarm system can contain many different types of device, depending on the requirements of the installation. Figure 1 and the following sections give an overview of key components of interest to users. 1. Two-button Hold Up Alarm long range. -
Page 8: Detectors (Zones)
Introduction The control unit contains the main processing unit, the power supply and stand-by battery. The stand-by battery can keep the alarm system operational for several hours if the mains supply fails. Several different control units are available. Each provides a different number of zones, outputs, users and other features. -
Page 9: Outputs
Introduction Outputs The system provides "outputs", which can control external equipment such as lights, locking devices or other equipment, or communicate with an Alarms Receiving Centre (ARC). The installer can configure "User Defined" outputs, which you can switch on or off from a keypad or remote control. Keypads Keypads normally provide the main interface between users and the alarm system. - Page 10 Introduction i-kp01 KEY-K01 KEY-KP01 KEY-KPZ01 2 abc 3 def KEY-RKPZ 4 ghi 5 jkl 6 mno KEY-FKPZ (similar 7 pqrs 8 tuv 9 wxyz layout) Figure 2. Keypad features (see the following sections) LCD display ("1" on Figure 2.) The LCD display shows messages and prompts to guide you through actions such as setting, unsetting, acknowledging alarms and using the user options.
- Page 11 Introduction Programming keys ("2" on Figure 2.) Confirms an action, such as selection of an option or acknowledgement of an alarm. Exits an option or cancels a change. Displays the user menu or provides further information. Navigation keys ("3"...
- Page 12 Introduction An installer can use a link in the keypad or choose an option in the keypad's local menu to hide the set status shown by the keys to comply with EN50131. To use A, B, C, D, enter your access code (or present your proximity tag) and press the key.
-
Page 13: Proximity Tags
Introduction Proximity Tags A proximity tag is a small plastic token that contains a low-powered radio transmitter. Each tag contains a unique identity code and is assigned to a specific user. When you present the tag within about 10mm from the front of a keypad that contains a proximity tag reader (or to a separate proximity tag reader), the reader senses the presence of the tag and reads its identity code. -
Page 14: About Users
Introduction About Users A user is a person who is able to enter an access code at a keypad to perform an action, such as to set or unset the system, raise a duress alarm or gain access to the user options. User options are available for carrying out tasks such as omitting zones, viewing the log, testing the system and switching outputs on or off. - Page 15 Introduction proximity tag, view the log and operate outputs, but cannot add or delete users. In a partitioned system, a normal user is assigned to one or more partitions, which are the only parts of the system that they can set and unset.
-
Page 16: User Access Codes
Introduction In a partitioned system, if any partition assigned to the user is currently set, all are unset. In a part-setting system, if the system is part set, the whole system is unset. In a partitioned system, if all partitions assigned to the user are currently unset, all are set (even if there are alerts present). -
Page 17: Installer Access
Eaton SecureConnect™ Eaton SecureConnect allows you to monitor and control your alarm system over the internet from your phone or tablet. Using the app, you can, for example: ... -
Page 18: Chapter 2: Setting And Unsetting
Chapter 2: Setting and Unsetting Introduction Readying the system to start an alarm when someone moves into a protected area is called “setting” the system. Disarming the system so that people can move freely is called “unsetting” the system. You can set and unset your system using a variety of different methods, depending on how the installer has configured your system. - Page 19 Setting and Unsetting The bottom line shows the first setting option: ↕ Press or followed by to select the option you require (refer to page 1 for details of part sets and partitions): Full Set (part-setting system only) To set the whole system.
- Page 20 Setting and Unsetting Note: A zone is armed only when ALL of the partitions that it belongs to are set. Repeat steps b) and c) as required. Press . If you see a fault warning such as: Press to override the warning and continue setting (if your installer has allowed this).
-
Page 21: Quick-Setting The System Using A Keypad
Setting and Unsetting After a short period, the standby screen is displayed. For example: In a part-setting system, one of four LEDs (Figure 4) may glow to show which part of the system is set, unless disabled by the installer to meet appropriate standards. -
Page 22: Unsetting The System Using A Keypad
Setting and Unsetting You will hear a continuous exit tone (unless the system is configured for silent or instant setting). The system sets as described in step 7 on page 16. Unsetting the system using a keypad Enter through the entry route designated by the installer (this usually the same as you used to leave the premises). -
Page 23: Using A Two-Way Keyfob-Style Remote Control
Setting and Unsetting If you see a fault warning such as: Press to acknowledge the warning. Contact your installer for assistance. Using a two-way keyfob-style remote control The two-way remote control (Figure 5) can be used to set and unset the system, query the current set/unset status of the system or operate a User- Defined output. -
Page 24: Setting The System
Setting and Unsetting You must hold down the button you intend to press for at least three seconds to activate its function. See page 57 for details of programming the * button. Setting the system Make sure the system is in standby. Press and hold the Set or Part Set button, as required. -
Page 25: Starting A Hold Up Alarm (Hua)
Setting and Unsetting Starting a Hold Up Alarm (HUA) A two-way remote control can be used to start a Hold Up Alarm if enabled by an installer and by a master or admin user (see page 61). Note: Enabling this feature means that the system no longer complies with BS8243 or DD243. -
Page 26: Setting The System
Setting and Unsetting Setting the system Make sure the system is in standby. Press the required button on the remote control. For example, Full Set (A) or Part Set (B). In a partitioned system, the default action is to full set or part set all of the user's partitions. -
Page 27: Using A One-Way Radio Keypad
Setting and Unsetting Using a one-way radio keypad A one-way keypad (Figure 7) does not have a display and can only transmit to the control unit (it cannot receive information back from the control unit). “Transmit” LED Proximity tag sensor 2 abc 3 def 4 ghi... -
Page 28: Unsetting The System
Setting and Unsetting Unsetting the system Enter through the entry route designated by the installer. Depending on how the system is configured, you may hear an entry tone. If you hear the tone, go directly to the keypad, since you will have limited time to unset the system before it generates an alarm. -
Page 29: Chapter 3: Managing Alarms
Chapter 3: Managing Alarms Alarm types and sounds An alarm may occur for several different reasons. For example: A zone is triggered when the system is set (intruder alarm). The lid of the control unit or other device has been opened without the installer being logged in (tamper alarm). -
Page 30: Other Alarm Actions
Managing Alarms Hold Up Loud warbling tone HUA zone or radio Hold Up Alarm from siren. transmitter activated at any time. Pressed on keypad. The installer must enable this feature. Tamper Loud warbling tone Some part of the alarm system has from siren. -
Page 31: Speech Messages
Managing Alarms Speech messages Note: This facility requires the control unit to have an appropriate communications module fitted. As well as making an audible signal, the installer can configure the control unit to send a pre-recorded voice message to specified phone numbers when an alarm occurs. - Page 32 Managing Alarms To silence, acknowledge and reset an alarm: Make sure that it is safe to enter the premises. Enter your access code or present your proximity tag to the keypad. This silences the alarm (if the sirens and sounders are still operating). Note: In a partitioned system, you can silence, acknowledge and reset an alarm only if it has been caused in a partition to which you have access.
-
Page 33: Installer Resets
Managing Alarms The control unit saves alarm information in the log. See page 41 for details of how to view the log. Installer resets If the alarm requires an installer reset, there are several ways that this can be accomplished: ... - Page 34 Managing Alarms keypads glows red if the system is unset, and keypads give a short "beep" approximately every second if the alert has not already been acknowledged. To view the cause of the alert: Make sure the system is unset and that the keypad shows the standby screen.
-
Page 35: Chapter 4: User Menu Options
Chapter 4: User Menu Options This chapter explains all options that are available to through the user menu. You can access the menu by pressing and entering your user access code. User Menu Map This chapter shows all options in the user menu, and the availability depending on the user type. - Page 36 User Menu Options KEY-RKPZ Internal Sounders Wired Keypad Walk Test Chime System Partitions Zones Outputs Remotes User HUAss Prox Tags ...
-
Page 37: Entering And Exiting The User Menu
User Menu Options Call Downloader Outputs On/Off About Panel Cloud Expanders Keypads Comms Pair App Entering and exiting the user menu To access the user menu: Make sure the display shows the standby screen. -
Page 38: Omitting Zones
User Menu Options Press # to change between capitals and lower case letters. The cursor is an underline for small letters and a block for capitals. Press to move the cursor left, or to move the cursor to the right. Press ... -
Page 39: Using Shunt Groups
User Menu Options An "O" is displayed at the end of the line if the zone is Omitted. An "I" is displayed if the zone is Included. Press or to display the zone you wish to omit, then to mark it for omission. -
Page 40: Activating Or Deactivating A Shunt Group
User Menu Options Activating or deactivating a shunt group A master or admin user can activate or deactivate a shunt group from a keypad as follows: Select Shunt Groups. The first shunt group set up by the installer is displayed: ... -
Page 41: Changing Your Access Code Or Assigned Devices
User Menu Options Changing your access code or assigned devices This section applies if you are a normal or partition user. If you are a master or admin user, you will need to use Users – Edit User to carry out these tasks (page 40). - Page 42 User Menu Options To add a new user: Select Users – Add User. The next available default user name is displayed: If you wish, edit this default name of the user (12 characters maximum). If required, please refer to page 33 for details of how to edit text.
- Page 43 User Menu Options Note: If you have a proximity tag that is already allocated, you can find out who it belongs to by using Test – Prox Tag (page 42). For user types that can set the system, you can assign a remote control that is not already assigned to another user: ...
-
Page 44: Editing Users
User Menu Options Editing users If you are a master or admin user, you can use Users – Edit User to: Change the name of existing users, and for users other than master users, also the user type (page 37) and allocated partitions. If you are an admin user, you can edit only those users who belong to the same partitions as you. -
Page 45: Deleting Users
User Menu Options Follow the prompts. Please refer to "Adding users" on page 37 if you need information about how to use any of the above options. Deleting users If you are a master or admin user, you can use the Users – Delete User option to delete users. -
Page 46: User Numbers
Press to finish viewing the log. User numbers The control unit identifies each user by a unique number as shown below. User Number Meaning i-on30R i-on40H Action by installer Action by default master user Action by other added user... -
Page 47: Testing A Wired Keypad
User Menu Options Wired Sirens Wired sirens and their strobes. Loudspeakers Extension loudspeakers. Wired Keypads Sounders in wired keypads. KEY-RKPZ Sounders in KEY-RKPZ two-way radio keypads. Internal Sounders SDR-RINT internal radio sounders. Press or to select whether to operate all sirens\sounders of the selected type, or (for partitioned system only) only those assigned to a specific partition. -
Page 48: Performing A Walk Test
User Menu Options Performing a walk test Master and admin users can use Test – Walk Test to test detectors without starting an alarm. Walking past motion detectors should be enough to trigger them. If you have detectors connected to doors or windows, you will have to open them to trigger those detectors. -
Page 49: Testing Outputs
User Menu Options Press to begin the test. The top line shows how many detectors remain to be tested. The bottom line provides a list of all the detectors ready for testing (press or to scroll through the zones): ... -
Page 50: Testing Remote Controls
User Menu Options bottom line shows the name of the output (which may be the same as the address) and whether the output is currently on or off. Press or to select the output. Press to switch the output on, and again to switch it off. Check that the output is working as expected. -
Page 51: Testing User Huas
User Menu Options Testing user HUAs Master and admin users can use Test – User HUAs to test radio Hold-Up Alarm (HUA) devices. To carry out the test: Select Test – User HUAs. The following is displayed: Press and hold both HUA buttons on the device you wish to test until the transmit LED on the device flashes. -
Page 52: Testing Arc Reporting
User Menu Options The keypad gives a double-beep confirmation tone and you will see the results of the test: The bottom line shows the name of the user the proximity tag is allocated to (or "Unknown" if the proximity tag is not recognised). Repeat step 2 for the other proximity tags. -
Page 53: System Configuration
User Menu Options communications, the second line or IP address may be used if the first fails to connect. Press to start the test. The keypad shows the progress of the call. Check with the ARC that the test call arrived. -
Page 54: Setting The Date And Time
User Menu Options The level-4 user is able to: a) Update the firmware and language files at the control unit using the web interface. b) Log into the user menu or web interface and change the level-4 user name and code. The level-4 user cannot perform other tasks, such as to set or unset the system, omit zones, etc. - Page 55 User Menu Options Note: You cannot program an event to change the system/partition directly from one part set level to another. You must program an event to unset the system/partition first, and another event to set the system/partition to a different part set level. For example, if event A part sets the system (or a partition), you cannot program event B to full set the system.
- Page 56 User Menu Options clock (that is, less than the period set by Warning Time), the event will not take action until the following day. Event Days Choose the days you want the event to occur. Press or to scroll through each day of the week. Press ...
- Page 57 User Menu Options Edit Event Use System Config – Calendar Set – Edit Event to edit individual parts of an event. Delete Event Use System Config – Calendar Set – Delete Event to delete an event. Add Exception Use System Config – Calendar Set – Add Exception to create an exception.
-
Page 58: Defining Contacts
User Menu Options Press to allow the setting event to proceed. Press to defer setting for 30 minutes. Note that for a partitioned system, the user must belong to the partition that is due to be set. ... -
Page 59: Editing Outputs
User Menu Options To edit the Contacts List: Select System Config – Contacts. The first recipient (contact) you are able to edit is displayed: Press or followed by to select the recipient you want to edit. Press ... - Page 60 User Menu Options Press or followed by to select the output you want to edit. Press or followed by to select the setting to change: Name You can edit the name of the output. See page 33 for details of how to enter text.
-
Page 61: Managing Remote Controls
User Menu Options Managing remote controls Master and admin users can use System Config – Remotes to specify the functions that can be carried out using remote controls. The System Config – Remotes menu contains the following options: Edit Used to edit the programming of the buttons, such as the buttons used to set or unset the system, or operate outputs. - Page 62 User Menu Options To re-program the buttons on a remote control: Select System Config – Remotes – Edit. The following is displayed: EITHER: Press the button on the remote control you want to re-program. Hold down the button until you see the transmit LED flash. OR (if you do not have the remote control): Press ...
- Page 63 User Menu Options Toggle – Changes the state of the output each time you press the button. Set/Unset (One-way remote control only.) To set or unset the system. Choose Set or Unset, then use or followed by to select the set/unsetting mode: ...
- Page 64 User Menu Options Deleting remote controls You may want to delete a remote control if is lost or you want to reassign it to another user. You must delete a remote control before you can reassign it to another user. The System Config –...
-
Page 65: Starting A Call To Downloader
User Menu Options Enabling or disabling HUA functions You can use System Config – Remotes – HUA Function to enable or disable the ability for a two-way remote control to generate Hold-Up Alarms (HUAs). Note: The installer must first enable this feature by configuring "Basic" confirmation mode. -
Page 66: Switching Outputs On/Off
User Menu Options Press if you decide you want to abandon the call. When the installer has finished and the connection is broken, the display shows the standard standby screen. For example: Switching outputs on/off Master and admin users can use Outputs On/Off to switch outputs on or off as follows: Select Outputs On/Off. -
Page 67: Generating A Secureconnect Pairing Code
Press repeatedly to exit. Generating a SecureConnect pairing code You can use the Pair App option to generate a pairing code for the Eaton SecureConnect app. The app allows you to monitor and control your alarm system over the internet from your mobile phone or tablet. - Page 68 SecureConnect is a trademark of Eaton. www.touchpoint-online.com Product Support (UK) Tel: +44 (0) 1594 541978 Available between: 08:30 to 17:00 Monday to Friday. email: securitytechsupport@eaton.com Part Number 12838021 21st February 2017 Page 64...
Need help?
Do you have a question about the i-on30R and is the answer not in the manual?
Questions and answers
I wish to remove my ion30 system as the installer is no longer available. How can i do this without activating the alarm ?
To remove the Eaton i-on30R system without activating the alarm:
1. Make sure the system is fully unset and showing the standby screen.
2. Enter the Installer menu by inputting the Installer code.
3. While in the Installer menu, alarms are disabled, including tampers, Hold-Up Alarms (HUA), fire zones, and 24-hour zones.
4. You can now open the control unit lid or perform removal tasks without triggering an alarm.
Exiting the Installer menu re-enables the alarm functions.
This answer is automatically generated