
Related Manuals for Precision Medical EASY PULSE PM4150 SERIES


Summary of Contents for Precision Medical EASY PULSE PM4150 SERIES
- Page 1 Service Manual Model PM4150 Series Precision Medical, Inc. 300 Held Drive Northampton, PA 18067 USA 507719 Rev 1, 051414...
-
Page 2: Table Of Contents
Contents Preface ........................................1 Definition of terms ....................................1 Safety information - Warnings and Cautions ............................1 Theory of Operation ....................................2 Warnings and Cautions ..................................3 Specifications: ......................................4 Component Description ..................................... 5 External ........................................5 Internal ........................................6 Maintenance / Cleaning ..................................... -
Page 3: Preface
Preface Precision Medical, Inc. 300 Held Drive Northampton, PA 18067 USA Customer Service / Tech Support Phone: 1-610-262-6090 Phone: 1-800-272-7285 Fax: 1-610-262-6080 Web: www.precisionmedical.com This manual is intended to guide and help a qualified service technician in the safe handling, service, and repair and performance verification of the PM4100 Series “EasyPulse POC”... -
Page 4: Theory Of Operation
The EasyPulsePOC is intended to provide supplemental oxygen to the ambulatory oxygen patient in the smallest lightest package possible. Utilizing Precision Medical, Inc.’s patented Oxygen Conserving Technology, the EasyPulsePOC is a state of the art device, designed to be versatile and reliable. -
Page 5: Warnings And Cautions
DO NOT block the outlet fitting or kink the cannula tubing when the device is in use. Store device in a clean area when not in use. Only use the Precision Medical carrying bag or carrying bag/backpack that is supplied from Precision Medical with the POC. P a g e... -
Page 6: Specifications
Specifications: Dimensions: Height: 10.1 in (25.7 cm) Width: 6.5 in (16.5 cm) Depth: 4.5 in (11.4 cm) Weight: 6.8 lbs (3.08 kg) Shipping Weight: 13.1 lbs (5.94 kg) Altitude: Sea level to 9000 ft (2743 m) 41˚F to 104˚F (5˚C to 40˚C) Operating Temperature: -4˚F to 140˚F (-20˚C to 60˚C) Storage / Transport Temperature:... -
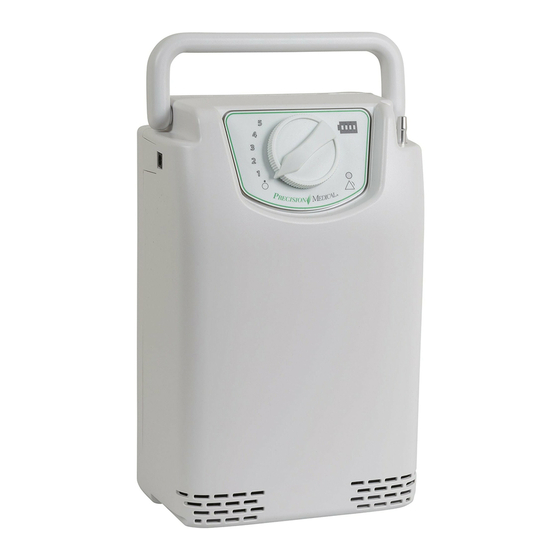
Page 7: Component Description
Component Description External P a g e... -
Page 8: Internal
Internal P a g e... -
Page 9: Maintenance / Cleaning
Returned products require a Returned Goods Authorization (RGA) number, contact Precision medical, Inc. All returns must be packaged in sealed containers to prevent damage. Precision medical, Inc. will not be responsible for goods damaged in transit. Refer to Precision medical, Inc. Return Policy available on the Internet, www.precisionmedical.com. -
Page 10: Troubleshooting
Troubleshooting Visual Indicator/Problem Audible Alarm Probable Cause Remedy The last LED on the internal Battery Level Repetitive beep Internal battery has Connect the POC to the AC Power Adapter, DC Power Indicator turns red dropped below 15% Adapter, or external battery pack charge remaining The last LED on the internal Battery Level Repetitive beep... -
Page 11: Alarm Indicators
Alarm Indicators Green Ready for use Amber Caution - Prompt response by the OPERATOR is required Warning - Immediate response by the OPERATOR is required P a g e... -
Page 12: Sieve Bed Assembly Replacement (505849)
Sieve Bed Assembly Replacement (505849): Tools and equipment required: #1 Phillips screwdriver Small diagonal wire cutters Needle nose pliers 3/16” (4.7625 mm) ID silicone tubing x 6 inch (15 cm) long (minimum) Disassembly 1. Disconnect the POC from any external power source. 2. -
Page 13: Reassembly
10. Disconnect the small black 6 pin connecter from the PC board and remove the sieve bed assembly from the POC as shown below. 11. Attach a piece of 3/16” (4.7625 mm) tubing to each of the large tubing fittings on the sieve bed assembly as shown and set aside. -
Page 14: Control Panel Replacement (505845)
Control Panel Replacement (505845): Tools and equipment required: #1 Phillips screwdriver Small flat blade screwdriver Small diagonal wire cutters Needle nose pliers 3/16” (4.7625 mm) ID silicone tubing x 6 inch (15 cm) long (minimum) ESD mat Disassembly 1. Follow steps 1 thru 11 of the “Disassembly” section of the “Sieve Bed Replacement” in this manual. 2. -
Page 15: Reassembly
16. Using a small flat blade screwdriver, from the top of the control panel, carefully pry it away from the front POC housing until it releases. The control panel is attached to the housing with an adhesive backing. 17. When the adhesive has released remove the Control Panel and discard. Reassembly STOP! Be sure to follow Electrostatic Discharge procedures to avoid damage to electronic components (Reference photos from the “Disassembly”... -
Page 16: Pc Board Replacement (506729)
PC Board Replacement (506729): Tools and equipment required: #1 Phillips screwdriver Small diagonal wire cutters Needle nose pliers 3/16” (4.7625 mm) ID silicone tubing x 6 inch (15 cm) long (minimum) ESD Mat Disassembly 1. Follow steps 1 thru 11 of the “Disassembly” section of the “Sieve Bed Replacement” in this manual. 2. -
Page 17: Internal Battery Replacement (507547)
Internal Battery Replacement (507547): Tools and equipment required: #1 Phillips screwdriver Small diagonal wire cutters Needle nose pliers 3/16” (4.7625 mm) ID silicone tubing x 6 inch (15 cm) long (minimum) Disassembly 1. Follow steps 1 thru 11 of the “Disassembly” section of the “Sieve Bed Replacement”... -
Page 18: Reassembly
Reassembly (Reference photos from the “Disassembly” section above) 1. From the bottom of the Battery Shelf, feed the Cable Tie up and through the rear right slot in the Shelf, and back through the rear left slot in the Shelf. 2. -
Page 19: Compressor Plate Assy Replacement (506320)
Compressor Plate Assy Replacement (506320): Tools and equipment required: #1 Phillips screwdriver Small diagonal wire cutters Needle nose pliers 3/16” (4.7625 mm) ID silicone tubing x 6 inch (15 cm) long (minimum) Disassembly 1. Follow steps 1 thru 11 of the “Disassembly” section of the “Sieve Bed Replacement” in this manual. 2. -
Page 20: Checking The Oxygen Purity
Checking the Oxygen Purity To Put the EasyPulse POC in Test Mode *It is very important to remove any external power source and allow the device to sit for at least 15 seconds before attempting to put in to the test mode. *Do not block the outlet while in the test mode.
Need help?
Do you have a question about the EASY PULSE PM4150 SERIES and is the answer not in the manual?
Questions and answers