Table of Contents
Advertisement
Quick Links
Advertisement
Table of Contents

Related Manuals for RayTek XR


Summary of Contents for RayTek XR
-
Page 1: Operating Instructions
Infrared Sensor Operating Instructions Rev. B2 Feb 2017 57301... - Page 3 Contacts Fluke Process Instruments Americas Santa Cruz, CA USA Tel: +1 800 227 8074 (USA and Canada, only) +1 831 458 3900 solutions@flukeprocessinstruments.com EMEA Berlin, Germany Tel: +49 30 478 0080 info@flukeprocessinstruments.de China Beijing, China Tel: +86 10 6438 4691 info@flukeprocessinstruments.cn Worldwide Service Fluke Process Instruments offers services,...
- Page 4 ARRANTY The manufacturer warrants this instrument to be free from defects in material and workmanship under normal use and service for the period of two years from date of purchase. This warranty extends only to the original purchaser. This warranty shall not apply to fuses, batteries, or any product which has been subject to misuse, neglect, accident, or abnormal conditions of operation.
-
Page 5: Table Of Contents
Content ............................7 AFETY NSTRUCTIONS ............................... 8 ECHNICAL 2.1 M ................................ 8 ODELS 2.2 O ........................... 10 PTICAL IAGRAMS 2.3 D ..........................12 IMENSIONS OF ENSOR 2.4 S ............................ 14 COPE OF ELIVERY ................................15 ASICS 3.1 M ................... 15 EASUREMENT OF NFRARED EMPERATURE... - Page 6 5.8.2 Avoidance of Condensation ........................ 41 5.9 T ............................42 HERMO ACKET ................................. 43 OFTWARE 6.1 R ............................43 EQUIREMENTS 6.2 S ......................... 43 OFTWARE NSTALLATION 6.3 S .............................. 44 ETUP 6.3.1 Sensor Setup ............................44 ..............................45 ROGRAMMING 7.1 T ............................
-
Page 7: Safety Instructions
Safety Instructions 1 Safety Instructions This document contains important information, which should be kept at all times with the instrument during its operational life. Other users of this instrument should be given these instructions with the instrument. Eventual updates to this information must be added to the original document. The instrument can only be operated by trained personnel in accordance with these instructions and local safety regulations. -
Page 8: Technical Data
Technical Data 2 Technical Data 2.1 Models Temperature range -40 to 600°C (-40 to 1112°F) Optical resolution* (90% energy, at focal distance) 33 : 1 Spectral response 8 to 14 µm Focus Options SF, CF1, CF2 Temperature range -40 to 600°C (-40 to 1112°F) Optical resolution* (90% energy, at focal distance) 50 : 1 Spectral response... - Page 9 Technical Data Measurement Parameters Accuracy ± 1 % or ± 1°C (± 2°F) of reading, whichever is greater ± 2°C (± 3.6°F) for temperatures < 10°C (50°F) ± 2°C (± 3.6°F) for temperatures < 90°C (194°F) for P7 models ± 1.2% or ± 1.2°C (± 2.2°F), for thermocouple Repeatability ±...
-
Page 10: Optical Diagrams
Technical Data 2.2 Optical Diagrams The optical diagrams indicate the target spot diameter at any given distance between the target object and the sensing head. All target spot sizes indicated in the optical diagrams are based on 90% energy. Distance D (in) Target Spot Diameter S (in) Distance between Sensor and Object [in] Target Spot Diameter... - Page 11 Technical Data LT, G5 MT, P7 Standard Focus SF Standard Focus SF LTSF MTSF G5SF P7SF LT, MT, G5 Close Focus CF2 Close Focus CF1 LTCF2 MTCF2 LTCF1 G5CF2 Close Focus CF2 Standard Focus SF LTHCF2 LTHSF Figure 2: Optical Diagrams Rev.
-
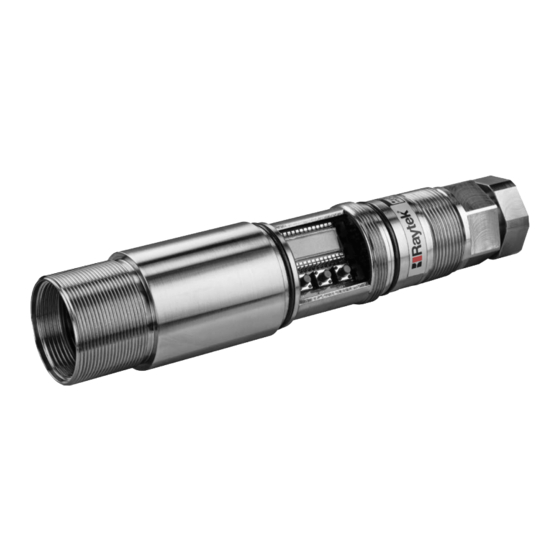
Page 12: Dimensions Of Sensor
Technical Data 2.3 Dimensions of Sensor All sensors are supplied with a fixed bracket and mounting nut. Alternatively, the sensor may also be mounted using customer-supplied accessories. All sensors and accessories are supplied with 1.5“ 20 UN 2 threads. Figure 3: Dimensions of the Sensor with DIN Connection Figure 4: Dimensions of the Sensor with Terminal Connection Rev. - Page 13 Technical Data Figure 5: Dimensions of the Sensor with DIN Connectors and Water-cooled housing Figure 6: Dimensions of the Sensor with Terminal Connections and Water-cooled housing Figure 7: Dimensions of the fixed bracket (XXXTXXACFB) Rev. B2 Feb 2017...
-
Page 14: Scope Of Delivery
Technical Data 2.4 Scope of Delivery All models are provided with: Operator’s manual Fixed bracket Mounting nut Support software CD Laser (only with LTHSF or LTHCF2) Rev. B2 Feb 2017... -
Page 15: Basics
Basics 3 Basics 3.1 Measurement of Infrared Temperature Everything emits an amount of infrared radiation according to its surface temperature. The intensity of the infrared radiation changes according to the temperature of the object. Depending on the material and surface properties, the emitted radiation lies in a wavelength spectrum of approximately 1 to 20 µm. -
Page 16: Ambient Temperature
Basics 3.3 Ambient Temperature The sensing head is designed for measurements in ambient temperatures between 0 and 70°C (32 to 158°F). 3.4 Atmospheric Quality In order to prevent damage to the lens and erroneous readings, the lens should always be protected from dust, smoke, fumes, and other contaminants. -
Page 17: Operation
Operation 4 Operation 4.1 DIN Quick Connection Designation Conductor 24 VDC black FTC1 black FTC2 white RS485-A purple RS485-B grey FTC3 yellow Shield clear Output + green Output – brown Relay NO/NC blue Figure 9: Plug (Connection side, not the solder side) Relay COM orange Table 1: Connections... -
Page 18: Terminal Strip Connection
Operation 4.2 Terminal Strip Connection Designation Conductor (24 VDC) GND In purple Output – yellow Output + green RS485-A blue RS485-B orange Figure 11: Plug Figure 12: Connection Figure 13: Cable Connection 1. Terminal connector 2. Seal-cap 3. 4. washer 5. 6-cores cable 6. relief bushing 7. arc-plate 8. End nut Sensor cables can be ordered in several lengths (XXXXRLTCB…). - Page 19 Operation Put the following on the cable: the one of metal washers (4), the relief bushing (6), the arc-plate (7) and the end nut (8). Cut about 60 mm (2.3 in) of the cable sheath from the end of the cable.
- Page 20 Operation Put the seal-cap (2) on the cable. Screw the end nut (8) and seal- cap (2) together, not too tight. Keep the cable revolve freely. Connect the wires to terminal connector (1). Plug the connector (1) in unit. Hold the cable tightly. Screw the seal-cap (2) to the unit. Keep the cable don’t revolve with the seal-cap (2).
-
Page 21: Operation Modes
Operation 4.3 Operation Modes Opening the Sensor To open the sensor, screw the cab on the right side and then push it further to the right until it hold from the second thread. Figure 14: Opening the Sensor S1 Switch S2 Switch S3 –... - Page 22 Operation User Interface and Sensor Programming You can easily make adjustments inside the electronic housing. The actual function mode is shown on the display. Use the Mode button to choose a parameter. Change the value using the <Up> and <Down> buttons.
- Page 23 Operation Switch functions: SR: Shunt Resistor (RS485 terminator) 0-5V Output Mode (default) Set the S1 and S2 to <mV> position. Use the <Down> button, until <mV> appears. Press <Mode> button. 4-20 mA Output Mode Set the S1 to <mA> position. Use the <Down> button, until <4-20>...
- Page 24 Operation J Thermocouple Output Mode Set the S1 and S2 to <TC> position. Use the <Down> button, until <TCJ> appears. Press <Mode> button. Thermocouple output available only with terminal block connections. K Thermocouple Output Mode Set the S1 and S2 to <TC> position. Use the <Down>...
-
Page 25: Post Processing
Operation 4.4 Post Processing 4.4.1 Averaging Averaging is used to smooth the output signal. The signal is smoothed depending on the defined time basis. The output signal tracks the detector signal with significant time delay but noise and short peaks are damped. -
Page 26: Valley Hold
Operation A defined hold time of 999 s (symbol “∞” in the display) will put the device into continuous peak detection mode. A low level input (GND) at external input FTC3 will promptly interrupt the hold time and will start the maximum detection again. -
Page 27: Advanced Valley Hold
Operation Temp Output temperature Object temperature Hysteresis Time Figure 19: Advanced Peak Hold The advanced peak hold function is only adjustable by means of the DataTemp Multidrop Software. 4.4.5 Advanced Valley Hold This function works similar to the advanced peak hold function, except that it will search the signal for a local minimum. -
Page 28: Inputs Ftc
Operation 4.5 Inputs FTC The three inputs FTC1, FTC2, and FTC3 are used for the external control of the unit. The inputs FTC1, FTC2, and FTC3 are controllable via the DataTemp Multidrop Software! FTC1 FTC2 FTC3 Emissivity value (analog input) Emissivity value (digital input) Ambient Temperature Compensation Trigger/Hold/Laser... - Page 29 Operation 1 = High signal (input at 5 V) A non-wired input is considered as High signal! Table Entry Emissivity FTC3 FTC2 FTC1 (Example) 1.100 0.500 0.600 0.700 0.800 0.970 1.000 0.950 Figure 22: Digital Selection of Emissivity with FTC Inputs The values in the table are controllable via the DataTemp Multidrop software only.
-
Page 30: Ambient Temperature Compensation
Operation 4.5.3 Ambient Temperature Compensation The sensor is capable of improving the accuracy of target temperature measurements by taking into account the ambient or background temperature. This feature is useful when the target emissivity is below 1.0 and the background temperature is significantly hotter than the target temperature. For instance, the higher temperature of a furnace wall could lead to hotter temperatures being measured especially for low emissivity targets. -
Page 31: Trigger/Hold/Laser
Operation 4.5.4 Trigger/Hold/Laser The external FTC3 input can be used either as Trigger or Hold or as Laser switch. External switch: - Relay contacts, - Transistor, - TTL output, … Figure 24: Wiring the FTC3 Input Trigger: A logical low signal at the input FTC3 will reset the peak or valley hold function. As long as the input is kept at logical low level, the software will transfer the actual object temperatures toward the output. -
Page 32: Rs485 Communication
Operation 4.6 RS485 Communication The RS485 serial interface is used for networked sensors or for long distances up to 1200 m (4000 ft). This allows ample distance from the harsh environment where the sensing system is mounted to a control room or pulpit where the computer is located. 4.6.1 PC Connection via USB/RS485 Converter The USB/RS485 converter is self-powering via the USB connection. -
Page 33: Pc Connection Via Rs232/485 Converter
Operation 4.6.2 PC Connection via RS232/485 Converter The RS232/485 adapter comes with a power supply: RAYMINCONV2 for 230 VAC RAYMINCONV1 for 110 VAC RS485A RS485B Rev. B2 Feb 2017... -
Page 34: Multiple Sensor Installation
Operation 4.6.3 Multiple Sensor Installation You may connect up to 32 units as shown below. Before units are in a loop the multidrop address needs to be defined. Use only one power supply for all boxes in the network to avoid ground loops! Multidrop Address Press <Mode>... -
Page 35: Factory Defaults
Operation 4.7 Factory Defaults Hold <Down> button and press <Mode> button twice to restore factory defaults. Rev. B2 Feb 2017... -
Page 36: Accessories
Accessories 5 Accessories 5.1 Overview For all models: Mounting Nut XXXTXXACMN Fixed Mounting Bracket XXXTXXACFB Adjustable Bracket XXXRXXACAB Air Purge Collar XXXRXXACAP Right Angle Mirror XXXRXXACRA Sighting Viewer XXXRXXACSV Adjustable Pipe Adapter XXXRXXAPA ... -
Page 37: Adjustable Bracket
Accessories 5.2 Adjustable Bracket Figure 30: Adjustable Bracket (XXXTXXACAB) 5.3 Air Purge Collar The Air Purge Collar (XXXTXXACAP) is used to keep dust, moisture, airborne particles, and vapors away from the lens. It can be mounted before or after the bracket. The airflow is passed through 1/8” NPT stainless steel fitting onto the front aperture. -
Page 38: Sighting Viewer
Accessories Figure 32: Right Angle Mirror When using the Right Angle Mirror, adjust the emissivity settings downward by 5%. For example, for an object with an emissivity of 0.65, you adjust the value down to 0.62. This correction accounts for energy losses in the mirror. 5.5 Sighting Viewer The Sighting Viewer (XXXTXXACSV) is used to aid in the alignment of the standard sensor. -
Page 39: Protective Window
Accessories 5.7 Protective Window Protective windows can be used to protect the sensor’s optic against dust and other contaminations. For sensors with plastic lenses the use of a protective window combined with the air purge is strongly recommended. The following table provides an overview of the available protective windows. All protective windows have a transmission below 100%. -
Page 40: Air/Water-Cooled Housing
Accessories 5.8 Air/Water-Cooled Housing The Air/Water-Cooled Housing accessory allows the sensor to be used in ambient temperatures up to 120°C (250°F) with air-cooling, and 180°C (356°F) with water-cooling. The cooling media should be connected using 1/8” NPT fittings. Air flow should be 1.4 to 2.5 l/sec at 25°C (77°F). Water flow should be approximately 1.0 to 2.0 l/min (water temperature between 10 and 27°C (50 to 80.6°F). -
Page 41: Avoidance Of Condensation
Accessories 5.8.2 Avoidance of Condensation If environmental condition makes water cooling necessary, it is strictly recommended to check whether condensation will be a real problem or not. Water cooling also causes a cooling of the air in the inner part of the device. Thereby the capability of the air to store water decreases. -
Page 42: Thermojacket
Accessories 5.9 ThermoJacket The ThermoJacket gives you the ability to use the sensor in ambient temperaturesup to 315°C (600°F). The ThermoJacket’s rugged cast aluminum housing completely encloses the sensor and provides water and/or air cooling and air purging in one unit. The sensor can be installed or removed from the ThermoJacket housing in its mounted position. -
Page 43: Software
Software 6 Software 6.1 Requirements PC with Windows 2000/XP/Vista/Win7, 64 MB RAM minimal memory about 10 M free memory on the hard disc for program files 6.2 Software Installation Make sure any sensor or sensors are turned on before running the program. The Startup Wizard runs the first time you use the program. -
Page 44: Setup Menu
Software 6.3 Setup Menu 6.3.1 Sensor Setup Figure 37: Sensor Setup Under that dialog you can set up the sensor (emissivity, ambient temperature compensation, signal processing), the outputs (0/4 - 20 mA, alarm relay) and other advanced settings. Further information you can find under the software online help. Rev. -
Page 45: Programming
Programming 7 Programming 7.1 Transfer Modes The unit’s serial interface is RS485. Settings: transfer rate: 9.6 kBaud, 8 data bits, 1 stop bit, no parity, flow control: none (half duplex mode). There are two possible transfer modes for the serial interface: Poll Mode: By user interface control, a parameter will be set or requested. -
Page 46: Device Setup
Programming Setting a parameter without writing it into the device EEPROM (Poll Mode) This function is for test purposes only. E#0.975<CR> “E“ is the parameter to be set “#“ is the command for “set parameter without writing it into the EEPROM“ “0.975“... - Page 47 Programming ES=D Emissivity set by the entries in a table (selected by digital inputs FTC1 – FTC3), see section 4.5.2 Emissivity Setting (digital), page 28. asks for the emissivity value that is used for temperature calculation There are eight entries possible for emissivity setting (1) and a related threshold value (2). To be able to write or read these values, use the following commands: EP=2 set pointer to line 2 (range: 0 to 7, “table entry“) (3)
-
Page 48: Post Processing
Programming 7.3.3 Post Processing The following parameters can be set to determine the post-processing mode. maximum hold, hold time: 5 s F=12.5 minimum hold, hold time: 12.5 s G=10 averaging, average time (90%): 10 s XY=3 advanced maximum hold, hysteresis: 3 K XY=-2 advanced minimum hold, hysteresis: 2 K Advanced Peak/Valley Hold with Averaging:... -
Page 49: Alarm Output
Programming H=500 the maximum current/voltage value is set to 500°C the minimum current/voltage value is set to 0°C Note: You cannot set these values for thermocouple output. The minimum span between the maximum / minimum settings is 20 K. 7.5.3 Alarm output The opto-coupled alarm output can be function and trigger from various temperature variables: Internal sensing head temperature (normally open N.O. -
Page 50: Multiple Units In A Network (Multidrop Mode)
Programming AC=2 compensation with an external voltage signal at the analog input FTC2 (0V – 5V corresponds to low end and high end of temperature range), current ambient temperature is readable with command A. Note: The mode AC = 2 does not function in case of setting the command ES = D! 7.6 Multiple Units in a Network (Multidrop Mode) Up to 32 units can be connected within a RS485 two-wire loop, see section 4.6 RS485... -
Page 51: Maintenance
Maintenance Maintenance Our customer service representatives are always at your disposal for any questions you might have. This service includes any support regarding the proper application of your infrared measuring system, calibration or the solution to customer-specific solutions as well as repair. In many cases your problems will be applications-specific and can possibly be solved over the telephone. -
Page 52: Error Codes
Maintenance 8.2 Error Codes Display Description OVER Temperature over range UNDER Temperature under range LCD test, after reset (2 seconds) Table 6: Error Codes via LCD display Display Description T>>>>>> Temperature over range T<<<<<< Temperature under range Table 7: Error Codes via RS485 8.3 Automatic Error Indication The automatic error indication (alarm output) shall warn the user and guarantee a secure output in the event of a system error. -
Page 53: Cleaning The Lens
Maintenance 8.4 Cleaning the Lens Care should be taken to keep the lens clean. Any foreign matter on the lens will affect the accuracy of the measurements. Be sure to take care when cleaning the lens. Please observe the following: Blow off lose particles with clean air. -
Page 54: Replacing A Protective Window
Maintenance 8.5 Replacing a Protective Window The models contain a thread allowing an easier protective window exchange. The window material is placed in a metal ring with a thread with an inner rubber gasket. This rubber gasket hermetically seals the sensor against atmospheric contaminants. Replace the protective window using the special tool supplied with the spare window. -
Page 55: Appendix
Appendix 9 Appendix 9.1 Determination of Emissivity Emissivity is a measure of an object’s ability to absorb and emit infrared energy. It can have a value between 0 and 1.0. For example a mirror has an emissivity of 0.1, while the so-called “Blackbody“ reaches an emissivity value of 1.0. - Page 56 Appendix ETALS Emissivity Material 1 µm 1.6 µm 2.3 µm 3.9 µm 5 µm 8 – 14 µm Aluminum Unoxidized 0.1-0.2 0.02-0.2 0.02-0.2 0.02-0.2 0.02-0.2 0.02-0.1 Oxidized 0.2-0.4 0.2-0.4 0.2-0.4 0.2-0.4 Alloy A3003, Oxidized Roughened 0.2-0.8 0.2-0.6 0.2-0.6 0.1-0.4 0.1-0.4 0.1-0.3 Polished 0.1-0.2...
- Page 57 Appendix ETALS Emissivity Material 1 µm 1.6 µm 2.3 µm 3.9 µm 5 µm 8 – 14 µm Nickel Oxidized 0.8-0.9 0.4-0.7 0.4-0.7 0.3-0.6 0.3-0.6 0.2-0.5 Electrolytic 0.2-0.4 0.1-0.3 0.1-0.2 0.1-0.15 0.1-0.15 0.05-0.15 Platinum Black 0.95 0.95 Silver 0.02 0.02 0.02 0.02 0.02...
- Page 58 Appendix ETALS Emissivity Material 1 µm 1.6 µm 2.3 µm 5 µm 8 – 14 µm Asbestos 0.95 Asphalt 0.95 0.95 Basalt Carbon Unoxidized 0.8-0.95 0,8-0,9 0.8-0.9 0.8-0.9 Graphite 0.8-0.9 0.8-0.9 0.7-0.9 0.7-0.8 Carborundum 0.95 Ceramic 0.8-0.95 0.8-0.95 0.95 Clay 0.8-0.95 0.85-0.95 0.95...
-
Page 59: Command List
Appendix 9.3 Command List Description Char Format Poll Burst Set Legal values Factory default Poll Parameter ?X/?XX Set Parameter X/XX=... E=0.85 Set Parameter without EEPROM X/XX# E#0.85 storage Multidrop addressing 001?E answer: 001!E0.95 Error message *Syntax error Acknowledge message !P010 Burst string Format UTEI Ambient radiation correction... - Page 60 Appendix Description Char Format Poll Burst Set Legal values Factory default Presel. Setpoint / Relay function nnn.n Target temperature nnnn.n In current scale (°C / °F) Temperature unit C / F Poll / Burst Mode P = poll B = burst Poll Mode Burst string, contents...
- Page 61 Appendix Notes Rev. B2 Feb 2017...
Need help?
Do you have a question about the XR and is the answer not in the manual?
Questions and answers