Table of Contents
Advertisement
Quick Links
31-46531
224D2828P001
12-08 JR
monogram.com
Installation
Instructions
Side-by-Side Refrigerators
Design Guide
With Installation Instructions
Réfrigérateurs Côte à Côte
Buide de conception comprenant
les instructions d'installation, Page 25
Frigoríficos Lado a Lado
Guía de diseño con
instrucciones de instalación, Página 47
Doppelseitige Kühlschränke
Aufbauanleitung
mit Installationsanleitung, Seite 69
'
Side-by-Side' Koelkasten
Ontwerpgids
met installatie instructies, Pagina 91
113
Advertisement
Table of Contents

Related Manuals for Monogram ZPB480D


Summary of Contents for Monogram ZPB480D
- Page 1 Buide de conception comprenant les instructions d'installation, Page 25 Frigoríficos Lado a Lado Guía de diseño con instrucciones de instalación, Página 47 Doppelseitige Kühlschränke Aufbauanleitung mit Installationsanleitung, Seite 69 ‘ Side-by-Side’ Koelkasten Ontwerpgids met installatie instructies, Pagina 91 31-46531 224D2828P001 12-08 JR monogram.com...
-
Page 2: Table Of Contents
Safety Information Skill Level – BEFORE YOU BEGIN Installation of this refrigerator requires basic mechanical, carpentry and plumbing skills. Read these instructions completely and carefully. Proper installation is the responsibility of the installer. IMPORTANT Product failure due to improper installation is not •... -
Page 3: The Installation Space
Design Guide DIMENSIONS AND CLEARANCES THE INSTALLATION SPACE Case Width: 645 mm Framed Models 42” Models, 457 mm 1041 mm for 42” Models 654 mm Stainless Steel Models 48” Models, 508 mm 1194 mm for 48” Models Case Depth *Finished Width * Shipping height. -
Page 4: 130° Door Swing
Design Guide Frameless Cabinets: The case trim overlaps cabinets at the top and sides. Therefore, frameless cabinets may require filler strips Refrigerator to prevent interference with cabinet door 6060 mm From swing. The opening must allow for filler strips. Rear of Refrigerator 25 mm 51 mm... -
Page 5: 90° Door Swing
Design Guide Frameless Cabinets: The case trim overlaps cabinets at the top and sides. Therefore, Refrigerator frameless cabinets may Case Trim require filler strips to prevent interference with cabinet door swing. The opening must allow for filler strips. 606 mm From Rear of Refrigerator 6 mm... -
Page 6: Customization Basics
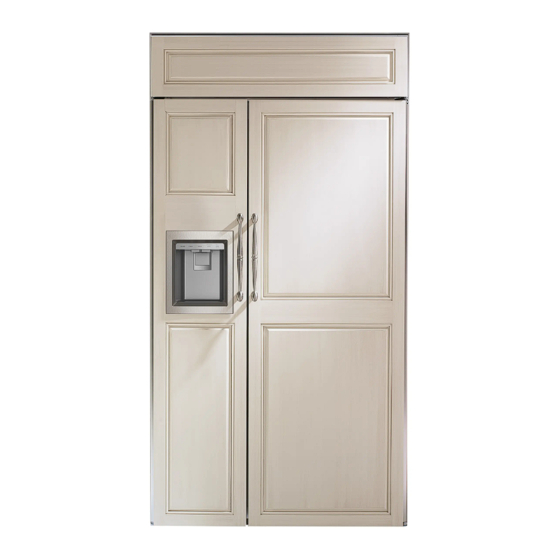
Models Acrylic designed to fit 19 mm overlay panels. ZISB480D ZPB480D ZIS480N ZPB480N ZISB420D ZPB420D Accessory Panels ZIS420N ZPB420N Black and stainless steel accessory panels are available from your Monogram dealer. Panels are cut to size and ready to install. -
Page 7: Mm Framed Panel Dimensions
Design Guide 6 mm FRAMED PANEL DIMENSIONS 8 mm Trim Door If you choose to install framed panels, they must Reveal be cut to the dimensions shown. The panels will slide into the frame on the door and grille. 6 mm Non-Dispenser Models Panel If the custom panel is less than 6 mm thick and it fits... -
Page 8: 19 Mm Overlay Panel Dimensions
Design Guide 19 mm OVERLAY PANEL DIMENSIONS Overlay Panel For a more custom appearance, overlay panels may Door 19 mm be installed on trimmed models. The overlay panel must Overlay Spacer Panel be secured to a 6 mm thick backer panel which slides Panel into the trim. -
Page 9: Raised Overlay Panel Design
Design Guide DISPENSER MODELS: 6 mm Backer Panel RAISED OVERLAY PANEL DESIGN 3 mm Spacer 19 mm Overlay Panel When a raised panel design is to be used, a custom wide middle rail is required to accept the dispenser trim. •... -
Page 10: Side Panels
Design Guide FLOORING SIDE PANELS For proper installation, this refrigerator must be placed Side panels must be used on a level surface of hard material that is at the same whenever the sides of the height as the rest of the flooring. This surface should be refrigerator will be exposed. -
Page 11: Step 1 Remove Packaging
Installation Instructions CAUTION: STEP 1 REMOVE PACKAGING DO NOT ATTEMPT TO ROLL CAUTION: UNIT OFF SKID. The refrigerator is much heavier at the top than at the bottom—be careful when moving. When using a hand truck, handle from the side only. •... -
Page 12: Step 4, Household Water Filtration
Installation Instructions STEP 6 INSTALL ANTI-TIP BRACKETS STEP 4 INSTALLATION WITH HOUSEHOLD WATER WARNING: ANTI-TIP PRECAUTIONS FILTRATION SYSTEM The refrigerator is top-heavy and must be secured to prevent the possibility of tipping forward. Skip this step if you do not have a household water filtration system. -
Page 13: Step 7 Level Refrigerator
Installation Instructions STEP 7 LEVEL REFRIGERATOR STEP 8 ALTERNATE ANTI-TIP PROCEDURE All models have 4-point leveling. The front is supported by leveling legs, and the rear is supported The refrigerator must be secured to prevent tipping. by adjustable wheels. Both are accessible from The anti-tip brackets cannot be used on metal the front of the refrigerator. -
Page 14: Step 9 Secure Refrigerator To Cabinetry
Installation Instructions STEP 9 SECURE REFRIGERATOR STEP 11 INSTALL GRILLE PANEL TO CABINETRY (for Custom Panel Models only) Whenever possible, perform this step for anti-tip To insert the framed or overlay panel into the grille: security or when anti-tip brackets cannot be used. •... -
Page 15: Step 12 Install Framed Panels
Installation Instructions STEP 12 INSTALL FRAMED PANELS Go to Step 10A for Overlay Panels Handle Door Trim Trim Refrigerator Door Supplied Handle Shown in 6 mm Panel Position Install door panels: • Open the door to 90°. Remove the 6 Phillips-head screws from the door handle. -
Page 16: Step 12A Install Overlay Panels
Installation Instructions STEP 12A INSTALL OVERLAY PANELS Door Trim Handle Trim Refrigerator Door Move Forward For 19 mm Panel Supplied Handle Shown in Overlay Panel Position Install door panels: • Open door to 90°. Remove the 6 Phillips-head screws from the door handle. •... - Page 17 Installation Instructions STEP 12A (continued) STEP 12A (continued) Custom Handles • Carefully place the aluminum cover trim into the top end cap so that the recess is aligned with the cap. • If you are using custom handles, the handle must Use the top-to-bottom grooves along the handle side be properly secured to the overlay panel before sliding to align the cover trim accurately.
-
Page 18: Step 13 Install Dispenser Trim
Installation Instructions STEP 13 INSTALL DISPENSER TRIM STEP 14 CONNECT WATER SUPPLY Skip this step is you are installing a stainless steel wrapped or a non-dispenser refrigerator. There are two dispenser trims shipped with your refrigerator. Select the appropriate trim for your application. -
Page 19: Step 15, Connect Power
Installation Instructions STEP 15 CONNECT POWER, CLOSE STEP 17 INSTALL TOEKICK GRILLE PANEL • Locate the supplied toekick (shipped taped to the side of the refrigerator). Install with the 2 screws • Open the grill panel. provided. Adjust to the desired height and tighten •... -
Page 20: Step 1 Remove Door Handles
Tubular Stainless Steel Handles This kit provides for the installation of tubular stainless steel handles on 19 mm overlay custom panels. TOOLS AND MATERIALS REQUIRED STEP 1 REMOVE DOOR HANDLES • Open the refrigerator door to 90°. Remove In addition to the custom door panels, you need: the 6 screws holding the handle to the door. -
Page 21: Step 2, Install Handles Onto Panels
Tubular Stainless Steel Handles STEP 2 INSTALL HANDLE ONTO PANELS STEP 2 (continued) Drill Pilot Holes Secure Handles to Panels • Measure, mark and draw a line, 29 mm from • Use a 7/8" spade bit to drill 13 mm to 14 mm max. the handle side edge, top to bottom. -
Page 22: Step 3 Install Assembled Handles
Tubular Stainless Steel Handles STEP 3 INSTALL ASSEMBLED HANDLES STEP 4 INSTALL DISPENSER TRIM • Slide the assembled panels into the door trim. For Dispenser Models Only: • Secure both trims using all the original screws. There are two dispenser trims shipped with your dispenser refrigerator. - Page 23 Notes...
- Page 24 Änderungen hinsichtlich Material, Aussehen und technischer Daten vor. OPMERKING: De verbetering van producten is een voortdurend streefdoel bij General Electric. Daarom kunnen de materialen, het uitzicht en de specificaties zonder kennisgeving worden gewijzigd. Monogram. ® Pub No. 31-46531 224D2828P001 12-08 JR 12008-00...
Need help?
Do you have a question about the ZPB480D and is the answer not in the manual?
Questions and answers