Page 1
Installation Instructions Side by Side Refrigerators Design Guide With Installation Instructions 31-46514-1 224D1889P014 01-13 GE monogram.com...
CAUTION: and to reduce the risk of personal injury or damage ou toute intervention. PRUDENCE For Monogram local service in your area, call 1.800.444.1845. For Monogram service in Canada, call 1.800.561.3344 For Monogram Parts and Accessories, call 1.800.626.2002.
Design Guide THE INSTALLATION SPACE DIMENSIONS AND CLEARANCES 36" Models 12 25-3/8" Framed Models 42" Models 18 25-3/4" Stainless Steel Models 35", 41", or 47" 48" Models 20 Case Width * Shipping height. *Finished Width The refrigerator can be adjusted to fit into a cutout that is 83-1/2”...
Design Guide Frameless Cabinets: cabinets at the top Refrigerator frameless cabinets may require filler strips to Case Trim prevent interference with cabinet door swing. for filler strips. 23-7/8" From Rear of Refrigerator 1/4" 1/2" 3/4" 1" 1-1/4" 1-1/2" Top View 90°...
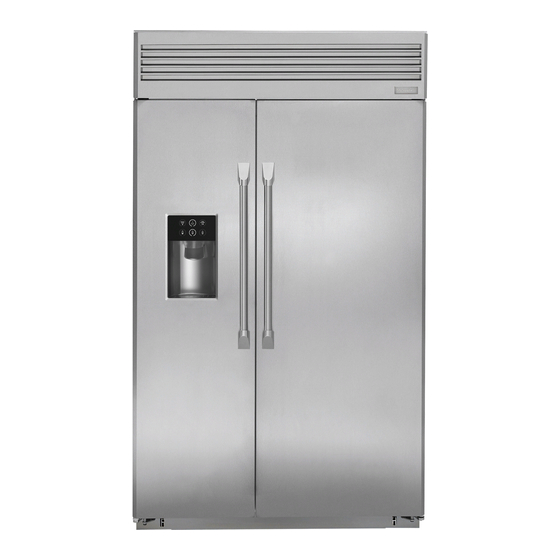
Stainless Steel Wrapped Refrigerators Stainless Steel wrapped refrigerators have wrapped doors and grille panel, beveled edges, and tubular stainless steel handles that coordinate with other Monogram appliances. Trimmed Refrigerators with decorative panels. Field installed custom door 3/4" Overlay Panel and grille panels are required.
Page 7
Design Guide 1/4” FRAMED PANEL DIMENSIONS 5/16" Trim If you choose to install framed panels, they must Door Reveal into the frame on the door and grille. 1/4" Non-Dispenser Models Panel loosely in the door frame it can be backed up with a piece of filler material or foam tape to improve the fit.
Page 8
Design Guide 3/4” OVERLAY PANEL DIMENSIONS Overlay Panel Door For a more custom appearance, overlay panels may 3/4" Spacer Panel Overlay Panel Backer Panel between the overlay and backer panel. Assemble the panels with glue and screws: NOTE: Left-to-right offset is right and top to bottom.
Page 9
Design Guide DISPENSER MODELS: RAISED OVERLAY PANEL DESIGN 1/4" Backer Panel .10" Spacer When a raised panel design is to be used, 3/4" Overlay Panel a custom wide middle rail is required to accept the dispenser trim. for the dispenser trim to overlap the opening. to accept the dispenser trim.
Design Guide 24" SIDE PANELS HARDWARE SUPPLIED Side panels must be used whenever the sides of the refrigerator will be exposed. 3/16" 1-7/8" slip into the side case trim. Secure the panels to the with custom handles. Includes 22 flat head screws refrigerator with stick-on and 4 endcaps.
Installation Instructions STEP 1 REMOVE PACKAGING bolts securing the straps to the skid. CAUTION CAUTION When using a hand truck, handle from the side only. OFF SKID. PRUDENCE Remove PRUDENCE Tie Down remove the outer carton. case must be removed before the refrigerator is NOTE: tilt the refrigerator and slide the blocks out from beneath.
Installation Instructions STEP 3 (continued) STEP 6 INSTALL ANTI-TIP BRACKETS Shut off the main water supply. ANTI-TIP PRECAUTIONS of water. to prevent the possibility of tipping forward. valve and cold water pipe in a basement or cabinet. PRECAUTIONS CONTRE LES BASCULEMENTS easily accessible.
Page 13
Installation Instructions STEP 7 LEVEL REFRIGERATOR STEP 8 ALTERNATE ANTI-TIP PROCEDURE supported by leveling legs, the rear is supported The refrigerator must be secured to prevent tipping. by adjustable wheels. Both are accessible from The anti-tip brackets cannot be used on metal the front of the refrigerator.
Installation Instructions STEP 9 SECURE REFRIGERATOR STEP 11 INSTALL GRILLE PANEL TO CABINETRY (for Custom Panel Models only) Whenever possible, perform this step for anti-tip To insert the framed or overlay panel into the grille: security, or when anti-tip brackets cannot be used. The refrigerator must be secured to prevent tipping.
Installation Instructions STEP 12 INSTALL 1/4” FRAMED PANELS Go to Step 12A for Overlay Panels Supplied Handle Shown in 1/4” Panel Position Install door panels: from the door handle. Dispenser Models Only: the trim at the top of the door should be removed. and slide into the hinge side trim.
Page 16
Installation Instructions STEP 12A INSTALL OVERLAY PANELS Supplied Handle Shown in Overlay Panel Position Install door panels: from the door handle. Dispenser Models Only: the trim at the top of the door should be removed. channel and slide into the hinge side trim. in the screw holes.
Page 17
Installation Instructions STEP 12A (continued) STEP 12A (continued) Custom Handles end cap so that the recess is aligned with the cap. be properly secured to the overlay panel before sliding the panel into the trim. to align the cover trim accurately. Pull the tape a few inches at a time while pressing the trim against handle and hardware.
Page 18
Installation Instructions STEP 13 INSTALL DISPENSER TRIM STEP 14 CONNECT WATER SUPPLY Skip this step is you are installing a stainless steel wrapped or a non-dispenser refrigerator. refrigerator. Select the appropriate trim for your application. Refrigerator House Framed Overlay Water Supply Water Supply Panel Panel...
Page 19
Installation Instructions STEP 17 INSTALL TOEKICKS STEP 15 CONNECT POWER, CLOSE GRILLE PANEL into the opening next to the water filter. If access is too tight, remove the 2 screws holding the water filter bracket and move aside. Plug in the power cord and secure the bracket with the original screws.
Page 20
ZKHSS2 Tubular Stainless Steel Handles TOOLS AND MATERIALS REQUIRED STEP 1 REMOVE DOOR HANDLES the 6 screws holding the handle to the door. handle and trim. ” and 7/8” spade bit PARTS LIST 2 Stainless tubular handles 8 Handle standoffs 3/32”...
Page 21
ZKHSS2 Tubular Stainless Steel Handles STEP 2 INSTALL HANDLE ONTO PANELS STEP 2 (continued) Drill Pilot Holes Secure Handles to Panels the handle side edge, top to bottom. into the back side of the panel. At this depth there will be enough screw threads to engage the handle centered top to bottom and on the marked line.
Page 22
ZKHSS2 Tubular Stainless Steel Handles STEP 3 INSTALL ASSEMBLED HANDLES STEP 4 INSTALL DISPENSER TRIM For Dispenser Models Only: Dispenser Models Only: the trim at the top of the door should be removed. recess on the door. and slide into the hinge side trim. Reinstall all original screws...
Page 24
While performing installations described in this book, safety glasses or goggles should be worn. For Monogram local service in your area, call ® 1.800.444.1845. specifications are subject to change without notice. GE Appliances & Lighting 31-46514-1 Appliances 224D1889P014 General Electric Company...
Need help?
Do you have a question about the ZISW480D and is the answer not in the manual?
Questions and answers