Advertisement
Quick Links
Advertisement

Related Manuals for Spirit XIC600


Summary of Contents for Spirit XIC600
- Page 1 XIC600 Indoor Cycle OWNER’S MANUAL...
-
Page 3: Table Of Contents
TABLE OF CONTENTS IMPORTANT SAFETY INSTRUCTIONS IMPORTANT OPERATION INSTRUCTIONS PRODUCT REGISTRATION XIC600 ASSEMBLY INSTRUCTIONS BIKE ADJUSTMENTS CONSOLE OPERATION FEATURES TROUBLESHOOTING GENERAL MAINTENANCE MANUFACTURER’S LIMITED WARRANTY Thank you for purchasing our product, please save these instructions. Please do not perform or attempt any... - Page 4 Through your dealer, Spirit Fitness will do all we can to make your ownership experience as pleasant as possible for many years to come.
-
Page 5: Important Safety Instructions
not touch any driving mechanism while it is in motion Important Safety Instructions as possible injury could occur. WARNING • Do not attempt to perform dip movements on handlebars Read all instructions before using this appliance. • Never drop or insert any object into any openings. WARNING - To reduce the risk of injury to persons, install the Indoor Bike on a flat level surface. - Page 6 intense than it really is, resulting in the possibility of SAVE THESE INSTRUCTIONS - THINK SAFETY! Important Operation Instructions overexertion or injury. WARNING Proper installation and regular maintenance are required to ensure user’s safety. Maintenance is the sole AS THE OWNER OF THIS EXERCISE EQUIPMENT, YOU responsibility of the owner.
-
Page 7: Important Operation Instructions
Please record the serial number of this fitness product in the space provided below. Serial Number: Serial Number Location Register Y our Purchase The self-addressed product registration card must be completed in full and returned to Spirit Fitness. You can also go to https://www.spiritfitness.com under the Support tab to register online. - Page 8 XIC600 PRE ASSEMBLY UNPACKING TOOLS INCLUDED: 1. Cut the straps, then lift the box over the unit and unpack. ‰ 14/15mm Wrench (#85) ‰ Combination Allen Wrench 2. Carefully remove all parts from the carton and inspect for any damage or missing parts.
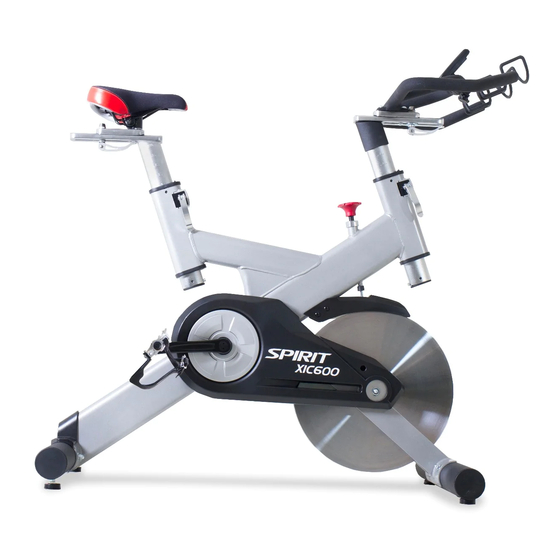
- Page 9 WATER BOTTLE HOLDER CONSOLE HANDLE BARS SEAT MAIN FRAME FLYWHEEL FRONT STABILIZER FOOT PEDALS LEVELERS REAR STABILIZER LEVELERS...
- Page 10 XIC600 STEP ONE HARDWARE FOR STEP 1 PART TYPE DESCRIPTION CARRIAGE BOLTS 3/8”X3-1/2” 3/8” CURVED WASHERS CAP NUT 3/8” 1. Gather HARDWARE FOR STEP 1. 2. Install the FRONT AND REAR STABILIZERS with four CARRIAGE BOLTS (81), four CURVED WASHERS (83) and four CAP NUTS (82).
- Page 11 Install the handlebars with four 5/16" x 15mm bolts (88), 5/16" split washers (49) and four 5/16” flat washers (48). Tighten the bolts securely. XIC600 STEP THREE Install the drink holder to the handlebars by loosening the thumb screw, clamp to the handlebars and re-tighten the thumb screw.
- Page 12 XIC600 STEP FOUR 1. Install the LEFT (25L) and Right (25R) pedals to the crank arms. Please note that the Left pedal has a reverse threaded bolt and needs to be tightened in a counterclockwise direction. The pedals are identified by either an R or L stamped into the end of the bolt.
- Page 13 XIC600 STEP FIVE It may be necessary to remove and re-install the batteries in both Cycling Console Battery Installation: the console and transmitter if you continue to receive an error. Remove the battery cover from the back of the computer.
- Page 14 XIC600 STEP FIVE Installing the speed transmitter: Plug the speed sensor wire into the transmitter (6) and then attach the transmitter (with Velcro pre-attached to the back) to the Velcro half that is pre-installed to the bike frame. The Velcro is...
- Page 15 XIC600 ADJUSTING BIKE Adjustment of Seat Position Take some time to learn how to properly adjust the bike Seat Forward /Aft Adjustment to your body; it will make your workouts more pleasant and a safer experience too. Riding the bike when it 1.
- Page 16 XIC600 ADJUSTING BIKE DUAL FUNCTION PEDAL Handlebar Adjustment Adjusting the Pedal Straps Handlebar Height Adjustment 1. Place your feet in between the aluminum surface of the pedal and ADJUSTING THE PEDAL STRAPS 1. The Handlebar height is a matter of preference. Start with a the nylon foot strap that wraps around it.
- Page 17 XIC600 BASIC OPERATION Now that you have established a proper riding position, take a few minutes to ride the bike and determine that your position is comfortable. Start pedaling at a slow pace with your toes and knees pointed directly forward. Hold the handlebar lightly and in a position that allows your shoulders and upper body to relax.
-
Page 18: Console Operation
TION XIC600 CONSOLE OPERA Large LCD Matrix Window Built-in Heart Rate Receiver Easy-T ouch Control Buttons... - Page 19 XIC600 CONSOLE OPERATION PLEASE NOTE: IMPORTANT SAFETY INSTRUCTIONS WARNING 1. The Cycling Monitor system is designed as sealed unit and not BEFORE BEGINNING THIS OR ANY OTHER EXERCISE PROGRAM, meant to be opened other than for the sole purpose of installing CONSULT A PHYSICIAN.
-
Page 20: Features
DISTANCE XIC600 FEATURES Distance is the measurement of the virtual distance traveled on the bike. This distance is based on the user riding a bike with tires that are the same size as the DISTANCE group bike‟s flywheel. DISPLAY WINDOW... - Page 21 XIC600 FEATURES 2. Pre RESET/HEART RATE ALARM SELECT MODE SELECT use th 1. Press the right hand key to activate the heart rate MODE SELECT 3. Pre RESET/HEART RATE ALARM SELECT Press the left hand key to select the SPEED, DIST, TIME Press the left hand key to select the SPEED, DIST, TIME, or CLOCK alarm.
- Page 22 XIC600 FEATURES 2. Press the left hand key to switch to the hour setting, Press the left hand key to switch to the hour setting, use the right use the right hand key to change hours. HEART RATE TARGET ZONES hand key to change hours.
- Page 23 XIC600 FEATURES Press the left hand key to set the measuring value for weight (Lb 2. Press the left hand key to set the measuring value for or Kg), press the right hand key to select. 2. Press the left hand key to set the measuring value for ayed then weight (Lb or Kg), press the right hand key to select.
-
Page 24: Troubleshooting
TROUBLESHOOTING No Display on Console Hold down any key to bring the console to “Quick Start” mode. Ensure that the batteries are installed properly in the console and transmitter. If they are, install fresh batteries. No Heart Rate signal displayed Ensure that your chest strap (sold separately) is worn correctly and that there is moisture under the electrodes. -
Page 25: General Maintenance
GENERAL MAINTENANCE Do not service internal parts of pedals. If they are found to be worn internally, we recommend replacing the pedal. Use of lubricants or cleaning solutions other than those specified will result in diminished performance and a shorter life span for that part. -
Page 26: Manufacturer's Limited Warranty
Indoor Cycle Warranty - Effective January 23, 2017 Spirit Fitness, Inc. (Spirit Fitness) warrants all its Indoor Cycle parts for a period of time listed below from the date of retail sale, as determined by sale receipt, or in the absence of a sales receipt eighteen (18) months from the original factory shipping date. Spirit Fitness’ responsibilities include providing new or remanufactured parts, at Spirit Fitness’... - Page 27 Spirit Fitness’ obligation under this warranty is limited to repairing or replacing, at Spirit Fitness’ option, the product through one of our authorized service centers. All repairs must be preauthorized by Spirit Fitness. If the product is shipped to a service center freight charges to and from the service center will be the customer’s responsibility.
- Page 29 800.258-8511 Spirit Fitness spiritservice@spiritfitness.com 3000 Nestle Road www.spiritfitness.com Jonesboro, AR 72401 XIC600 Owners Manual © 2017 All Rights Reserved Revision: 01.24.2017...
Need help?
Do you have a question about the XIC600 and is the answer not in the manual?
Questions and answers