
Subscribe to Our Youtube Channel
Related Manuals for Spirit XR895


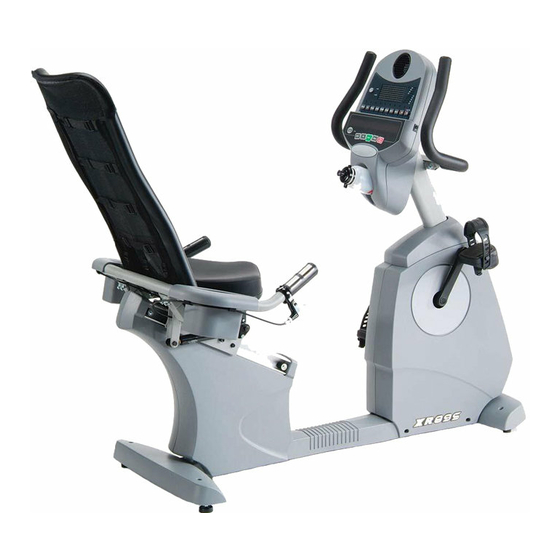
Summary of Contents for Spirit XR895
- Page 1 Z500 Z100 / Z300 Z700 OWNER’S MANUAL PLEASE CAREFULLY READ THIS ENTIRE MANUAL BEFORE OPERATING YOUR NEW BIKE!
-
Page 2: Table Of Contents
XU 875 Assembly Instructions Features Operation of Your New Bike Manufacturer s Limited Warranty ATTENTION- THIS BIKE IS INTENDED FOR RESIDENTIAL USE ONLY AND IS WARRANTED FOR THAT APPLICATION. ANY OTHER APPLICATION VOIDS THIS WARRANTY IN ITS ENTIRETY. .. 34 XU875 & XR895... -
Page 3: Product Registration
Through your dealer, Spirit will do all we can to make your ownership experience as pleasant as possible for many years to come. The local dealership where you purchased this bike is your administrator for all Spirit warranty and service needs. -
Page 4: Important Safety Instructions
. Quality athletic shoes are recommended to avoid leg fatigue. SAVE THESE INSTRUCTIONS - THINK SAFETY! on deeply padded, plush or shag carpet. Damage to both the bike for any purpose other than for the purpose it is XU875 & XR895... -
Page 5: Important Electrical Information
This product is self powered by a built in generator but does have the option of being plugged into an A.C. outlet (Optional 24 VAC transformer available through your local Spirit fitness dealer). The following are warnings to be observed when using the A.C. plug in option. -
Page 6: Xr 895 Assembly Instructions
Assembly Pack Check List (XR895) Step 1 #77.3/8" x 19 x 1.5T Flat Washer (2pcs) #89. 3/8" x 7T Nyloc Nut (2 pcs) Step 2 #99. M5 x 12m/m Phillips Head Screw (4pcs) #68. 5/16 x 15m/m Hex Head Screw (8pcs) #84.3/8"... - Page 7 Phillips Head Screw (4pcs) # 71. 3/8 x 1-3/4 Hex Head Screw (4 pcs) #76. 5/16" x 19 x 1.5T Flat Washer (1 pc) #91. 5/16" x 6T Nylon Nut (1 pc) #89. 3/8" x 7T Nyloc Nut (4 pcs) XU875 & XR895...
- Page 8 Tools #114. Phillips Screw Driver (1 pc) #115. M5 Allen Wrench (1pc) #112. 12/14m/m Wrench (1 pc) #113. 13/15m/m Wrench (1 pc) #130. 13/14m/m Wrench (1 pc) XU875 & XR895...
- Page 9 Assembly Instructions (XR895) UNPACKING THE UNIT 1. Cut the straps then lift the carton off. 2. Carefully remove all parts from carton and inspect for any damage or missing parts. If damaged parts are found, or parts are missing, contact your dealer immediately.
- Page 10 5. Install the Handle Bar (3) onto the Console Mast (2) with the 2pcs of 5/16 x 15mm Hex Head Bolts (68), 2pcs of 5/16 x 20 x 1.5T Flat Washers (83) and 2pcs of 8m/m x1.5T Split Washers (82) by using the 12/14mm Wrench (112). XU875 & XR895...
- Page 11 (26), just under the seat. It does not matter which connector plugs into which socket. 4. Install the Front Stabilizer Cover (32) and the Rear Stabilizer Cover (37) on the Main Frame with the 4pcs of M5x12mm Phillips Head Screws (99). XU875 & XR895...
- Page 12 It may be necessary to re-tighten the pedals if you feel a thumping during pedaling the bike. A noise or feeling such as a thumping or clicking is usually caused by the pedals being too loose. stamped into the end of the threaded post of the XU875 & XR895...
-
Page 13: Xu 875 Assembly Instructions
#50.3/8 x 2-1/4 Hex Head Screw (4pcs) #72. 5/16" x 19 x 1.5T Flat Washer (6pcs) #72. 5/16" x 19 x 1.5T Flat Washer (2pcs) #99. 5/16" x 20 x 1.5T Curved Washer (1pc) #103. 8m/m Split Washer (2pcs) XU875 & XR895... - Page 14 Tools #93. Phillips Screw Driver (1 pc) #100. 12/14m/m Wrench (1 pc) #92. 13/15m/m Wrench (1 pc) XU875 & XR895...
- Page 15 1. Install the Rear Stabilizer (5) onto the Main Frame (1) with the 4pcs of 3/8 x 2-1/4 Hex Head Bolts (50) and 4pcs of 3/8 x 25 x 2T Flat Washers (71) by using the 12/14mm Wrench (100). XU875 & XR895...
- Page 16 2. Install the Console Mast (2) onto the Main Frame (1) with the 7pcs of 5/16 x 5/8 Hex Head Screws (51), 6pcs of 5/16 x19x1.5T Flat Washers (72) on the side screws and 1pc of 5/16 x 20x 1.5T Curved Washer (99) on the front screw by using the 12/14mm Wrench (100). XU875 & XR895...
- Page 17 1. Install the Handle Bar (3) onto the Front Console Mast (2) with the 2pcs of 5/16 x 5/8 Hex Head Screws (51), 2pcs of 5/16 x 19 x 1.5T Flat Washers (72) and 2pcs of 8m/m Split Washers (103) by using the 12/14mm Wrench (100). XU875 & XR895...
- Page 18 6. Insert the Seat Mount Assembly (6) onto the Seat Cylinder Assembly (12). 7. Install the Seat (19) onto the post of the Seat Mount Assembly (6) by using the 12/14mm Wrench (100). stamped into the end of the threaded post of the left pedal XU875 & XR895...
- Page 19 XU875 & XR895...
-
Page 20: Features
Q factor. Spirit has designed our pedal system so the Q factor is the smallest in the industry, but we did not stop there. We have also custom designed and tooled a new pedal that provides a two degree inward tilt to compensate for the Q factor not being perfect. -
Page 21: Operation Of Your New Bike
Power on The XR895 or XU875 Bike has a built-in generator for power and do not need to be plugged into an AC outlet. To power up the XR895 or XU875 simply start to pedal, the console will turn on automatically. -
Page 22: Console Operation
NOTE: You must enter your age for the Bar Graph to be accurate. Refer to Heart Rate section for details about these features and how they can help you work out more efficiently. XU875 & XR895... - Page 23 If you want to workout without entering new settings then just press the Start key. This will bypass the programming of data and take you directly to the start of your workout. If you want to change the personal settings then just follow the instructions in the XU875 & XR895...
-
Page 24: Preset Programs
You may adjust the level of difficulty (Max level) for each program before beginning by following the instructions in the message window after selecting your program. XU875 & XR895... -
Page 25: The Programs
2. The message window will ask you to enter your Age. You may enter your Age, using the Up and Down keys or the numeric key pad, then press the Enter key to accept the new number and proceed on to the next screen. XU875 & XR895... - Page 26 Display key, switch between the profile display and a quarter mile track by pressing the Display key adjacent to the matrix, use the heart rate monitoring features and can switch to heart rate Auto-Pilot mode. See Heart Rate section for details of XU875 & XR895...
- Page 27 2. The message window will ask you to enter your Age. You may enter your Age, using the Up and Down keys or the numeric key pad, then press the Enter key to accept the new number XU875 & XR895...
- Page 28 6. Now you are asked to adjust the Max Level. This is the peak exertion level you will experience during the program. The factory setting is level seven. Adjust the level and then press enter. A , if there is no name saved. XU875 & XR895...
- Page 29 Display key adjacent to the matrix, use the heart rate monitoring features and can switch to heart rate Auto-Pilot mode. See Heart Rate section for details of this feature). XU875 & XR895...
-
Page 30: Heart Rate Programs
If you enter your age during programming the console will perform this calculation automatically. Entering your age is used for the Heart Rate control programs and also for the Heart rate bar graph. After calculating your Maximum Heart Rate you can decide upon which goal you would like to pursue. XU875 & XR895... - Page 31 Consult your physician before participating in any exercise program. With all Spirit Heart Rate Control bike machines you may use the heart rate monitor feature without using the Heart Rate Control program. This function can be used during manual mode or during any of the nine different programs.
-
Page 32: Rate Of Perceived Exertion
In this condition, your pace will feel harder. Again, this will show up in your RPE and you will train at the proper level for that day. XU875 & XR895... - Page 33 2. Adjust the strap as tightly as possible as long as the strap is not too tight to remain comfortable. 3. Position the transmitter with the Spirit logo centered in the middle of your body facing away from your chest (some people must position the transmitter slightly left of center). Attach the final end of the elastic strap by inserting the round end and, using the locking parts, secure the transmitter and strap around your chest.
- Page 34 Auto-pilot button. For instance: If you are in the Manual mode and your heart rate is at 150 beats per minute, pressing the Auto-pilot button will switch the console to heart rate control and keep your heart rate at 150 beats per minute automatically. XU875 & XR895...
-
Page 35: Manufacturer S Limited Warranty
Manufacturer’s Limited Warranty Spirit Manufacturing Inc. warrants all its bike parts for a period of 5 years from the date of retail sale, as determined by sale receipt, or in the absence of a sales receipt eighteen (18) months from the original factory shipping date, whichever comes first. Spirit s responsibilities include providing new or remanufactured parts, at Spirit s option, and technical support to our independent dealers and servicing organizations.
Need help?
Do you have a question about the XR895 and is the answer not in the manual?
Questions and answers