Table of Contents
Advertisement
Questa pagina e' stata lasciata in bianco intenzionalmente
This page has been intentionally left blank
Cette page est intentionnellement laissée blanche
Diese Seite wurde absichtlich leer gelassen
Esta página ha sido dejada en blanco de manera intencional
Esta página foi intencionalmente deixada em branco
Denna sida har avsiktligt lämnats tom
Tämä sivu on tarkoituksella tyhjä
Denne side er med vilje efterladt blank
Denne siden er med hensikt blank
Deze pagina is met opzet blanco gelaten
Ç ðáñïýóá óåëßäá åßíáé óêüðéìá êåíÞ
62
Advertisement
Table of Contents

Related Manuals for Electrolux Prostore PS06R1F


Summary of Contents for Electrolux Prostore PS06R1F
- Page 1 Questa pagina e’ stata lasciata in bianco intenzionalmente This page has been intentionally left blank Cette page est intentionnellement laissée blanche Diese Seite wurde absichtlich leer gelassen Esta página ha sido dejada en blanco de manera intencional Esta página foi intencionalmente deixada em branco Denna sida har avsiktligt lämnats tom Tämä...
-
Page 2: Table Of Contents
C.1 Operation ............... 81 Foreword ..............64 C.1.1 Digital temperature controller and control panel ...81 A.1 General information ..........65 C.1.1.1 Switching the appliance on ..........81 C.1.1.2 Control panel buttons ............81 A.1.1 General safety instructions ............65 C.1.1.3 Digital temperature controller display ......82 A.1.2 additional Indications..............65 C.1.2 Alarms and signalling ..............82 A.1.3 Introduction ..................65... -
Page 3: Foreword
Foreword The installation, use and maintenance manual (hereinafter Manual) provides the user with information necessary for correct and safe use of the machine (hereinafter “machine”, “refrigerator” or “appliance”). The following must not be considered a long and exacting list of warnings, but rather a set of instructions suitable for improv- ing machine performance in every respect and, above all, preventing injury to persons and animals and damage to property due to improper operating procedures. -
Page 4: General Information
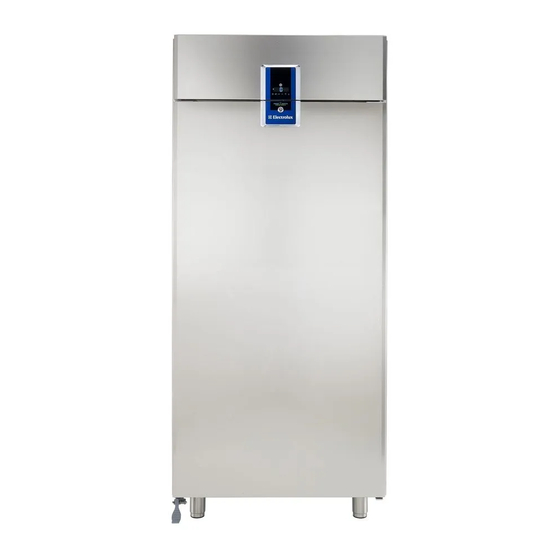
A.1 General information A.1.4 New appliance concept The cupboard line has been created according to a new system that optimises performance and reduces energy con- Thank you for choosing a quality product. We are sure sumption, also taking into account space requirements and our Prostore refrigerator will meet all your needs for environmental impact. -
Page 5: Testing And Inspection
Passing of the tests (visual inspection - electrical test - functional IPX1 test) is guaranteed and certi ed by the speci c enclosures. Electrolux Professional SpA - Viale Treviso, 15 - 33170 Pordenone (Italy) A.1.9 De nitions The data plate gives the product identi cation and technical Listed below are the de nitions of the main terms used in data. -
Page 6: Appliance Identi Cation
For further details regarding your model, refer to par. A.2.3 in compliance with regulations in force in the country of use. Dimensions, performance and consumption. Electrolux Professional SpA declines any liability for inaccuracies contained in the manual, if due to printing or translation errors. A.1.12 Copyright... -
Page 7: Keeping The Manual
(*) During Normal use, gloves protect hands from the cold A.2 Technical data tray when being removed from the appliance. Note: The gloves to be worn during cleaning are the type suitable for contact with the cooling ns (metal plates). A.2.1 Climatic class Failure to use the personal protection equipment by opera- The climatic class given on the data plate refers to the fol-... -
Page 8: Dimensions, Performance And Consumption
A.2.3 Dimensions, performance and consumption A.2.4 Mechanical safety characteristics, hazards The appliance does not have sharp edges or protruding parts. 600 mm models External dimensions: The guards for the moving and live parts are xed to the cab- width mm inet with screws, to prevent accidental access. -
Page 9: Handling
B.1.6 Placing the load NOTE The transported load can shift: Before placing the load, make sure the way is free and that when braking; the oor is at and can take the load. Remove the appliance when accelerating; from the wooden pallet, move it to one side, then slide it in corners;... -
Page 10: Installation And Assembly
B.2 Installation and assembly B.2.3 Positioning Install the appliance, taking all the safety precautions required To ensure correct operation of the appliance and maintain for this type of operation, also respecting the relevant re-pre- safe conditions during use, carefully follow the instructions vention instructions. -
Page 11: Disposal Of Packing
B.2.4 Disposal of packing The packing must be disposed of in compliance with the cur- rent regulations in the country where the appliance is used. All the packing materials are environmentally friendly. They can be safely kept, recycled or burned in an appropriate waste in- cineration plant. -
Page 12: Fitting Anti-Tipping Cables On The Appliance
B.2.5 Fitting anti-tipping cables on the appliance retighten the screw complete with the cable on the roof of the appliance. When installing the appliance, make sure to x the anti-tipping cables to it. To t, proceed as follows: 600 mm models undo the two hex screws positioned on the roof of the machine, as shown in the gure, and remove the cables from their packing:... - Page 13 900 mm models retighten the screw complete with the cable on the roof there are 2 holes on the roof of the machine, at the areas of the appliance: shown in the following gure: remove the cables from their packing: the cable, must then be xed to the wall using a plug, to permanently secure the appliance.
-
Page 14: Reversing Opening Of Fully Insulated Doors
B.2.6 Reversing opening of fully insulated doors fastening screw “B” and the 2 xing screws (Detail 1); remove the cap “C” from the left side and place it on the ATTENTION right side (Detail 2); Disconnect the appliance remove the door, pull out the hinge from its seat, move from the power supply be- it from the right to the left and t it in the hole as shown in the gure (Detail 3);... -
Page 15: Reversing Opening Of Half Doors
B.2.7 Reversing opening of half doors remove the door, pull out the hinge from its seat, move it from the right to the left and t it in the hole as shown in ATTENTION the gure (Detail 3); Disconnect the appliance remove the middle bracket “D”... - Page 16 Note: after carrying out the above operations, the holes in Note: in case of installation on a concrete plinth, make 2 slots the appliance must be closed with the special plastic plugs. near the door bottom bracket, as deep as the thickness of the bracket and the head of the screws (at least 15mm), as shown in the following image: 15 mm...
-
Page 17: Electrical Connection
B.2.8 Electrical connection B.3 Remote Unit installation ATTENTION ATTENTION If the power cable is dam- For the choice of remote aged it must be replaced condensing unit refer to by the After-Sales Service the unit recommended by or in any case by quali ed the Manufacturer, given personnel, in order prevent on the equipment techni-... -
Page 18: Positioning
B.3.2 Customer's responsibility B.3.1 Positioning The refrigerant charge must be R134a type for refrigerated Place the condensing unit in a well-ventilated room away models and R404A for freezer models (depending on the from heat sources. type of valve tted). If the remote unit is installed outdoors, it must be protected In any case refer to the data given on the rating plate. -
Page 19: Evacuating The Lines And Charging With Refrigerant Gas
ATTENTION B.3.4 Evacuating the lines and charging with refrigerant Appliances arranged for connection to the remote B.3.4.1 Leakage test alarm have an anchoring Wash the inlet and delivery pipes with pressurised dry device for connecting the nitrogen. connection cable of the ex- Connect a nitrogen cylinder to the high and low pressure connectors, also making sure to install a pressure gauge ternal siren. -
Page 20: Operation
C.1 Operation Programs button It is used in the HISTORY function (see par. C.1.1.2). Press the button P to also access the C.1.1 Digital temperature controller and control panel Technical Menu, which cannot be modi ed. Humidity button IT IS available in refrigerated models only and is used to set 3 di erent humidity levels. -
Page 21: Digital Temperature Controller Display
C.1.1.3 Digital temperature controller display “Up” button The digital temperature controller has a 3-digit electronic To increase the values. display and several signalling icons (see g.1) “Down” button To decrease the values. lit up indicates compressor activation “Defrost” button lit up indicates defrost function Manual defrost activation. -
Page 22: Alarm Icons
C.1.2.2 Alarm icons NOTE: The message “CLn” is factory-set in maximum room temperature operating conditions (43°C) and considering the Compartment high temperature condenser completely obstructed. alarm When the compartment temperature C.1.3 Loading the product exceeds the set maximum value the icon lights up and an audible alarm is activated. -
Page 23: General Safety Rules
C.2 General safety rules Regarding “ice-cream preserver” models, load the trays as shown in the diagram below: C.2.1 Introduction The machines are provided with electric and/or mechanical safety devices for protecting workers and the machine itself. Therefore the user must not remove or tamper with such devices. -
Page 24: End Of Use
ATTENTION ATTENTION Do not remove, tamper Extraordinary machine with or make illegible the maintenance operations safety, danger and instruc- must only be carried out tion signs and labels on by specialised technicians the machine. provided with all the ap- propriate personal pro- C.2.4 End of use tection equipment (safe- When the appliance is no longer to be used, make it unusable... -
Page 25: Reasonably Foreseeable Improper Use
C.2.6 Reasonably foreseeable improper use C.2.7 Residual risks Improper use is any use di erent from that speci ed in this The machine has several risks that were not completely elim- manual. During machine operation, other types of work or inated from a design standpoint or with the installation of activities deemed improper and that in general can involve adequate protection devices. -
Page 26: Normal Machine Use
C.3 Normal machine use D.1 Machine cleaning and maintenance ATTENTION C.3.1 Characteristics of personnel trained for normal Before carrying out any machine use cleaning or maintenance, The Customer must make sure the personnel for normal ma- disconnect the appliance chine use are adequately trained and skilled in their duties, as from the power supply and well as ensuring their own safety and that of other persons. -
Page 27: Routine Maintenance
D.1.1 Routine maintenance Pay special attention when cleaning the front control panel: make sure water sprays do not go beyond the ATTENTION panel. Disconnect the power sup- ATTENTION: ply before cleaning the There is an extra rack on the bottom of the compartment. When cleaning, if this rack is temporarily removed, remember appliance. -
Page 28: Extraordinary Maintenance
ATTENTION D.1.2 Extraordinary maintenance Maintenance, checking and ATTENTION overhaul operations must WEAR PROTECTIVE GLOVES AND A MASK WHEN CAR- only be carried out by a specialised technician or RYING OUT ANY EXTRAOR- the After-Sales Service, pro- DINARY MAINTENANCE vided with suitable person- OPERATIONS. -
Page 29: Replacing The Power Cable
Condenser 600 mm freezer model: D.1.2.3 Quick troubleshooting guide In some cases, faults can be eliminated easily and quickly by following a brief troubleshooting guide: A. The appliance does not switch on: make sure the plug is properly inserted in power socket. make sure the socket is powered. -
Page 30: Maintenance Intervals
ATTENTION D.1.3 Maintenance intervals Maintenance, checking The inspection and maintenance intervals depend on the actual machine operating conditions and ambient condi- and overhaul operations tions (presence of dust, damp, etc.), therefore precise time must only be carried out intervals cannot be given. In any case, careful and periodical by a specialised technician machine maintenance is advisable in order to minimise ser- vice interruptions. -
Page 31: Decommissioning
ATTENTION D.2 Machine disposal All scrapping operations ATTENTION must occur with the ma- Dismantling operations chine stopped and cold and must be carried out by qual- the electrical power supply i ed personnel. disconnected. ATTENTION Work on the electrical Work on the electrical equipment must only be equipment must only be carried out by a quali ed... -
Page 32: Enclosed Documents
ATTENTION Make the appliance unus- able by removing the power cable and any compartment closing devices, to prevent the possibility of someone becoming trapped inside. NOTE When scrapping the machine, the “CE” marking, this manual and other documents concerning the appliance must be destroyed.
Need help?
Do you have a question about the Prostore PS06R1F and is the answer not in the manual?
Questions and answers