Table of Contents
Advertisement
Quick Links
Advertisement
Table of Contents

Subscribe to Our Youtube Channel
Related Manuals for Piranha C62109


Summary of Contents for Piranha C62109
- Page 1 Piranha Enviro Bagless Upright Vac USER MANUAL MODEL: C62109 ( Item : 900019 )
-
Page 2: Parts And Features
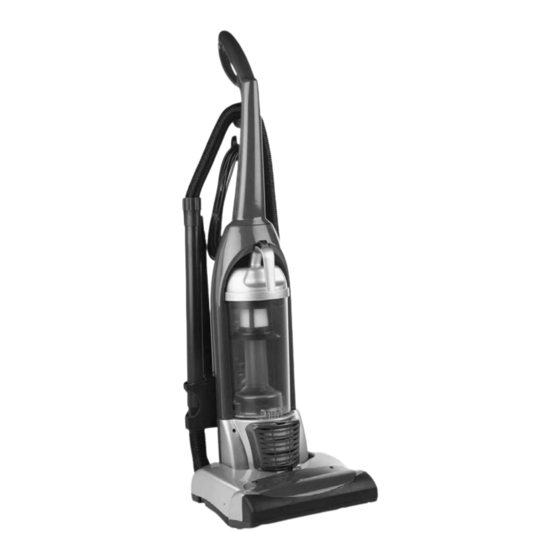
PARTS AND FEATURES 1. Furniture Guard 11. Hose Holder 2. Front Cover 12. Quick Release Cord Hook 3. Nozzle Cover 13. Lower Cord Retainer 4. Exhaust Filter 14. Suction Inlet 5. Tool Holder 15. Dusting Brush 6. Dust Bin 16. On/Off Switch 7. - Page 3 IMPORTANT Your safety is important to us. To reduce the risk of fire, electrical shock, injury to person or damage when using your vacuum cleaner, follow basic safety precautions including the following: 1. Read this manual before assembling or use of your new vacuum cleaner. 2.
- Page 4 Proper assembly and safe use of your vacuum cleaner are your responsibilities. Your cleaner is intended only for household use. Read this manual carefully for important use and safety information. ASSEMBLY INSTRUCTIONS Before assembling vacuum, use parts list to verify that you have received all the components of your new cleaner.
-
Page 5: Attachment Assembly
Insert the screw so it passes through the handle into the vacuum. Begin to tighten the screw with your fingers. It may be necessary to adjust the handle slightly. Using a screwdriver lighten the screw. CAUTION Do not over tighten. Over tightening could strip the screw holes. -
Page 6: Operation
OPERATION 1. Turn the quick release cord hook to either side and down to release the power cord. 2. Release the power cord off the quick release cord hook. Check to be sure the power cord is still locked into the locking notches on the body of the vacuum. -
Page 7: Releasing The Handle
RELEASING THE HANDLE Release the handle by placing your foot on the pedal and pull back on the handle until it releases from its upright position. To start the vacuum cleaner, step on the ON/OFF switch located on the back of the vacuum. -
Page 8: Attachment Use Chart
CAUTION When using attachments, be careful not to overextend the hose length when reaching. Trying to reach beyond the hose reach could cause the cleaner to tip over. If the dusting brush is being used and more distance is needed, the crevice tool can be added to the wand and then the dusting brush can be added onto the crevice tool as shown below. -
Page 9: Motor Protection System
MOTOR PROTECTION SYSTEM This vacuum has a thermal protector, which automatically trips to protect the vacuum from overheating. If a blockage prevents the normal flow of air to the motor, the thermal protector turns the motor off automatically and allows the motor to cool in order to prevent possible damage to the vacuum. -
Page 10: Dust Bin Cleaning
DUST BIN CLEANING Always empty the dustbin when the dirt level reaches the ”MAX FULL” line. To remove dust bin: WARNING Always unplug power cord from electrical outlet before performing any service on vacuum. Press the handle lock down and lift dustbin up and out of the vacuum cleaner. Remove any blockage that might be located in the dustbin port or the primary filter HEPA. -
Page 11: Filter Changing And Cleaning
Ensure the primary filter HEPA has been replaced in the bottom of the dustbin. Place the dustbin back into vacuum cleaner by inserting the bottom first and tilting back with the dustbin handle. Press the handle forward to lock the dustbin in place. FILTER CHANGING AND CLEANING WARNING Unplug power cord from electrical outlet. -
Page 12: Belt Changing And Agitator Cleaning
EXHAUST FILTER Check the exhaust filters frequently and clean when dirty To clean the exhaust HEPA filter, detach the grill by pulling firmly away from the Vacuum Cleaner. Remove the HEPA exhaust filter and round foam filter. The exhaust filters can be cleaned by gently tapping over a trash container or washed under running warm water. - Page 13 Release Handle 5 Screws Slide the clip to the right position, and press inward on each side of the nozzle base. Click and lift up to remove from the nozzle cover. Unscrew the 5 screws (screw position is marked on the image above) and press 2 clips from both sides of the nozzle base inward (clips position is marked in the photos below).
- Page 14 Carefully remove any residue the may exist in the belt area. WARNING Always unplug the cleaner before cleaning the brush area as agitator may suddenly restart. Failure to do so could result in electrical shock or personal injury. To remove belt/clean agitator: Position hands on the agitator.
-
Page 15: Troubleshooting
Please Note: This vacuum is supplied with extra belt to be used as a replacement belt when the belt in the vac is break. It is normal for the belt to wear and tear or break after long usage similar to car tyres.
Need help?
Do you have a question about the C62109 and is the answer not in the manual?
Questions and answers