Table of Contents
Advertisement
Model No.: VC-0908S-3
Item No.: 900657
240Va.c. 50Hz
2200W Max
Rev 4
Note: The specifications and/or components of this appliance are subject to change without prior notice.
If the Hose, Floor Head or any Accessories should fail during use, please call 1800 079 124 for an immediate
replacement. This will save you from returning the product to the store.
If we can assist you in any other way, please feel free to contact us
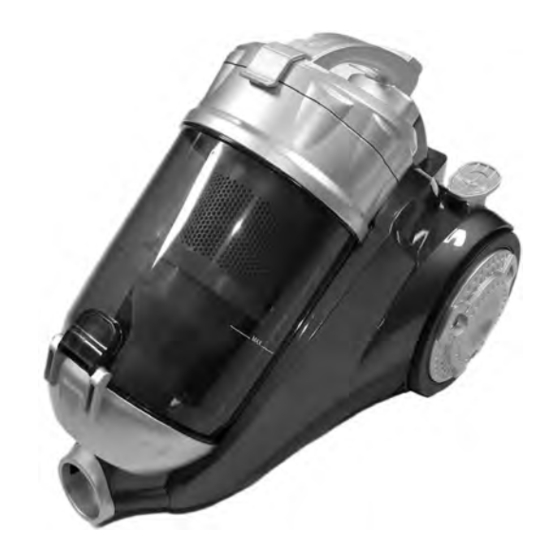
Piranha
Vacuum Cleaner
For Household Use Only
Advertisement
Table of Contents

Related Manuals for Piranha VC-0908S-3


Summary of Contents for Piranha VC-0908S-3
-
Page 1: Vacuum Cleaner
Piranha Vacuum Cleaner For Household Use Only Model No.: VC-0908S-3 Item No.: 900657 240Va.c. 50Hz 2200W Max Rev 4 Note: The specifications and/or components of this appliance are subject to change without prior notice. If the Hose, Floor Head or any Accessories should fail during use, please call 1800 079 124 for an immediate replacement. -
Page 2: Table Of Contents
Warnings .................. 3 Safety Direction ............... 3 Transporting your Vacuum ............ 6 Schematic Wiring Diagram ............. 6 Components ................7 Assembly Method ..............8 6.1 Fitting Flexible Hose ............8 6.2 Hose Removal ..............8 6.3 Fitting Telescopic Tube and Accessories ......8 6.5 Tools .................. -
Page 3: Warnings
Warnings Before using this appliance, read and follow all warnings and instructions in this manual, even if you are familiar with this product. This appliance is not intended for use by persons (including children) with reduced physical, sensory or mental capabilities, or lack of experience and knowledge, unless they have been given supervision or instruction concerning use of the appliance by a person responsible for their safety. - Page 4 DO NOT use the vacuum cleaner if the appliance malfunctions, abnormal noise, smell, smoke, is dropped or damaged in any manner or any breakage is found during operation. Return appliance to the nearest authorised service agent or similarly qualified person for a thorough examination, repair, electrical or mechanical adjustment.
- Page 5 DO keep hair, loose clothing, fingers, feet and body parts away from openings or moving parts. DO disconnect the appliance from the mains supply before connecting the flexible suction hose. DO turn off controls before you connect or disconnect the appliance to or from the mains supply.
-
Page 6: Transporting Your Vacuum
This product has not been designed for any uses other than those specified in this manual. ONLY for domestic use. Industrial or commercial use invalidates the warranty. Read and Save These Instructions Transporting your Vacuum To move your vacuum cleaner from room to room, unplug the unit and carry using the carry handle. -
Page 7: Components
Components Dust Canister Release Button Tool Holder Hose Upholstery Tool Handle Crevice Tool Suction Strength Control Slide Hose Coupling Floor Head Hose Connector Hole Telescopic Tube Dust Canister Page 7 of 18... -
Page 8: Assembly Method
Assembly Method Please Note: Always remove the plug from the power socket before fitting or removing accessories. Ensure all Filters are fitted, and fitted correctly before using. Fitting Flexible Hose Insert the coupling end of the vacuum cleaner hose into the Hose Connector hole and push inward until it locks into place. -
Page 9: Tools
Tools The Crevice tool is used for cleaning down the side of sofas and into corners, etc. The Upholstery tool is used for cleaning sofas and curtains, etc. Tool Holder There is a convenient tool holder on the telescopic tube where the Crevice tool and Upholstery tool stored when not in use. -
Page 10: Suction Relief Slide
Suction Relief Slide The Suction Relief Valve is used for easy, temporary reduction of the vacuum cleaner suction at the floor head. Slide the Suction Control Slide to the open position to reduce the suction power and then slide close to revert back to full suction power at the floor head. -
Page 11: Safety Devices Operation
11 Safety Devices Operation NOTE: The motor has an overheating protection device built in. It will automatically switch off power to the motor if it overheats. e.g. from blocked nozzles, full dust Canister or uncleaned blocked filters. If this happens, turn off the vacuum and unplug from power socket, clean blockage and / or filters and allow to rest for at least 60 minutes which should be enough time for the motor to cool down. -
Page 12: Emptying The Dust Canister
14 Emptying the Dust Canister Empty the Dust Canister as frequently as possible or when the suction power is reduced. • To remove the Dust Canister, turn off the power and unplug. • Grip the handle on the Dust Canister, press the Dust Canister Release Button and pull the Dust Canister forward and out of the housing. -
Page 13: Cleaning Filters
15.2 Cleaning Filters Important Note – the Filters must be cleaned regularly for best suction performance and to prevent over-heating and damage to your vacuum cleaner. Cleaning is best done at the same time when emptying the dust Canister after you have finish vacuuming for the day. NOTE: Never use the vacuum cleaner with wet or damp filters or without ALL filters fitted. -
Page 14: Exhaust Air Filter
Note: Only clean the white filter if it is very dirty. wash the filter in warm mild soapy water, rinse in clean fresh cold water and let dry. DO NOT scrub the filters or place in a dishwasher. DO NOT use a hair drier to dry the filters. NOTE: Never use the vacuum cleaner with wet or damp filters. -
Page 15: Cleaning The Dust Canister
DO NOT use a hair drier to dry the filter. NOTE: Never use the vacuum cleaner with wet or damp filters. Using wet or damp filters will damage the filters, may cause serious damage to the vacuum cleaner and will void your warranty. Refit the Filter to the holder (or replace with a new one) and refit the assembly back into the vacuum cleaner Refit the Rear Exhaust Air Grille. -
Page 16: Cleaning The Vacuum Cleaner Body And Tools
Remove the bottom section of the venturi tube by rotating it to unlock and pull straight down. Wash all parts in warm water with mild detergent. After cleaning, rinse off and allow to completely dry before reassembling and using. Do Not place components in a dishwasher. 15.4 Cleaning the Vacuum Cleaner Body and Tools Do not clean the vacuum cleaner, components or accessories using petrol or any other flammable liquid or solvents, etc. -
Page 17: Troubleshooting
16 Troubleshooting Clean the Filters and empty the Dust Canister Noisy operation Check for partial blockages and unblock. Clean the Filters and empty the Dust Canister. Check for blockages and unblock Suction Not Strong Check that the Suction Relief Valve on the hose handle is closed. -
Page 18: Warranty Against Defect
17 Warranty Against Defect WHAT’S COVERED? 5.2 Our goods come with guarantees that cannot be excluded under Australian Consumer Law. You H.E. Group Pty Ltd (“us” “we” or “our”) are entitled to a replacement or refund for a warrants this good for a full replacement or major failure and compensation for any other refund for a period of twelve months from reasonably foreseeable loss or damage.
Need help?
Do you have a question about the VC-0908S-3 and is the answer not in the manual?
Questions and answers