Table of Contents
Advertisement
Quick Links
Model No.: VU32W-09P
Item No.: 900551
Rev 6
Note: The specifications and/or components of this appliance are subject to change without prior notice.
If any Accessories should fail during use, please call 1800 079 124 for an immediate replacement. This will
save you from returning the product to the store.
If we can assist you in any other way, please feel free to contact us
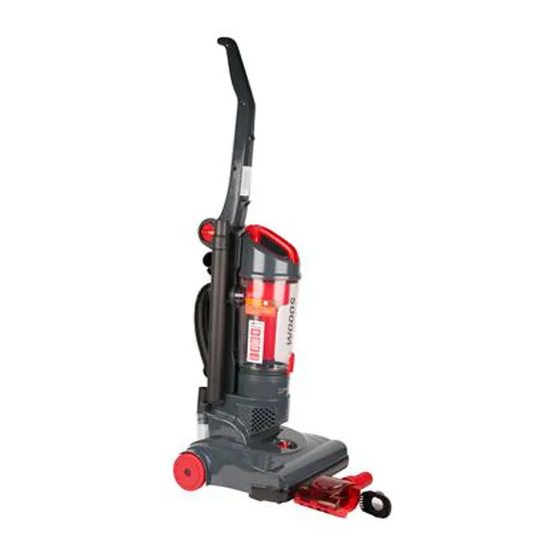
Piranha Striker
Vacuum Cleaner
For Household Use Only
Advertisement
Table of Contents

Subscribe to Our Youtube Channel
Related Manuals for Piranha VU32W-09P


Summary of Contents for Piranha VU32W-09P
-
Page 1: Vacuum Cleaner
Piranha Striker Vacuum Cleaner For Household Use Only Model No.: VU32W-09P Item No.: 900551 Rev 6 Note: The specifications and/or components of this appliance are subject to change without prior notice. If any Accessories should fail during use, please call 1800 079 124 for an immediate replacement. This will save you from returning the product to the store. -
Page 2: Table Of Contents
Warnings .................. 3 Safety Direction ............... 3 Transporting your Vacuum ............ 6 Assembly Method ..............6 Unfolding and Folding the Handle ..........6 Fitting the Tool Holder ..............7 Tools ..................... 7 Fitting Tools to Tool Holders ............8 Using the Extension Tube and Accessories ......9 Power Switch ................. -
Page 3: Warnings
Warnings Before using this appliance, read and follow all warnings and instructions in this manual, even if you are familiar with this product. This appliance is not intended for use by persons (including children) with reduced physical, sensory or mental capabilities, or lack of experience and knowledge, unless they have been given supervision or instruction concerning use of the appliance by a person responsible for their safety. - Page 4 DO NOT use the vacuum cleaner if the appliance malfunctions, abnormal noise, smell, smoke, is dropped or damaged in any manner or any breakage is found during operation. Return appliance to the nearest authorised service agent or similarly qualified person for a thorough examination, repair, electrical or mechanical adjustment. DO NOT misuse the cord.
- Page 5 DO turn off controls before you connect or disconnect the appliance to or from the mains supply. DO disconnect the appliance from the power supply when not in use, before changing the filters, cleaning the filters or connecting / disconnecting the accessories.
-
Page 6: Transporting Your Vacuum
Transporting your Vacuum To move your vacuum cleaner from room to room, unplug the unit and either push the appliance or carry using the carry handle. Never pull or carry the vacuum cleaner by its cord. Never carry or pull the vacuum cleaner by the flexible hose. Assembly Method Please Note: Always remove the plug from the power socket before fitting or removing accessories. -
Page 7: Fitting The Tool Holder
Fitting the Tool Holder The Rotary Floor Brush Holder will need to be attached to the front of the handle. To do this, remove the screw with a Phillips or flat blade screwdriver. Place the holder over the location and then using the screw which you just removed, screw the holder into position. -
Page 8: Fitting Tools To Tool Holders
Fitting Tools to Tool Holders Crevice Tool First, the Extension tube needs to be placed in its holder on the side of the appliance. Place the small end over the location at the bottom, and then clip the top end into the clip. Next, insert the Crevice tool into the end of the extension tube as shown, or you can insert the nozzle end first. -
Page 9: Using The Extension Tube And Accessories
Rotary Brush Head Tool The Rotary Brush Head Tool holder is located on the front of the handle. Place the brush opening lip on the rest and then roll over into the clip as shown. Using the Extension Tube and Accessories Remove the flexible hose by pulling the end of the hose up and off the connecting tube as shown Page 9 of 24... - Page 10 Insert the small end of the Extension tube into the end of the hose and push in as shown. To Use the Crevice tool, push this into the end of the Extension Tube as shown. To Use the Brush tool, push this into the end of the Extension Tube as shown.
-
Page 11: Power Switch
Power Switch The On / Off switch is located on the back of the floor head as shown. Press the On / Off button with your foot to start the motor. Press again to turn off. Floor Head The floor head is adjustable in height to suit low to high pile carpets. Setting “0”... -
Page 12: Safety Devices Operation
Safety Devices Operation NOTE: The motor has an overheating protection device built in. It will automatically switch off power to the motor if it overheats. e.g. from blocked nozzles, full dust Canister or uncleaned blocked filters. If this happens, turn off the vacuum and unplug from power socket, clean blockage and / or filters and allow to rest for at least 60 minutes which should be enough time for the motor to cool down. -
Page 13: User Maintenance
User Maintenance WARNING: The plug must be removed from the power socket before any maintenance or replacement. NOTE: To maximise the performance of your vacuum cleaner, you should clean your filters regularly. If the filters are broken or worn, replace them before continuing to use the vacuum. - Page 14 Grasp the Cap of the internal housing unit and pull straight up and out. Whilst holding Cap still, rotate the middle section to unlock the two components and then pull apart. Locate the mesh filter inside the housing body and rotate anticlockwise to unclip.
- Page 15 DO NOT scrub the filter or place in a dishwasher. DO NOT use a hair drier to dry the filter. NOTE: Never use the vacuum cleaner with wet or damp filters. Using wet or damp filters will damage the filters, may cause serious damage to the vacuum cleaner and will void your warranty.
-
Page 16: Pre Motor Filter
9.1.2 Pre Motor Filter The pre-motor foam filter is located in the bottom section where the dust canister locates. To Access and Remove this filter, first rotate the cover anticlockwise and lift straight up and off to expose the filter. Page 16 of 24... - Page 17 To remove the filter, grasp with your fingers and pull straight up and out. Wash the foam filter in warm mild soapy water, rinse in clean fresh cold water and let completely dry. DO NOT scrub the filters or place in a dishwasher. DO NOT use a hair drier to dry the filters.
-
Page 18: Replacing The Floor Brush Rubber Drive Belt
Replacing the Floor Brush Rubber Drive Belt Should the Floor Brush rubber drive belt break or become worn, it can be replaced as follows: Call the customer service department to order your new drive belt. Switch off and unplug the vacuum cleaner from the power point. Lay the vacuum cleaner down on its back so that you can access the bottom of the cleaner head. - Page 19 Place the new belt around the motor spindle as shown in Fig 4 Feed the Brush Bar through the belt as shown in Fig 5 Fig 5 Fig 4 Raise the brush Bar up to its working position and push the right side of the bar into its slot as per fig 6 Note: You will have to pull hard enough to stretch the rubber belt to reach.
-
Page 20: Cleaning The Vacuum Cleaner Body And Tools
Cleaning the Vacuum Cleaner Body and Tools Do not clean the vacuum cleaner, components or accessories using petrol or any other flammable liquid or solvents, etc. Clean only the outside of the vacuum cleaner. Use only a moist cloth and mild detergent for cleaning the vacuum cleaner, components and accessories. -
Page 21: Warranty Against Defect
11 Warranty Against Defect WHAT’S COVERED? 5.2 Our goods come with guarantees that cannot be excluded under Australian Consumer Law. You H.E. Group Pty Ltd (“us” “we” or “our”) are entitled to a replacement or refund for a warrants this good for a full replacement or major failure and compensation for any other refund for a period of twelve months from reasonably foreseeable loss or damage. - Page 22 Page 22 of 24...
- Page 23 Page 23 of 24...
- Page 24 Page 24 of 24...
Need help?
Do you have a question about the VU32W-09P and is the answer not in the manual?
Questions and answers