
Related Manuals for marsden C-100


Summary of Contents for marsden C-100
-
Page 1: User Manual
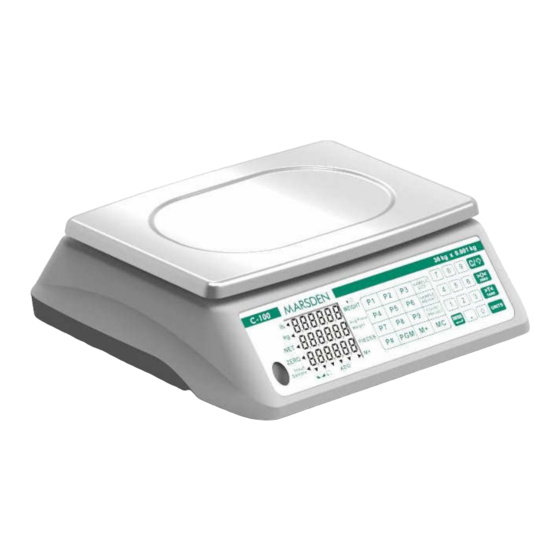
Digital Counting Scale C-100 USER MANUAL PLEASE TAKE THE TIME TO READ THESE INSTRUCTIONS BEFORE STARTING TO USE THE SCALES... -
Page 2: Table Of Contents
TABLE OF CONTENTS TABLE OF CONTENTS .............. 2 INTRODUCTION ................ 4 SAFETY INSTRUCTION............. 4 UNPACKING ................5 CLEANING ................. 5 DISPOSING OF THE SCALE ............. 5 MAINTENANCE................6 LEVEL ADJUSTMENT..............6 Explanation of the graphic symbols ..........7 RECHARGEABLE LEAD-ACID BATTERY......... 8 1. - Page 3 Clear the Quantity and Weight Preset Hi Limits......22 COUNTING................23 1. Weight of Sample Is Unknown ..........23 2. Sample Weight is Known ............23 ACCUMULATOR ..............25 1. ADDING TO THE WEIGHT ACCUMULATOR ....... 25 2. DISPLAYING THE ACCUMULATOR........25 3.
-
Page 4: Introduction
INTRODUCTION Thank you for purchasing a Marsden Digital Counting Scale. Please read this instruction manual carefully before use. Keep these instructions handy for future reference. SAFETY INSTRUCTION Before putting the device into use, please read with care the information given in the Operating Instructions. They contain important instructions for installation, proper use and maintenance of the device. -
Page 5: Unpacking
UNPACKING Before beginning installation of your C-100 Digital Counting Scale, make certain the scale has been received in good condition. Carefully remove the scale from the shipping carton and inspect it for any evidence of damage (such as exterior dents or scratches) that may have taken place during shipment. -
Page 6: Maintenance
MAINTENANCE The scale does not require any routine maintenance. However, we recommend checking the scale’s accuracy at regular intervals. The regularity of these checks is dependent on the level of use and the state of the scale. If any inaccuracies occur, please contact your local dealer or service partner LEVEL ADJUSTMENT Check to make certain the scale is level. -
Page 7: Explanation Of The Graphic Symbols
B Device protection category II Dispose of old appliances separately from your household waste!l! Instead, take them to communal collection points. Carefully read this operation manual before setup and commissioning, even if you are already familiar with Marsden scales. -
Page 8: Rechargeable Lead-Acid Battery
RECHARGEABLE LEAD-ACID BATTERY Built-in rechargeable 6v/4Ah battery 1. Battery Charging The scale can charge the battery (lead-acid rechargeable battery, 6v/4Ah). Just connect the scale to the external power supply to charge it. The battery will be charged regardless if the scale is on or off. -
Page 9: Low Battery
2. Low Battery When the battery voltage falls below 5.7v, the low battery annunciator will be turned on. The battery must be recharged. Continued use (approximately 15 minutes later), the display will show in the weight field. If the battery voltage drops too low for accurate weighing, the scale will automatically shut off and you will be unable to turn it back on. -
Page 10: Power Supply
The capacity of the batteries will reduce over the years and therefore also the total operation time of the scale. This is not an error of the scale, but it is normal behavior or rechargeable batteries. POWER SUPPLY Make sure the battery pack is installed in the battery box of indicator, or, plug the connector of 12VDC /110~240 VAC 50/60Hz AC adapter in the scale. -
Page 11: Specifications
SPECIFICATIONS C-100 MODEL# Capacity 30 kg x 0.001 kg Division Units of Measure Kg, Lb P1~P9, P#, PGM, M+, MC, SAMPLE SIZE, SAMPLE WEIGHT, COUNT PRESET, 0~9, Function keys “ ”, ENTER, ZERO,TARE,UNITS, C/BLACKLIGHT, 1-2 seconds Stabilisation Time Temperature 0° C - 40° C... -
Page 12: Panel
PANEL LCD DISPLAY FUNCTION 1. lb The lb annunciator is illuminated to show that the weight displayed is in pounds. The UNITS key may be used to select pounds as the weighing units. 2. kg The kg annunciator is illuminated to show that the weight displayed is in kilograms. - Page 13 3. NET The NET annunciator is illuminated to show that the weight displayed is the net weight. Net weight is determined by subtracting the stored tare weight from the gross or scale weight. The tare weight, usually the weight of the container, is entered using the tare key.
- Page 14 7. M+ The M+ annunciator is located on the lower right of the display and is illuminated to show that the display is in the Accumulator mode and that the value displayed is the current contents of the accumulator. Individual counts are adjusted via the ( M+ ) and ( MC ) keys or optionally, any count may be entered using the numeric keypad.
-
Page 15: Key Function Description
KEY FUNCTION DESCRIPTION Description This key is used to weigh a known number of pieces in preparation for a new counting operation. Sample quantities are entered using the numeric keypad in any quantity desired. Pressing this key will display the calculated average piece weight from the current sampling and counting operation. - Page 16 Pressing the M+ key will cause the scale to display the contents of the accumulator (the number of pieces accumulated since the last time the accumulator was cleared). The M+ key is also used to add the current piece count value to the accumulator. The M+ annunciator will be selected to indicate the accumulation has taken place.
- Page 17 key is used to perform different functions depending on the current mode of operation: Data Entry: The key is used to clear an incorrect entry from the display without processing the data. If an incorrect entry is made, press the key and re-enter the correct data.
- Page 18 Pressing this key will toggle the weighing units between pounds (lb) and kilograms (kg). The currently selected weighing unit is indicated by illuminating either the lb or kg annunciator. Metric Conversion To change weighing units, press the UNITS key to toggle between pounds and kilograms.
-
Page 19: Power Switch
POWER SWITCH The Power Switch is located on the bottom left side panel towards the front of the scale. Place the power switch in the on position. The scale will perform a brief lamp test. This test consists of illuminating all display segments and annunciator LED's to allow the operator to make a visual... -
Page 20: Displaying Weight
DISPLAYING WEIGHT 1. With the scale in the Weight mode ( will be displayed for WEIGHT and will be displayed for the Avg Piece Weight and PIECES displays), place the item to be weighed on the scale platform. 2. The display will show the weight on the scale platform. The lb or kg annunciators will illuminate to indicate which unit of weight has been selected and that the scale is in the Weight mode. -
Page 21: Pre-Set Tare With Known Weight Of Container
2. Pre-set Tare with Known Weight of Container 2.1 With the scale in the Weight mode, press the TARE key. The display will change to show PrEtA and the PIECES display will show ------ (six dashes). 2.2 Using the numeric keypad, enter the desired tare (container) weight. -
Page 22: Quantity Preset Hi Limit
QUANTITY PRESET HI LIMIT The scale can store a Quantity Preset Hi Limit value. The scale will beep and the Avg Piece Weight will display a blinking if the quantity is over the Hi limit value set. 1. Press the COUNT PRESET key (items can be on scale or platform can be empty). -
Page 23: Counting
COUNTING 1. Weight of Sample Is Unknown 1.1 With the scale in the Weight mode, place the sample on the scale platform. 1.2 On the numeric keypad, enter the number of pieces in the sample. 1.3 While the display is blinking, press the SAMPLE SIZE key. 1.4 The display will change to show and then show the average piece weight and number of pieces. - Page 24 Insufficient Sample IMPORTANT! If the sample weight is too small the PIECES display will show “ ------ “ (six dashes) for a few seconds and then the Insuf Sample annunciator will illuminate. Continued use of the scale with the Insuf Sample annunciator illuminated, will result in an “inaccurate”...
-
Page 25: Accumulator
ACCUMULATOR 1. ADDING TO THE WEIGHT ACCUMULATOR 1.1 With the scale in the Weight mode and displaying zero weight, place the item on the scale platform. 1.2 Press the M+ key to add to the value of the Weight Accumulator. 1.3 The Avg Piece Weight display will change to show the accumulator values and the ADD annunciator will be illuminated(to indicate the addition to the accumulator has taken... -
Page 26: Operation Using Plu(S)
OPERATION USING PLU(S) 1. ADD OR EDIT PLU 1.1 With the scale in the Weight mode, press the PGM key. The Weight display will change to show 1.2 Touch the P1 through 9 key or using the numeric keys, enter the desired number of PLU 10 through 99 to change and press the ENTER key. -
Page 27: Plu Operation Using Preset P1 Through P9
2.4 Add the pieces to be counted and read the total weight on the WEIGHT and the total count on the PIECES display. 2.5 Remove the pieces from the scale. 2.6 Press the key to complete the counting operation and return to the Weight mode. -
Page 28: Scale Settings
SCALE SETTINGS 1. Accessing the User Setup Mode To access the User Setup Mode, with the scale off press and hold the UNITS key while switching the scale on. The Scale will display 2. To Navigate in the User Setup Mode Use the following keys to navigate the User Setup settings. -
Page 29: Backlight Mode
– Backlight Mode With , btli displayed the current setting for the Backlight Mode parameter will be shown. If the setting displayed is acceptable, press the UNITS key to proceed to the next parameter. Otherwise, use the TARE key to toggle between the selections and then press the UNITS key to save it and proceed to the next parameter. -
Page 30: Sleep Mode
180s = After 180 seconds (3 minutes) of no activity the scale will shut off and must be turned on using the ON/OFF switch. 240s = After 240 seconds (4 minutes) of no activity the scale will shut off and must be turned on using the ON/OFF switch. 300s = After 300 seconds (5 minutes) of no activity the scale will shut off and must be turned on using the ON/OFF switch. -
Page 31: Beeper
- Weighing Units With displayed the current setting for the Weighing Units parameter will be shown. If the setting displayed is acceptable, press the UNITS key to proceed to the next parameter. Otherwise, use the TARE key to toggle between the selections and then press the UNITS key to save it and proceed to the next parameter. -
Page 32: Save User Setup
Otherwise, use the TARE key to toggle between the selections and then press the UNITS key to save it and proceed to the next parameter. The available settings are: = The weight have to return to 0.0 then you can execute the = You can execute the M+ even the weight did not return to –... -
Page 33: Error Message
ERROR MESSAGE ERROR REASON ACTION MESSAGE Low battery: Please replace with new This warning shows that batteries or plug the AC the voltage of batteries adaptor for operation. is too low to use. Overload: The total load exceeds Please reduce the loading the maximum capacity and try again. - Page 34 This error is normally Counting error (too low): caused by a serious fault Indicates that the signal on the scales such as a from the load cells is too faulty load cell or wiring. low. Please contact the local Service Representative. This error is normally EEPROM error: caused by a serious fault...
-
Page 35: Rohs Compliance
ROHS COMPLIANCE EU Directive 2011/65/EU restrict the use of the 6 substances below in the manufacture of specified types of electrical equipment. The product does not contain any of the restricted substances in concentrations and applications banned by the directive; and for components, the product is capable of being worked on at higher temperatures required by lead-free soldering. - Page 36 FREEPHONE NUMBER: 0800 169 2775 HEAD OFFICE: UNIT 1 SALES, SERVICE, GENESIS BUSINESS PARK SHEFFIELD ROAD MARKETING AND ACCOUNTS ROTHERHAM S60 1DX TELEPHONE: 0845 130 7330 FAX: 0845 1307440 Unit 7 DESPATCH AND PRODUCTION CENTURION BUSINESS PARK COGGIN MILL WAY ROTHERHAM S60 1FB TELPHONE: 0845 130 7330...