
Related Manuals for marsden MPPS-250


Summary of Contents for marsden MPPS-250
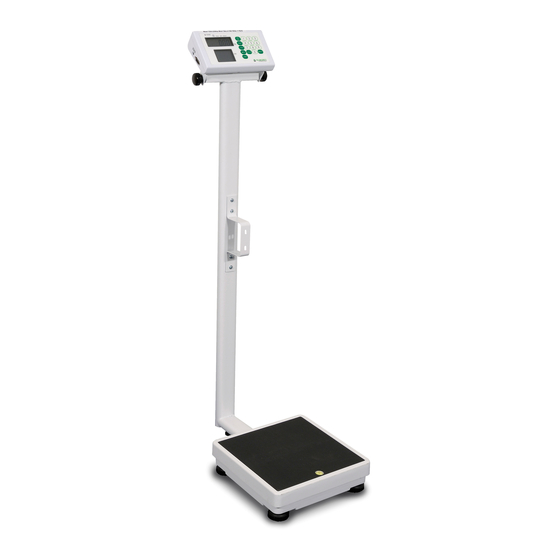
- Page 1 MPPS-250 USER MANUAL PLEASE TAKE THE TIME TO READ THESE INSTRUCTIONS BEFORE STARTING TO USE THE SCALES...
-
Page 2: Table Of Contents
TABLE OF CONTENTS TABLE OF CONTENTS TABLE OF CONTENTS TABLE OF CONTENTS BEFORE USE…….…………………………………………… 2 POWER SUPPLY…….………………………………………. 3 INSTRUCTION FOR REPLACING BATTERIES…………… 4 SPECIFICATIONS………………………………………….…. 6 KEY FUNCTIONS……………………………………………… 7 LCD SYMBOL DESCRIPTION………………………………. 8 MAINATENANCE AND GENERAL CARE……………….… 9 1.0 BASIC FUNCTIONS……………………………………. 10 1.1 SWITCHING ON ………………………………. -
Page 3: Before Use
BEFORE USE BEFORE USE BEFORE USE BEFORE USE 1. Place the scale on a firm, level ground. 2. Turn down the 2 level feet till contacting the ground. 3. Make sure the level feet and wheels are standing on the ground and the bubble is located correctly as below: Bubble indicator: Good Bubble indicator: Good... -
Page 4: Power Supply
POWER SUPPLY POWER SUPPLY POWER SUPPLY POWER SUPPLY 1. Make sure the battery pack is installed in the battery box of indicator, or, plug the connector of AC ADAPTER (12V 2A) in the indicator. The INDICATOR uses a rechargeable battery pack, or an AC adaptor. -
Page 5: Instruction For Replacing Batteries
INSTRUCTION FOR REPLACING INSTRUCTION FOR REPLACING INSTRUCTION FOR REPLACING INSTRUCTION FOR REPLACING BATTERIES BATTERIES BATTERIES BATTERIES 1. Open the battery door. 2. Disconnect the rechargeable battery pack then replace it. 3. Push the female and male connectors together. - Page 6 Push the battery pack into the battery holder then locate the cable connector above the battery pack. 4. Place the housing back, and close the battery door.
-
Page 7: Specifications
SPECIFICATION SPECIFICATION SPECIFICATION SPECIFICATION MODEL MODEL MARSDEN MP MARSDEN MPPS PS- - - - 250 MODEL MODEL MARSDEN MP MARSDEN MP ACCURACY CLASS ACCURACY CLASS ACCURACY CLASS ACCURACY CLASS CLASS III CLASS III CLASS III CLASS III CAPACITY CAPACITY 250kg... -
Page 8: Key Functions
KEY FUNCTIONS KEY FUNCT IONS KEY FUNCT KEY FUNCT IONS IONS Description Description Description Description ON/OFF Switching on/off the scale PRINT Data transmission via interface Determination of Body Mass Index Hold function / determination of stable weighing HOLD value The scale is reset to 0.0kg display. It is possible to set max. -
Page 9: Lcd Symbol Description
LCD SYMBOL DESCRIPTION LCD SYMBOL DESCRIPTION LCD SYMBOL DESCRIPTION LCD SYMBOL DESCRIPTION Definitions Definitions Definitions Definitions Stable symbol: Stable symbol: To indicate that the weight is stable. Stable symbol: Stable symbol: Minor weight: Weight under zero. Minor weight: Minor weight: Minor weight: Zero symbols: Weight is at zero point. -
Page 10: Mainatenance And General Care
MAINTENANCE AND GENERAL CARE MAINTENANCE AND GENERAL CARE MAINTENANCE AND GENERAL CARE MAINTENANCE AND GENERAL CARE Repair and Service should only be carried out by authorised service agents. There are no user serviceable parts in the weighing scale itself. The mains power adaptor fuses that are not accessible. When the adaptor is plugged into the mains supply a Green LED should illuminate to indicate that the adaptor is functioning correctly. -
Page 11: Basic Functions
OPERATOR INSTRUCTIONS OPERATOR INSTRUCTIONS OPERATOR INSTRUCTIONS OPERATOR INSTRUCTIONS SECTION 1 - BASIC FUNCTIONS SWITCHING ON THE SCALE Press the ON/OFF button firmly. The scale will first test all of the display segments. The scale will now show its current software version number. The scale will now go into weighing mode and should show 0.0kg on the display. -
Page 12: Switching Off
SWITCHING OFF THE SCALE Press the ON/OFF button when the scale is turned on. The scale will power down. SETTING THE SCALE TO ZERO If for some reason the scale shows a reading other than 0.0kg then it can be reset to zero (2% of capacity). -
Page 13: Advanced Functions
SECTION 2 – ADVANCED FUNCTIONS HOLD FUNCTION Press the HOLD button once. The person should now get on to the scales. After a few seconds the scale will lock on the person’ s weight, the person can now stand off the scale and the weight will remain. -
Page 14: Body Mass Index (Bmi) Function
BMI (BODY MASS INDEX) FUNCTION For this example we will assume we have a person weighing 60kg who is 170.0cm tall. In normal mode, press BMI key to enter into BMI mode. The display will show the last height entered and the extreme left digit will flash. - Page 15 Press the BMI button, return to normal mode and the person can now be taken off the scale.
-
Page 16: Setting The Date And Time
SETTING THE DATE AND TIME Press the HOLD key for 3 seconds to access the time setting mode. The time period digit that is flashing can be changed by entering the appropriate number from the numeric key pad. The time period to be edited is selected by pressing the HOLD key. -
Page 17: Printing Function
PRINTING FUNCTION An optional Marsden external printer (Model TP-2100) is available for all models. When the printer is fitted the patient’ s weight, height, and BMI result can be printed on to a paper roll. Once the person has been weighed and their BMI calculated, simply... -
Page 18: Scale Assembling Instructions
SCALE ASSEMBLING Put the column onto the bracket then screwing them. USING & ASSEMBLING the HM200D/HM-201D DIGITAL HEIGHT MEASUREMENT The height measurement will be mounting on the column of MPPS250 by following steps: Step 1. Assembling mounting brackets on the column of MPPS250. Step 2. - Page 19 Step 2 Step 3 Step 1...
- Page 20 After assembling HM 200D or 201D on the MPPS250, plug the data transmission cable in the indicator of MPPS250 and HM 200D or HM201D as below: Simply pull up the head stop according to the person’ s height. The height measuring result made from HM200D or HM201D will be transferred to MPPS250 automatically, displayed and calculate the BMI in case of under the BMI mode.
-
Page 21: Using & Assembling The Hm-200D/-201D.17 2.7 Using & Assembling The Hm200M)
USING & ASSEMBLING: HM200M MANUAL HEIGHT ROD Step 1. Assembling mounting brackets on the column of MPPS250. Step 2. Screwing the black blocks on the mounting bracket. Step 3. Screwing HM200M on the black blocks. Step 3 Step 2 Step 1... - Page 22 After assembling the HM 200M height rod, simply pull up the height rod and adjust the head stop according to the person’ s height. Key in the height measuring result on the indicator of MPPS250 to calculate the B.M.I.
-
Page 23: Assembling The Tp2100) Printer
2.8 ASSEMBLING: TP2100 THERMAL PRINTER 1. Assembling bracket. 2. Fix the thermal printer (TP-2100) on the bracket and tighten the screws. Plug the cable to the printer, and then connect its 9D connector to the indicator. -
Page 24: Error Messages
E E E E RR RRO O O O R R R R M M M M ESS ESSA A A A G G G G E E E E S S S S ERROR ERROR ERROR ERROR REASON REASON ACTION ACTION REASON... - Page 25 This error is normally caused EEPROM error: by a serious fault on the scales Indicates that there is a fault such as a faulty load cell or with the scales software. wiring. Please contact the local Service Representative. *1 – These errors are usually less serious and can be rectified by re- calibration;...
-
Page 26: Rohs Compliance
ROHS COMPLIANCE EU Directive 2002/95/EC restrict the use of the 6 substances below in the manufacture of specified types of electrical equipment. The product does not contain any of the restricted substances in concentrations and applications banned by the directive; and for components, the product is capable of being worked on at higher temperatures required by lead-free soldering. -
Page 27: Product Conformity & Contact Information
PRODUCT CONFORMITY H H H H a a a a r r r r m m m m on oni i i i s s s s e e e e d d d d S S S S t t t t anda andar r r r d d d d s s s s t t t to o o o W W W W h h h h i i i i c c c c h h h h Con Conf f f f o o o o r r r r m m m m i i i i t t t t y y y y i i i i s s s s Dec Decl l l l a a a a r r r r e e e e d d d d –...
Need help?
Do you have a question about the MPPS-250 and is the answer not in the manual?
Questions and answers