ZENEC Z-N326 User Manual
Infotainer
device
Hide thumbs
Also See for Z-N326:
- Quick start manual (19 pages) ,
- User manual (76 pages) ,
- Installation manuallines (2 pages)

Related Manuals for ZENEC Z-N326


Summary of Contents for ZENEC Z-N326
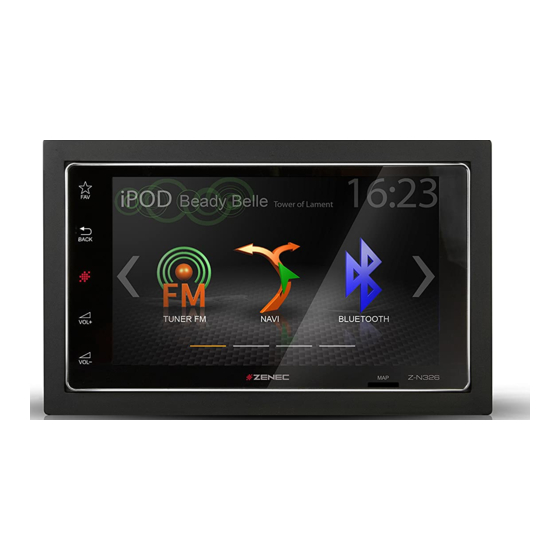
- Page 1 Z-N326 Z-N426 INFOTAINER DEVICE USER MANUAL...
-
Page 2: Table Of Contents
Differences in the information, illustrations or features cannot form a basis for any claims. PHONEBOOK............................45 If you sell your vehicle with the ZENEC system still fitted, please ensure that this operating manual CALL LISTS ............................46 stays with the vehicle, and that any personal data like a phonebook stored in the device is deleted. -
Page 3: Safety Instructions
Switching on the ignition will activate the ZENEC system. The boot process can take up to 1.5 GRUNDSÄTZLICHE BEDIENUNG minutes. This may result in some delay until the system is ready. The ZENEC system is shut down by EIN-/AUSSCHALTEN switching off the ignition, or removing the ignition key. -
Page 4: Multifunction Steering Wheel Controls
NOTE These functions can only be used when a multifunction steering wheel is present in the vehicle, Slot for the microSD with GPS navigation software and the ZENEC system is connected via a car specific CAN/Stalk interface. PANTONE 8420 C... -
Page 5: Z-N426 (Front Panel)
Z-426 (FRONT PANEL) MAIN MENU STRUCTURE Main menu with 3 Icons Device Front Panel Control Options Item Icon Function Press, or press and hold to decrease the playback volume Press, or press and hold to increase the playback volume Main menu with 6 Icons The icon amount show per main menu page can be adjusted in the setup (see page 54 „Main Menu Press to jump back to main menu... -
Page 6: Main Menu Icons
MAIN MENU ICONS MEDIA AUDIO SOURCES You can navigate through main menu pages by swiping or tapping on the orange page markers in You can access / enter connected internal or external sources by tapping on the main icon according to the following list. -
Page 7: Input Sources
INPUT SOURCES STATUS BAR (”INFO BAR”) Screenshot fehlt To select and open external sources like HDMI, Camera or Smartlink, they need to be paired or The „info bar in the upper hand screen area shows TA, volume and time but also contains two physically connected to the device. -
Page 8: Search And Input Function
SEARCH AND INPUT FUNCTION UKW (FM) RADIO The keyboard for search and input is based on the Android OS system layout. The system language The FM RDS source menu offers a control-/operating section on the right hand side, for fast and selection will automatically assign QUERTY or QWERTZ layout. -
Page 9: Fm Bar Graph Mode
FM BAR GRAPH MODE MANUAL FM STATION SEARCH The FM setup mode (press gear icon) allows to assign two different operation modes to both station When you tap to the frequency display area, the numeric input keyboard opens for a direct station frequency arrows: manual steps in 100kHz, or auto scan (stopping at next station). -
Page 10: Ukw Setup (Fm)
UKW SETUP (FM) DAB+ RADIO SETUP (ONLY FOR Z-N426) The DAB+ source menu offers a control- + operating section on the right side of the display, allowing Here you can set important FM RDS based settings such are AF and REG. for simple and convenient direct adjustments in the playback menu. -
Page 11: Dab+ Ensemble And Station List (Only For Z-N426)
DAB+ ENSEMBLE AND STATION LIST (ONLY FOR Z-N426) DAB+ SETUP (ONLY FOR Z-N426) Once the first DAB+ band scan has completed, device will show all DAB+ Ensembles and radio The setup page for the DAB+ tuner allows to define important functions such as DAB<>DAB and stations of sufficient signal strength. -
Page 12: Dab+ Stations-Presets (Only For Z-N426)
USB / BT A2DP / iPOD (AUDIO) MEDIA DAB+ STATIONS-PRESETS (ONLY FOR Z-N426) Various types of information shown in the source menu of the audio playback by (USB, BT A2DP, Select a previously stored DAB+ radio station by tapping on the station preset button. iPOD, etc.). -
Page 13: Usb / Bt A2Dp / Ipod (Audio) Media Control And Operation Bar
USB / BT A2DP / iPOD (AUDIO) MEDIA CONTROL AND OPERATION BAR BT MUSIC (A2DP) The control and operation bar on the right side of the audio playback media menu continues to play The A2DP RVC interface offers Play, Pause and Skip control of previously paired smartphones in lists, favorites, and external USB memory. -
Page 14: Ipod (Audio)
iPOD (AUDIO) PLAYLIST (AUDIO) The order of the Artist display of is given by the sorting sequence on the mobile Apple device and There are different playlists. We generally differentiate between the standard and special playlists can not be changed or adapted in any way. (Smart Playlist and Favorites Playlist). -
Page 15: Smart Playlist (Audio)
SMART PLAYLIST (AUDIO) FAV PLAYLIST (AUDIO) This playlist feature allows you to add a song easily and quickly to a fixed favorite playlist. This function allows you to manage the playlists which created by the Smart Playlist function. The playlists can be renamed. Function Icon Operation... -
Page 16: Video Media: Harddisk
VIDEO MEDIA: HARDDISK PLAYLIST (VIDEO) For video playback via USB, parking cable must be connected during the device installation. Without Playlist (Video) displays the video files on the USB data carrier with their file name. In this list sliding this connection, the screen remains black. up or down is easily possible. -
Page 17: Camera
HDMI CAMERA Tap to the HDMI icon starts the A / V source, if a compatible HDMI source connected, for example a Tapping the camera icon starts the manual camera mode, if a CVBS capable camera is connected videogame, smartphone, tablet, notebook. to the camera input of the unit. -
Page 18: Smartlink Direct
SMARTLINK DIRECT CONTROL INTERFACE SMARTLINK DIRECT When a compatible smartphone is connected to the device via USB port, tapping on the Smartlink Function Icon Operation Direct main icons open the pairing options of the smartphone, or the display mode if the phone has been successfully paired before. -
Page 19: Smartlink Direct Control Bar Icons
Smartlink Direct control bar to access versioninfo and display setup. embedded function on the ZENEC device. Tap on the respective function field in the Drive Mode panel, where you want to assign a specific function. With the linked smartphone app, you can operate the app control functions directly via Zenec device (Android OS). -
Page 20: Bluetooth (Hands-Free System)
CAUTION Using the mobile phone with the hand while driving is not permitted. Only enter data or make changes via the ZENEC system when the traffic situation allows such actions. CAUTION The vertical control and operation bar on the right area of the Bluetooth page serves to invoke device Network coverage depends on a number of factors –... -
Page 21: Device Manager
The BT function on the device must be activated to invoke connection process. Please pay attention To connect a smartphone to the Zenec device via Bluetooth, first step is to successfully complete the to the smartphone manufacturer's instructions regarding device pairing. -
Page 22: Pairing
BLUETOOTH SETUP ACCEPTING/ENDING INCOMING CALLS (VIA DEVICE) On the Bluetooth setup page you can adjust settings for Bluetooth operation. Press the appropriate button / field to change any of the listed settings. Function Icon Operation Function Icon Operation Bluetooth Accept Tap the green handset to accept the call Tap to change settings for BT operation Settings... -
Page 23: Bluetooth Menu
BLUETOOTH MENU PHONEBOOK Contacts Function Icon Operation Touch to pass the call from the hands-free system to the Discrete mobile phone or vice versa Mute Voice output muted/- unmuted conversation Tap to show the numeric pad Numeric pad Necessary in case asked to enter a further number during the call (telephone call center etc.) Back Tap to jump back to the previous level... -
Page 24: Phonebook
CALL LISTS FAVORITES On this page you can link eight or more phone numbers to become favorites. You can select any of If a compatible mobile phone is connected, call lists from the mobile phone will be synchronized with the BT hands-free system (process can take some minutes, depending on the number of the phone numbers in the phonebook and save them as Favorites;... -
Page 25: Navigation
NAVIGATION Fast and simple route calculation For the ZENEC devices Z-N326 and Z-N426 is a navigation package is available separately. This bundle comes with multilanguage Quickstart manual and navigation software on 8GB microSDHC card. The images shown on this double page, as well as instructions, are taken from this solution. -
Page 26: Setup Operations
With the display icon, the LCD TFT screen picture brightness can be dimmed or switched off (standby) that settings or changed parameters can have a direct influence on the everyday use of the ZENEC in two steps. This is done by tapping the icon. -
Page 27: Setup Of Sources
SETUP OF SOURCES BT / NETWORK SETUP When you tap the setup icon, you will enter this setup source page, which offers six different sources In BT / Network Setup, you can make important settings for best Bluetooth operation. Tap on the you can adjust for personal preferences. -
Page 28: Misc Setup
OSD Language Tap to change the menu language Tap to alter hard key or sensor field illumination to Red or White Button Color color (ZENEC logo color cannot be altered) Wallpapers Tap to change the background image ON / OFF... -
Page 29: Audio Setup
VOLUME SETUP QUICK AUDIO SETUP (BAL / FAD / SUBWOOFER / LOUDNESS / BASS BOOST) In the Audio menu -> Media Volume, you can customize the basic settings of each source In this menu, you can adjust the Balance / Fader, Loudness, Bass Boost and Subwoofer level of the individually. -
Page 30: Volume Setup
AUDIO SETUP: EXPERT MODE AUDIO VOLUME – BASE LEVEL SETUP In the Audio Setup menu page with the Expert Mode set to “ON”, you can change audio relevant In the audio menu, you can adjust the basic volume values of the various audio sources. settings. -
Page 31: Balance / Fader
BALANCE / FADER EQUALIZER In this Expert Mode menu page, you can adjust the balance and faders. Press and hold the green In this Expert Mode menu page, you can set the 10-band graphical equalizer. Press and hold the indi- dot of the crosshair to move sound center position into any desired position. -
Page 32: X-Over Setup
SUBWOOFER SETUP X-OVER SETUP In this Expert Mode menu, you can adjust the High-pass transition frequencies of the front and rear In this Expert Mode menu, you can adjust Phase, Gain, and Low-pass transition frequencies of the speakers. The factory default is OFF for front and rear speakers. subwoofer. -
Page 33: Navi-Mixer Setup
Secondly, you can adjust if the route guidance voice will be TFT LCD display screen. This will only work with 8GB microSD card from the ZENEC navigation transmitted only via the left front speaker (driver side) or via both front speakers. Works only for software bundle (Z-N326-SDFEU or Z-N426-SDFEU). -
Page 34: Car (Vehicle) Setup
CAR (VEHICLE) SETUP INPUT SETUP In the Car Setup menu, you can set how the ZENEC device interacts with optional components such In the Input Setup menu, you can adjust the image settings of the connected video sources, such as as cameras and parking assit inside the vehicle. -
Page 35: System Setup
SW Version Displays the current software version information Tap to access detailed software version information Info Load Factory Tap and confirm to reset the ZENEC system to factory default Clock Time Tap to adjust clock time Setup Software Tap and confirm to initiate a software update. -
Page 36: Clock Time
Enter the desired password CAUTION * If you protect you ZENEC system with a Passwort make sure, you have access to this password anytime. Lost or forgotten Passwords require the device to be uninstalled and sent in to ZENEC Service... -
Page 37: Installation Notes
(trees, high buildings etc.). Now insert the navigation software SD card supplied into the microSD card slot of the ZENEC system, and start it in order to establish a sat fix. Make sure that the vehicle is not moved until the sat fix is established. Now press the NAV button to start the NOTE navigation mode, and choose map view. - Page 38 CONNECTION DIAGRAM Z-N326 AND Z-N426 Z-N326 DAB* HDMI USB 2 (WIFI)* UKW/FM USB 1 Z-N426 HDMI External Microphone USB 2 (WIFI)* UKW/FM LINEOUT FRONT Red(R) F CAMERA 12V USB 1 White(L) Black USB1: USB2: R CAMERA 12V LINEOUT REAR Red(R) •...
-
Page 39: Abbreviations
Should your ZENEC product require warranty service, please return it to the retailer from whom Manufacturer-independent Bluetooth® technology allowing audio signals to be it was purchased or the distributor of your country. Do not send any product to ZENEC directly. A2DP... - Page 40 © Copyright 2017 RevA / copy deadline: Q2-2017 English Manufacturer: ACR AG ∙ Bohrturmweg 1 ∙ CH-5330 Bad Zurzach ∙ Switzerland EU Legal Representative: ACR S & V GmbH ∙ Industriestraße 35 ∙ D-79787 Lauchringen ∙ Germany...
Need help?
Do you have a question about the Z-N326 and is the answer not in the manual?
Questions and answers