Advertisement
Advertisement

Subscribe to Our Youtube Channel
Summary of Contents for Ayra ERO 101
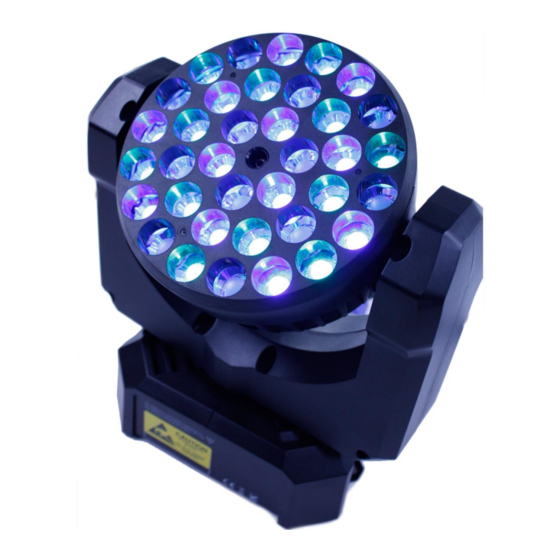
- Page 1 ERO 101 LED movinghead 36x 5W LED Product manual...
-
Page 2: Safety Precautions
(visible cores, defective cable sleeves or strain reliefs), do not connect the fixture. - Make sure that the total amount of power required for your power chain (e.g. several ERO 101 fixtures with power daisy-chaining) does not exceed the capacity of your cables and installation. - Page 3 Installing a Neutrik Powercon power supply: Use the schemes and graphics below to help you with the installation of Neutrik Powercon connectors to your power cables. For more information, contact your local selling point.
- Page 4 - Do not activate the device if the environment temperature exceeds 40 degrees Celsius. - The housing of the ERO 101 may turn hot or warm during intensive use. Always apply a cool -down time after use, as the electronic components are more fragile during transport while they are still warm or hot.
-
Page 5: Table Of Contents
Contents Safety precautions Page 1 Product details Page 6 Introduction Page 7 Menu display and settings Page 8 DMX and DMX-channel assignment Page 15 Technical specifications Page 20... -
Page 6: Product Details
Product details Front Rear Powercon input Moving beam output head Powercon output Graphic display with menu-structure 3-pins DMX input Cooling fan 3-pins DMX output Menu operating buttons Hook not M12 mounting points for G-clamp or halfcoupler included! Mounting points for safety cables... -
Page 7: Introduction
Introduction Congratulations with the purchase of this Ayra ERO 101 LED beam movinghead. This advanced LED fixture is equipped with lots of functions and characteristics, to create amazing light shows. These features include: - compact design - minimal fan and movement noise... -
Page 8: Menu Display And Settings
Menu display and settings The ERO 101 movinghead is equipped with an advanced graphic LCD display, with backlight for easy navigation in dark or dimmed environments. The display is positioned on the rear of the moving head and is equipped with four menu-buttons to cycle through the several functions and values. After activating the movinghead it is important to let the device finish the start -up progress, in which it will calibrate the stepping motors of the device. - Page 9 When scrolling through the several functions of the ERO 101 in the menu structure, you will notice that there are several settings to change. On the next page you will find an extensive description of all functions and the several values which can be selected.
- Page 10 ① SET menu←SET/ESC←Addr:001(DMX mode→ENT→DMX menu② UP↑↓DOWN SET menu←SET/ESC←ManualDimmer→ENTE R→Manual dimmer menu③ UP↑↓DOWN SET menu←SET/ESC←Red→ENTE R→null UP↑↓DOWN SET menu←SET/ESC←Green→E NTER→null UP↑↓DOWN SET menu←SET/ESC←Blue→ENTE R→null UP↑↓DOWN SET menu←SET/ESC←Yellow→ENTE R→null UP↑↓DOWN SET menu←SET/ESC←Cyan→ENTER→null UP↑↓DOWN SET menu←SET/ESC←Purple→ENTE R→null UP↑↓DOWN SET menu←SET/ESC←PureWhite→ENTE R→null UP↑↓DOWN SET menu←SET/ESC←Amber→ENTE R→null UP↑↓DOWN SET menu←SET/ESC←All White→ENTER→null UP↑↓DOWN...
- Page 11 SET menu←SET/ESC←Change Color→ENTER→Motor Run Menu④ UP↑↓DOWN SET menu←SET/ESC←Twinkling→ENTE R→Motor Run Menu UP↑↓DOWN SET menu←SET/ESC←Fade→ENTE R→Motor Run Menu UP↑↓DOWN SET menu←SET/ESC←Macro→ENTER→Macro menu⑤ UP↑↓DOWN SET Menu: ├ Reset Machine │ ├ Reset: ON ;Fixture reset │ └ Reset: OFF ;No reset (default) ├...
- Page 12 │├ Pan Degree ; maximum pan degree setting │ │ ├ Pan Degree: 630 │ │ └ Pan Degree: 540 ; (default) │ ├ Scan Black Out │ │ ├ Scan Black Out: ON ; Activate black-out mode while movement still takes place │...
- Page 13 ② DMX menu DMX Menu: ; DMX mode ├ DMX Address: 001 ; Select DMX address ├ No DMX Signal ; Function when no DMX-signal is sensed │ ├Stop Run ; Blackout with all values to 0 (default) │ ├Hold Run ;...
- Page 14 ⑤ ManualDimmer menu ManualDimmer: ├ Light Switch │ ├ Light ON ; (default) │ └ Light OFF ├ Light Red: 255 ; Dimmer red 0-255 (default: 255) ├ Light Green: 255 ; Dimmer green 0-255 (default: 255) ├ Light Blue: 255 ;...
-
Page 15: Dmx And Dmx-Channel Assignment
The functions and values of the several DMX channel modes and corresponding values are defined on the next pages. To avoid errors in your DMX signal line, Ayra advises to use a DMX-terminator at the end of your DMX-line. Also recommended is the use of special DMX-cable with a cable impedance of 110 Ohms. - Page 16 7-channel HSV modus Channel Value Function 000-255 0~100% Saturation 000-255 0~100% Value 000-255 0~100% 000-255 0~540°/0~630° (maximum range adjustable in menu) 000-255 Pan fine Tilt 000-255 0~240° 000-255 Tilt fine 5-channel STAGE modus Channel Value Function Dimmer red 000-255 0~100% Dimmer green 000-255 0~100%...
- Page 17 8-channel STAGE modus Channel Value Function Dimmer red 000-255 0~100% Dimmer green 000-255 0~100% Dimmer blue 000-255 0~100% Master dimmer 000-255 0~100% 000-255 0~540°/0~630° 000-255 Pan fine Tilt 000-255 0~240° 000-255 Tilt fine 12-kanaals STAGE modus Channel Value Function Strobe 000-019 Shutter open 020-064...
- Page 18 Master dimmer 000-255 0~100% 000-255 0~540°/0~630° 000-255 Pan fine Tilt 000-255 0~240° 000-255 Tilt fine Fixture control settings 000-009 No function 010-014 Reset (Set value for >8 seconds) 015-039 No function 040-044 Medium pan/tilt speed 045-049 Maximal pan/tilt speed 050-054 Minimal pan/tilt speed 055-059 No function...
- Page 19 080-084 Half CT Blue 085-089 Steel Blue 090-094 Lighter Blue 095-099 Light Blue 100-104 Medium Blue Green 105-109 Dark Green 110-114 Primary Green 115-119 Moss Green 120-124 Fern Green 125-129 JAS Green 130-134 Lime Green 135-139 Spring Yellow 140-144 Deep Amber 145-149 Chrome Orange 150-154...
-
Page 20: Technical Specifications
Technical specifications Power requirements: 100-240V AC, 50/60 Hz Power consumption: max. 180 Watt LEDs: CREE XP-E 5 Watt LED chip Number of LEDs: 36 RGB LED color distribution: 12x rood, 12x groen, 12x blauw LED lifespan: 50.000 uur Projection angle: 13 graden Pan range: 540/630 degrees Tilt range: 240 degrees DMX-channel modes: 5, 7, 8, 9 or 12...


Need help?
Do you have a question about the ERO 101 and is the answer not in the manual?
Questions and answers