D-Link DCS-7110 User Manual
Full hd day & night network camera
Hide thumbs
Also See for DCS-7110:
- User manual (80 pages) ,
- Quick installation manual (61 pages) ,
- Specifications (4 pages)

Related Manuals for D-Link DCS-7110


Summary of Contents for D-Link DCS-7110
-
Page 1: User Manual
Version 2.30 | January 19. 2016 User Manual Full HD Day & Night Network Camera DCS-7110... -
Page 2: Preface
Preface Preface D-Link reserves the right to revise this publication and to make changes in the content hereof without obligation to notify any person or organization of such revisions or changes. Manual Revisions Revision Date Description March 7, 2011 DCS-7110 Revision A1 with firmware version 1.00... -
Page 3: Table Of Contents
Tamper Detection ............51 Web-based Configuration Utility ..........20 DI and DO ................52 Web-based Configuration Utility ..........22 DI/DO Schematics ............52 Client Settings ................26 Event Settings ..............53 Setup ....................27 Email ................53 Basic Setup ................27 FTP ..................54 Advanced Setup ..............27 HTTP ................55 D-Link DCS-7110 User Manual... - Page 4 HTML Code Examples ...........66 System ..................67 User Settings ..............67 Device Settings ..............68 Time and Date ..............69 Maintenance ..............70 Parameter List ..............72 Logs ..................73 Technical Specifications ............74 Contacting Technical Support ..........76 Warranty ................... 77 Registration ................83 D-Link DCS-7110 User Manual...
-
Page 5: Product Overview
Product Overview Product Overview Product Overview Package Contents ƒ DCS-7110 HD IR Outdoor Camera ƒ Mounting Bracket and Hardware ƒ Hex Key ƒ CAT5 Ethernet Cable ƒ User Manual and Software on CD-ROM ƒ Quick Install Guide Note: If any of the above items are missing, please contact your reseller. -
Page 6: Introduction
Nothing herein represents a warranty or representation that the D-Link product provided herein is suitable for the end-user’s intended use under the applicable laws of his or her state. D-Link disclaims any liability whatsoever for any end-user use of the D-Link product, which fails to comply with applicable state, local, or federal laws. -
Page 7: Features
High-Quality Video at HD Resolution The DCS-7110 provides real-time video feeds at up to 15 fps with Full HD resolution and 30 fps with HD resolution. H.264 encoding ensures that images remain crisp, clear, and vivid without taking up too much network bandwidth. -
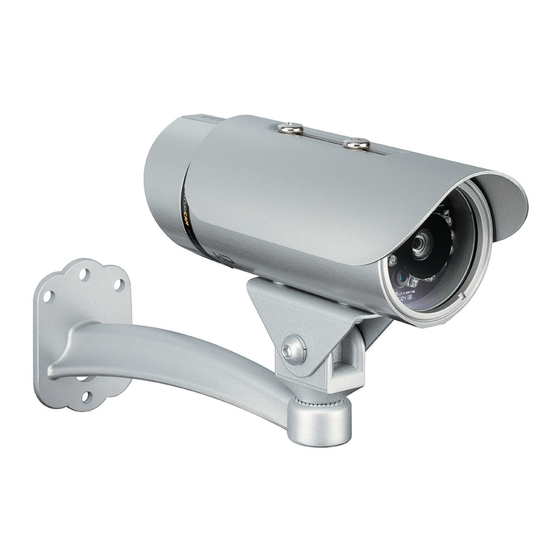
Page 8: Hardware Overview
IR LEDs Illuminate the camera's field protects the camera of view at night. sensor from direct sunlight. Power and IR-Cut Removable (ICR) Sensor network indicator. IR-Cut Removable sensor judges lighting conditions and switches from day mode to night mode accordingly. D-Link DCS-7110 User Manual... -
Page 9: Cable Connectors
RJ-45 connector is for Ethernet and can also be used to power the camera using Power over Ethernet (PoE). DI/DO Connectors DI/DO connectors provide a physical interface to send and receive digital signals to and from a variety of external devices. D-Link DCS-7110 User Manual... -
Page 10: Rear Panel
Reset Button (under weatherproof cover) Remove the weatherproof cover and use a paperclip or similar tool to press and hold the recessed button for 10 seconds to reset the camera back to the factory default settings. D-Link DCS-7110 User Manual... -
Page 11: Installation
Attach the Camera to the Mounting Bracket Step 1: Using the provided screws, attach the camera shoe to the underside of the camera. Step 2: Attach the camera shoe to the mounting bracket and adjust the vertical orientation of the camera. D-Link DCS-7110 User Manual... - Page 12 Step 2: Use the camera mount base to mark where holes will be drilled. Wall anchors and screws are included if needed for the material you are drilling into. Step 3: The camera cables can be installed through a separate large hole drilled in the wall, or using an external cable conduit. D-Link DCS-7110 User Manual...
-
Page 13: Cable Connections
3. Connect the power adapter to a power outlet. Note: Once power has been established, the LED will turn red. When the device has obtained an IP address and is accessible, the LED will turn green. D-Link DCS-7110 User Manual... - Page 14 2. The unsheathed part of the wire connectors should be positioned at a downward-facing angle when they extend out of the rear of the camera, not upward. The unsheathed part of the wire connectors must either be sealed or enclosed in a junction box. D-Link DCS-7110 User Manual...
-
Page 15: Software Installation
Setup Wizard Insert the DCS-7110 CD into your computer's CD-ROM drive to begin the installation. If the Autorun function on your computer is disabled, or if the D-Link Launcher fails to start automatically, click Start and then type D:\autorun.exe, where D: represents the drive letter of your CD-ROM drive. - Page 16 Installation Click Yes to accept the License Agreement. Click Next to start the installation process. Note: The installation may take several minutes to finish. D-Link DCS-7110 User Manual...
- Page 17 Installation Click Finish to complete the installation. Click on the D-Link Setup Wizard SE icon that was created in your Windows Start menu. Click Start and then click All Programs. Scroll down to the D-Link folder, open the Setup Wizard SE folder and click D-Link Setup Wizard SE.
- Page 18 192.168.0.20 will be displayed. Click the Wizard button to continue. Enter the Admin ID and password. When logging in for the first time, the default Admin ID is admin with the password left blank. Click Next to continue. D-Link DCS-7110 User Manual...
- Page 19 Select DHCP if your camera obtains an IP address automatically from a DHCP server such as your router. Select Static IP if you want to manually assign the IP settings to your camera. Click Next to continue. Take a moment to confirm your settings and click Restart. D-Link DCS-7110 User Manual...
-
Page 20: Configuration
Configuration Configuration Web-based Configuration Utility This section explains how to configure your new D-Link Network Camera using the Web-based Configuration Utility. Click on the D-Link Setup Wizard SE icon that was created in your Windows Start menu. Click Start and then click All Programs. Scroll down to the D-Link folder, open the Setup Wizard SE folder and click D-Link Setup Wizard SE. - Page 21 Configuration Enter admin as the default username and leave the password blank. Click OK to continue. The Live View screen will appear. The next few pages will explain the page layout and features. D-Link DCS-7110 User Manual...
-
Page 22: Web-Based Configuration Utility
When you connect to the camera's web interface you will see the following page. This is the Live Video page which will allow you to view the camera's video feed and control basic camera functions using the icons on this screen. Refer to the tables on the following pages for detailed information about these icons. D-Link DCS-7110 User Manual... - Page 23 Configuration Click this logo to visit the D-Link website. The logos and website can be customized to fit your needs. For more information, please refer to "User Customization" on page 65. D-Link Logo Set up the stream transmission mode and saving options on the local computer.
- Page 24 Stop: Stop patrol and auto pan. Select from the preset drop-down list to quickly move the camera to the desired preset position. Go Preset Control Pan/Tilt/Zoom speed Pan Speed Control Tilt Speed Control Zoom Speed Control Speed Control D-Link DCS-7110 User Manual...
- Page 25 Zoom ratio 50%: Keep the video zoom ratio at 50% 25%: Keep the video zoom ratio at 25% Click the question mark for more information regarding camera setup to help you solve any problems you encounter. Help D-Link DCS-7110 User Manual...
-
Page 26: Client Settings
Local Streaming Buffer Time: Enter the buffer time in milliseconds. The buffer will cause a slight delay between live activity and the video of the live stream but may increase the quality of video. D-Link DCS-7110 User Manual... -
Page 27: Setup
Configuration Setup The DCS-7110 include both basic and advanced setup screens. Both screens include a tree view with multiple setup options. Click the Settings button and then click either Basic Setup or Advanced Setup. Basic Setup Advanced Setup Basic setup includes the following options:... -
Page 28: System Overview
Configuration System Overview The system overview page contains a summary of the camera's current settings. D-Link DCS-7110 User Manual... -
Page 29: Video
Frame Rate (size of the live view window). Viewing Window Stream 4: This is global view stream which captures the full view of the video. Users can also define the Output Frame Rate (size of the live view window). D-Link DCS-7110 User Manual... - Page 30 • Preview: Click to view your current settings in the preview window. • Restore: Click to reset the settings back to the original values. • Save: Click to enable your settings. • Close: Click to close the window. Profile 2 D-Link DCS-7110 User Manual...
- Page 31 • Fixed quality: Select to optimize the bandwidth utilization and video quality. The video quality can be adjusted to one of the following settings: Medium, Standard, JPEG Settings Good, Detailed, and Excellent. You can also select Customize and manually enter a value. D-Link DCS-7110 User Manual...
-
Page 32: Image Settings
4. Enter a name for the window and click Save to apply changes. 5. Select Enable privacy mask to activate this function. Note: Up to five privacy mask windows can be set up on the same screen. Privacy Mask D-Link DCS-7110 User Manual... - Page 33 Status of Profiles: Displays if the profile is enabled or disabled. Profile 2: Click to create a second profile. Restore: Click to set the above settings to their default values. Save: Click to save and activate your settings. D-Link DCS-7110 User Manual...
-
Page 34: Day And Night Settings
Light Sensor Sensitivity: Select either Low, Normal, or High sensitivity for the light sensor. Disable IR LED: Select this option to disable the IR LED. The IR LED automatically switches on at night (on by default). D-Link DCS-7110 User Manual... -
Page 35: Network
LAN. To utilize this feature, make sure that your router supports UPnP and it is activated. D-Link DCS-7110 User Manual... - Page 36 4. Go to Setup > Network > IP settings. Select PPPoE and enter the user name and password provided by your ISP. Click Save to enable the setting. 5. The camera will reboot. 6. Disconnect the power to the camera and remove it from the LAN environment. D-Link DCS-7110 User Manual...
-
Page 37: Ipv6
3. Press Enter on the keyboard or click Refresh button to refresh the webpage. Manually Setup the IP Address: Select this option to manually configure IPv6 setting if your network environment does not have DHCPv6 server and advertisements-enabled routers. IPv6 Information D-Link DCS-7110 User Manual... -
Page 38: Port And Access Name Settings
By default, the HTTPS port is set to 443. You can assign it to another port number between 1025 and 65535. The FTP server allows the user to save recorded video clips. You can utilize D-Link's IP Cam Wizard to upgrade the firmware via FTP server. By default, the FTP port is set to 21. It also can be assigned to another port number between 1025 and 65535. - Page 39 RTP port for video: By default, the RTP (video) port is set to 5556. You can assign it to another port number between 1025 and 65534. This value must be an even number. RTCP port for video: This port will always be assigned automatically depending on the RTP port for video value. D-Link DCS-7110 User Manual...
- Page 40 Multicast TTL [1-255]: The multicast TTL (Time To Live) is the value that tells the router the range a packet can be forwarded. By default, the multicast TTL value is 15. D-Link DCS-7110 User Manual...
-
Page 41: Dynamic Dns
User name: Enter your username or e-mail used to connect to the DDNS Password: Enter your password used to connect to the DDNS server. Confirm Password: Enter your password again for confirmation. Status: Indicates the connection status. Save: Click to save your settings. D-Link DCS-7110 User Manual... -
Page 42: Https
Click Create to open the Create Certificate page. b. Enter the requested information and click Save to generate the certificate. c. The certificate information will automatically be displayed in the buttom section. You can click Property to view detailed information about the certificate. D-Link DCS-7110 User Manual... - Page 43 If you want to create and install other certificates, please remove the existing one. To remove the signed certificate, deselect Enable HTTPS secure connection in the top section and click Save. Then click Remove to erase the certificate. D-Link DCS-7110 User Manual...
-
Page 44: Access List
Note that those selected connections will only be disconnected temporarily and will automatically try to re-link again (i.e., Explore or Quick Time Player). Enable Access List Filtering: Select this item and click Save if you want to enable the access list filtering function. D-Link DCS-7110 User Manual... - Page 45 Administrator IP address Always allow the IP address to access this device: You can select this item and add the Administrator’s IP address in this field to make sure the Administrator can always connect to the device. D-Link DCS-7110 User Manual...
-
Page 46: Advanced Settings
• Authentication type: Select either MD5 or SHA as the authentication method. • Authentication password: Enter a password for authentication (at least 8 characters). • Encryption password: Enter a password for encryption (at least 8 characters). D-Link DCS-7110 User Manual... -
Page 47: Ieee 802.1X
In the following boxes, enter your ID and password issued by the CA, then upload the related certificate(s). 3. When all setting are complete, move the camera to the protected LAN by connecting it to an 802.1x-enabled switch. The devices will then start the authentication automatically. D-Link DCS-7110 User Manual... -
Page 48: Cos
They only offer a "best-effort. " Users can think of CoS as "coarsely- grained" traffic control and QoS as "finely-grained" traffic control. • Though CoS is simple to manage, it lacks scalability and does not offer end-to-end guarantees since it is based on L2 protocol. D-Link DCS-7110 User Manual... -
Page 49: Qos/Dscp
Please follow the steps below to enable QoS/DSCP settings: 1. Check the Enable CoS box. 2. Choose the priority for each application (0~7). 3. Click Save. D-Link DCS-7110 User Manual... -
Page 50: Event Management
3. Define the sensitivity to moving objects and the space ratio of all alerted pixels by moving the Sensitivity and Percentage slide bar. 4. Click Save to apply the changes. 5. Check the Enable motion detection box to activate motion detection. D-Link DCS-7110 User Manual... -
Page 51: Tamper Detection
(the difference between current frame and pre-saved background) exceeds the trigger threshold. Set up the event source as Camera Tampering Detection on Event Settings > Server Settings. Please refer to "Event Settings" on page 53 for more information. D-Link DCS-7110 User Manual... -
Page 52: Di And Do
The I/O connector provides the physical interface for digital input (DI+, GND) and digital output (DO-, +12V) that is used for connecting external alarm devices to the camera such as IR-Sensors and alarm relays. DI/DO Schematics D-Link DCS-7110 User Manual... -
Page 53: Event Settings
To verify if the email settings are correctly configured, click Test. The result will be shown in a pop-up window. If successful, you will also receive an e-mail indicating the result. Click Save to enable the settings, then click Close to exit the page. D-Link DCS-7110 User Manual... -
Page 54: Ftp
To verify if the FTP settings are correctly configured, click Test. The result will be shown in a pop-up window. If successful, you will also receive a test.txt file on the FTP server. Click Save to enable the settings, then click Close to exit the page. D-Link DCS-7110 User Manual... -
Page 55: Http
To verify if the HTTP settings are correctly configured, click Test. The result will be shown in a pop-up window. If successful, you will receive a test.txt file on the HTTP server. Click Save to enable the settings then click Close to exit the page. D-Link DCS-7110 User Manual... -
Page 56: Network Storage
• Password: If required, enter the password for your storage device. Click Save to enable the setting, then click Close to exit the page. When completed, the new server settings will automatically be displayed on the Event Settings page. D-Link DCS-7110 User Manual... -
Page 57: Media Settings
• File name prefix: Enter the text that will be appended to the front of the file name. • Add date and time suffix to the file name: Select this option to add a date/time suffix to the file name. Click Save to enable the settings, then click Close to exit the page. D-Link DCS-7110 User Manual... -
Page 58: Video Clip
• Maximum file size: Specify the maximum file size allowed. • File name prefix: Enter the text that will be appended to the front of the file name. Click Save to enable the settings, then click Close to exit the page. D-Link DCS-7110 User Manual... -
Page 59: System Log
System log: Select to send a system log when a trigger is activated. • Name: Enter a name for the server setting. Click Save to enable the settings, then click Close to exit the page. The new media settings will appear on the Event Settings page. D-Link DCS-7110 User Manual... -
Page 60: Event Settings
Priority: Set the priority for this event (High, Normal, or Low). The event with higher priority will be executed first Detect next event after * seconds: Select the delay time before selecting the next event. It is being used for both events of motion detection and digital input trigger. D-Link DCS-7110 User Manual... -
Page 61: Trigger
• Camera tampering detection: This option allows the camera to trigger when the camera detects that it is being tampered with. To enable this function, you need to configure tamper detection first. For more information, refer to "Tamper Detection" on page 51. Video Motion Detection Periodically D-Link DCS-7110 User Manual... -
Page 62: Recording
Enable cyclic recording: If you select this item, when the maximum capacity is reached, the oldest file will be overwritten by the latest one. The reserved amount is reserved for cyclic recording to prevent malfunction. This value must be larger than 15 Mbytes. D-Link DCS-7110 User Manual... - Page 63 Network Storage. The new recording name will appear in the drop-down list on the recording page. To remove a recording setting from the list, select a recording name from the drop-down list and click Delete. D-Link DCS-7110 User Manual...
-
Page 64: Ptz Control
5. If you want to delete a selected location, select it from the Source list and click Remove. 6. Select a location and click Up or Down to rearrange the patrol order. 7. Click Save to enable the settings. D-Link DCS-7110 User Manual... -
Page 65: User Customization
4. Enter a website link if necessary. 5. Click Save to enable the setting. Repeat the steps 1-3 and 5 for the center and right side. Title: You can also change the title at the top of your Live Video page. D-Link DCS-7110 User Manual... -
Page 66: Html Code Examples
• Refresh interval - If a user only needs to embed a still image in a browser, use this option and set up the refresh interval of the still image. After selecting a profile, click Generate and code will be created and displayed. Click the Copy button at the bottom to copy the code. D-Link DCS-7110 User Manual... -
Page 67: System
User name: Select an existing user from the drop-down menu to edit. User Password: Enter a new password. Authentication: Select the access rights for the user (Administrator, Normal, or Guest). Modify: Click to save your changes. Delete: Click to delete the selected user. D-Link DCS-7110 User Manual... -
Page 68: Device Settings
Turn off the LED indicator: Check the box to turn off the LED next to the lens. This will prevent anyone from observing the operation of the network camera. Camera Name: Create a unique name for your camera. D-Link DCS-7110 User Manual... -
Page 69: Time And Date
NTP server. Set the date and time manually: Set the time and date manually. (Enter the Year, Month, Day, Hour, Minute, and Second.) Copy Your Computer’s Time Setting: Click to synchronize the time information from your PC. D-Link DCS-7110 User Manual... -
Page 70: Maintenance
If you have set up a fixed IP or other special settings for your device, it is not suggested to upload a settings backup file. Firmware Upgrade: Refer to the next page. D-Link DCS-7110 User Manual... - Page 71 Note: Do not power off the camera during the upgrade! Follow the steps below to upgrade the firmware: 1. Download the latest firmware file from the D-Link website. The file is in .pkg file format. 2. Click Browse and select a firmware file.
-
Page 72: Parameter List
Configuration Parameter List The Parameters List page lists the entire system’s parameters in alphabetical order. D-Link DCS-7110 User Manual... -
Page 73: Logs
4. Click Save to enable the setting. Current Log: This will display the system log in chronological order. The system log is stored in the camera’s buffer area and will be overwritten when reaching a certain limit. D-Link DCS-7110 User Manual... -
Page 74: Technical Specifications
Network Protocols IPv4, IPv6, TCP/IP, UDP, ICMP, DHCP Client, NTP Client (D-Link), DNS Client, DDNS Client (D-Link), SMTP Client, FTP Client, HTTP / HTTPS, Samba Client, PPPoE, UPnP Port Forwarding, RTP / RTSP/ RTCP, IP filtering, 3GPP, LLTD, CoS/QoS, SNMP, IGMP, 802.1x, ONVIF Compliant ƒ... - Page 75 Operating Temperature -20 to 50 ˚C (-4 to 122 ˚F) Storage Temperature -20 to 70 ˚C (-4 to 158 ˚F) Humidity 90% non-condensing Weight 808 g Certifications CE (Class A), LVD, FCC (Class A), C-Tick Dimensions D-Link DCS-7110 User Manual...
-
Page 76: Contacting Technical Support
• Hardware Revision (located on the label on the bottom of the Camera (e.g. rev B2)) • Serial Number (s/n number located on the label on the bottom of the Camera) You can find software updates and user documentation on the D-Link website as well as frequently asked questions and answers to technical issues. -
Page 77: Warranty
Any repair or replacement will be rendered by D-Link at an Authorized D-Link Service Office. The replacement hardware need not be new or have an identical make, model or part. D-Link may, at its option, replace the defective Hardware or any part thereof with any reconditioned product that D-Link reasonably determines is substantially equivalent (or superior) in all material respects to the defective Hardware. - Page 78 D-Link further warrants that, during the Software Warranty Period, the magnetic media on which D-Link delivers the Software will be free of physical defects. The customer’s sole and exclusive remedy and the entire liability of D-Link and its suppliers under this Limited Warranty will be, at D-Link’s option, to replace the non-conforming Software (or defective media) with software that substantially conforms to D-Link’s...
- Page 79 D-Link Systems, Inc., 17595 Mt. Herrmann, Fountain Valley, CA 92708. D-Link will not be held responsible for any packages that are lost in transit to D-Link. The repaired or replaced packages will be shipped to the customer via UPS Ground or any common carrier selected by D-Link.
-
Page 80: Limitation Of Liability
FOR WARRANTY SERVICE) RESULTING FROM THE USE OF THE PRODUCT, RELATING TO WARRANTY SERVICE, OR ARISING OUT OF ANY BREACH OF THIS LIMITED WARRANTY, EVEN IF D-LINK HAS BEEN ADVISED OF THE POSSIBILITY OF SUCH DAMAGES. THE SOLE REMEDY FOR A BREACH OF THE FOREGOING LIMITED WARRANTY IS REPAIR, REPLACEMENT OR REFUND OF THE DEFECTIVE OR NONCONFORMING PRODUCT. - Page 81 The availability of some specific channels and/or operational frequency bands are country dependent and are firmware programmed at the factory to match the intended destination. The firmware setting is not accessible by the end user. D-Link DCS-7110 User Manual...
- Page 82 Warranty For detailed warranty information applicable to products purchased outside the United States, please contact the corresponding local D-Link office. Industry Canada Notice: This device complies with RSS-210 of the Industry Canada Rules. Operation is subject to the following two conditions: (1) This device may not cause harmful interference, and (2) this device must accept any interference received, including interference that may cause undesired operation.
-
Page 83: Registration
Registration Registration Register your product at registration.dlink.com Product registration is entirely voluntary and failure to complete or return this form will not diminish your warranty rights. D-Link DCS-7110 User Manual...
Need help?
Do you have a question about the DCS-7110 and is the answer not in the manual?
Questions and answers