Table of Contents
Advertisement
Quick Links
Advertisement
Table of Contents

Related Manuals for Advantech PCI-1713


Summary of Contents for Advantech PCI-1713
- Page 2 Co., Ltd. assumes no responsibility for its use, nor for any infringe- ments of the rights of third parties which may result from its use. PC-LabCard is a trademark of Advantech Co., Ltd. IBM and PC are trademarks of International Business Machines Corporation. MS-DOS and Windows are trademarks of Microsoft Corporation.
-
Page 3: Table Of Contents
Contents CHAPTER 1 General Information ......1 1.1 Introduction ............2 1.2 Features..............3 1.3 Specifications ............3 1.4 Block Diagram ............. 6 CHAPTER 2 Installation ........7 2.1 Initial Inspection ........... 8 2.2 Unpacking............. 8 2.3 Installation Instructions ........9 CHAPTER 3 Signal Connections ...... - Page 4 4.7 Control Register ..........27 4.8 Status Register ............ 28 4.9 Clear Interrupt and FIFO ........29 4.10 Programmable Timer/Counter Registers ..29 CHAPTER 5 Calibration ........31 5.1 Introduction ............32 5.2 VR Assignment ............ 32 5.3 A/D Calibration ..........33 APPENDIX A 82C54 Counter Chip Functions..
- Page 5 Chapter 1 General Information...
- Page 6 It provides 32 analog input channels with a sampling rate up to 100k samples/s, 12-bit resolution and isolation protection of 2500 The PCI-1713 uses a PCI controller to interface the card with the PCI bus. The controller fully implements the PCI bus specification Rev 2.1.
-
Page 7: Chapter 1 General Information
The PCI-1713 provides optical isolation protection of 2500 V between the inputs and the PC bus to protect the PC and peripherals from damage due to high voltages on the input lines. It is ideal for the situations where budget-conscious users require flexibility, stability and a high level of isolation protection for their data acquisition system. - Page 8 • Counter chip: 82C54 or equivalent • Counters: 3 channels, 16 bits 2 channels are permanently configured as programmable pacers; 1 channel is un-used. • Time base: Channel 1:10 MHz Channel 2:Takes input from output of channel 1 Channel 0:un-used. PCI-1713 User's Manual...
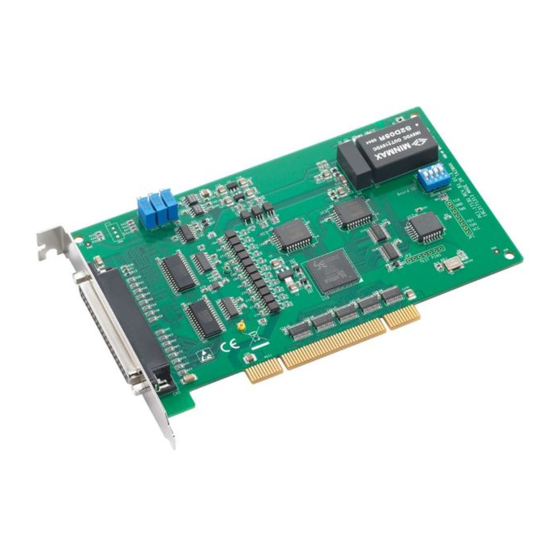
- Page 9 • I/O Connector: 37-pin D-type female connector • Dimensions: 175 mm x 100 mm (6.9” x 3.9”) • Power consumption: +5 V @ 850 mA (Typical), +5 V @ 1.0 A (Max.) • Operating temperature: 0 ~ +60 °C (32 ~ 140 °F) ( refer to IEC 68-2- 1, 2 ) •...
-
Page 10: Block Diagram
Code Logic Generator Generator E X T _ T R G Isolation Isolation Isolation Isolation AI 0 AI 1 Multiplexer 12 bit 32 S.E. P G I A Converter 16 Diff AI31 Figure 1-1: PCI-1713 block diagram PCI-1713 User's Manual... - Page 11 Chapter 2 Installation...
- Page 12 It should be free of marks and in perfect order upon receipt. As you unpack the PCI-1713, check it for signs of shipping damage (damaged box, scratches, dents, etc.). If it is damaged or fails to meet specifications, notify our service department or your local sales representative immediately.
-
Page 13: Chapter 2 Installation
Save the screw to secure the interface card retaining bracket. 5. Carefully grasp the upper edge of the PCI-1713. Align the hole in the retaining bracket with the hole on the expansion slot and align the gold striped edge connector with the expansion slot socket. - Page 14 PCI-1713 User's Manual...
-
Page 15: Chapter 3 Signal Connections
Chapter 3 Signal Connections... -
Page 16: I/O Connector
PCI-1713 card via the I/O connector. The I/O connector for the PCI-1713 card is a 37-pin D-type connector which you can connect to 37-pin D-type accessories with Advantech's PCL-10137 cable. - Page 17 Signal Reference Direction Description Name Analog Input Channels 0 through 31. Each channel pair, AI<i, i+1> (i = 0, 2, AI<0…31> Input 4...30), can be configured as either two single-ended inputs or one differential input. Ground. These pins are the reference points for single-ended measurements and the bias current return point for differential measurement.
- Page 18 A signal source without a local ground is also called a “floating source”. It is fairly simple to connect a single-ended channel to a floating signal source. In this mode, the PCI-1713 card provides a reference ground for external floating signal sources.
- Page 19 If one side of the signal source is connected to a local ground, the signal source is ground-referenced. The ground of the signal source and the ground of the PCI-1713 will not be at exactly the same voltage, as they are connected through the ground return of the equipment and building wiring.
- Page 20 AIGND. Figure 3-4 shows a differential channel connection between a floating signal source and an input channel on the PCI-1713 card. In this figure, each side of the floating signal source is connected through a resistor to the AIGND. This connection can reject the common-mode voltage between the signal source and the PCI-1713 card ground.
-
Page 21: Analog Input Connections
In addition to pacer triggering, the PCI-1713 card also allows external triggering for A/D conversions. A low-to-high edge coming from EXT_TRG will trigger an A/D conversion on the PCI-1713 board. Note!: Don't connect any signal to the EXT_TRG pin when the external trigger function is not being used. - Page 22 • Keep a reasonable distance between high-voltage (or high-current) lines and signal cables connected to the PCI-1713 card if the cables run parallel, or route signal cables at right angles to high voltage/current cables.
-
Page 23: Chapter 4 Register Structure And Format
Chapter 4 Register Structure and Format... - Page 24 The PCI-1713 is delivered with an easy-to-use 32-bit DLL driver for user programming under the Windows 98/95/NT operating system. We advise users to program the PCI-1713 using the 32-bit DLL driver provided by Advantech to avoid the complexity of low-level program- ming by register.
-
Page 25: A/D Data
Base Read Address + decimal Channel Number and A/D Data AD11 AD10 Status Register ONE/FH IRQEN GATE PACER Counter 0 Counter 1 Counter 2 Chapter 4 Register Structure and Format... -
Page 26: Software A/D Trigger
Address + decimal Software A/D Trigger A/D Channel Range Setting MUX Control Stop channel Start channel Control Register ONE/FH GATE PACER Clear Interrupt and FIFO clear FIFO clear interrupt Counter 0 Counter 1 Counter 2 Counter Control PCI-1713 User's Manual... - Page 27 These two bytes, BASE+0 and BASE+1, hold the result of A/D conversion data. The 12 bits of data from the A/D conversion are stored in BASE+1 bit 3 to bit 0 and BASE+0 bit 7 to bit 0. Read A/D Data Bit # BASE+1 AD11 AD10...
- Page 28 0 means the channel is single-ended, and 1 means it is differential. Bipolar or Unipolar 0 means the channel is bipolar, and 1 means it is unipolar. G2 to G0 Gain Code The following table lists the gain codes for the PCI-1713: PCI-1713 Gain Code Input Range(V) Gain -5 to +5 -2.5 to +2.5...
-
Page 29: Mux Control
Write MUX Control Bit # BASE+5 BASE+4 CL4 ~ CL0 Start Scan Channel Number CH4 ~ CH0 Stop Scan Channel Number BASE+4 bit 4 to bit 0, CL4 ~ CL0, act as a pointer when you program the A/D channel setting (see previous section). When you set the MUX start channel to an analog input channel, AIn ( n = 0, 1, 2, 3,..., 31), the gain code, B/U and S/D written to the register of BASE+2, is for channel n. - Page 30 AI2, then the scan sequence is AI29, AI30, AI31, AI0, AI1, AI2, AI29, AI30, AI31, AI0, AI1, AI2, AI29, AI30… This scan logic of the PCI-1713 card is quite powerful and easily understood. You can respectively set the gain code, B/U and S/D, for each channel.
-
Page 31: Control Register
The write-only register BASE+6 allows users to set an A/D trigger source and an interrupt source. Write Control Register Bit # BASE + 6 ONE/FH IRQEN GATE PACER SW Software trigger enable bit Set 1 to enable software trigger, and set 0 to disable. PACER PACER trigger enable bit Set 1 to enable pacer trigger, and set 0 to disable. -
Page 32: Status Register
F/F FIFO Full flag This bit indicates whether the FIFO is full. 1 means that the FIFO is full. IRQ Interrupt flag This bit indicates the interrupt status. 1 means that an interrupt has occurred. PCI-1713 User's Manual... -
Page 33: Clear Interrupt And Fifo
Writing data to either of these two bytes clears the interrupt or the FIFO. Write Clear Interrupt and FIFO Bit # BASE+9 Clear FIFO BASE+8 Clear Interrupt The four registers of BASE+24, BASE+26, BASE+28 and BASE+30 are used for the 82C54 programmable timer/counter. Please refer to Appendix A data sheets for detailed application information. - Page 34 PCI-1713 User's Manual...
-
Page 35: Chapter 5 Calibration
Chapter 5 Calibration... - Page 36 To assist users in the A/D calibration process, we provide one calibration program, ADCAL.EXE, on the PCI-1713 software CD-ROM. The ADCAL.EXE program makes A/D calibrations easy. It leads you through the calibration and setup procedure with a variety of prompts and graphic displays, showing you all of the correct settings and adjustments.
-
Page 37: Vr Assignment
Figure 5-1: PCL-1713 VR assignment The following list shows the function of each VR: Function A/D full scale (gain) A/D bipolar offset A/D unipolar offset PGIA initial offset PGIA output Regular and accurate calibration procedures ensure the maximum possible accuracy. The ADCAL.EXE calibration program leads you through the whole A/D offset and gain adjustment procedure. - Page 38 13. Adjust VR3 until the output codes from the card's AI1 flickers between 2047 and 2048. A/D code Mapping Voltage Hex. Dec. Bipolar ± 5V Unipolar 0 to 10V 000h -4.9971V 7FFh 2047 -0.0024V 4.9947V 800h 2048 4.9971V FFFh 4095 +4.9947V 9.9918V PCI-1713 User's Manual...
- Page 39 Appendix A 8524 Counter Chip Functions...
- Page 40 The PCI-1713 uses one Intel 82C54 compatible programmable interval timer/counter chip. This popular 82C54 offers three indepen- dent 16-bit counters, counter 0, counter 1 and counter 2. Counter 0 is not available for users. Counter 1 is cascaded with counter 2 to create a 32-bit timer for the pacer trigger.
- Page 41 SC1 & SC0 Select counter. Counter Read-back command RW1 & RW0 Select read/write operation Operation Counter latch Read/write LSB Read/write MSB Read/write LSB first, then MSB M2, M1 & M0 Select operating mode Mode Description Stop on terminal count Programmable one shot Rate generator Square wave rate generator Software triggered strobe...
- Page 42 O U T N C R W 1 R W 0 M2 B C D Current state of counter output Null count is 1 when the last count written to the counter register has been loaded into the counting element PCI-1713 User's Manual...
- Page 43 The output will initially be low after you set this mode of operation. After you load the count into the selected count register, the output will remain low and the counter will count. When the counter reaches the terminal count, its output will go high and remain high until you reload it with the mode or a new count value.
- Page 44 CLK pulse. The count will be inhibited while the GATE input is low. The counter will start counting after the rising edge of the trigger input and will go low for one clock period when the terminal count is reached. The counter is retriggerable. PCI-1713 User's Manual...
- Page 45 Before you write the initial count to each counter, you must first specify the read/write operation type, operating mode and counter type in the control byte and write the control byte to the control register [BASE + 30(Dec)]. Since the control byte register and all three counter read/write registers have separate addresses and each control byte specifies the counter it applies to (by SC1 and SC0), no instructions on the operat- ing sequence are required.
- Page 46 Set bits SC1 and SC0 to 1 and CNT = 0. The second method has the advantage of operating several counters at the same time. A subsequent read operation on the selected counter will retrieve the latched value. PCI-1713 User's Manual...
-
Page 47: Appendix B Pcld-881B Wiring Terminal Board
Appendix B PCLD-881B Wiring Terminal Board... - Page 48 • Table-top mounting using nylon standoffs. Screws and washers provided for panel or wall mounting • Dimensions: 218mm (W) x 115mm (L) x 31mm (H) (8.6" x 4.5" x 1.2") • Field wiring for the PCI-1713 and PCL-813B equipped with 37-pin D- type connector. PCI-1713 User's Manual...
- Page 49 AI 8 AI 9 AI10 AI11 AI12 AI13 AI14 AI15 GND CN1: 37-pin D-type connector for connection to the PCI-1713 or PCL-813B CN2 ~ 5: 10-pin wiring terminal block for analog input JP1: Connecting pin 1 of CN4 to the ground (default setting) or to float for an external trigger source.
- Page 50 R A n + R B n Internal side Field side d) 4 ~ 20 mA to 1 ~ 5 V signal converter: RAn = 0 Ω (short) RBn = 250 Ω (0.1% precision resistor) Cn = none Internal side Field side PCI-1713 User's Manual...
- Page 51 where n = 0, 2, 4, .., 30 AIn+1 RAn+1 Internal side Field side a) Straight-through connection (factory setting): RAn = 0 Ω (short) = 0 Ω (short) RDn = none AIn+1 CDn = none Internal side Field side b) 1.6 kHz (3dB) low pass filter RAn = 5 kΩ...
- Page 52 C D 2 8 R A 3 1 R B 3 1 C D 3 0 C 3 1 R A 2 9 C 2 9 A I3 1 A I2 9 T B _ 1 0 PCI-1713 User's Manual...
- Page 53 C N 1 E X T _ T R G A I 3 1 A I 3 0 A I 2 9 A I 2 8 A I 2 7 A I 2 6 A I 2 5 A I 2 4 A I 2 3 A I 2 2 A I 2 1...
- Page 54 PCI-1713 User's Manual...
Need help?
Do you have a question about the PCI-1713 and is the answer not in the manual?
Questions and answers