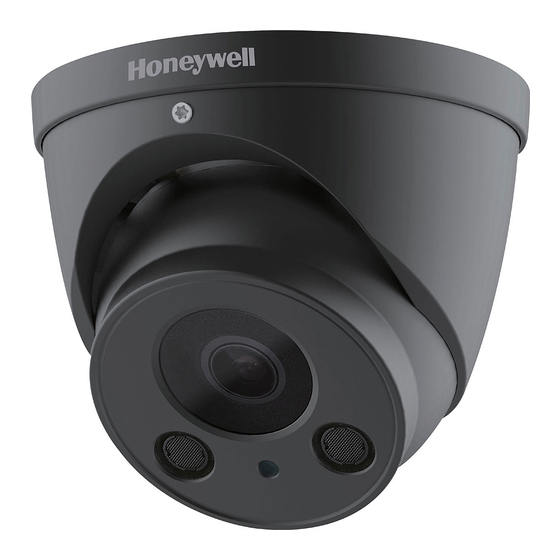
Honeywell H2W2PRV3 Software Configuration Manual

Honeywell H2W2PRV3 Software Configuration Manual

Performance series
Hide thumbs Also See for H2W2PRV3:
Table of Contents

Advertisement

|
Performance Series
Honeywell
Performance Series IP Cameras
Software Configuration Guide
H2W2PRV3 HBW2PR1
H2W4PRV3 HBW2PR2
H4W2PRV2 HBW4PR1
H4W4PRV2 HBW4PR2
H4W4PRV3 HEW2PR1
Recommended
Find the latest version of this and other Performance Series IP camera
documents on the Honeywell Video website. Go
to: http://www.honeywellvideo.com/products/cameras/ip/index.html
to find your camera and view/download the latest documentation.
Refer to the Honeywell Open Technology Alliance to learn more about
our open and integrated solutions (go
to: http://www.security.honeywell.com/hota/).
HEW2PR2
HEW2PRW1
HEW4PR2
HEW4PR3
HEW4PRW3

Advertisement

Table of Contents
loading

Summary of Contents for Honeywell H2W2PRV3

  • Page 1 Find the latest version of this and other Performance Series IP camera documents on the Honeywell Video website. Go to: http://www.honeywellvideo.com/products/cameras/ip/index.html to find your camera and view/download the latest documentation. Refer to the Honeywell Open Technology Alliance to learn more about our open and integrated solutions (go to: http://www.security.honeywell.com/hota/).
  • Page 3 Revisions Issue Date Revisions 07/2016 New document. 09/2016 Added specification and dimension information for MFZ IP cameras 11/2016 Edited Manufacturer’s Declaration of Conformance...
  • Page 4: Cautions And Warnings

    Cautions and Warnings WARNING Installation and servicing should be performed only by qualified and experienced technicians to conform to all local codes and to maintain your warranty. WARNING To ensure compliance with electrical safety standards this product is intended for use with a Listed Power Adapter marked with “Limited Power Source”, “LPS”, on the unit, output rated 12 V DC, minimum 0.7A, Tma=60°C or from Power over Ethernet (PoE) provided by Listed Information Technology Equipment meeting the IEEE 802.3af PoE standard.
  • Page 5: Safety Instructions

    Changes or modifications not expressly approved by the party Note responsible for compliance could void the user’s authority to operate the equipment. Canadian Compliance Statement This Class B digital apparatus complies with Canadian ICES-003. Cet appareil numérique de la Classe B est conforme à la norme NMB-003 du Canada. Manufacturer’s Declaration of Conformance The equipment supplied with this guide meets the provisions of the following European Union council directives:...
  • Page 6: Warranty And Service

    Warranty and Service Subject to the terms and conditions listed on the product warranty, during the warranty period Honeywell will repair or replace, at its sole option, free of charge, any defective products returned prepaid. In the event you have a problem with any Honeywell product, please call Customer Service at 1.800.323.4576 for assistance or to request a Return Merchandise Authorization (RMA) number.
  • Page 7: Table Of Contents

    Overview ....................................1 Key Features ..................................1 Camera Dimensions ................................ 2 HEW2PR1/HEW4PR3/HEW2PRW1/HEW4PRW3 Ball Cameras............ 2 H2W2PRV3/H2W4PRV3 Micro Dome Cameras..................3 HBW2PR1/HBW4PR1 Bullet Camera ......................4 H4W4PRV3 Mini Dome Camera ........................4 H4W2PRV2/H4W4PRV2 Mini Dome Camera .................... 5 HEW2PR2/HEW4PR2 Ball Camera ........................ 5 HBW2PR2/ HBW4PR2 Bullet Camera ......................
  • Page 8 Embedded NVR Integration Capacity Matrix ....................65 Camera Specifications ..........................66 HEW2PR1/HEW2PRW1/HEW4PR3/HEW4PRW3 Ball Cameras ............66 HBW2PR1/HBW4PR1 Bullet Cameras ........................68 H2W2PRV3/H2W4PRV3 Micro Dome Cameras .....................70 H4W4PRV3 Mini Dome Camera ..........................72 H4W2PRV2/H4W4PRV2 Mini Dome Cameras ....................74 HEW2PR2/HEW4PR2 Ball Cameras ........................76 HBW2PR2/HBW4PR2 Bullet Cameras ........................78...
  • Page 9 Figures Figure 1-1 HEW2PR1/HEW4PR3/HEW2PRW1/HEW4PRW3 Dimensions ........2 Figure 1-2 HEW2PR1/HEW4PR3/HEW2PRW1/HEW4PRW3 Components ........3 Figure 1-3 H2W2PRV3/H2W4PRV3 Dimensions ..................3 Figure 1-4 H2W2PRV3/H2W4PRV3 Components ..................3 Figure 1-5 HBW2PR1/HBW4PR1 Dimensions ....................4 Figure 1-6 HBW2PR1/HBW4PR1 Components ..................... 4 Figure 1-7 H4W4PRV3 Dimensions ........................4 Figure 1-8 H4W4PRV3 Components ........................
  • Page 10 Figure 5-11 Connection Configuration Interface ..................33 Figure 5-12 PPPoE Configuration Interface ....................34 Figure 5-13 DDNS Configuration Interface ....................35 Figure 5-14 Using Honeywell DDNS to Configure DDNS ................35 Figure 5-15 IP Filter Configuration Interface ....................36 Figure 5-16 SMTP Configuration Interface .....................37 Figure 5-17 UPnP Configuration Interface .....................38...
  • Page 11 Table 5-7 TCP/IP Configuration ...........................31 Table 5-8 P2P Configurations ..........................32 Table 5-9 Connection Configurations ........................33 Table 5-10 DDNS Configurations ........................35 Table 5-11 Honeywell DDNS Configurations ....................36 Table 5-12 SMTP (Email) Configurations ......................37 Table 5-13 SNMP Configurations ........................39 Table 5-14 Multicast Configurations .........................41 Table 5-15 802.1X Configurations ........................41...
  • Page 12: About This Document

    Live View interface. • Chapter 4, Playing Back Video, describes how to search for recorded video and snapshots and how t o export them (H2W2PRV3/H2W4PRV3/HBW2PR2/HBW4PR2/HEW2PR2/HEW4PR2/ H4W2PRV2/H4W4PRV2 only). • Chapter 5, Configuring Camera Settings, describes all configurations, including camera configurations, network configurations, and storage configurations.
  • Page 13: Introduction

    • Camera Dimensions, page 2 Overview Honeywell’s Performance Series IP cameras integrate traditional camera and network video technology, combining video data collection and transmission. These flexible, fully featured cameras are the ideal choice for a wide range of indoor and outdoor surveillance applications.
  • Page 14: Camera Dimensions

    Performance Series IP Camera Software Configuration Guide • Recording over Internet, files stored on client PC • Network storage (FTP) Network Monitoring • One-channel video data transmission to a network • Terminal and decoding • Delay time less than 270 ms (network bandwidth support required) •...
  • Page 15: H2W2Prv3/H2W4Prv3 Micro Dome Cameras

    Introduction Figure 1-2 HEW2PR1/HEW4PR3/HEW2PRW1/HEW4PRW3 Components Lens Camera module Camera enclosure 12 VDC connector LAN connector H2W2PRV3/H2W4PRV3 Micro Dome Cameras Figure 1-3 H2W2PRV3/H2W4PRV3 Dimensions 4.17" (106.0 mm) Figure 1-4 H2W2PRV3/H2W4PRV3 Components Enclosure Dome Cover LAN connector 12 VDC connector...
  • Page 16: Hbw2Pr1/Hbw4Pr1 Bullet Camera

    Performance Series IP Camera Software Configuration Guide HBW2PR1/HBW4PR1 Bullet Camera Figure 1-5 HBW2PR1/HBW4PR1 Dimensions 7.13" (181.0 mm) 2.91" (74.0 mm) 4.16" (105.8 mm) Figure 1-6 HBW2PR1/HBW4PR1 Components LAN connector 12 VDC connector H4W4PRV3 Mini Dome Camera Figure 1-7 H4W4PRV3 Dimensions 4.33"...
  • Page 17: H4W2Prv2/H4W4Prv2 Mini Dome Camera

    Introduction H4W2PRV2/H4W4PRV2 Mini Dome Camera Figure 1-9 H4W2PRV2/H4W4PRV2 Dimensions 4.8" (122.0mm) Figure 1-10 H4W2PRV2/H4W4PRV2 Components LAN connector 12 VDC connector HEW2PR2/HEW4PR2 Ball Camera Figure 1-11 HEW2PR2/HEW4PR2 Dimensions 4.8 (122.0 mm) Figure 1-12 HEW2PR2/HEW4PR2 Components LAN connector 12 VDC connector...
  • Page 18: Hbw2Pr2/Hbw4Pr2 Bullet Camera

    Performance Series IP Camera Software Configuration Guide HBW2PR2/HBW4PR2 Bullet Camera Figure 1-13 HBW2PR2/HBW4PR2 Dimensions 3.14" (79.7mm) 8.46" (214.8mm) Figure 1-14 HBW2PR2/HBW4PR2 Components LAN connector 12 VDC connector...
  • Page 19: Getting Started

    Before you can start using your camera, you must install the ConfigTool IP utility on your PC. 1. Insert the software CD that came with your camera into your PC’s disk drive. 2. Open the Honeywell ConfigTool folder, and then double-click Honeywell ConfigTool.exe. 3. On the ConfigTool welcome screen, click Next.
  • Page 20: Figure 2-1 Log In To A Device

    Performance Series IP Camera Software Configuration Guide Figure 2-1 Log In to a Device On the Config screen, click the Net tab, type the new IP settings in the IP Address, Subnet Mask, and Gateway fields, and then click Save. Figure 2-2 Network Settings...
  • Page 21: Upgrading Your Device's Firmware

    Getting Started Upgrading Your Device’s Firmware Before you begin using your camera, make sure you have the latest firmware installed. You can upgrade a single device or multiple devices at the same time. To upgrade a single device: From the list of devices in ConfigTool, click the device that you want to upgrade. Click Login, type the login user name and password for the device (the default user name is admin and the default password is 1234), and then click OK.
  • Page 22: Opening A Web Client

    Performance Series IP Camera Software Configuration Guide Figure 2-5 Batch Mode Screen On the Batch Upgrade screen, click Open, navigate to the directory that contains the firmware file, and then click OK. Figure 2-6 Batch Upgrade Dialog Box When the upgrade is complete, the devices will reboot. While a device is rebooting, the message "Device is offline: [device IP address]"...
  • Page 23: Logging In And Viewing Live Video

    Logging In and Viewing Live Video 3 Logging In and Viewing Live Video This chapter contains the following sections: • Logging In to the Camera via the Web Client, page 11 • Using the Live View Interface, page 13 Logging In to the Camera via the Web Client Using the web client, you can monitor live video, play back recorded video, and configure camera settings.
  • Page 24: Installing The Browser Plug-In

    Performance Series IP Camera Software Configuration Guide Installing the Browser Plug-In If you are logging in for the first time, you will be prompted to download and install a browser plug-in. Follow the on-screen instructions to install the plug-in. When the installation is complete, the web client automatically refreshes and the Live View interface opens (Figure 3-5).
  • Page 25: Using The Live View Interface

    Logging In and Viewing Live Video Using the Live View Interface The Live View interface has four areas with controls and options for monitoring live video. Figure 3-5 Live View Interface 1. Video encoder settings area (see Video Encoder Settings, page 2.
  • Page 26: System Menus

    Performance Series IP Camera Software Configuration Guide System Menus Figure 3-7 System Menu When you log in to the camera using the web client, the Live View interface opens by default. To access the Playback, Setup, and Alarm interfaces, or to log out, select the corresponding tab in the system menus area.
  • Page 27: Live View Window Configuration

    Logging In and Viewing Live Video Live View Window Configuration From the Live View window configuration toolbar, you can adjust the screen brightness, contrast, hue, or saturation; change the screen size and/or aspect ratio; and adjust image fluency. These controls are described in more detail below.
  • Page 28: Playing Back Video

    Performance Series IP Camera Software Configuration Guide 4 Playing Back Video This chapter only applies to these following models: H2W2PRV3/H2W4PRV3/HBW2PR2/HBW4PR2/HEW2PR2/HEW4PR2/H4W2PRV2/H4W4PRV2. This chapter contains the following sections: • Introduction, page 16 • Playing Back Recorded Video, page 17 • Using the Playback Assistant, page 20 •...
  • Page 29: Overview Of The Playback Interface

    Playing Back Video Overview of the Playback Interface The Playback interface has six areas with controls and options for playback (see Figure 4-1). Figure 4-1 Playback Interface Playback controls (see Playback Controls on page Calendar area (see Playing a Recorded File from the Calendar on page Clip selection (see Creating a Video Clip on page Record type (see...
  • Page 30: Playing A Recorded File From The Calendar

    Performance Series IP Camera Software Configuration Guide Control Description Click to go to next frame. Note Video playback must be paused before you can use this function. Slow playback Fast playback Mute sound Volume control Playing a Recorded File from the Calendar On the playback calendar, a day in BLUE indicates a day on which video was recorded.
  • Page 31: Searching For A File By Recording Type

    Playing Back Video • Blue indicates manual recording. Figure 4-4 Recording Timeline Click on the timeline to select a playback time. Click to open the list of recorded files. Double-click a file in the file list to begin playback, and to see the file size, start time, and end time. Use the Playback Controls, page 17, to review the video.
  • Page 32: Using The Playback Assistant

    You can clip and save a section of recorded video during video playback using the clip function. Playback of recorded video is automatically paused during clipping. Creating Video Clip function is only supported by the following models: Note H2W2PRV3/H2W4PRV3/HBW2PR2/HBW4PR2/HEW2PR2/HEW4PR2/ H4W2PRV2/H4W4PRV2. Figure 4-8 Clip Function Controls Find the recording that you want to create a clip from.
  • Page 33: Viewing Snapshots

    Playing Back Video Viewing Snapshots Viewing snapshots function is only supported by the following models: Note H2W2PRV3/H2W4PRV3/HBW2PR2/HBW4PR2/HEW2PR2/HEW4PR2/ H4W2PRV2/H4W4PRV2. Figure 4-9 Snapshot Playback Control Interface Playback Play Snapshot In the Playback interface, in the calendar area, do the following: In the File Type box, select jpg.
  • Page 34: Configuring Camera Settings

    Performance Series IP Camera Software Configuration Guide 5 Configuring Camera Settings This chapter contains the following sections: • Configuring Camera Settings, page 22 • Configuring Network Settings, page 31 • Configuring Storage Settings, page 43 • Configuring System Settings, page 47 •...
  • Page 35: Table 5-1 Camera Configurations

    Configuring Camera Settings Table 5-1 Camera Configurations Parameter Function Profile Select from Normal, Day, Night. Brightness Adjusts monitor brightness. Choosing a higher value increases the video brightness. Adjustments to this value affects the brightness of the video. Select from 0 to 100. The recommended range is between 40 and 60. The default value is Note If this value is too high, then the video can become hazy.
  • Page 36 Performance Series IP Camera Software Configuration Guide Parameter Function White Balance Sets the White Balance mode, which affects the general hue of the video. This function is on by default. You can select different scene modes such as Auto, Sunny, Outdoor, Night, or Customized, to achieve the best quality video.
  • Page 37: Profile Management

    Configuring Camera Settings Parameter Function Flip No Flip: This is the default setting. Flip 180°: Rotates the video 180°. Flip 90°: Rotates the video by 90°. Flip 360°: Rotates the video by 360°. 3D Noise 3D noise reduction is enabled by default. Reduction 3D NR Level This value ranges from 0 to 100.
  • Page 38: Zoom And Focus

    Performance Series IP Camera Software Configuration Guide Zoom and Focus This section only applies to HBW2PR2/HBW4PR2/HEW2PR2/HEW4PR2/ Note H4W2PRV2/H4W4PRV2 motorized focus/zoom cameras. Figure 5-3 Motorized Zoom and Focus Table 5-2 Zoom and Focus Parameter Function Adjust the focal length of the lens by clicking "+" to zoom in or "–" to zoom out. Changing the Speed setting adjusts the length of a single-click increment.
  • Page 39: Video Configuration

    Configuring Camera Settings Video Configuration Video Bit Stream Figure 5-4 Video Bit Stream Configuration Window Table 5-3 Video Bit Stream Configurations Parameter Function Main Stream Code-Stream Type General bit stream. Encode Mode Select from four options for Encode Mode: H.264 (Main Profile), H.264H (High Profile), H.264B (Baseline Profile), and MJPEG mode.
  • Page 40: Snapshot

    Performance Series IP Camera Software Configuration Guide Parameter Function Watermark This function allows you to verify that the video has not been altered. Select to enable the watermark function, and then type the watermark text. The default watermark text is DigitalCCTV. The maximum length is 85 digits.
  • Page 41: Video Overlay

    Configuring Camera Settings Table 5-4 Snapshot Configurations Parameter Function Shapshot Type Select from either General (schedule) or Event (activation). Image Size Same as the main stream resolution. Quality Select from six levels of image quality. Interval Set the snapshot frequency from 1s to 7s. on page for information about configuring where snapshots Note...
  • Page 42: Roi

    ( in the live interface). The default path for snapshots is C:\Honeywell Video Systems\LiveSnapshot. The default path for recorded video is C:\Honeywell Video Systems\LiveRecord. Click Save to save any changes to the storage paths.
  • Page 43: Configuring Network Settings

    Configuring Camera Settings Configuring Network Settings TCP/IP Figure 5-9 TCP/IP Interface Table 5-7 TCP/IP Configuration Parameter Function Configure to set the current host camera’s name. Maximum 32 Host Name characters. Select an Ethernet port. The default is wire LAN. Ethernet Card Note If you modify these settings, you will have to reboot your camera to activate the new setup.
  • Page 44: P2P

    Performance Series IP Camera Software Configuration Guide Parameter Function Alternate DNS Server Enter an alternate DNS server IP address. If you know the camera’s MAC address, then use the ARP/Ping command to modify or set the camera’s IP address. Before operating the camera, please ensure that the network camera and the PC are in the same LAN.
  • Page 45: Connection

    Configuring Camera Settings Connection Figure 5-11 Connection Configuration Interface Table 5-9 Connection Configurations Parameter Function Displays the maximum number of network connections for the same camera. The Connection value ranges from 1 to 20. The maximum number of connections is 20. TCP Port The default setting is 37777.
  • Page 46: Onvif

    Performance Series IP Camera Software Configuration Guide ONVIF ONVIF (Open Network Video Interface Forum) is a global open standard for the interface of IP-based security products. It covers network video mode, interface, data type, and data interaction mode. The ONVIF specification aims at interoperability of network video products regardless of manufacturer. The ONVIF setting is enabled by default.
  • Page 47: Ddns

    You can set the interval value between the camera and the DDNS server here. Using Honeywell DDNS to Configure DDNS Figure 5-14 Using Honeywell DDNS to Configure DDNS Set the DDNS to connect the Honeywell DDNS server so that you can access the system through the servers.
  • Page 48: Ip Filter

    Performance Series IP Camera Software Configuration Guide Table 5-11 Honeywell DDNS Configurations Parameter Function Server Type To enable DDNS, select the check box and choose the Honeywell DDNS server from the drop-down list. Server Address The default server address is www.hennvr-ddns.com. Mode Select Auto or Manual.
  • Page 49: Smtp (Email)

    Configuring Camera Settings SMTP (Email) Figure 5-16 SMTP Configuration Interface Table 5-12 SMTP (Email) Configurations Parameter Function SMTP Server Enter the server address. Port The default setting is 25. You can modify this setting as necessary. Anonymity Supports the anonymity function for the server. You can automatically log in anonymously.
  • Page 50: Upnp

    Performance Series IP Camera Software Configuration Guide Parameter Function Interval The interval for sending ranges from 0 to 3600 seconds. 0 seconds means that there is no interval. The system will not immediately send the email when the alarm occurs. When an alarm, motion detection, or other event occurs to activate an email, the system sends the email according to the interval that you have specified here.
  • Page 51: Snmp

    Configuring Camera Settings Click Details, and then click to select Internet Gateway Device Discovery and Control client and UPnP User Interface. Click OK to begin the installation. SNMP You can configure cameras using SNMP (Simple Network Management Protcol). Figure 5-18 SNMP Configuration Interface Table 5-13 SNMP Configurations Parameter Function...
  • Page 52: Bonjour

    Performance Series IP Camera Software Configuration Guide Bonjour Bonjour is based on the multicast DNS service from Apple. It can automatically broadcast its service information and listen to the camera information from the other camera. Figure 5-19 Bonjour Configuration Interface If you do not know the network camera’s information, such as its IP address, you can use Bonjour’s browser in the same LAN to search for and access network cameras.
  • Page 53: Ieee802.1X

    Configuring Camera Settings Table 5-14 Multicast Configurations Parameter Function Select the check box to enable the multicast function. Enable Note Main stream and sub stream cannot be used at the same time. Multicast The main/sub stream multicast address is 239.255.42.42 and its range is Address 224.0.0.0 ‒...
  • Page 54: Qos

    To access the web client, you must install a Honeywell-signed security certificate. The installation of the security certificate involves three sets of steps: •...
  • Page 55: Configuring Storage Settings

    General (auto), Motion, and Alarm. You can configure up to nine recording periods per day. Ensure that you have enabled the corresponding recording mode in SetupStorageConditions. Note Alarm recording mode is only supported by the following models: H2W2PRV3/H2W4PRV3/HBW2PR2/HBW4PR2/HEW2PR2/HEW4PR2/ H4W2PRV2/H4W4PRV2. Figure 5-24 Recording Schedule Configuration Interface Recording Schedule Color Codes •...
  • Page 56: Destination

    Performance Series IP Camera Software Configuration Guide Figure 5-25 Holiday Schedule Destination Path On the Path tab, you can assign where recorded video files or snapshots will be saved. Depending on your camera model, you can save recorded video or snapshots to a microSD card, an FTP server, and/or an NAS disk.
  • Page 57: Figure 5-27 Local Storage Configuration Interface

    Read Only, Read & Write, Hot Swap, and Format functions. This function is only supported by the following models: Note H2W2PRV3/H2W4PRV3/HBW2PR2/HBW4PR2/HEW2PR2/HEW4PR2/ H4W2PRV2/H4W4PRV2. Figure 5-27 Local Storage Configuration Interface On the FTP tab, you can enable the FTP storage function. When enabled, event-triggered video and...
  • Page 58: Record Control

    Enable Emergency (Local) to save to the local microSD card when the network connection to FTP is unavailable. Emergency (Local) Note This function is only supported by the following models: H2W2PRV3/H2W4PRV3/HBW2PR2/HBW4PR2/HEW2PR2/HEW4PR2/ H4W2PRV2/ H4W4PRV2. Figure 5-29 NAS Configuration Interface Table 5-19 NAS Configurations Parameter...
  • Page 59: Configuring System Settings

    Configuring Camera Settings Table 5-20 Record Control Configurations Parameter Function Pack Duration Select the file size. The default is 8 minutes. Enter a pre-record value. Pre-event Record For example, if you enter 4, the system can record the four seconds of video in the buffer.
  • Page 60: Account Setup

    Performance Series IP Camera Software Configuration Guide Date and Time Figure 5-32 Date and Time Configuration Interface Table 5-22 Date and Time Configurations Parameter Function Date Format Select a date format from the drop-down list. Time Format Select a time format, either 24-hour or 12-hour. Time Zone Select the time zone for the camera.
  • Page 61: Figure 5-33 Username Configuration Interface

    Configuring Camera Settings User Name In the Username Configuration interface, you can enable anonymous login, add/remove users, and modify a username. Figure 5-33 Username Configuration Interface Enable Anonymous Login: Click to enable. When you enter an IP, no username or password is required. You can log in anonymously (with limited rights).
  • Page 62: Figure 5-35 Modifying User Interface

    Performance Series IP Camera Software Configuration Guide Modifying Users: Click to modify a user’s properties, including their group, passwords, and rights. Figure 5-35 Modifying User Interface Modifying a Password: Enter the old password once, and then enter the new password twice to confirm the new password.
  • Page 63: Restoring Default Settings

    Configuring Camera Settings Figure 5-37 Add Group Interface Click Modifying a Group to edit the remark and/or the rights assigned to the group. Click Save to save the new settings. Figure 5-38 Modify Group Interface Restoring Default Settings Click Default to restore the camera to its factory default settings. Figure 5-39 Default Interface Note The system cannot reset some information, such as the network IP address.
  • Page 64: Import/Export

    Performance Series IP Camera Software Configuration Guide Import/Export Figure 5-40 Import/Export Configuration Interface Table 5-23 Import/Export Configurations Parameter Function Import Click to import local setup files to the system. Export Click to export the current system setup to your local PC. Automatic Maintenance You can select either Auto Reboot, Auto Delete Old Files, or Manual Reboot.
  • Page 65: Upgrade

    Configuring Camera Settings Upgrade Figure 5-42 Upgrade Interface Click Browse, go to the location of the upgrade file on your computer, select it, and click Upgrade. CAUTION Selecting the incorrect upgrade file might cause a camera malfunction. Viewing System Information Version In the Version interface, you can view the system hardware features, the software version, and the release date.
  • Page 66: Log

    Performance Series IP Camera Software Configuration Guide Figure 5-44 Log Interface Table 5-24 Log Interface Configurations Parameter Function Start Time Configure the start time for the requested log. End Time Configure the end time for the requested log. Type Select a log type: System, Setting, Data, Event, Record, Account, Clear Log. Select a log type from the drop-down list, and then click Search to view the list Search that is generated by the search.
  • Page 67: Configuring Events And Alarms

    Configuring Events and Alarms 6 Configuring Events and Alarms This chapter contains the following sections: • Configuring Motion Detection Settings, page 55 • Configuring Camera Tampering Settings, page 57 • Configuring System Events Settings, page 58 • Configuring Alarms, page 61 Configuring Events Configuring Motion Detection Settings Figure 6-1 Video Detection Configuration Interface...
  • Page 68: Figure 6-2 Configuring The Working Period

    Performance Series IP Camera Software Configuration Guide Parameter Function Configure the motion detection region, its sensitivity, and area. The default settings Area covers the entire area. Click Save to enable these settings. See Configuring the Motion Detection Area on page 56. Record When Record is enabled, you can trigger motion detection to activate recording.
  • Page 69: Configuring Camera Tampering Settings

    Configuring Events and Alarms Table 6-2 Motion Detection Area Configurations Parameter Function Adjusts the brightness sensitivity. You might need to increase the brightness sensitivity to trigger motion detection. You can configure up to four areas. The Sensitivity sensitivity ranges from 0 to 100. We recommend that you choose a sensitivity between 30 to 70.
  • Page 70: Configuring System Events Settings

    Snapshot occurs. Figure 6-5 Tampering Working Period Configuration Interface Configuring System Events Settings System events include No SD Card, Capacity Warning, SD Card Error, Disconnection, IP Conflict, and Unauthorized Access. Only applicable to cameras with microSD cards Note (H2W2PRV3/H2W4PRV3/HBW2PR2/HBW4PR2/HEW2PR2/HEW4PR2/ H4W2PRV2/H4W4PRV2).
  • Page 71: Figure 6-6 No Sd Card Warning Configuration Interface

    Configuring Events and Alarms Configuring for SD Card Event Settings SD card events include No SD Card, SD Card Error, and Capacity Warning. Figure 6-6 No SD Card Warning Configuration Interface Figure 6-7 SD Card Error Warning Configuration Interface Figure 6-8 Capacity Warning Configuration Interface 1.
  • Page 72: Figure 6-9 Disconnection Configuration Interface

    Click Enable to trigger an alarm when there is a network disconnection or an IP conflict. Click Record to record a video to the microSD card when there is a network disconnection or an IP conflict. Record is only supported by the following models: Note H2W2PRV3/H2W4PRV3/HBW2PR2/HBW4PR2/HEW2PR2/HEW4PR2/ H4W2PRV2/H4W4PRV2.
  • Page 73: Configuring Alarms

    Configuring Events and Alarms Configuring Illegal Access Event Settings You can specify how many unsuccessful login attempts can be made before the system triggers an illegal access alarm. Figure 6-11 Illegal Access Configuration Interface Click Enable to trigger an alarm when someone tries to illegally access the camera. Enter the number of times a user can attempt to log in.
  • Page 74: Table 6-4 Alarm Configurations

    Tampering with. System alarms when the disk (microSD card) is full. Note This function is only supported by the following models: Disk Full H2W2PRV3/H2W4PRV3/HBW2PR2/HBW4PR2/HEW2PR2/ HEW4PR2/H4W2PRV2/ H4W4PRV2. Alarm Type System records alarm information when a microSD card error occurs. Disk Error...
  • Page 75: Troubleshooting

    7 Troubleshooting Refer to the following guidelines to troubleshoot any performance issues. If you require additional assistance, contact Honeywell Technical Support (see back cover for contact information). • Use the player located on the CD that came with your camera.
  • Page 76 Performance Series IP Camera Software Configuration Guide Cannot upgrade firmware through the • If you cannot upgrade firmware over the network, network try using port 3800. • Ensure that your browser’s security settings allow ActiveX controls. • Ensure that DirectX 8.1 or higher is installed on Cannot install/log in to web client.
  • Page 77: Embedded Nvr Integration Capacity Matrix

    Troubleshooting Embedded NVR Integration Capacity Matrix Refer to the following table when integrating Performance Series IP cameras with Honeywell Embedded NVRs. Table 7-1 Embedded NVR Integration Matrix - Maximum Frame Rate and Resolution Part No HEN04112(X) HEN04122(X) HEN08122(X) HEN08142(X) HEN08162(X)
  • Page 78: Camera Specifications

    Performance Series IP Camera Software Configuration Guide 8 Camera Specifications HEW2PR1/HEW2PRW1/HEW4PR3/HEW4PRW3 Ball Cameras Table 8-1 HEW2PR1/HEW2PRW1/HEW4PR3/HEW4PRW3 Specifications Camera HEW2PR1/HEW2PRW1: 1/2.7″ 2 megapixel progressive scan CMOS Image Sensor HEW4PR3/HEW4PRW3: 1/3″ 4 megapixel progressive scan CMOS HEW2PR1/HEW2PRW1: 1920×1080 (2 MP) Max. Effective Pixels (H×V) HEW4PR3/HEW4PRW3: 2688×1520 (4 MP) HEW2PR1/HEW2PRW1: 0.01 lux @ F2.0 (Color)/0 lux (B/W with IR LEDs on) Min.
  • Page 79 Camera Specifications Video Compression H.264/H.264H/H.264B/MJPEG HEW2PR1/HEW2PRW1: 25/30 fps @ 1920 ×1080 (2 MP), 1280×720 (720p), 704×576/704×480 (D1), 352×288/352×240 (CIF) Frame Rate HEW4PR3/HEW4PRW3: 20 fps @ 2688×1520(4 MP); 20 fps @ 2560 × 1440 (4 MP); 25/30 fps @2304×1296(3 MP), 1920×1080(1080p), 1280×720 (720p), 704×576/704×480 (D1), 352×288/352×240 (CIF) Bit Rate (H.264) 32Kbps –...
  • Page 80: Hbw2Pr1/Hbw4Pr1 Bullet Cameras

    Performance Series IP Camera Software Configuration Guide HBW2PR1/HBW4PR1 Bullet Cameras Table 8-2 HBW2PR1/HBW4PR1 Specifications Camera HBW2PR1: 1/2.7″ 2 megapixel progressive scan CMOS Image Sensor HBW4PR1: 1/3″ 4 megapixel progressive scan CMOS HBW2PR1: 1920×1080 (2 MP) Max. Effective Pixels (H×V) HBW4PR1: 2688×1520 (4 MP) HBW2PR1: 0.01 lux @ F2.0 (Color)/0 lux (B/W with IR LEDs on) Min.
  • Page 81 Camera Specifications User Access 20 users max. Mobile App HonView Touch for iPhone, Android Phone and Tablet General Power Supply 12 VDC, PoE (802.3af) HBW2PR1: < 6.5 W Power Consumption HBW4PR1: < 6 W Operating Temperature -22°F to 140°F (30°C to 60°C) Range Relative Humidity <95%...
  • Page 82: H2W2Prv3/H2W4Prv3 Micro Dome Cameras

    H2W2PRV3: 1920×1080 (2 MP) Max. Effective Pixels (H×V) H2W4PRV3: 2688×1520 (4 MP) H2W2PRV3: 0.01 lux @ F2.0 (Color)/0 lux (B/W with IR LEDs on) Min. Illumination H2W4PRV3: 0.01 lux @ F2.0 (Color)/0 lux (B/W with IR LEDs on) H2W2PRV3: Fixed, 2.8 mm @ F2.0 Lens H2W4PRV3: Fixed, 2.8 mm @ F2.0...
  • Page 83 Camera Specifications Network Ethernet RJ-45 (10/100Base-T) IPv4/IPv6, HTTP, HTTPS, TCP/IP, UDP, UPnP, ICMP, IGMP, RTSP, RTP, SMTP, Supported Protocols NTP, DHCP, DNS, PPPoE, DDNS, FTP, IP Filter, QoS, SSL, SNMP, Bonjour, 802.1X Compatibility ONVIF Profile S, CGI User Access 20 users max. Mobile App HonView Touch for iPhone, Android Phone and Tablet General...
  • Page 84: H4W4Prv3 Mini Dome Camera

    Performance Series IP Camera Software Configuration Guide H4W4PRV3 Mini Dome Camera Table 8-4 H4W4PRV3 Specifications Camera Image Sensor 1/3″ 4 megapixel progressive scan CMOS Max. Effective Pixels (H×V) 2688×1520 (4 MP) Min. Illumination 0.01 lux @ F2.0 (Color)/0 lux (B/W with IR LEDs on) Lens Fixed, 2.8 mm @ F2.0 Horizontal Angle of View...
  • Page 85 Camera Specifications Range Relative Humidity <95% Protection Rating IP66 Dimensions 4.33 × 3.19 in. (110.0 × 81.0 mm) Weight 1.04 lb (0.47 kg) Regulatory FCC: Part 15B Class B HEN041*2(X) H.264 4-Channel 1080p Embedded Network Video Recorder System Compatibility HEN081*2(X) H.264 8-Channel 1080p Embedded Network Video Recorder HEN161*2(X) H.264 16-Channel 1080p Embedded Network Video Recorder HQA-WK Wall Mount HQA-BB3 Junction Box (Cable Box)
  • Page 86: H4W2Prv2/H4W4Prv2 Mini Dome Cameras

    Performance Series IP Camera Software Configuration Guide H4W2PRV2/H4W4PRV2 Mini Dome Cameras Table 8-5 H4W2PRV2/H4W4PRV2 Specifications Camera H4W2PRV2: 1/2.7″ 2 megapixel progressive scan CMOS Image Sensor H4W4PRV2: 1/3″ 4 megapixel progressive scan CMOS H4W2PRV2: 1920×1080 (2 MP) Max. Effective Pixels (H×V) H4W4PRV2: 2688×1520 (4 MP) Min.
  • Page 87 Camera Specifications User Access 20 users max. Mobile App HonView Touch for iPhone, Android Phone and Tablet General Power Supply 12 VDC, PoE (802.3af) Power Consumption <8 W Operating Temperature -22°F to 140°F (-30°C to 60°C) Range Relative Humidity <95% Ingress Protection Rating IP66 Vandal Resistance...
  • Page 88: Hew2Pr2/Hew4Pr2 Ball Cameras

    Performance Series IP Camera Software Configuration Guide HEW2PR2/HEW4PR2 Ball Cameras Table 8-6 HEW2PR2/HEW4PR2 Specifications Camera HEW2PR2: 1/2.7″ 2 megapixel progressive scan CMOS Image Sensor HEW4PR2: 1/3″ 4 megapixel progressive scan CMOS HEW2PR2: 1920×1080 (2 MP) Max. Effective Pixels (H×V) HEW4PR2: 2688×1520 (4 MP) Min.
  • Page 89 Camera Specifications User Access 20 users max. Mobile App HonView Touch for iPhone, Android Phone and Tablet General Power Supply 12 VDC, PoE (802.3 af) HEW2PR2: <7 W Power Consumption HEW4PR2: <7.5 W Operating Temperature -22°F to 140°F (-30°C to 60°C) Range Relative Humidity <95%...
  • Page 90: Hbw2Pr2/Hbw4Pr2 Bullet Cameras

    Performance Series IP Camera Software Configuration Guide HBW2PR2/HBW4PR2 Bullet Cameras Table 8-7 HBW2PR2/HBW4PR2 Specifications Camera HBW2PR2: 1/2.7″ 2 megapixel progressive scan CMOS Image Sensor HBW4PR2: 1/3″ 4 megapixel progressive scan CMOS HBW2PR2: 1920×1080 (2 MP) Max. Effective Pixels (H×V) HBW4PR2: 2688×1520 (4 MP) Min.
  • Page 91 Camera Specifications User Access 20 users max. Mobile App HonView Touch for iPhone, Android Phone and Tablet General Power Supply 12 VDC, PoE (802.3af) HBW2PR2: <13 W Power Consumption HBW4PR2: <12.5 W Operating Temperature -22°F to 140°F (-30°C to 60°C) Range Relative Humidity <95%...
  • Page 92: List Of Symbols

    Performance Series IP Camera Software Configuration Guide List of Symbols The following is a list of symbols that may appear on the camera: Symbol Explanation The WEEE symbol. This symbol indicates that when the end-user wishes to discard this product, it must be sent to separate collection facilities for recovery and recycling.
  • Page 94 Document 800-22299 – Rev C – 11/2016 © 2016 Honeywell International Inc. All rights reserved. No part of this publication may be reproduced by any means without written permission from Honeywell. The information in this publication is believed to be accurate in all respects. However, Honeywell cannot assume responsibility for any consequences resulting from the use thereof.

Table of Contents