Table of Contents
Advertisement
Advertisement
Table of Contents

Related Manuals for AEG Favorit CE


Summary of Contents for AEG Favorit CE
- Page 1 Favorit CE Dishwasher Instruction book...
- Page 2 Dear customer, please read these user instructions carefully. Please observe the safety instructons on the first few pages of this Instruction book. Save these instructions and make sure they remain with the dish- washer if it is moved or sold, so that everyone using it through its life can be properly informed on appliance use and safety.
-
Page 3: Table Of Contents
Contents Contents Instruction book ..........4-21 Safety information .............4 Disposal ................6 General information............7 Description of the appliance..........8 Prior to using for the first time.........10 Programme chart ............14 Loading the dishes............16 Using the appliance ............17 Care and cleaning............19 In the event of a fault ............20 Service..............22 Service and spare parts ..........22 Position- and connection instructions...23-27... -
Page 4: Instruction Book
Instruction book Instruction book Safety information The safety aspects of AEG electrical appliances comply with accepted technical standards and the German Appliance Safety Law. Nevertheless, as a manufacturer we consider it our obligation to make you aware of the following safety information: General safety Only wash household dishes using the dishwasher. - Page 5 Improper repairs can give rise to significant hazards for the user. If your appliance needs repairing, please contact your local AEG Service Force Centre. Use only spare parts supplied by these. If the mains lead is damaged, or is to be replaced for a longer lead, the cable (obtainable from AEG Service Force) must be replaced by a service engineer authorised by AEG.
-
Page 6: Disposal
Instruction book Disposal Disposing of the packaging material Caution! Never leave packaging material in a place where children may play with it. All materials used in packaging this appliance are environmentally- friendly. The cardboard components of the packaging are made from recyclable paper and should be taken to a collection point for recycling. -
Page 7: General Information
Instruction book General information Economical and ecological dishwashing Only connect the dishwasher to the hot water supply, if your hot water is not electrically heated. Ensure that the water softener is correctly adjusted. Do not pre-rinse dishes under running water. Select the wash programme to suit the nature and degree of the soiling on the dishes. -
Page 8: Description Of The Appliance
Instruction book Description of the appliance 1 Spray arm 2 Coarse filter/microfilter 3 Fine filter 4 Detergent dispenser 5 Rinse aid dispenser 6 Salt container... -
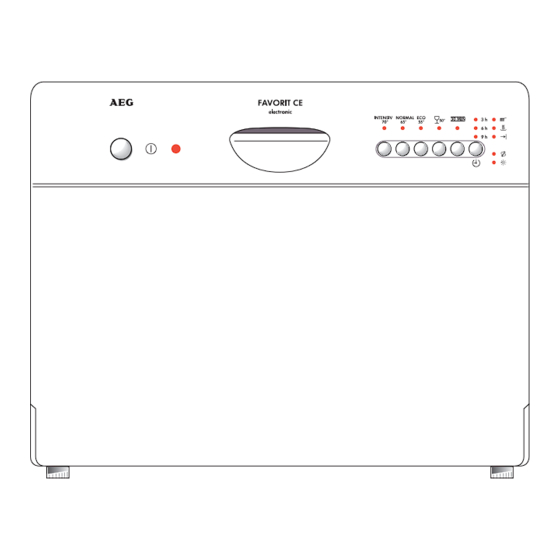
Page 9: The Control Panel
Instruction book The control panel Indicator and control lamps Indicator lamps delayed start On/Off button Water softener Delay start button button Programme Control lamp Functions button buttons Water softener and functions button: In addition to selecting a programme, you can press these two buttons to adjust the setting of the water softener. -
Page 10: Prior To Using For The First Time
Instruction book Prior to using for the first time Adjusting the water softener To prevent limescaling on the dishes and to the interior of the dishwasher, the dishes must be washed with soft i.e. water with low lime content. This dishwasher is equipped with a water softener, where tapwater which is harder then 4°d (german degree) is descaled with special salt. -
Page 11: Filling With Salt For The Water Softener
Instruction book Filling with salt for the water softener Caution! Use only salt designed for dishwashers. Never fill the salt container with any another type of salt or dishwasher detergent as this would irreparably damage the water softener. Prior to filling with salt, please check each time that you really do have a packet of dishwasher salt in your hand. - Page 12 Instruction book Filling the rinse aid Use of rinse aid will result in cleaner and faster drying of the load, since it helps water and soil to run off. Too much rinse aid may result in streakiness, too little may cause white spots. Caution! Only use rinse aid specifically designed for domestic dishwashers.
-
Page 13: Adjusting Rinse Aid Dosing
Instruction book Adjusting rinse aid dosing The dispenser holds about 150 ml. This is enough for approx. 60 wash cycles, depending on the dosage setting. Adjust the dosage setting according to the hardness of the water. You can set the dosage between 1 - 6, equivalent to 1 - 6 ml rinse aid. Factory setting is 1. -
Page 14: Programme Chart
Instruction book Programme chart Plates and cooking Type of dishes All types of dishes pots Type of soil: • heavily soiled • normaly soiled • dried-on food • dried-on food remnants especially remnants eggwhite and starch Suitable INTENSIV NORMAL programme: 70°... - Page 15 Instruction book Coffee cups, All types of dishes delicate items • normaly soiled • lightly soiled • lightly soiled GLASS 30 MIN 55° 50° 40° Pre-rinse Washing Washing Washing Rinse Rinse Rinse Final rinse Final rinse Final rinse Drying 150 minutes 35 minutes 30 minutes 54 minutes...
-
Page 16: Loading The Dishes
Instruction book Loading the dishes Always place glasses, cups and bowls upside down. Incline deep dishes (soup plates etc.) so that the water can run off when drying. Make sure that the dishes do not rest against each other. This is particularly important in regard to the cutlery basket - nested spoons, etc. -
Page 17: Using The Appliance
Instruction book Using the appliance Starting the programme 1. Scrape or rinse off solid food remnants. 2. Load the dishwasher. 3. Put the correct amount of detergent into the detergent dispenser and close the dispenser lid. 4. Close the door. 5. -
Page 18: Cancelling The Drying Phase
Instruction book Cancelling the drying phase In case you do not want to wait until the drying phase is completed, you can cancel it. 1. Press in the On/Off button. The control lamp for the On/Off button goes out. 2. Open the door. The drying phase is cancelled. Setting the delay start The programme start can be delayed by 3, 6 or 9 hours. -
Page 19: Care And Cleaning
Instruction book Care and cleaning Machine Clean the outside surfaces of the appliance using a mild (non-abrasive) household cleaning product. Finish by removing remaining traces of the product with a damp cloth. Caution! Do not use cleaning products which contain alcohol (spirits), thinners and similar substances. -
Page 20: In The Event Of A Fault
Instruction book In the event of a fault Before calling out an engineer, please check through the details below because some faults can be rectified easily without the need to call out an engineer. Fault Check The programme will not Is the door closed properly? start. -
Page 21: Instruction Book
Instruction book Fault Check Visible lime deposits or Is the salt container empty? white film on the dishes. Is the water softener not correctly adjusted? Is the rinse aid dispenser empty? Is the rinse aid dispenser adjusted to too low dosage? The dishwasher is noisy. -
Page 22: Service
Service Service Service and spare parts Servicing and repairs must be carried out by a service company authorized by the supplier. Use only spare parts supplied by these. Before calling out an engineer, please check through the details under the heading ”In the event of a fault” because some faults can be rectified easily without the need to call out an engineer. -
Page 23: Position- And Connection Instructions
Position- and connection instructions Position- and connection instructions Technical specifications Capacity: 6 place settings acc. EN 50242 Dimensions: Height 447 mm Width 546 mm Depth (to the edge of the door) 480 mm Depth (to the middle of the door) 507 mm Weight: 22 kg... -
Page 24: Installation
Position- and connection instructions Installation Unpacking Check the dishwasher for transport damage. Never connect a damaged machine. In the case of damage, please contact your retailer. Keep all packaging away from children. Check that the following accessories are supplied: – A funnel for filling salt (1) –... - Page 25 Position- and connection instructions Water inlet The dishwasher is equipped with safety features which are to pre- vent the water from going back to the fresh water system. These features are according to current water technical safety regulations. The temperature of the water supply should not exceed 65° C and the pressure should be between 80-1000 kPa (0,8 - 10 bar).
-
Page 26: Water Drainage
Position- and connection instructions Water drainage To protect the dishwasher against water damage it is equipped with a water safety system. In the event of a fault the drainpump starts automatically and the remaining water inside the dishwasher is pumped out. The water safety system also works when the dishwasher is switched off. -
Page 27: Information For Test Centres
Position- and connection instructions Electrical connection The dishwasher is supplied with a lead and electrical plug for connection to a 230 V earthed wall socket, which should be easily accessible and protected by a 10 A fuse. Permanent electrical installation must be carried out by an authorized electrician or competent person. - Page 28 822 61 10-33...
- Page 29 SERVICE MANUAL DISHWASHER COMPACT MIDI Dishwasher COMPACT MIDI © AEG Hausgeräte GmbH Publ.-Nr.: Muggenhofer Straße 135 599 513 616 D-90429 Nürnberg Germany Fax +49 (0)911 323 1022 Spares Operation Edition: 06.03.02 - 1 - Spares Operation - R.Kurzke 02/02 599 513 616 EN...
- Page 30 Index Technical data / Dimensions / Installation water drainage ......3 Typical features for use ................3 Components In- and Output elements ................4 Interference Filter ..................5 Pressure Switch ..................5 Flow Heater ....................5 Circulation Pump ..................6 Drain Pump ....................
- Page 31 Technical data / dimensions Typical features for use Volt: 230 V Frequency: 50 Hz Compact dishwasher MIDI Heatung element: 1100 W (1000 W, UK) Connected load: 1200 W Wash programs: Super wash 70, Fuse required: 10 A Normal 65, Energy saving 55, Height: 447 mm Quick 50,...
- Page 32 Components In- and Output elements L D8 L D9 L D7 L D10 L D1 L D2 L D3 L D4 L D5 L D6 L D11 L D12 L D13 L D14 - 4 - Spares Operation - R.Kurzke 02/02 599 513 616 EN...
-
Page 33: Interference Filter
Interference Filter The interference filter is connected in the terminal board parallel to the mains feed. Pressure Switch The pressure switch controls the water level. Without water, contact is opened. Switch point with level 47 mm Ws Reset point with level 10 mm Ws Overfill The pressure switch is not adjustable. -
Page 34: Circulation Pump
Circulation Pump The circulation pump is driven by an asynchronous motor with an auxiliary winding. The auxiliary winding ist in circuit with a 3 µF (2,5 µF, UK) capacitor. A tacho generator is used for speed control. There are two speeds for rinsing. 2800 1/min, 1600 1/min, Power output 80 W Drain Pump The drain pump is driven by a synchronous motor. - Page 35 Detergent / Rinse Aid Combination Dispenser Unit Dosing of detergent prewash 10 ml wash 20 – 30 ml Dosing of rinse-aid position 1 – 6 2 ml – 7 ml Capacity 140 ml The detergent dispenser is activated by a release coil. display “lack of rinse-aid”...
-
Page 36: Water Softening
coil time With the coil switched off, the rinse-aid flows from compartment 2 into compartment 3. coil time During the rinse cycle, the coil is always switched on twice. When it is switched on the second time, the remaining rinse-aid flows into the rinse tank. Water Softening The components required for water softening. - Page 37 Water Hardness Settings: When calling service functions, generally no rinsing program may be selected! General Information Calling / Modifying / Storing the Hardness Range Value w Setting and adjusting the water hardness range is identical Calling the function "Water hardness settings" Press keys S1 and S2 simultaneously and ...
-
Page 38: Position Of Components
Position of components - 10 - Spares Operation - R.Kurzke 02/02 599 513 616 EN... -
Page 39: Water Course Scheme
Water Course Scheme - 11 - Spares Operation - R.Kurzke 02/02 599 513 616 EN... -
Page 40: Leakage Protection
Leakage Protection The anti-flood switch in the base tray will activate the drain pump and drain the water from the tub in the event of an internal leakage. If the float switch is activated, all electric components are switched off except the drain pump. Overflow protection The filling phase fills up to the level, monitored by a pressure monitor. -
Page 41: Static Filling
Water Inlet The water flows into the regeneration dosage chamber via inlet valve, over air break, into regeneration dosage chambers and into softener The level control chamber built into the sump operates the pressure switch. Static filling Static filling until pressure switch point. failure code: If this point isnt reached after max. - Page 42 New pulse wash with „random“ functionality speed 2800 var iable speed 1600 20 S ec. high,r high,r high,r star t-r outine time in s ec. -function = time (high s peed) + r andom time high,r water in L dynamic pulse was h level pr es sur e switch...
- Page 43 12. Regeneration The water chamber for regeneration contains 350 ml water. During regeneration, the regeneration valve is energized. The 350 ml water runs into the salt container and mixes with the salt to form a brine solution. In the top of the salt container there is an opening with a small filter, from here the brine solution enters the softener where the resins are regenerated.
-
Page 44: Rinse Out After Regeneration
11. Rinse out after regeneration Regeneration takes place after the pump 30 sec rinsing process, as the final step. Rinsing out then follows automatically 1. fill & pump 8 sec. with the start of the next wash pro- pump 15 sec. gram. - Page 45 23. Overview of Service and After sales functions - 17 - Spares Operation - R.Kurzke 02/02 599 513 616 EN...
- Page 46 24. Overview of failure displays - 18 - Spares Operation - R.Kurzke 02/02 599 513 616 EN...
- Page 47 16. Programs and options 55°C 50°C ‡r€ƒr… h‡ˆ… r ‡v €rÃhs‡r… à ∆ T + 10 ∆ T + 5 ∆ T + 6 ∆ T + 8 ∆ T + 8 ‡r€ƒr… h‡ˆ… r ctrl ctrl ctrl puls e_2 puls e_2 puls e_1 h†...
- Page 48 26. Description of the options Option ..half load Chooseable to all programs, except „Prewash“ If the choosen program has a phase „prewash“, this phase is skipped. The speed of the circulation pump is reduced in the filling step. Reduction of average time are 28 minutes by intensiv programmes, 18 minutes by programmes.
- Page 49 27. Rinse, resin wash, regeneration and measure rinse Always when activating the circulation pump and/or the interheater, refilling of water is enabled. But the maximum refill time is limited to 10 seconds. Exceeding this limit causes a failure code display and the program cycle L D9 is stopped.
- Page 50 Service tips You need screwdriver Torx TX20 Replacement of the components within the door. Remove the screws from the frame. Carefully unclip the front of the door. Before finally opening, unclip the on/off LED. The electronics can then be The dosing unit is held by snapped out.
- Page 51 Replacement of the door hinge. After slackening, the door spring is removed from its hinges together with the deflection band. After removing the screws on the chassis and on the door- frame, the door hinge can be removed. Housing After removing the housing screws (lay the machine on its side) from the bottom of the machine, the housing is unclipped front and back from the...
- Page 52 The pressure monitor is simply unscrewed. The outlet hose ventilation can be unscrewed for cleaning when necessary, in case these rubber parts in the interior of this valve become dirty or stuck because of residues. The air should be able to enter the hose from the hol- der - not the other way around!
- Page 53 The floor of the machine is held with screws at the front, and clipped in at the back. It contains the bosses for the overflow water and the flooding switch. After removal you come to the most important functional components. After loosening the screws of the two holders and the yoke, the circulation pump...
- Page 54 To release the hose clamps, it is recommended that this assembly be taken off its hinges. The mounting for the thermostats is screwed in behind the drain pump. After its release, the thermostats can be removed. After the removal of the hose, the valve can be drawn out of the chassis with suitable pliers.
- Page 55 To dismount the leach pump, the hose clamps are released and the screws removed. Here you can see how the hose clamps can be re-tensioned with wire cutting pliers. The flooding switch is snapped out with a small screwdriver and can be taken out of its mounting.
- Page 56 To dismount the water softener, these attachment screws are removed. The connections on the reed switch are removed. The hose connections are detached. The large nut of the salt hol- der can be released with the help of a V-belt. A spanner is useful in removing the recycling inlet nut.
- Page 57 - 29 - Spares Operation - R.Kurzke 02/02 599 513 616 EN...
- Page 58 - 30 - Spares Operation - R.Kurzke 02/02 599 513 616 EN...
- Page 59 Measuring points and values Conditions: - Door closed - Main plug disconnected - Main switch ON - Electronic plugs disconnected Heater 49 Reed switch - salt empty Reed switch - rinse aid drain pump 200 empty circulation pump Main coil 126 NTC - temperature sensor pressure switch ¥...
- Page 60 N9113380102_1...
- Page 62 Measuring points and values Conditions: - Door closed - Main plug disconnected - Main switch ON - Electronic plugs disconnected Heater 49 Reed switch - salt empty Reed switch - rinse aid drain pump 200 empty circulation pump Main coil 126 NTC - temperature sensor pressure switch ¥...
- Page 63 Programs and options 55°C 50°C ‡r€ƒr… h‡ˆ… r ‡v €rÃhs‡r… à ∆ T + 10 ∆ T + 5 ∆ T + 6 ∆ T + 8 ∆ T + 8 ‡r€ƒr… h‡ˆ… r ctrl ctrl ctrl puls e_2 puls e_2 puls e_1 h†...
- Page 64 PRODUCT SURVEY DISHWASHER Product no: 911 338 013 EAN code: Model: Favorit CE TN02-222 rev: 7392436 70097 9 Technical characteristics Push-button: Brand: Market: Austria Functionality: Electronic On/Off Design fam: Voltage V: Delayd start Frequency Hz: Type: MD 20 Approval: Semko...
- Page 65 SERVICE BULLETIN NOT CONFIGURED ELECTRONIC BOARDS (Rev. 02) In the sections: “Electrical equipment” in Washing machines, Washer-dryers, Dryers and Dishwashers spare part lists. “Diffuser” or “Cooling Unit” in Refrigeration appliances. the “configured electronic board”, identified by the first digits “973” of the spare part, is featured, where possible. Also the “not configured electronic board”...
- Page 66 DISHWASHERS 2430 SERVICE BULLETIN NEW DETERGENT DISPENSER DESCRIPTION: From December ’03 (serial no. 349…) a new “detergent dispenser” is introduced into the dishwashers produced in the Solaro (MI) factory. This dispenser features a modified connection to the salt/rinse aid sensor: from 2 fastons to 1 connector. Previous “Dispenser”...
- Page 67 INSTRUCTIONS FOR THE SERVICE (a) After removing the external door, detach the electric connections from the dispenser. (b) Remove the screws which secure it to the inner door. (c) Press on the fixing side anchor tabs and remove it from its seat. (d) Push it from the outside of the door and extract it from the inside of the appliance (e) Secure the new “detergent dispenser”...
- Page 68 SZERVIZKÖZLEMÉNY MOSOGATÓGÉPEK ÁTLÁTSZÓ BELSŐ AJTÓK, 01. VÁLTOZAT Fontos: pótalkatrészként többféle típusú átlátszó belső ajtó áll rendelkezésre. Ezeket arra tervezték, hogy lehetővé tegyék a szerelők számára, hogy vizuálisan ellenőrizzék a mosogatógépek működését. Ötféle belső ajtó áll rendelkezésre, ezek lefedik az Olaszországban (Solaro) és Németországban (Nürnberg) gyártott összes mosogatógép-típust.
- Page 69 Service-Bulletin Compact Dishwasher MIDI 599 516 638 Problem: „Not draining“ or „not emptying“ due to clogged drain system. We have introduced a new Coarse strainer / micro filter 150954401/9 to prevent clogging of the drainsystem. 150954401/9 shall replace the 150954400/1 version in all service visits Product ser no / ELC.
- Page 70 MINDEN TERMÉK SERVICE BULLETIN ESD MEGELŐZÉSE, REV. 01 Bevezetés Az elektrosztatikus kisülés (ESD) a különböző elektromos feszültségű testek közötti töltésátvitel. A statikus elektromosság 10.000 volt feletti magasfeszültséget halmozhat fel, alacsony páratartalmú környezetben pedig 30.000 voltnál is többet. Amikor két eltérő töltésű tárgy közelebb kerül, az elektronok hirtelen az egyik tárgyból a másikba áramolnak.
- Page 71 ESD-szabályok a szervizek számára • Tegyük fel, hogy minden aktív alkatrész ESD-érzékeny • Kezelje úgy az elektronikus alkatrészeket, mint a PCB ESD-védett területét A beszerelési és programozási fázisok során az áramköri kártyákat a lehető legkisebb mértékben érintse. Az áramköri kártyát helyezze földelt felületre, és soha ne érintse meg a MOS-áramkört. Ahol az áramköri modulokkal programozási célból kell dolgozni, statikus disszipatív szegélyt és kézelőt kell csatlakoztatni a földpotenciálhoz.
- Page 72 GYAKORLATI TANÁCS Programozás esetén: 1. Először csatlakoztassa a DAAS-t a PCB-hez 2. Ezután helyezze az USB-csatlakozót a számítógépbe 3. Majd csatlakoztassa az USB-t az interfészeszközhöz 4. A programozási fázis során ne érintse meg a PCB-t (PCB-áramellátás) Szoftverfrissítés esetén: 1. Először csatlakoztassa a DAAS-t a PCB-hez (ne érintse meg a PCB-t) – még mindig a készüléken 2.
- Page 73 DISHWASHER Product Group: 24 Service Bulletin Ref No: DW02011 Subject: Leakage in base tray / activation of float switch Brand: ZANUSSI Model: Compact dishwashers, DCS14W/S, DCE5655 You may receive a call where the float switch has been activated by water in the base tray.
- Page 74 SZERVIZKÖZLEMÉNY MOSOGATÓGÉP A SZÁRÍTÁS EREDMÉNYÉNEK JAVÍTÁSA LEÍRÁS: Az utolsó generációs mosogatógépek tervezésekor figyelembe vették a környezeti hatást és ezért fogyasztásuk jelentősen csökkent. Az egyik olyan megoldás, amelyet a fogyasztás csökkentése eredményezett, a szárításra vonatkozik, ami a múltbelitől eltérő elvek szerint történik. A múltban amikor az ellenállás a levegőben volt, és látható...
- Page 75 8) A különböző mosogatógép modelleknél létezik a fényesítő adagolás aktiválása opció, ami a "multitab" funkció kiválasztásával használható (a 3 az 1-ben tabletták használatához). Ezt az opciót azért építették a készülékbe, hogy javítsák az öblítés és szárítás eredményét. Azoknál a mosogatógépeknél, amelyek tartalmaznak ilyen opciót, ennek aktiválását és funkcióját a felhasználói kézikönyv írja le.
- Page 81 DISHWASHER Instruction sheet Detergent dispenser KIT Composition of the KIT part no. 5027 82 60-00/0: Description Q.ty Part no. Detergent dispenser 111 57 50-40/6 (adaptor included) Faston 5024 12 55-00/4 Faston cover 5022 59 95-00/5 Instruction sheet 9914 16 12-89/7 INSTRUCTIONS FOR THE SERVICE (a) After removing the external door, detach the electric connections from the dispenser (b) Remove the screws which secure it to the inner door...
Need help?
Do you have a question about the Favorit CE and is the answer not in the manual?
Questions and answers