Canon imageRUNNER 1750 Copying Manual
Hide thumbs
Also See for imageRUNNER 1750:
- Service manual (358 pages) ,
- Remote manual (126 pages) ,
- Quick manual (9 pages)

Related Manuals for Canon imageRUNNER 1750


Summary of Contents for Canon imageRUNNER 1750
- Page 1 Copying Guide Copying Guide Please read this guide before operating this product. After you finish reading this guide, store it in a safe place for future reference.
- Page 2 imageRUNNER 1750iF/1750 1740iF/1740 1730iF/1730 Copying Guide...
-
Page 3: Manuals For The Machine
Manuals for the Machine The manuals for this machine are organized as shown below. Please refer to them for detailed information. Guides with this symbol are PDF manuals included on the Guides with this symbol are printed manuals. CD-ROM accompanying CD-ROM. (See footnote.) •... -
Page 4: How This Manual Is Organized
Includes the instructions on how to place originals, available combination of copy modes, and index. Considerable effort has been made to ensure that this manual is free of inaccuracies and omissions. However, as we are constantly improving our products, if you need an exact specification, please contact Canon. -
Page 5: Table Of Contents
Contents Preface ............vi How to Use This Manual . - Page 6 2-Sided Copying ..........2-20 Making 1 to 2-Sided, 2 to 2-Sided, or 2 to 1-Sided Copies .
-
Page 7: Preface
Preface Thank you for purchasing the Canon imageRUNNER 1750iF/1750/1740iF/1740/1730iF/ 1730. Please read this manual thoroughly before operating the machine to familiarize yourself with its capabilities, and to make the most of its many functions. After reading this manual, store it in a safe place for future reference. -
Page 8: Illustrations Used In This Manual
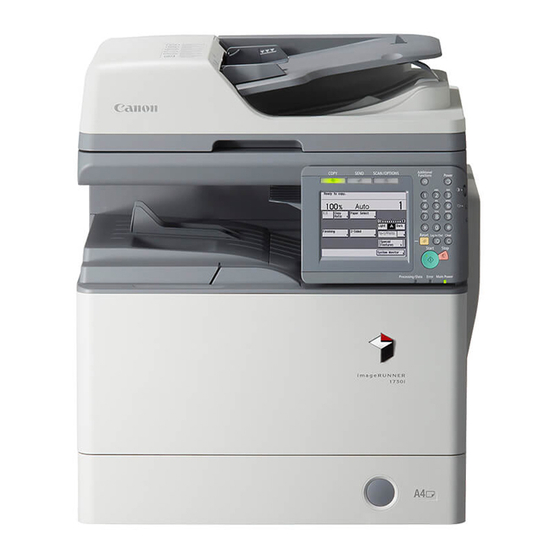
Illustrations Used in This Manual The machine illustrations used in this manual are those of the imageRUNNER 1750iF with the following optional equipment attached: Staple Finisher-H1 and Cassette Module-Y1 (triple-tiered). Displays Used in This Manual Screen shots used in this manual may differ from actual displays depending on the machine configuration. -
Page 9: Trademarks
Trademarks Windows logo and Windows are trademarks or registered trademarks of Microsoft Corporation in the U.S. and/or other countries. Other product and company names herein may be the trademarks of their respective owners. viii... -
Page 10: Legal Notices
Disclaimers The information in this document is subject to change without notice. CANON INC. MAKES NO WARRANTY OF ANY KIND WITH REGARD TO THIS MATERIAL, EITHER EXPRESS OR IMPLIED, EXCEPT AS PROVIDED HEREIN, INCLUDING WITHOUT LIMITATION, THEREOF, WARRANTIES AS TO MARKETABILITY, MERCHANTABILITY, FITNESS FOR A PARTICULAR PURPOSE OR USE OR NON-INFRINGEMENT. -
Page 12: Introduction To Copy Function
Introduction to Copy Function CHAPTER This chapter is an introduction to the Copy function. Overview of Copying Features ..........1-2 Keys and Functions . -
Page 13: Overview Of Copying Features
Overview of Copying Features Most operations of this machine are performed from the touch panel display. To use the Copy function, press the appropriate keys as instructed in the messages displayed on the touch panel display. Keys and Functions Basic Features ■... - Page 14 ➞ See "Enlarging/Reducing Images," on p. 2-14. Press to make copies in the same size as your original. [Collate] Is Selected ➞ See "Finishing," on p. 2-25. Press to select the Collate, Group, or Staple mode. [1 to 2-Sided] Is Selected ➞...
-
Page 15: Advanced Features
➞ See "Advanced Features," on p. 1-4 and Chapter 3, "Advanced Copying Features." Press to select an advanced features mode, such as the Frame Erase mode. ➞ See "Managing Copy Jobs," on p. 1-11. Press to check the details and the record of copy jobs, or cancel copy jobs using the System Monitor screen. Advanced Features ■... - Page 16 ➞ See "Erasing Shadows/ [Book Frame Erase] Is Selected Frame Lines (Frame Erase)," on p. 3-11. Not Selected Press to eliminate dark border areas and lines that appear around original images or shadows from binding holes. Selected ➞ See "Copying Different LGL Original Size Originals Together (Different Size Originals),"...
-
Page 17: Basic Copying Procedure
Basic Copying Procedure This section describes the basic copy operation procedures. NOTE • For instructions on how to turn ON the machine, see Chapter 2, "Before You Start Using the Machine," in the User's Guide. • For instructions on how to load paper, see Chapter 5, "Routine Maintenance," in the Reference Guide. - Page 18 Specify the desired copy modes on the top screen. NOTE You can select the paper size and type, copy density, original type, copy ratio, two-sided, and the desired finishing mode. If necessary, specify the copy modes on the Special Features screen.
- Page 19 Enter the desired copy quantity (from 1 to 999) using (numeric keys). IMPORTANT You cannot change the number of copies while the machine is copying. NOTE If you make a mistake when entering a value, press (Clear) and enter the correct value.
- Page 20 If the screen on the left is displayed, follow the instructions on the touch panel display ➞ press (Start) once for each original. When scanning is complete, press [Done]. Copying starts. IMPORTANT You cannot change the copy mode settings, such as the copy quantity, paper size, or copy ratio, while the machine is copying.
- Page 21 ● If you want to start copying the next original while printing for the current job is in progress: ❑ Press [Done]. The message <Reservation copies can be made.> appears on the top left corner of the touch panel display. ❑...
-
Page 22: Managing Copy Jobs
Managing Copy Jobs This section describes how to cancel copy jobs using (Stop) and the System Monitor screen, and how to check the details and records of copy jobs using the System Monitor screen. Canceling a Copy Job Using the Stop Key You can cancel a copy job by using (Stop) NOTE... -
Page 23: Checking And Canceling Copy Jobs Using The System Monitor
NOTE • Pressing (Stop) while the machine is scanning an original placed in the feeder may cause a paper jam. For instructions on how to clear paper jams in the feeder, see Chapter 6, "Troubleshooting," in the Reference Guide. • You cannot select multiple jobs and cancel them all at once. Select and cancel one job at a time. -
Page 24: Checking The Copy Log
Press [Yes]. NOTE • Pressing (Stop) while the machine is scanning an original placed in the feeder may cause a paper jam. For instructions on how to clear paper jams in the feeder, see Chapter 6, "Troubleshooting," in the Reference Guide. •... - Page 25 Press [Log] ➞ select the job you want to check ➞ press [Details]. Press to return to the top screen. [Done] 1-14 Managing Copy Jobs...
-
Page 26: Checking/Changing/Canceling Selected Settings
Checking/Changing/Canceling Selected Settings Copy mode settings that you have specified are all grouped together onto one screen so that you can easily check them. You can also change or cancel selected modes from the screen. Press [Setting Confirmation]. NOTE This key appears after you specify any of the copy mode settings. - Page 27 ● To change the settings for a copy mode: ❑ Perform again the setting procedure for the mode to change the settings as you desire ➞ press [OK]. The display returns to the Setting Confirmation screen. ● To cancel a copy mode: ❑...
-
Page 28: Basic Copying Features
Basic Copying Features CHAPTER This chapter describes the basic copying features. Selecting the Paper Size..........2-2 Automatic Paper Selection . -
Page 29: Selecting The Paper Size
Selecting the Paper Size You can manually specify a paper size or set the machine to automatically select the paper size. NOTE • If you are copying an original with an image that extends all the way to the edges onto the same size paper at a copy ratio of 100%, the periphery of the original image may be slightly cut off on the copy. - Page 30 NOTE • You can activate or deactivate the Automatic Paper Selection mode for each paper drawer and the stack bypass. (See Chapter 3, "Configuring the Machine's Basic Settings," in the Reference Guide.) • You can use the stack bypass for the Automatic Paper Selection mode when: - The paper is loaded in the stack bypass and the paper size and type are specified.
-
Page 31: Manual Paper Selection
Press (Start). If the screen appears prompting you to specify the size of the original, select the original size ➞ press [OK] ➞ (Start). Copying starts. Manual Paper Selection You can manually select the paper size. Place your originals ➞ press [Paper Select]. -
Page 32: Copying Using The Stack Bypass
NOTE • The paper sizes and types in each paper source are indicated on the touch panel display. • The type of paper loaded in each paper source are displayed by icons. (See Chapter 3, "Configuring the Machine's Basic Settings," in the Reference Guide.) •... - Page 33 Specify the paper size and type. NOTE When Stack Bypass Standard Settings set to 'On', the screens for specifying the paper size and type shown in the following steps are not displayed even if you load paper or envelopes. Disable Stack Bypass Standard Settings to display the setting screens. (See Chapter 3, "Configuring the Machine's Basic Settings,"...
- Page 34 ● If you want to select a nonstandard paper size: ❑ Press [Irreg. Size]. ❑ Press [X] ➞ enter the length along the horizontal axis of the paper using the numeric keys. The horizontal length can be set between 5 9/16" and 24 3/4" (140 mm and 630 mm).
- Page 35 ❑ Press [Next]. ❑ Select the paper type ➞ press [OK]. IMPORTANT Make sure that the paper type setting is correct. An incorrect paper type setting may adversely affect the image quality, damage the fixing unit, and cause paper jams. NOTE •...
- Page 36 ● If you want to select an envelope type: ❑ Press [Envelope]. ❑ Select the envelope type ➞ press [OK]. IMPORTANT • If the correct envelope type is not selected, a paper jam will occur. • If an envelope size is selected, the Staple, 1 to 2-Sided, 2 to 2-Sided, Image Combination, or ID Card Copy mode cannot be specified.
- Page 37 Press (Start). Copying starts. NOTE You can load envelopes in Paper Drawer 2 only when the optional Envelope Cassette-D1 is attached to the machine. For more information, see Chapter 5, "Routine Maintenance," in the Reference Guide. 2-10 Selecting the Paper Size...
-
Page 38: Adjusting Density And Image Quality
Adjusting Density and Image Quality You can set the desired density and select the type of original before scanning the original. Density The machine automatically adjusts the copy density to the level best suited to the quality of the text original. Also, you can manually adjust the copy density to the most appropriate level for the original. -
Page 39: Type Of Original
● If you want to adjust the copy density manually: ❑ Press [Light] or [Dark] to adjust density. Press [Light] to move the indicator to the left to make the density lighter, or press [Dark] to move the indicator to the right to make the density darker. - Page 40 ■ Text/Photo Mode This mode is best suited for making copies of originals containing both text and images/photos, such as magazines or catalogues. ■ Photo Mode This mode is best suited for making copies of photos printed on photographic paper, or images printed with halftone dots (i.e., printed photos). IMPORTANT •...
-
Page 41: Enlarging/Reducing Images
Enlarging/Reducing Images You can set the machine to adjust the copy ratio automatically, or you can specify the copy ratio manually. Preset Zoom The machine offers a variety of preset copy ratios to reduce or enlarge standard size originals to another standard paper size. IMPORTANT To achieve outputs in the desired image orientation, place smaller sized originals such as STMT horizontally, even if the scanning area of the platen glass or feeder fully... -
Page 42: Zoom By Percentage
You can select the preset copy ratio from the following: - 400% MAX. - 200% STMT ➞ LTR - 129% - 100% Direct LGL ➞ LTR - 78% LTR ➞ STMT - 64% - 50% - 25% MIN. Enter the desired copy quantity (from 1 to 999) using (numeric keys). - Page 43 Place your originals ➞ press [Copy Ratio]. Use [-] or [+] to set the copy ratio ➞ press [Done]. NOTE • You can also use (numeric keys) to enter a value, and (Clear) to clear your entry. • You can reset the copy ratio to 100% by pressing (Clear) instead of entering '100', or pressing [Direct] on the top screen.
-
Page 44: Auto Zoom
Auto Zoom You can set the machine to automatically select the appropriate copy ratio based on the size of the original and the selected copy paper. The copy ratio is set within the range of 25% to 400%. IMPORTANT • You cannot use the Auto setting on the Copy Ratio screen with the Automatic Paper Selection mode. - Page 45 Select the desired paper size ➞ press [Done]. Press [Copy Ratio]. Press [Auto] ➞ [Done]. The display returns to the top screen, and the copy ratio generated by the machine is displayed. On the following cases, however, the copy ratio is displayed as <Auto %>: −When the original is placed in the feeder (the copy ratio is generated when...
- Page 46 Enter the desired copy quantity (from 1 to 999) using (numeric keys). Press (Start). If the screen appears prompting you to specify the size of the original, select the original size ➞ press [OK] ➞ (Start). Copying starts. NOTE • To return the copy ratio to 100%, press [Direct] on the top screen. •...
-
Page 47: 2-Sided Copying
2-Sided Copying The 2-Sided mode enables you to make two-sided copies from one-sided or two-sided originals, or make one-sided copies from two-sided originals. Making two-sided copies enables you to cut print costs in half when copying in large quantities. IMPORTANT Paper used to make two-sided copies must conform to the following specifications: - Paper size: LTR, LGL, STMT or EXEC... - Page 48 ■ 2 to 2-Sided The 2 to 2-Sided mode automatically turns over two-sided originals placed in the feeder to copy both sides of the original on the front and back sides of the paper. Original Copy ■ 2 to 1-Sided The 2 to 1-Sided mode automatically turns over two-sided originals placed in the feeder to make one-sided copies.
-
Page 49: Making 1 To 2-Sided, 2 To 2-Sided, Or 2 To 1-Sided Copies
Making 1 to 2-Sided, 2 to 2-Sided, or 2 to 1-Sided Copies Place your originals into the feeder or on the platen glass. IMPORTANT To achieve the desired outputs, make sure that your originals are placed in the correct orientation. (See "Placing Orientations of Originals," on p. 5-2.) ●... - Page 50 Select the orientation of the originals ➞ press [Next]. ● For 1 to 2-Sided copying: ❑ Press [Book Type] or [Calendar Type] to select the layout type of the copies ➞ press [OK]. ● For 2 to 2-Sided copying: ❑ Press [Book Type] or [Calendar Type] to select the layout type of the originals and the copies ➞...
- Page 51 ● For 2 to 1-Sided copying: ❑ Press [Book Type] or [Calendar Type] to select the layout type of the originals ➞ press [OK]. • [Book Type]: The front and back sides of the copy/original will have the same top-to-bottom orientation. •...
-
Page 52: Finishing
Finishing The Finishing modes enable you to make copies in sets arranged in page order (Collate) or in groups of each page (Group). You can also staple copies (Staple). The Collate mode or Group mode can be set in combination with the Offset mode. The table below shows all the Finishing modes that are available with the optional Staple Finisher-H1, and the paper sizes that can be used. - Page 53 ■ Group Mode All copies of the same original page are grouped together. Three Copies Originals Set 1 Set 2 Set 3 Set 4 of Each Page Grouped by Page ■ Staple Mode The copies are automatically collated into sets arranged in page order and stapled.
-
Page 54: Collating Or Stapling Copies
Collating or Stapling Copies Place your originals ➞ press [Finishing]. IMPORTANT To achieve the desired outputs, make sure that your originals are placed in the correct orientation. (See "Placing Orientations of Originals," on p. 5-2.) Select the desired collating mode. ●... - Page 55 ❑ Select the orientation of the originals. Press [OK]. The display returns to the top screen. Enter the desired copy quantity (from 1 to 999) using (numeric keys). Press (Start). If the original is placed on the platen glass, follow the instructions that appear on the touch panel display ➞...
-
Page 56: Advanced Copying Features
Advanced Copying Features CHAPTER This chapter describes the advanced copying features for document layout and image adjustment. Multiple Originals onto One Sheet ......... . 3-2 Making 2 on 1 or 4 on 1 Copies (Image Combination) . -
Page 57: Multiple Originals Onto One Sheet
Multiple Originals onto One Sheet This mode enables you to automatically reduce two or four originals to fit onto one side or both sides of a selected paper size. In addition, the ID Card Copy mode enables you to copy the both sides of an ID card on one side of paper. ■... - Page 58 IMPORTANT • The 2 on 1 and 4 on 1 combination modes cannot be used with the Automatic Paper Selection, Original Frame Erase, Book Frame Erase, or Different Size Originals modes. • If originals in vertical (portrait) orientation are copied with the 2 on 1 combination and Staple modes, the copies are stapled in the lower left corner.
-
Page 59: Making 2 On 1 Or 4 On 1 Copies (Image Combination)
Making 2 on 1 or 4 on 1 Copies (Image Combination) Place your originals ➞ press [Special Features] ➞ [Image Combination]. Select the original size ➞ press [Next]. IMPORTANT You can set the Image Combination mode only for the original paper sizes shown on the touch panel display. - Page 60 ❑ Select the type of two-sided original ➞ press [OK]. • [Book Type]: The front and back sides of the original have the same top-to-bottom orientation. • [Calendar Type]: The front and back sides of the original have opposite top-to-bottom orientations. ❑...
- Page 61 ● If you want to make 2-sided copies: ❑ Press [2-Sided Copy]. ❑ Select the type of two-sided copy ➞ press [OK]. • [Book Type]: The front and back sides of the copy will have the same top-to-bottom orientation. • [Calendar Type]: The front and back sides of the copy will have opposite top-to-bottom orientations.
- Page 62 ❑ Select the image order ➞ press [Done] ➞ [Next]. If you select [2 On 1], the display on the left appears. The layout images on the display are for originals in vertical (portrait) orientation. IMPORTANT For originals in horizontal (landscape) orientation, select the layout according to the chart below.
- Page 63 If you select [4 On 1], the display on the left appears. The layout images on the display are for originals in vertical (portrait) orientation. IMPORTANT For originals in horizontal (landscape) orientation, select the layout according to the chart below. Outputs Layouts on the Display...
-
Page 64: Making Id Card Copies
Press (Start). If the original is placed on the platen glass, follow the instructions that appear on the touch panel display ➞ press (Start) once for each original. When scanning is complete, press [Done]. Copying starts. If you are copying in the Collate, Staple, or Offset + Collate mode, copying starts when the scanning of all pages is complete. - Page 65 Select the paper source ➞ press [OK] ➞ [Done]. Select the size of the paper that is loaded in a paper drawer or the stack bypass. Enter the desired copy quantity (from 1 to 999) using (numeric keys). Press (Start). The display on the left appears.
-
Page 66: Erasing Shadows/Frame Lines (Frame Erase)
Erasing Shadows/Frame Lines (Frame Erase) The Frame Erase modes erase shadows and lines that appear when copying various types of originals. This section describes the three Frame Erase modes available. IMPORTANT Only one of the three Frame Erase modes can be set at a time. If you select one of these modes, the previously set mode is canceled. -
Page 67: Binding Erase
■ Book Frame Erase The Book Frame Erase mode erases the dark borders such as center and contour lines that appear when you copy facing pages in a bound original onto a single sheet of paper. Not Set Copy Original Copy IMPORTANT •... -
Page 68: Original Frame Erase
Original Frame Erase Place your originals ➞ press [Special Features] ➞ [Frame Erase]. NOTE To achieve the desired outputs, make sure that your originals are placed in the correct orientation. (See "Placing Orientations of Originals," on p. 5-2.) Press [Original Frame Erase] ➞ [Next]. - Page 69 Press [-] or [+] to set the frame erase width. NOTE • The default setting is '1/8" (4 mm)'. You can adjust the frame erase width to between 1/16" and 1 15/16" (1 mm and 50 mm). • To enter values in millimeters, press [mm]. (See Chapter 3, "Configuring the Machine's Basic Settings,"...
-
Page 70: Book Frame Erase
Press [Done]. The display returns to the top screen. Enter the desired copy quantity (from 1 to 999) using (numeric keys). Press (Start). Copying starts. NOTE • To cancel this setting, press [Special Features] ➞ [Frame Erase] ➞ [Cancel]. • To cancel all settings and return the machine to the Standard Settings, press (Reset). - Page 71 Select the size of the bound original when it is open ➞ press [Next]. IMPORTANT You can set the Book Frame Erase mode only for the original paper sizes shown on the touch panel display. NOTE To select the paper size in A or B series, press [A/B-size].
- Page 72 ● If you want to set the top, left, center, right, and bottom widths independently: ❑ Press [Adjust Each Dim.]. ❑ Select the side to set the erase width ➞ press [-] or [+] to set their respective frame erase widths ➞ press [OK]. •...
-
Page 73: Binding Erase
Binding Erase This mode erases shadows from binding holes on originals. Place your original on the platen glass ➞ press [Special Features] ➞ [Frame Erase]. For help, see step 1 in "Original Frame Erase," on p. 3-13. NOTE To achieve the desired outputs, make sure that your originals are placed in the correct orientation. - Page 74 Press [-] or [+] to set the frame erase width ➞ press [OK] ➞ [Done]. The display returns to the top screen. NOTE • The default setting is '3/4" (18 mm)'. You can adjust the frame erase width to between 3/16"...
-
Page 75: Copying Different Size Originals Together (Different Size Originals)
Copying Different Size Originals Together (Different Size Originals) The Different Size Originals mode enables you to place different size originals (LTR and LGL) into the feeder and copy them at the same time. By using this mode, for example, you can copy LTR and LGL originals on the same paper size as the originals', or copy LTR and LGL originals on LTR paper, automatically reducing the original LGL images to fit on LTR paper. - Page 76 The combination of the original's sizes available for the Different Size Originals mode is LTR and LGL. IMPORTANT • The combinations other than described above may wrinkle originals. • Make sure that the different sized originals are of the same weight (paper type). •...
- Page 77 Enter the desired copy quantity (from 1 to 999) using (numeric keys). Press (Start). Copying starts. NOTE • To cancel this setting, press [Special Features] ➞ [Different Size Originals]. • To cancel all settings and return the machine to the Standard Settings, press (Reset).
-
Page 78: Adjusting Sharpness
Adjusting Sharpness This mode enables you to adjust the sharpness level. ■ Low If you use the Photo mode to make copies of an original containing halftones, such as a printed image, the moiré effect (a shimmering, wavy pattern) may occur. - Page 79 Place your originals ➞ press [Special Features]. Press [Sharpness]. Press [Low] or [High] to adjust the sharpness ➞ press [OK] ➞ [Done]. To copy originals containing printed images or other halftones, the setting should be towards [Low]. To copy text or lines clearly, the setting should be towards [High].
- Page 80 Enter the desired copy quantity (from 1 to 999) using (numeric keys). Press (Start). Copying starts. NOTE • To cancel this setting, press [Special Features] ➞ [Sharpness] ➞ [Cancel]. • To cancel all settings and return the machine to the Standard Settings, press (Reset).
-
Page 81: Frequently Used Settings (Mode Memory)
Frequently Used Settings (Mode Memory) You can store setting combinations of copy modes in the four memory keys. These keys can be named for increased convenience. This function is useful for storing frequently used copy settings. NOTE The copy settings stored in memory keys are not erased when the main power is turned OFF. - Page 82 Press [Store/Erase]. Press [Store]. Select a key ([M1] to [M4]) for storing the copy settings ➞ press [Next]. NOTE • Keys that already have settings stored in them are displayed with a black square (■) in the lower right corner of the key. •...
- Page 83 ● If you select a key with no settings: A screen appears, asking for your confirmation to store the settings. ❑ Press [Yes]. The key in which you stored the settings is displayed with a black square (■) in the lower right corner, and the stored settings are displayed.
-
Page 84: Recalling Mode Memory
❑ Enter a name ➞ press [OK]. You can enter up to 10 characters for the name. IMPORTANT If the Language Switch setting is set to 'On', some characters are restricted and cannot be entered. To enter all characters, set the Language Switch setting to 'Off'. -
Page 85: Deleting Mode Memory
Verify the settings ➞ press [OK] ➞ [Done]. If you select a key that does not have copy settings stored in it, [OK] is grayed out and cannot be pressed. Select another key that has copy settings stored in it, or press [Cancel]. - Page 86 NOTE • Keys that already have settings stored in them are displayed with a black square (■) in the lower right corner of the key. • If you select a key that already has settings stored in it, the settings are displayed. •...
- Page 87 3-32 Frequently Used Settings (Mode Memory)
-
Page 88: Customizing Settings
Customizing Settings CHAPTER This chapter describes how to change the machine's settings from the Additional Functions screen. Customizing the Copy Settings..........4-2 Copy Settings Table . -
Page 89: Customizing The Copy Settings
Customizing the Copy Settings You can change the machine's default settings and customize them to suit your needs. The settings you change and store in the Copy Settings in the Additional Functions menu are not returned to the factory default settings even when (Reset) is pressed. -
Page 90: Storing New Standard Settings
• The Standard Settings (the factory default settings) are: - Number of Copies: 1 - Copy Ratio: 100% - Paper Source Selection: Auto - Density and Original Type: Auto - 2-Sided: Off - Finishing: Off - Image Combination: Off - Frame Erase: Off - Different Size Originals: Off - Sharpness: middle (center) - ID Card Copy: Off... - Page 91 Press [Standard Settings]. Press [Store]. Press [Yes]. The message <Stored in memory.> appears for approximately two seconds on the touch panel display. The displayed settings are stored as the Standard Settings. NOTE The settings displayed are the currently set copy settings. Press [ ] or [ ] to display any copy settings that do not fit into the display area.
-
Page 92: Initializing Standard Settings
Press (Reset) to return to the top screen. Initializing Standard Settings You can restore the Standard Settings to their default settings. (Additional Functions) ➞ [Copy Settings]. Press For help, see step 2 in "Storing New Standard Settings," on p. 4-3. Press [Standard Settings]. -
Page 93: Restoring The Default Copy Settings
Check the settings ➞ press [Yes]. The message <Initialized.> appears for approximately two seconds on the touch panel display. The Standard Settings are initialized. Press (Reset) to return to the top screen. Restoring the Default Copy Settings The modes that have been changed in Copy Settings can be restored to the factory default settings. - Page 94 (Additional Functions) ➞ [Copy Settings]. Press For help, see step 2 in "Storing New Standard Settings," on p. 4-3. Press [Initialize Copy Settings]. Press [Yes]. The message <Initialized.> appears for approximately two seconds on the touch panel display. The Copy Settings are initialized. Press (Reset) to return to the top screen.
- Page 95 Customizing the Copy Settings...
-
Page 96: Appendix
Appendix CHAPTER This chapter provides the detailed instructions on how to place originals, the combination of functions chart, and the index. Placing Orientations of Originals ......... . . 5-2 Placing One-Sided Originals . -
Page 97: Placing Orientations Of Originals
Placing Orientations of Originals This section describes the orientations of your originals when you place them on the platen glass or in the feeder. Make sure that your originals are placed in the proper orientation to achieve outputs in the desired image orientation. IMPORTANT •... - Page 98 Place your originals as indicated below: ■ For Originals in Portrait Orientation Type of Original Platen Glass Feeder ■ For Originals in Landscape Orientation Type of Original Platen Glass Feeder Placing Orientations of Originals...
-
Page 99: Placing Two-Sided Originals
Placing Two-Sided Originals Two-sided originals have the following types and are combined with the portrait or landscape orientation, such as "book type in portrait orientation." • Book Type: The front and back sides of the original have the same top-to-bottom orientation: these originals will open horizontally if bound. - Page 100 ■ For Book Type Originals in Landscape Orientation Type of Original Platen Glass* Feeder * Turn over the original horizontally to scan the back side, making sure that the original is placed in the same orientation as the front side was scanned. ■...
-
Page 101: Combination Of Copy Modes Chart
Combination of Copy Modes Chart The chart shows the available combinations of settings when you want to set more than one mode at a time. *1 You cannot combine these modes when a nonstandard paper size or envelope is selected. *2 You cannot combine the ID Card Copy mode with the Binding Erase mode. -
Page 102: Index
Index Numerics 2 on 1, 3-2 Density, 2-11 2-Sided copying Automatic, 2-11 1 to 2-sided, 2-20, 2-22 Manual, 2-12 2 to 1-sided, 2-21, 2-22 Density key, 1-3 2 to 2-sided, 2-21, 2-22 Department ID, 1-6 2-sided mode, 2-20 Different Size Originals, 3-20 4 on 1, 3-2 Different Size Originals key, 1-5 Direct key, 1-3... - Page 103 ID Card Copy, 3-3, 3-9 Paper Select key, 1-2 ID Card Copy key, 1-5 Paper selection Image Combination Automatic, 2-2 2 on 1, 3-2, 3-4 Manual, 2-4 4 on 1, 3-2, 3-4 Stack Bypass, 2-5 ID card copy, 3-3, 3-9 Photo Mode, 2-13 Image combination mode, 3-2 Preset Zoom, 2-14...
- Page 104 Zoom by Percentage, 2-15 Index...
- Page 105 5-10 Index...
- Page 106 CANON INC. 30-2, Shimomaruko 3-chome, Ohta-ku, Tokyo 146-8501, Japan CANON U.S.A., INC. One Canon Plaza, Lake Success, NY 11042, U.S.A. CANON CANADA INC. 6390 Dixie Road Mississauga, Ontario L5T 1P7, Canada CANON EUROPA N.V. Bovenkerkerweg 59-61 1185 XB Amstelveen, The Netherlands (See http://www.canon-europe.com/ for details on your regional dealer)
Need help?
Do you have a question about the imageRUNNER 1750 and is the answer not in the manual?
Questions and answers