
Related Manuals for Leggett & Platt style series


Summary of Contents for Leggett & Platt style series
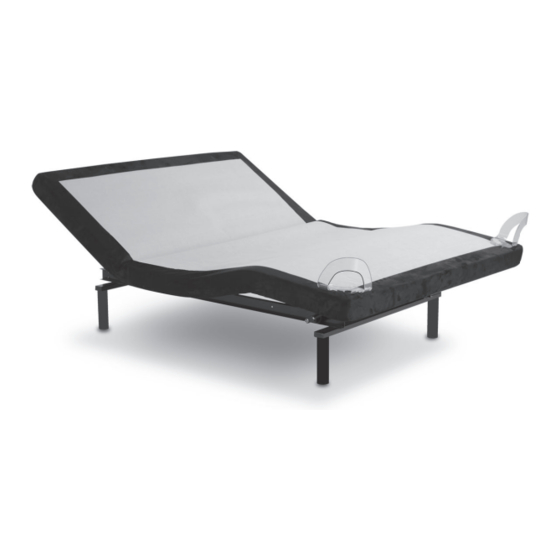
- Page 1 STYLE ™ owners manual FOUNDATION DESIGN 1 PIECE MODELS ENGLISH SPANISH FRENCH...
-
Page 2: Table Of Contents
CONTENTS Advisory ........................3 Acoustics ........................5 Fabric Cleaning Information ..................5 Installation ......................... 6 Power Down Operation ....................13 Remote Control Function .................... 14 Remote Control Programming ..................15 Troubleshooting ......................17 1-3-25 Warranty ......................18 Spanish translation begins on page 20. La traducción en español inicia en la página 20. -
Page 3: Advisory
ADVISORY IMPORTANT INFORMATION READ THE FOLLOWING INFORMATION CAREFULLY BEFORE USING THIS PRODUCT PRODUCT RATINGS The base lift motors are not designed for continuous use. Reliable operation and full life expectancy will be realized as long as lift motor operation does not FOR OPTIMUM ADJUSTABLE BASE exceed five (5) minutes over a thirty (30) minute OPERATION, USE A GROUNDED, ELECTRICAL... - Page 4 ADVISORY IMPORTANT INFORMATION READ THE FOLLOWING INFORMATION CAREFULLY BEFORE USING THIS PRODUCT SMALL CHILDREN / PETS WARNING FCC COMPLIANCE After the base is unboxed, immediately dispose The equipment has been tested and found to of packaging material as it can smother small comply with the limits for a Class B digital device, children and pets.
-
Page 5: Acoustics
ACOUSTICS LIFTING/LOWERING MECHANISMS LOCATION ENVIRONMENT The lift/lower feature will emit a minimal humming The level of sound experienced during operation sound during operation. This is normal. is directly related to the location environment. For example, when a base is located on a hardwood floor During operation, the lift arm wheels make contact with the massage feature in operation, a vibrating with the platform support of the base. -
Page 6: Installation
INSTALLATION For installation and setup, complete the following procedures, in the order indicated below and on the following pages: STEP 1 Before discarding any packing materials, check the adjustable base shipping carton and verify the following items are included: • (2) Corner Mattress Retainers w/ bushings (per base) •... - Page 7 INSTALLATION INSTALLATION STEP 2 Remove the hardware box. WARNING WARNING STEP 3 AT LEAST TWO PEOPLE ARE Install (4) legs into the base frame. Simply screw each leg RECOMMENDED FOR HANDLING AND into a tapped hole at the corner of the base frame (FIGURE 1). MOVING ADJUSTABLE BASE.
- Page 8 INSTALLATION STEP 5 Plug electrical power cord into a working, grounded electrical outlet. Note: An electrical surge protection device is recommended (not included). STEP 6 Install batteries in remote control (3-AAA, included) (FIGURE 2). Note: Make sure batteries are properly oriented. Briefl y activate all functions of the base with the remote control to verify all features are in working order.
- Page 9 INSTALLATION STEP 9 Install corner mattress retainers at the foot end of the adjustable base as follows: a. Locate by feel corner holes underneath base cover at foot end of base (FIGURE 3). b. Insert two-pronged bushing into holes in corner mattress retainer. Press bushing through material into holes until retainer fi ts securely against base (FIGURE 4).
- Page 10 INSTALLATION HEADBOARD BRACKET INSTALLATION NOTE FAILURE TO FOLLOW HEADBOARD BRACKET INSTALLATION INSTRUCTIONS MAY CAUSE HEADBOARD BRACKET INTERFERENCE WITH BASE FOAM DURING BED OPERATION. BASE FOAM OR BASE COVER DAMAGE COULD RESULT. WARNING WARNING IN ORDER TO AVOID A PERSON OR PET BEING CAUGHT IN THE SPACE REFERENCED BELOW WHILE THE BASE IS IN MOTION, THE BOTTOM OF THE HEADBOARD CROSS MEMBER MUST BE POSITIONED SO THAT THERE IS...
- Page 11 INSTALLATION STEP 10 Install headboard brackets to the adjustable base frame as follows: a. Using the remote control, raise the head section of the base as far as it will articulate to gain access to the adjustable base frame. b. Slide one headboard bracket channel onto one side of the base frame. Using (2) carriage bolts/nuts attach channel to base frame (FIGURE 6).
- Page 12 INSTALLATION c. Attach one headboard bracket fl ange to one of the bracket channels with (2) hex head bolts/nuts (FIGURE 7). Tighten bolts. Repeat procedure to attach the other headboard bracket fl ange. d. Slide headboard bracket assemblies (in or out) to achieve a distance of 1.5 inches (38.1mm) to 2 inches (50.8mm) between the edge of the base and headboard bracket fl ange assemblies (FIGURE 7).
-
Page 13: Power Down Operation
POWER DOWN OPERATION To lower the base to the fl at position during an electrical power outage, complete the following procedure: STEP 1 Locate (1) power down box (FIGURE 8). Install (2) 9 volt batteries (not included) in power down box (FIGURE 8). FIGURE 8 POWER DOWN BOX... -
Page 14: Remote Control Function
REMOTE CONTROL FUNCTION TORCH BUTTON SET BUTTON Press and hold to use the fl ashlight Use to program z grav, tv, and cust feature. presets. UNDERBED LIGHT BUTTON LOCK BUTTON Press to turn on/off underbed light feature. To lock / unlock the remote control buttons, press and hold lock button for HEAD UP/DOWN BUTTONS 5 seconds. -
Page 15: Remote Control Programming
REMOTE CONTROL PROGRAMMING (1 remote control - 1 base) Program One Remote to Operate One Base - perform the following numbered procedure. STEP 1 Remove the battery compartment door from the remote control (FIGURE 9). FIGURE 10 FIGURE 9 MOTOR attached to BATTERY underside... - Page 16 REMOTE CONTROL PROGRAMMING (1 remote control - 2 bases) Program One Remote to Operate Two Bases (Tandem Syncing) - perform the following numbered procedure. Note: Make sure both remotes are in “press & hold” mode and both bases are fl at before beginning procedure. BASE 1 STEP 1 Unplug both bases from electrical power source.
-
Page 17: Troubleshooting
TROUBLESHOOTING If adjustable base fails to operate, investigate the symptoms and possible solutions provided in the chart below: SOLUTION SYMPTOM • Verify power cord is plugged into a working, grounded Remote control illuminates and appears to be electrical outlet. A grounded, electrical surge protection device is recommended. -
Page 18: Warranty
1 YEAR, 3 YEAR AND 25 YEAR LIMITED WARRANTY In this warranty: “Adjustable base” means the adjustable bed foundation sold by L&P to the dealer. The “adjustable base” does not include the mattress. “L&P” means Leggett & Platt, Incorporated. “Purchaser” and “You” both mean the consumer who is the original purchaser of this adjustable base made by L&P. - Page 19 1 YEAR, 3 YEAR AND 25 YEAR LIMITED WARRANTY Repair or replacement shall be the sole remedy of the L&P makes no other warranty whatever, express or Purchaser. There shall be no liability on the part of L&P implied, and all implied warranties of merchantability and for any special, indirect, incidental, or consequential fitness for a particular purpose are disclaimed by L&P and damages or for any other damage, claim, or loss not...
Need help?
Do you have a question about the style series and is the answer not in the manual?
Questions and answers
Joe to open control & change batteries
To open the remote control and change the batteries on a Leggett & Platt Style Series adjustable bed:
1. Press in on the tab of the battery compartment door and lift it out to remove.
2. Insert three AAA batteries, ensuring they are properly oriented with the positive (+) and negative (-) ends in the correct direction.
3. To replace the battery compartment door, insert the end tabs into the tab slots and snap it back into place.
This answer is automatically generated
Does Leggett and Platt still make this model or is there a newer replacement model? What are the specifications and features of the Style foundation?
What size mattress does this model use? See attached pic