Table of Contents
Advertisement
Available languages
Available languages
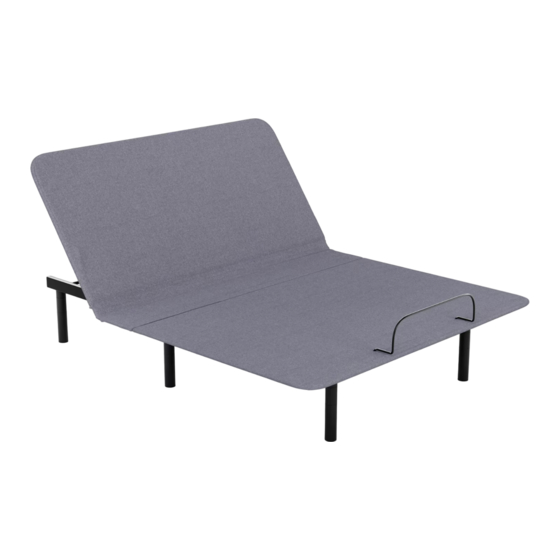
Sleepy's Signature Adjustable Base Setup Guide
BASE APPEARANCE MAY VARY DEPENDING
ON FEATURES OF THE PURCHASED PRODUCT.
DUE TO RISK OF INJURY, TWO ADULTS ARE REQUIRED TO HANDLE AND MOVE ADJUSTABLE BASE.
1
Verify contents; inspect for damage.
FLAT
x1 - Remote Control
2
Open the shipping carton.
Carefully, lift adjustable base out
of shipping carton and place on
clean surface. Remove remote,
both leg boxes, power supply,
and protective plastic.
4
Cut zip-ties (2) and remove the mattress retainer.
!
CAUTION
BE CAREFUL USING SHARP INSTRUMENTS. INJURY
IS POSSIBLE IF TOOLS ARE NOT USED PROPERLY.
NOTE
WARNING
!
DO NOT DROP!
ADJUSTABLE BASE IS HEAVY.
READ ALL INSTRUCTIONS BEFORE USING.
x6 - Legs
x1 - Power supply
!
CAUTION
HANDLE BASE BY FRAME
ONLY. DO NOT GRAB FABRIC.
TEAM
LIFT
x1 - Mattress Retainer
3
Fold adjustable base out flat.
5
Screw all legs into the threaded inserts. HAND TIGHTEN.
FOOT
HEAD
NOTE
MAKE SURE ALL LEGS ARE AT THE SAME
HEIGHT, THE WIDEST LEG SEGMENT IS
SCREWED DIRECTLY INTO BASE, AND LEG
SEGMENTS ARE FULLY TIGHTENED TOGETHER.
NOTE
ALLOW FOR ENOUGH SPACE TO
UNFOLD BASE IN SETUP AREA.
!
WARNING
PINCH POINT WARNING!
KEEP HANDS AND FINGERS
CLEAR WHEN UNFOLDING BASE.
x1 - Warranty Sheet
x1 - Remote Guide
x1 - Setup Guide
!
CAUTION
KEEP THE DECK AND METAL FRAME
TOGETHER WHILE UNFOLDING THE BASE.
Stack leg
segments and
screw ends
together to adjust
height of base.
2"
3"
8"
Advertisement
Table of Contents

Related Manuals for Leggett & Platt Sleepy's Signature Adjustable Base


Summary of Contents for Leggett & Platt Sleepy's Signature Adjustable Base
- Page 1 Sleepy’s Signature Adjustable Base Setup Guide CAUTION NOTE NOTE HANDLE BASE BY FRAME ALLOW FOR ENOUGH SPACE TO BASE APPEARANCE MAY VARY DEPENDING ONLY. DO NOT GRAB FABRIC. UNFOLD BASE IN SETUP AREA. ON FEATURES OF THE PURCHASED PRODUCT. WARNING WARNING TEAM LIFT...
- Page 2 If unassembled, plug electrical power cord into power brick. Plug brick Extend power cord out head end of base. Remove power cord into control box. Secure connection using cable latch. protective covering from power cord plug. FOOT HEAD NOTE Lower base to flat position. TEAM ALIGN PINS BEFORE INSERTING PLUGS.
- Page 3 Guía de instalación de la base ajustable Signature de Sleepy’s PRECAUCIÓN NOTA NOTA LA APARIENCIA DE LA BASE PUEDE VARIAR MANEJAR LA BASE POR EL DEJE ESPACIO SUFICIENTE SEGÚN LAS CARACTERÍSTICAS DEL BASTIDOR SOLAMENTE. NO PARA DESPLEGAR LA BASE EN PRODUCTO COMPRADO.
- Page 4 Si no esta ensamblado, conecte el cable de alimentación eléctrica al Extienda el cable de alimentación desde el Extremo de la cabecera de la bloque de alimentación. Conecte el cable del bloque de alimentación base. Retire la cubierta protectora del enchufe del cable de alimentación. a la caja de control.
- Page 5 Guide de montage de la base ajustable Signature de Sleepy’s MISE EN GARDE REMARQUE REMARQUE MANIPULER BASE PAR CADRE L’APPARENCE DE LA BASE PEUT DIFFÉRER PRÉVOYER SUFFISAMMENT D’ESPACE POUR UNIQUEMENT. NE SAISISSEZ PAS EN FONCTION DES CARACTÉRISTIQUES DU POUVOIR DÉPLIER LA BASE COMPLÈTEMENT LE TISSU.
- Page 6 Si démonté, branchez le cordon de l’alimentation électrique dans le Faire passer le cordon d’alimentation principal bloc d’alimentation. Branchez le cordon d’alimentation du bloc dans sous la base et le faire ressortir au niveau de le boîtier de commande. Fixez la connexion à l’aide du loquet de la tête.
Need help?
Do you have a question about the Sleepy's Signature Adjustable Base and is the answer not in the manual?
Questions and answers
To keep the mattress from sliding where do you place a bar in the sleepy Signature adjustable base Adjustable Twin xl Prime
The mattress retainer bar should be inserted into the holes at the foot of the adjustable base to prevent the mattress from sliding.
This answer is automatically generated
How to flatten signature base without remote