Table of Contents
Advertisement
Quick Links
Download this manual
See also:
Setup Manual
Advertisement
Table of Contents

Related Manuals for Epson SC-P20000 SERIES


Summary of Contents for Epson SC-P20000 SERIES
- Page 1 User's Guide CMP0056-04 EN...
- Page 2 Epson printer. Epson is not responsible for any use of this information as applied to other printers. Neither Seiko Epson Corporation nor its affiliates shall be liable to the purchaser of this product or third parties for damages, losses, costs, or expenses incurred by the purchaser or third parties as a result of accident, misuse, or abuse of this product or unauthorized modifications, repairs, or alterations to this product, or (excluding the U.S.) failure to strictly comply with Seiko Epson Corporation’s operating and maintenance instructions.
-
Page 3: Table Of Contents
SC-P20000 Series/SC-P10000 Series User's Guide Contents Contents Loading Roll Paper..... . 33 Copyrights and Trademarks Cutting the roll paper....35 Removing Roll Paper. - Page 4 Menu List......116 Using Epson Printer Utility 4....77 Print Queues.
- Page 5 Options and Consumable Products... 179 Epson Special Media....179 Ink cartridges......179 Others.
-
Page 6: Introduction
❏ Keep the entire computer system away from potential sources of electromagnetic interference, The symbols on this Epson product are used in order such as loudspeakers or the base units of cordless to ensure safety and proper use of the product and to telephones. -
Page 7: When Using This Product
SC-P20000 Series/SC-P10000 Series User's Guide Introduction ❏ Unplug this product and refer servicing to ❏ If ink gets on your skin, wash it off with soap and qualified service personnel under the following water. If it gets in your eyes, flush them conditions: immediately with water. -
Page 8: Illustrations
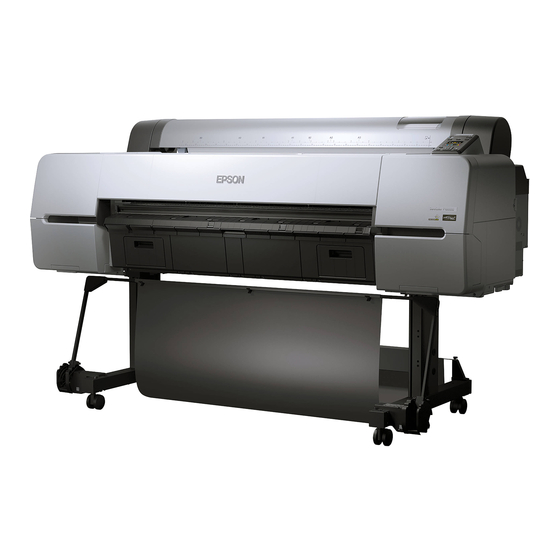
SC-P20000 Series/SC-P10000 Series User's Guide Introduction Important: Important contains important information on the operation of this product. Note: Notes contain useful or additional information on the operation of this product. Illustrations Unless otherwise noted, the illustrations in this documentation show the SC-P20000 Series. -
Page 9: Printer Parts
SC-P20000 Series/SC-P10000 Series User's Guide Introduction Printer Parts Front Head maintenance cover Open when cleaning around the print head. “Cleaning around the print head” on page 169 Cartridge cover On the left and right of the printer. Open when replacing ink cartridges. - Page 10 SC-P20000 Series/SC-P10000 Series User's Guide Introduction Paper basket Output from the printer collects in this basket, keeping the media clean and free of creases. “Using the Paper Basket” on page 56 Poster board support Lift this up and out when loading poster board. Ensures that poster board feeds smoothly.
-
Page 11: Inside
SC-P20000 Series/SC-P10000 Series User's Guide Introduction Inside Attachment container Use this to store the print head protective material removed during setup, and for storing the hexagon wrench and so on. Maintenance Box Absorbs waste ink that is discharged during cleaning and printing. Replace when a replacement message is displayed on the control panel. - Page 12 SC-P20000 Series/SC-P10000 Series User's Guide Introduction Adapter holder Attach the roll paper adapter in which roll paper has been set. Adapter guides Guides for attaching roll paper. Move the roll paper adapter along these guides to attach it to the adapter holder.
-
Page 13: Side/Back
SC-P20000 Series/SC-P10000 Series User's Guide Introduction Side/Back Status light The color indicates the network transmission speed. Red : 100Base-T Green: 1000Base-T LAN port Connects the LAN cable. Data light The network connection status and data reception are indicated by a lit or flashing light. - Page 14 SC-P20000 Series/SC-P10000 Series User's Guide Introduction AC inlet Connect the supplied power cable here. Option slot Slot to connect the optional hard disk unit or Adobe PostScript 3 Expansion Unit. Vents Vents air from inside the printer. Do not block the vents.
-
Page 15: Roll Paper Adapter
SC-P20000 Series/SC-P10000 Series User's Guide Introduction Roll paper adapter Control panel Use the supplied roll paper adapter when loading roll paper onto the printer. “Attaching the Roll Paper Adapter” on page 31 Adapter lock lever Lift to unlock, lower to lock. Unlock when attaching roll paper to the adapter, lock once the roll is attached. - Page 16 SC-P20000 Series/SC-P10000 Series User's Guide Introduction ❏ Pressing this button displays the Load/Remove Displays the menu for the tab currently selected in the display. Paper menu. Instructions for loading or removing “Using the Control Panel Menu” on page 115 the paper can be displayed by highlighting either Remove Paper or the type of paper currently ❏...
-
Page 17: Screen View
SC-P20000 Series/SC-P10000 Series User's Guide Introduction , : The Print Queues Tab Screen View Print job information is displayed in the info display area. When you press the Menu button, the Print Queues menu is displayed. “Print Queues menu” on page 122... - Page 18 SC-P20000 Series/SC-P10000 Series User's Guide Introduction : Yellow : The Ink Tab Shows ink cartridge status in the info display area. : Vivid Magenta The Info Display Area As shown in the following illustrations, the - : The Maintenance Tab...
-
Page 19: Features
By implementing technology to reduce slight differences on the right and left when feeding roll paper, along with Epson's original sensor technology, we have drastically improved the precision for paper feeding. By realizing minute paper feeding control, we... -
Page 20: Superior Ease Of Use
You can use two types of black ink according to the The Epson Color Calibration Utility software media being used. Photo Black which realizes a provided on the Epson homepage allows you to easily smooth, professional finish on glossy paper, and perform color calibration using the printer's built-in Matte Black which increases black optical density sensors. -
Page 21: Notes On Usage And Storage
SC-P20000 Series/SC-P10000 Series User's Guide Introduction PostScript data printing Notes on Usage and The installation of the Adobe PostScript 3 Expansion Storage Unit allows you to print PostScript data accurately and stably. Hardware RIP is highly reliable and simple to use. -
Page 22: Notes When Not Using The Printer
SC-P20000 Series/SC-P10000 Series User's Guide Introduction ❏ Store the printer after confirming that the print paper's requirements are met. For more details, see the documentation supplied with the paper. head has been capped (the print head is Also, when operating in dry areas, air conditioned positioned at the far right). -
Page 23: Notes On Handling Paper
❏ Ink cartridges that have been stored at low Notes on Handling temperatures for an extended period should be allowed to return to room temperature over a ❏ Use Epson special media under normal room period of four hours. conditions (temperature: 15 to 25°C, humidity: 40 to 60%). - Page 24 Typically, printouts and photos fade over time (color distortion) due to the effects of light and various constituents in the air. This also applies to Epson special media. However, with the correct storage method, the degree of color distortion can be minimized.
-
Page 25: Introducing The Software
The supplied Software Disc contains the following software. For details on using the software, see the PDF manuals or the on-line help for the software in question. Note: You can upgrade the software supplied. Check for the latest versions on the Epson website. http://www.epson.com Software Name... -
Page 26: Summary Of The Printer Driver
SC-P20000 Series/SC-P10000 Series User's Guide Introduction Mac OS X Summary of the Printer Driver The main functions of the printer driver are described below. ❏ Converts print data received from applications into printable data and sends it to the printer. - Page 27 The screens displayed differ according to the operating system being used as shown below. If there is no disk drive available, access http:// epson.sn/, and then search for this product. Windows Click Information for Manuals and Applications. Check the folder containing the necessary software, and install.
-
Page 28: Software On The Website
LFP Accounting Tool Epson Color Calibration Utility Software that performs calibrations using the printer's built-in sensors. This software allows you to make enlarged copies using an Epson scanner. Check for CopyFactory supported scanners on the Epson website. * Windows only... -
Page 29: Remote Manager
❏ Other than Windows 8.1/Windows 8 Click the Start button, click the installed software name from All Programs (All apps or Programs) or in the folder named EPSON, and then select the software you want to start. ❏ Mac OS X... -
Page 30: Uninstalling Software
Uninstall/Change (or Change/ Printer Driver Remove/Add or remove). Use the "Uninstaller". You can remove EPSON Status Monitor 3 and the printer driver by selecting EPSON Downloading the Uninstaller SC-XXXXX Printer Uninstall. Download the Uninstaller from the Epson website. -
Page 31: Basic Operations
SC-P20000 Series/SC-P10000 Series User's Guide Basic Operations Attaching the Roll Paper Adapter Basic Operations Turn on the printer by pressing the P button. Loading and Removing Note: After finishing operations, return the support bar the Roll Paper to the storage position. - Page 32 SC-P20000 Series/SC-P10000 Series User's Guide Basic Operations Move the size switch levers of the two supplied Note: roll paper adapters in accordance with the When removing the roll rests, hold down the roll-core size (core diameter) of the roll paper button and remove them up and diagonally.
-
Page 33: Loading Roll Paper
SC-P20000 Series/SC-P10000 Series User's Guide Basic Operations Attach an adapter to each end of the roll. Loading Roll Paper Push the adapters in until they are fully inserted in the roll, with no gaps. Buttons that are used in the following settings Lower the lock levers to lock the adapters in place. - Page 34 SC-P20000 Series/SC-P10000 Series User's Guide Basic Operations Remove the roll paper from the roll stand, slide Note: the roll paper right until it contacts the adapter The cloth in the paper slot section may have been guide, and then slide the roll slowly inside.
-
Page 35: Cutting The Roll Paper
Note: The cut end may bend when paper that is wider than 44 inches is cut by the SC-P20000 Series. Improve The printer is equipped with a built-in cutter. You can cutting by pressing the part, as seen below, to use the cut roll paper after printing by using one of the part in a raised position. - Page 36 SC-P20000 Series/SC-P10000 Series User's Guide Basic Operations Press the ) button. While viewing the inside Note: of the printer through the window, hold down ❏ Disable printer driver Auto Cut and printer Auto the d button until the cutting position reaches Cut options when using the auto take-up reel unit.
-
Page 37: Removing Roll Paper
SC-P20000 Series/SC-P10000 Series User's Guide Basic Operations Open the roll paper cover. Removing Roll Paper This section describes how to remove and store roll paper after printing. The rollers may leave impressions on paper that is left in the printer. -
Page 38: Loading And Removing Cut Sheets
SC-P20000 Series/SC-P10000 Series User's Guide Basic Operations Lift the adapter lock levers on both sides to Loading and Removing release the roll paper adapters. Cut Sheets The following cut sheet sizes can be loaded. 210 to 1118 mm 279.4 to 1580 mm (paper thickness 0.08 to 0.8 mm) - Page 39 SC-P20000 Series/SC-P10000 Series User's Guide Basic Operations Press the M button on the control panel. Press Note: the d/u button to highlight Cut Sheet and The paper that can be used in the printer is detailed in press the Z button.
-
Page 40: Removing Cut Sheets
To remove paper that was loaded but not used, press the M button and select Remove Paper. Button that is used in the following settings ❏ For Epson Color Calibration Utility color charts, insert the page from the top with the printed side facing up. -
Page 41: Loading And Removing Poster Board
SC-P20000 Series/SC-P10000 Series User's Guide Basic Operations Loading and Removing Paper Size Front (a) Back (b) Poster Board 880 mm 505 mm 24 x 30 inch 612 mm 237 mm This section describes how to load and remove poster 30 x 40 inch... - Page 42 SC-P20000 Series/SC-P10000 Series User's Guide Basic Operations Turn on the printer by pressing the P button. While aligning the edge of the board along the inner projecting support, insert it with the printable side facing up. Note: After finishing operations, return the support bar to the storage position.
-
Page 43: Removing Poster Board
SC-P20000 Series/SC-P10000 Series User's Guide Basic Operations Align the right and leading edges of the paper Buttons that are used in the following settings with the lines on the poster board support as shown in (2). Confirm that the Paper Eject message is displayed in the control panel. -
Page 44: Checking And Setting The Paper Type
SC-P20000 Series/SC-P10000 Series User's Guide Basic Operations Checking and Setting the Paper Type Settings Paper Type Buttons that are used in the following settings Before you start printing, check the paper loaded in the printer on the control panel's screen, and if it differs, make settings again. -
Page 45: Replacing Paper
When the selected paper type in the printer and the printer driver differ, the following setting is applied. ❏ Genuine Epson paper is selected in the printer: The printer driver setting is applied when printing. ❏ When custom paper is selected in the printer: The printer setting is applied when printing. -
Page 46: Using The Auto Take-Up Reel Unit
Paper width that can be taken up This differs from the width of paper that can be printed. SC-P20000 Series: 406 mm (16 inches) to 1,626 mm (64 inches) SC-P10000 Series: 406 mm (16 inches) to 1,118 mm... -
Page 47: Using The Control Panel
SC-P20000 Series/SC-P10000 Series User's Guide Basic Operations : The auto take-up reel unit is Caution: ready for use. ❏ Fix the roll core for the auto take-up reel unit Flickering : The auto take-up reel unit is in place as described in the documentation. -
Page 48: Attaching The Roll Core
SC-P20000 Series/SC-P10000 Series User's Guide Basic Operations ❏ The sensor on the stand is lowered, and the Attaching the Roll Core casters on the front are parallel to the stand Note: Important: If the inside sensor is at an angle to the floor and ❏... - Page 49 SC-P20000 Series/SC-P10000 Series User's Guide Basic Operations Unlock the unit on which flange L is installed, Install the roll core with the flange attached and then move it until it is to the left of the roll into the unit on the right of the printer.
-
Page 50: Attaching The Paper
SC-P20000 Series/SC-P10000 Series User's Guide Basic Operations Make sure that the roll core is fixed in place Note: and cannot move around. Paper is attached even if you do not follow the guide on the control panel. The procedure when... - Page 51 SC-P20000 Series/SC-P10000 Series User's Guide Basic Operations When you have finished sticking to the roll Hold down the Manual button in the taking-up direction to wind the paper around the roll core, press the r button. core twice. Check that the Auto switch on the auto take-up...
- Page 52 SC-P20000 Series/SC-P10000 Series User's Guide Basic Operations Printed side in Move the support bar to position A. For the A position, see the label attached to the stand section. Align flange R for the tensioner with the right Press the r button after moving the support bar.
-
Page 53: Using The Tensioner
SC-P20000 Series/SC-P10000 Series User's Guide Basic Operations ❏ Singleweight Matte Paper When you installed the tensioner, press the r button. Tensioner can be used for some other papers than the above. The following effects are expected. Set the Auto to the taking-up direction. -
Page 54: Removing Paper From The Auto Take-Up Reel Unit
SC-P20000 Series/SC-P10000 Series User's Guide Basic Operations Attach flange L to the end of the last pipe you Set the Auto to Off. attached. Flange L is not secured here. After placing it in the slack part of the paper wound around the auto take-up reel unit, make adjustments. -
Page 55: Storing The Sensor
SC-P20000 Series/SC-P10000 Series User's Guide Basic Operations Secure with tape so that it does not unwind Loosen the screw on the sensor at the front to from the paper core. remove the sensor, and then attach the sensor to the unit above. -
Page 56: Using The Paper Basket
SC-P20000 Series/SC-P10000 Series User's Guide Basic Operations Using the Paper Basket Note: For other operations, we recommend moving the support bar to the storing position. The paper basket collects paper from the printer, preventing it falling to the floor and becoming creased or dirty. -
Page 57: Basic Printing Methods
SC-P20000 Series/SC-P10000 Series User's Guide Basic Operations Remove the cloth from the support bars. Basic Printing Methods For the SC-P10000 Series you need to remove from three points. This section explains how to print and how to cancel printing. Printing (Windows) Make print settings such as paper size and paper source from the connected computer and then print. -
Page 58: Printing (Mac Os X)
SC-P20000 Series/SC-P10000 Series User's Guide Basic Operations The progress bar is displayed, and printing starts. Select the Media Type, Color, Print Quality, Mode, and Source according to the paper loaded in the printer. Screen while printing The following screen is displayed when you start printing, and the progress bar (the computer's processing status) is displayed. - Page 59 SC-P20000 Series/SC-P10000 Series User's Guide Basic Operations When you have created the data, from the File Check that this printer is selected, and then set menu of the application, click Print and so on. the paper size. Select the paper size, borderless printing options, and paper source in the Paper Size menu.
-
Page 60: Canceling Printing (Windows)
SC-P20000 Series/SC-P10000 Series User's Guide Basic Operations The printer icon is displayed in the Dock while Canceling Printing (Windows) printing. Click the printer icon to display the status. You can check the progress of the current print job When the computer has finished sending data to the and the printer status information. -
Page 61: Canceling Printing (Mac Os X)
SC-P20000 Series/SC-P10000 Series User's Guide Basic Operations Printable area Canceling Printing (Mac OS X) When the computer has finished sending data to the This section describes the printable areas for the printer. printer, you cannot cancel the print job from the computer. -
Page 62: Cut Sheets Printable Area
❏ The print size does not change even when the UltraSmooth Fine Art paper/Baryta margins are changed. When you want to change the margins of Epson Special Media, select the paper you are using from Note: Select Reference Paper in the Paper menu in Custom When printing multiple pages without using auto cut, Paper Setting and select Roll Paper Margin. -
Page 63: Setting Power Saving
SC-P20000 Series/SC-P10000 Series User's Guide Basic Operations About Power Management Setting Power Saving You can adjust the time before Power Management is applied. Any increase will affect the printer’s energy efficiency. Please consider the environment before The printer offers the following two power making any change. -
Page 64: Using The Optional Hard Disk Unit
USB, you can and resume printing, making your work more efficient. also perform operations from the HDD utility. You can download the software from the Epson home page. ❏ Print jobs that specify sources that differ from that selected with the printer “Software on the Website”... -
Page 65: Data On A Hard Disk
SC-P20000 Series/SC-P10000 Series User's Guide Using the Optional Hard Disk Unit Saving Print Jobs Data on a Hard Disk Data on a hard disk cannot be copied to a computer This section describes the printer driver settings used or other device. Even when print jobs have been to save print jobs. - Page 66 SC-P20000 Series/SC-P10000 Series User's Guide Using the Optional Hard Disk Unit Making Settings for Mac OS X On the Page Layout screen, click the Settings When you have created the data, from the File button from Hard Disk Unit, and then select menu of the application, click Print and so on.
-
Page 67: Viewing And Printing Saved Print Jobs
SC-P20000 Series/SC-P10000 Series User's Guide Using the Optional Hard Disk Unit Saves the job to the hard disk at the same Viewing and Printing time as printing. When Print after Transmission Completed is selected, Saved Print Jobs printing starts after the print job has been saved to the hard disk. -
Page 68: Using The Printer Driver(Windows)
SC-P20000 Series/SC-P10000 Series User's Guide Using the Printer Driver(Windows) Right-click your printer icon, and click Using the Printer Printing preferences. Driver (Windows) Displaying the Settings Screen You can access the printer driver in the following ways: The printer driver setting screen is displayed. -
Page 69: Displaying Help
SC-P20000 Series/SC-P10000 Series User's Guide Using the Printer Driver(Windows) Displaying Help Right-click on the item you want to check and display You can access the printer driver help in the following Right-click the item, and then click Help. ways: ❏ Click Help ❏... -
Page 70: Customizing The Printer Driver
Media Type on the printer settings screen and can be selected. Important: When using commercially available paper in Epson Color Calibration Utility, make sure you register the paper information. Display the printer driver's Main screen. “Printing (Windows)” on page 57... - Page 71 Click Custom Settings. Config..When registering a commercially available media as custom paper, select the Epson special media that is closest to the paper you are using. When you enter a name in Name and click Save, the settings are saved in Settings List.
-
Page 72: Rearranging Display Items
SC-P20000 Series/SC-P10000 Series User's Guide Using the Printer Driver(Windows) Order or group items in the List box. Rearranging display items ❏ You can move and order items by dragging and dropping. To display frequently used items right away, you can arrange Select Setting, Media Type, and Paper Size ❏... -
Page 73: Summary Of The Utility Tab
Utility tab. Monitoring Preferences You can select the error notifications displayed on the EPSON Status Monitor 3 screen, or register a shortcut for the Utility icon to the Taskbar. Note: If you select the Shortcut Icon on the Monitoring Preferences screen, the Utility shortcut icon is displayed on the Windows Taskbar. - Page 74 “Software on the Website” on page 28 Driver Update Click to connect to the Epson home page and check if there is a newer version of the current printer driver available. If a new printer driver is found, the printer...
-
Page 75: Using The Printer Driver(Mac Os X)
(1) Select Print Settings from the list, and then OS version. select the Epson special media that is the closest to the paper you are using in Media “Printing (Mac OS X)” on page 58 Type. -
Page 76: Deleting From Presets
SC-P20000 Series/SC-P10000 Series User's Guide Using the Printer Driver(Mac OS X) Click Save Current Settings as Preset… from Select the setting you want to delete, click Presets. Delete, and then click OK. Enter a name, and then click OK. Note:... -
Page 77: Using Epson Printer Utility 4
For details, see the EPSON LFP Remote Panel 2 help. Note: If EPSON LFP Remote Panel 2 is grayed out, the application is not installed on the computer being used. You can download the latest applications from the Epson website. -
Page 78: Printing Varieties
SC-P20000 Series/SC-P10000 Series User's Guide Printing Varieties Printing Varieties Color Management Settings Windows XP No Color Management (other than the above) Auto Color Adjustment by PhotoEnhance In other applications, set No Color Management. (Windows Only) Note: For information on supported operating systems, The printer driver for this printer comes with the see the website for the application in question. -
Page 79: Correct Color And Print
SC-P20000 Series/SC-P10000 Series User's Guide Printing Varieties Select Custom from Mode, and then select Correct color and print PhotoEnhance. To make more detailed adjustments, click The printer driver automatically and internally Advanced, and then proceed to Step 4. corrects colors to match the color space. You can select from the following color correction modes. - Page 80 SC-P20000 Series/SC-P10000 Series User's Guide Printing Varieties Make the necessary settings. Note: For information on supported operating systems, See the printer driver help for more details on see the website for the application in question. each item. Setting example for Adobe Photoshop CC Open the Print screen.
- Page 81 Select Color Matching from the list, and then each item. click EPSON Color Controls. Note: EPSON Color Controls will not be available in the following applications if Step 1 is omitted. ❏ Adobe Photoshop CS3 or later ❏ Adobe Photoshop Lightroom 1 or later ❏...
-
Page 82: Printing Black And White Photos
SC-P20000 Series/SC-P10000 Series User's Guide Printing Varieties Printing Black and White Note: For information on supported platforms, see the Photos website for the application in question. Setting example for Adobe Photoshop CC You can print black and white photos with rich gradation by adjusting the image data color by the Open the Print screen. - Page 83 SC-P20000 Series/SC-P10000 Series User's Guide Printing Varieties To make detailed adjustments, proceed to Step 4. If you do not want to make adjustments, Making Settings for Mac OS X proceed to Step 6. When using applications featuring a color management function, specify how to adjust colors from these applications.
- Page 84 SC-P20000 Series/SC-P10000 Series User's Guide Printing Varieties Display the Print screen, select Print Settings Make the necessary settings. from the list, and then select Advanced B&W See the printer driver help for more details on Photo as the Color. each item.
-
Page 85: Borderless Printing
Use settings such as Page Setup in the “Epson Special Media Table” on page 182 applications to set the size of the image data as follows. “Supported Commercially Available Paper” on... -
Page 86: About Roll Paper Cutting
SC-P20000 Series/SC-P10000 Series User's Guide Printing Varieties About Roll Paper Cutting When performing borderless printing on roll paper, you can specify whether it is left and right borderless printing or all edges borderless printing, and how to cut the paper in the printer driver's Roll Paper Option. The cutting operation for each value is shown in the following chart. -
Page 87: Setting Procedures For Printing
SC-P20000 Series/SC-P10000 Series User's Guide Printing Varieties Select Auto Expand or Retain Size as the Setting Procedures for Printing Method of Enlargement. If you select Auto Expand, set how much of the Making Settings in Windows image goes beyond the edge of the paper as When the printer driver's Main screen is shown below. - Page 88 SC-P20000 Series/SC-P10000 Series User's Guide Printing Varieties Where XXXX is the actual paper size, such as A4. When using roll paper, click Roll Paper Option, and then set Auto Cut option. “About Roll Paper Cutting” on page 86 Note: If page setting options are not available in the application's print dialog, display the page settings dialog.
-
Page 89: Enlarged/Reduced Printing
SC-P20000 Series/SC-P10000 Series User's Guide Printing Varieties Enlarged/Reduced Printing You can enlarge or reduce the size of your data. There are three setting methods. ❏ Fit to Page printing Automatically enlarges or reduces the image size to fit the paper size. -
Page 90: Fit To Page/Scale To Fit Paper Size
SC-P20000 Series/SC-P10000 Series User's Guide Printing Varieties Check other settings, and then start printing. Fit to Page/Scale to fit paper size Making Settings in Windows Making Settings for Mac OS X When the printer driver's Page Layout screen Open the Print screen, select Paper Handling... -
Page 91: Fit To Roll Paper Width(Windows Only)
SC-P20000 Series/SC-P10000 Series User's Guide Printing Varieties Select Fit to Roll Paper Width. Fit to Roll Paper Width (Windows Only) Display the printer driver Main tab and select Roll Paper for Source. “Printing (Windows)” on page 57 Display the Page Layout tab and choose a Page Size that matches the page size used in the document size. -
Page 92: Custom Scale Setting
SC-P20000 Series/SC-P10000 Series User's Guide Printing Varieties Custom Scale Setting Making Settings for Mac OS X When the Print screen is displayed, select the Making Settings in Windows size of the paper loaded in the printer from the When the printer driver's Page Layout screen Paper Size list. -
Page 93: Multi-Page Printing
SC-P20000 Series/SC-P10000 Series User's Guide Printing Varieties “Printing (Mac OS X)” on page 58 Multi-Page Printing You can print multiple pages of your document on one sheet of paper. If you print continuous data prepared at A4 size, it is printed as shown below. - Page 94 SC-P20000 Series/SC-P10000 Series User's Guide Printing Varieties Making Settings in Windows Making Settings for Mac OS X When the printer driver's Page Layout screen When the Print screen is displayed, select is displayed, select the Multi-Page check box, Layout from the list, and then specify the select N-up, and then click Settings.
-
Page 95: Poster Printing (Enlarge To Cover Several Sheets And Print - Windows Only)
SC-P20000 Series/SC-P10000 Series User's Guide Printing Varieties Poster Printing (Enlarge Setting Procedures for Printing to cover several sheets Prepare the print data using applications. and print - Windows only) The printer driver automatically enlarges the image data when printing. The poster printing function automatically enlarges When the printer driver's Page Layout screen and divides the print data. - Page 96 Note: If Borderless Poster Print is grayed out, the selected paper or the size does not support borderless printing. “Epson Special Media Table” on page 182 “Supported Commercially Available Paper” on page 195 When with margins is selected: Clear Borderless Poster Print.
-
Page 97: Joining The Output Paper Together
SC-P20000 Series/SC-P10000 Series User's Guide Printing Varieties The following section describes how to join four Joining the output paper printed pages together. together Ready the two top sheets and trim the excess from the left sheet by cutting along the line... - Page 98 SC-P20000 Series/SC-P10000 Series User's Guide Printing Varieties With the two sheets overlapping, trim the Trim the bottom from the upper sheets by excess by cutting along the line joining the two cutting along the line joining the two guides cut guides (the lines to the left of the X marks).
- Page 99 SC-P20000 Series/SC-P10000 Series User's Guide Printing Varieties With the two sheets overlapping, trim the Join the upper and lower sheets together. excess by cutting along the line joining the two Use an adhesive tape to stick the backs of the cut guides (the lines above the X marks).
-
Page 100: Printing At Non-Standard Sizes
See the following for paper sizes supported by the printer. “Printable area” on page 61 Paper SC-P20000 Series: 210 to 1626 mm Width SC-P10000 Series: 210 to 1118 mm Paper Windows: 279.4 to 15,000 mm Height Mac OS X: 279.4 to 15,240 mm... - Page 101 SC-P20000 Series/SC-P10000 Series User's Guide Printing Varieties Making Settings in Windows Note: When the printer driver's Main screen is ❏ To change the paper size you saved, select displayed, click User Defined. the paper size name from the list on the left.
-
Page 102: Banner Printing (On Roll Paper)
SC-P20000 Series/SC-P10000 Series User's Guide Printing Varieties Click +, and then enter the paper size name. Banner printing (on roll paper) You can print banners and panoramic pictures if you create and set print data for banner printing in your application. - Page 103 SC-P20000 Series/SC-P10000 Series User's Guide Printing Varieties Making Settings in Windows Click User Defined and match the paper size to In the printer driver's Main screen, select the size of the data if necessary. Media Type. Note: “Printing (Windows)” on page 57...
-
Page 104: Layout Manager(Windows Only)
SC-P20000 Series/SC-P10000 Series User's Guide Printing Varieties “Printing (Mac OS X)” on page 58 Layout Manager (Windows Only) The Layout Manager function allows you to place multiple pieces of print data created in different applications on the paper freely and print them at once. -
Page 105: Setting Procedures For Printing
SC-P20000 Series/SC-P10000 Series User's Guide Printing Varieties Placing the same data Open the file you want to print in your application. Select Layout Manager in the Main tab of the printer driver and choose an option for Size that matches the size of the document created in the application. - Page 106 SC-P20000 Series/SC-P10000 Series User's Guide Printing Varieties The overall size and placement of the objects Click File - Properties, and make print settings can be changed using the Preferences and on the printer driver screen. Arrangement options in the File menu.
-
Page 107: Saving And Recalling Settings
SC-P20000 Series/SC-P10000 Series User's Guide Printing Varieties Saving and Recalling Settings You can save the Layout Manager screen arrangement and setting contents to a file. If you need to close your application in the middle of a job, you can save it to a file and then open it later to continue your work. -
Page 108: Color Management Printing
SC-P20000 Series/SC-P10000 Series User's Guide Color Management Printing Color Management Print Color Management Settings Printing You can perform color management printing using this printer's printer driver in the following two ways. About Color Management Choose the best method according to the application you are using, the operating system environment, the aim of the printout, and so on. -
Page 109: Setting Profiles
SC-P20000 Series/SC-P10000 Series User's Guide Color Management Printing Setting color Setting profiles management with the Settings for the input profile, printer profile, and intent (matching method) vary between three types of applications color management printing since their color management engines are used differently. This is... - Page 110 SC-P20000 Series/SC-P10000 Series User's Guide Color Management Printing For Mac OS X Set color management to off. Select Print Settings from the list, and then For Windows select Off (No Color Adjustment) as the Color In the Main screen, select Custom as the Mode Settings setting.
-
Page 111: Setting Color Management With The Printer Driver
SC-P20000 Series/SC-P10000 Series User's Guide Color Management Printing Setting example for Adobe Photoshop CC Setting color Open the Print screen. management with the Select Color Management, select Printer Manages Colors as the Color Handling printer driver setting, and then click Print. -
Page 112: Color Management Printing By Colorsync (Mac Os X)
SC-P20000 Series/SC-P10000 Series User's Guide Color Management Printing Select Color Matching from the list, and then When Epson special media is selected for click ColorSync. Media Type in the Main screen, the printer profile corresponding to the media type is automatically selected and displayed in the Printer Profile Description box. - Page 113 SC-P20000 Series/SC-P10000 Series User's Guide Color Management Printing In the printer driver's Main screen, select Color Management Custom as the Mode, select ICM, and then Settings click Advanced. Windows 8.1, Printer Manages Colors “Printing (Windows)” on page 57 Windows 8,...
- Page 114 SC-P20000 Series/SC-P10000 Series User's Guide Color Management Printing Intent Explanation Perceptual Converts the data so that a more visually natural image is produced. This feature is used when a wider gamut of color is used for image data. Relative Converts the data so that a set...
-
Page 115: Using The Control Panel Menu
SC-P20000 Series/SC-P10000 Series User's Guide Using the Control Panel Menu Using the Control Panel Menu Menu Operations The steps for displaying the various menus are shown below. The example below shows the steps for accessing the Paper menu. Only displayed when the optional hard disk unit or Adobe PostScript 3 Expansion Unit has been connected. -
Page 116: Menu List
Cut Sheet Poster Board Use Take-up Unit Displayed when the auto take-up reel unit is connected and roll paper is loaded. Select Paper Roll Paper Displays supported Epson paper types, custom paper Type types, and others. Cut Sheet Poster Board... - Page 117 SC-P20000 Series/SC-P10000 Series User's Guide Using the Control Panel Menu Menu item Description Custom Paper XXXXXXXXXXXX Select Reference Photo Paper Lists supported Epson Setting XXXXXXXX Paper media. Proofing Paper (name of custom paper Fine Art Paper type) Matte Paper Plain Paper...
-
Page 118: Maintenance
SC-P20000 Series/SC-P10000 Series User's Guide Using the Control Panel Menu Maintenance “Maintenance menu” on page 128 Menu item Description Nozzle Check Print Check Pattern Press Z to start printing. Printless Nozzle Check Press Z to start checking. Head Cleaning Select Nozzle & Level Displays the combination of nozzle arrays. - Page 119 SC-P20000 Series/SC-P10000 Series User's Guide Using the Control Panel Menu Menu item Description Printer Setup Roll Paper Setup Auto Cut On, Off Refresh Margin On, Off Page Line On, Off Roll End Option Continue, Stop Printing, Reprint Roll Paper Tension...
- Page 120 SC-P20000 Series/SC-P10000 Series User's Guide Using the Control Panel Menu Menu item Description PS3 Expansion Version PostScript, PDF Option Setup Unit PS Status Sheet Press Z to start printing. Output Size Auto, A Series, US-ANSI, US-ARCH, B Series, Photo Series,...
- Page 121 SC-P20000 Series/SC-P10000 Series User's Guide Using the Control Panel Menu Menu item Description Administrator Change Password Enter a password. Menu Operational Network Setup Password Required, No Password Required Control Powerful Cleaning Displays the combination of nozzle arrays. Timer Cleaning On, Off...
-
Page 122: Menu Descriptions
SC-P20000 Series/SC-P10000 Series User's Guide Using the Control Panel Menu Menu Descriptions Print Queues menu This menu is only displayed when the optional hard disk unit or Adobe PostScript 3 Expansion Unit has been connected. When the printer printed without using the printer driver included with the printer or the PS driver included with the optional Adobe PostScript 3 Expansion Unit, the job names and estimated times in the following table may not be displayed correctly. -
Page 123: Paper Menu
Custom Paper Custom Paper Setting Register paper information when using commercially available paper or when using customized paper settings for genuine Epson paper. See the following table for details on the setting content. “Custom Paper Setting” on page 125 Print Paper List Press the Z button to print a list of custom paper settings. - Page 124 SC-P20000 Series/SC-P10000 Series User's Guide Using the Control Panel Menu Item Description Remaining Displayed when On is selected for Roll Paper Remaining. 1 to 15 m (5 Alert Set within a range from 1 to 15 m to display a warning when the amount of remaining roll paper drops below that limit.
- Page 125 Set each item in the following table for commercially available paper based on the characteristics of the paper. When customizing paper settings for genuine Epson paper, select the corresponding paper type from Select Reference Paper, and then enter your settings. This item has priority over the printer driver and the software RIP settings, when printing.
- Page 126 SC-P20000 Series/SC-P10000 Series User's Guide Using the Control Panel Menu Item Description Drying Time Per Select the time the print head pauses to allow drying after each pass. 0 to 10 seconds (0 Pass Choose from values between 0.0 and 10.0 seconds. Depending on the paper type, the ink may take a while to dry.
- Page 127 SC-P20000 Series/SC-P10000 Series User's Guide Using the Control Panel Menu Item Description Margin Per Page When printing multiple pages without using auto cut, set the margins Normal between pages. Normally, leave the setting at Normal. In Normal, the margins between pages is 30 to 35 mm. However, when the following 30mm paper types are selected, the margins are 65 mm.
-
Page 128: Maintenance Menu
SC-P20000 Series/SC-P10000 Series User's Guide Using the Control Panel Menu Maintenance menu Item Description Nozzle Check Print Check Pattern Press the Z button to print a nozzle check pattern. Inspect the pat- tern visually and perform head cleaning if you detect faint or miss- ing colors. - Page 129 SC-P20000 Series/SC-P10000 Series User's Guide Using the Control Panel Menu Item Description Transportation/Storage Perform this when transporting or storing the printer in an environ- ment of -10°C or less. Press the Z button to put the printer in transport or storage sta-...
-
Page 130: Setup Menu
SC-P20000 Series/SC-P10000 Series User's Guide Using the Control Panel Menu Setup menu Printer Setup *1: Only displayed when the optional hard disk unit or Adobe PostScript 3 Expansion Unit has been connected. * Default setting Roll Paper Setup Item Description... - Page 131 Wide +1 This setting is enabled for the platen gap values of Epson Special Wider +2 Media. Only Standard 0 can be selected when Custom Paper is selected in Select Paper Type.
-
Page 132: Printer Status
Calibration Set- You can make settings whether to enable the calibration data for ting Epson Color Calibration Utility. For details on the calibration procedure and so on, see the software manual. Restore Settings If Yes is selected, the Printer Setup is restored to default values. -
Page 133: Network Setup
Press the Z button to print a list of current printer settings. Choose this option to view settings at a glance. Calibration Date Displays the latest Epson Color Calibration Utility execution date. You can check details on operations and so on in Epson Color Calibration Utility. Network Setup * Default setting... - Page 134 SC-P20000 Series/SC-P10000 Series User's Guide Using the Control Panel Menu Item Description PS Status Sheet If the Z button is pressed, the information of the Adobe PostScript 3 Expansion Unit is printed. Output Size Auto Select the size of the paper used for printing.
- Page 135 SC-P20000 Series/SC-P10000 Series User's Guide Using the Control Panel Menu Item Description Margin Options The position at which the margin is added depends on the Output Standard Size setting, as shown below. ❏ When set to Auto Adds 3 mm of margin (area of in the following illustration) outside the data size (paper size or image size;...
- Page 136 SC-P20000 Series/SC-P10000 Series User's Guide Using the Control Panel Menu Item Description Add Margins The position at which the margin is added depends on the Output Size setting, as shown below. ❏ When set to Auto The result is the same as when Standard is selected.
- Page 137 SC-P20000 Series/SC-P10000 Series User's Guide Using the Control Panel Menu Item Description Quality Draft Choose Print Quality in view of image quality and print speed. Normal Fine Color Mode Specify whether to print in color or switch to black and white and Color then print.
- Page 138 SC-P20000 Series/SC-P10000 Series User's Guide Using the Control Panel Menu Item Description Optimize Edge Quality This function is enabled when printing PDFs, TIFFs, and JPEGs directly. Set this to On if printouts are worn or the colors are uneven on the edges of the paper.
- Page 139 Administrator Menu will only be displayed if the correct password is entered, preventing non-administrators from accidentally changing settings. Keep the password in a safe place. Should you forget the password, contact your dealer or Epson Support. Operational Control Choose whether the administrator password is required to access Network Setup from the control panel or Remote Manager.
- Page 140 SC-P20000 Series/SC-P10000 Series User's Guide Using the Control Panel Menu Item Description Auto Cleaning Auto cleaning is adjusted depending on the clogged status of the Standard nozzles. Auto cleaning is not supported from Printless Nozzle Check. Light Standard: When nozzles are clogged, cleaning is performed automatically.
-
Page 141: Maintenance
SC-P20000 Series/SC-P10000 Series User's Guide Maintenance Auto Nozzle Check Maintenance When anything except for Off is selected, nozzles are checked at the following times and clogged nozzles are detected. When clogged nozzles are detected, cleaning is performed automatically the number of times set on Maintaining the Print the control panel. -
Page 142: Checking For Clogged Nozzles
There are two types of function; one is to automatically detect clogged Use Epson Printer Utility 4 for Mac OS X. nozzles and perform cleaning and another is to perform head cleaning immediately after selecting the “Epson Printer Utility 4 Functions”... -
Page 143: Cleaning The Print Head
SC-P20000 Series/SC-P10000 Series User's Guide Maintenance Example of clogged nozzles From the printer This section explains how to print and confirm a check pattern. To confirm without printing a check pattern, select Printless Nozzle Check in step 4, and If there are areas missing from the pattern, then follow the on-screen instructions. - Page 144 Buttons that are used in the following settings Explanations in this section use the Windows printer driver as an example. Use Epson Printer Utility 4 for Mac OS X. “Using Epson Printer Utility 4” on page 77 Click Head Cleaning from the Utility tab in the printer driver's Properties (or Printing preferences) screen.
-
Page 145: Adjusting Print Misalignments (Head Alignment)
Before starting this procedure, be sure to read the following. If the situation is not improved even after performing “Notes on Head Cleaning” on page 143 Powerful Cleaning, contact your dealer or Epson Support. When you press the Menu button, the Setup menu is displayed. - Page 146 Adjustments are made depending on the paper loaded in the printer. Use Epson Printer Utility 4 for Mac OS X. Make sure that the paper is loaded correctly, and that a Select Paper Type is selected.
- Page 147 SC-P20000 Series/SC-P10000 Series User's Guide Maintenance From the printer Load cut sheets A4 size or larger or roll paper, and then perform Select Paper Type. Before starting this procedure, be sure to read the “Loading and Removing the Roll Paper” on following.
-
Page 148: Paper Feed Adjust
SC-P20000 Series/SC-P10000 Series User's Guide Maintenance Block Pattern Press the Z button. Two types of patterns are printed, and you can make When you select Auto, head alignment is adjustments while inspecting the patterns visually. performed automatically while printing an This is useful for adjusting printouts with an emphasis adjustment pattern. -
Page 149: Block Pattern
SC-P20000 Series/SC-P10000 Series User's Guide Maintenance Block Pattern Compare the colors in the center of the printed patterns, and then select the pattern with the lightest color. Select Paper Feed Adjust on the control panel. This would be pattern 0 in the example shown “Selecting Paper Feed Adjust”... -
Page 150: Replacing Consumables
You can use the same procedure to replace all ink cartridges. Important: Epson recommends the use of genuine Epson ink cartridges. Epson cannot guarantee the quality or reliability of non-genuine ink. The use of non-genuine ink may cause damage that is not covered by Epson’s warranties, and under certain... - Page 151 SC-P20000 Series/SC-P10000 Series User's Guide Maintenance Make sure the printer is on. Important: Do not touch the IC chips on the ink Open the cartridge cover. cartridges. You may not be able to print properly. Open the left, right or both covers for the color you want to replace.
-
Page 152: Replacing Maintenance Boxes
SC-P20000 Series/SC-P10000 Series User's Guide Maintenance Close the cartridge cover. Open the maintenance box cover. Pull out the maintenance box. Important: Lifting the maintenance box up releases the lock, and you can simply pull it straight out. We recommend that you remove and shake the installed ink cartridges once every three months to ensure print quality. -
Page 153: Replacing The Cutter
SC-P20000 Series/SC-P10000 Series User's Guide Maintenance Install the new maintenance box. Buttons that are used in the following settings Remove any paper from the printer. “Removing Roll Paper” on page 37 Important: “Removing Cut Sheets” on page 40 Do not touch the IC chip on the maintenance “Removing Poster Board”... - Page 154 SC-P20000 Series/SC-P10000 Series User's Guide Maintenance After replacing the cutter, press the Z button. The cutter will return to its original position. Remove the material that detached itself from the cutter. Ready is displayed in the control panel when the process is complete.
-
Page 155: Cleaning The Printer
SC-P20000 Series/SC-P10000 Series User's Guide Maintenance Cleaning the Printer Cleaning the inside When some components are dirty, the following occurs. To keep your printer in optimum operating condition, clean it regularly (about once a month). ❏ Roller section Prints are smudged or soiled. - Page 156 SC-P20000 Series/SC-P10000 Series User's Guide Maintenance Ink absorbing areas Open the printer cover. If any dust or paper particles accumulate on part “b” in the illustration, or around that area, Important: use a cleaning stick (provided or consumable) ❏ When cleaning, be sure not to touch the as shown below to wipe it off.
- Page 157 SC-P20000 Series/SC-P10000 Series User's Guide Maintenance Paper feed sensor Important: Using a cotton swab, wipe away any dust or stains on the glass section of the sensor. To ❏ Always use a new cleaning sheet. If you reuse avoid spreading the dirt, wipe from the inside a cleaning sheet, it may actually increase the to the outside.
- Page 158 SC-P20000 Series/SC-P10000 Series User's Guide Maintenance Insert and pull out the sheet the entire length of the paper slot, from left to right. Dispose of the used cleaning sheet.
-
Page 159: What To Do When A Message Is Displayed
Ink cartridge cannot be detected. Insert again or replace ink cartridge. Ink Cartridge Error Insert a genuine Epson ink cartridge approved for use in the printer. Please install the correct ink “Options and Consumable Products” on page 179 cartridge. “Replacing Ink Cartridges” on page 150 Ink Low The ink is low. - Page 160 SC-P20000 Series/SC-P10000 Series User's Guide Problem Solver Messages What to do Paper Load Error Remove and then reload the paper. No paper detected. ❏ Roll Paper Before you reload the paper, cut the edge of the roll paper straight horizontally.
- Page 161 Firmware update failed. Update the firmware again. Restart the printer. If this message appears on the LCD panel again, contact your dealer or Epson Support. Command Error Press the W button and select Job Cancel to stop printing. Confirm that the printer Check driver settings.
- Page 162 Adobe PostScript 3 Expansion Unit. installed. If this message appears on the LCD panel again, contact your dealer or Epson Support. When you are printing via the printer driver included with the printer, you can print regardless of the hard disk status when you select Print only in the Settings dialog box of Hard Disk Unit.
-
Page 163: When A Maintenance Call/Service Call Occurs
AC inlet on the printer, and then reconnect. Turn on the printer again multiple times. If the same call for service is displayed on the LCD panel, contact your dealer or Epson Support for assistance. Tell them the call for service code is "XXXX". -
Page 164: Troubleshooting
SC-P20000 Series/SC-P10000 Series User's Guide Problem Solver Troubleshooting Does the printer port setting match the printer connection port? Check the printer port. Click the Port tab in the printer Properties dialog You cannot print (because the and check the option selected for Print to printer does not work) following port(s). -
Page 165: The Printer Stops Printing
Pause version number of the Windows internal driver. This status. You cannot print in this status. differs from the Epson printer driver version that you installed. Double-click the printer icon in the Devices and Printers, Printers, or Printers and Faxes folder;... -
Page 166: Nothing Prints
Are you using a genuine Epson ink cartridge? pattern can be printed without connecting to a This printer is developed for use with Epson ink computer, you can check the operations and print cartridges. If you use non-Epson ink cartridges, status for the printer. - Page 167 Dust from the surface of the paper accumulates on Epson special media should be used at normal room the cloth attached to the paper slot if the printer is temperature (temperature: 15 to 25°C, humidity: 40 used for a long period of time.
- Page 168 SC-P20000 Series/SC-P10000 Series User's Guide Problem Solver The print is not positioned properly Vertical ruled lines are misaligned. on the media. Is the print head misaligned? (in bidirectional printing) Have you specified the print area? With bidirectional printing, the print head prints Check the print area in the settings of the while moving left and right.
- Page 169 SC-P20000 Series/SC-P10000 Series User's Guide Problem Solver Is the print head scuffing the printed surface? Is the interior of the printer dirty? If the printed surface is being scuffed, set a wider The rollers may need cleaning. Clean the rollers by feeding and ejecting paper.
- Page 170 SC-P20000 Series/SC-P10000 Series User's Guide Problem Solver Cleaning Open the left cartridge cover. Buttons that are used in the following settings Remove the screws. Turn off the printer. Start the printer in head maintenance mode. (1) While holding down the " button, press the P button.
- Page 171 SC-P20000 Series/SC-P10000 Series User's Guide Problem Solver (1) Wipe the edges at the back and front of the Close the cartridge cover. print head. View the print head from the bottom, and clean around it using a cleaning stick. (2) Wipe the gaps in the print head on the left Important: and right.
- Page 172 SC-P20000 Series/SC-P10000 Series User's Guide Problem Solver Attach the screws, and then close the cartridge Wipe the outer areas of the wipers (three cover. points) and the top edges. (1) Wipe the outer areas of the front wipers (two points).
- Page 173 Are you using the printer at normal room “Cleaning the inside” on page 155 temperature? Epson special media should be used at normal room temperature (temperature: 15 to 25°C, humidity: 40 Too much ink is fired. to 60%). For information about paper such as thin...
-
Page 174: Feeding Or Ejecting Problems
Always use new paper. “Borderless Printing” on page 85 Is the paper damp? Do not use paper that is damp. Also, Epson special Is the paper stored correctly? media should be left in the bag until you intend to The paper may expand or contract if it is not stored use it. -
Page 175: Roll Paper Jam
SC-P20000 Series/SC-P10000 Series User's Guide Problem Solver Turn off the printer. Is the paper suction too strong? If you continue to have problems with ejected paper, try lowering the Paper Suction (the amount Turn the printer on. of suction used to keep the paper on the paper feed path). -
Page 176: Others
SC-P20000 Series/SC-P10000 Series User's Guide Problem Solver Remove any torn or crinkled areas. Turn the printer on. After a pause, the message Open printer cover then tear off and remove jammed portion. is displayed. Open the printer cover and move the print head away from the paper jam. - Page 177 When the printer is not turned off normally, the print head may not be capped correctly. If the print Are you using the SC-P20000 Series to print head is left uncapped for a long time, the print on paper that is wider than 44 inches? quality may decline.
- Page 178 If the paper has not been registered, you cannot select it from the Paper Type in Epson Color Calibration Utility. ❏ Register to the printer driver Windows U “Adding a Paper Type ”...
-
Page 179: Appendix
Epson recommends the use of genuine Epson ink cartridges. Epson cannot guarantee the quality or reliability of non-genuine ink. The use of non-genuine ink may cause damage that is not covered by Epson’s warranties, and under certain circumstances, may cause erratic printer behavior. -
Page 180: Others
SC-P20000 Series/SC-P10000 Series User's Guide Appendix Product Name Product number SC-P20000 SC-P20070 SC-P20080 /SC-P10000 /SC-P10070 /SC-P10080 Ink Cartridges (350 ml) Photo Black T9001 T9091 T9021 Cyan T9002 T9092 T9022 Vivid Magenta T9003 T9093 T9023 Yellow T9004 T9094 T9024 Light Cyan... - Page 181 SC-P20000 Series/SC-P10000 Series User's Guide Appendix Product Part number Explanation SC-P20000/ SC-P20080/ SC-P20070/ SC-P10080 SC-P10000/ SC-P10070 ™ Adobe® PostScript® 3 C12C891131 C12C891131 This unit allows you to use the printer as a PostScript Expansion Unit printer. For information on using the unit, see the documentation supplied with the Adobe PostScript 3 Expansion Unit.
-
Page 182: Supported Media
We recommend you use the following Epson special media for high-quality printing results. Note: For information about the media types and appropriate settings for printing on paper other than Epson special media or when using raster image processing (RIP) software, see the documentation supplied with the paper, or contact the dealer of the paper or the manufacturer of the RIP. - Page 183 SC-P20000 Series/SC-P10000 Series User's Guide Appendix Auto head Size Borderless Calibration Take-up alignment 406 mm/16 inches 610 mm/24 inches ✓ ✓ ✓ 914 mm/36 inches FN/B 1118 mm/44 inches 1524 mm/60 inches* * SC-P10000 Series not supported Premium Semigloss Photo Paper (250) ❏...
- Page 184 SC-P20000 Series/SC-P10000 Series User's Guide Appendix Auto head Size Borderless Calibration Take-up alignment 406 mm/16 inches ✓ ✓ ✓ 610 mm/24 inches FN/B 1118 mm/44 inches Premium Luster Photo Paper (260) ❏ ❏ Paper thickness: 0.27 mm Roll core size (core diameter): 3 inches ❏...
- Page 185 SC-P20000 Series/SC-P10000 Series User's Guide Appendix Auto head Size Borderless Calibration Take-up alignment 420 mm/A2 610 mm/24 inches ✓ ✓ 914 mm/36 inches FN/BY ✓ 1118 mm/44 inches 1524 mm/60 inches* * SC-P10000 Series not supported Premium Semigloss Photo Paper (170) ❏...
- Page 186 Epson Proofing Paper White Semimatte ❏ ❏ Paper thickness: 0.25 mm Roll core size (core diameter): 3 inches ❏ : Proofing Paper - Epson Proofing Paper White Semimatte Printer driver settings ❏ : SC-P20000_Series EpsonProofingPaperWhiteSemimatte.icc ICC profile : SC-P10000_Series EpsonProofingPaperWhiteSemimatte.icc ❏...
- Page 187 SC-P20000 Series/SC-P10000 Series User's Guide Appendix Auto head Size Borderless Calibration Take-up alignment 329 mm/13 inches 432 mm/17 inches ✓ * ✓ ✓ 610 mm/24 inches FN/BN 914 mm/36 inches 1118 mm/44 inches * Borderless printing available, but print quality may decline or borderless printing may not be available due to paper expanding or contracting.
- Page 188 SC-P20000 Series/SC-P10000 Series User's Guide Appendix Auto head Size Borderless Calibration Take-up alignment 610 mm/24 inches ✓ 914 mm/36 inches ✓ ✓ 1118 mm/44 inches 1626 mm/64 inches* * SC-P10000 Series not supported Enhanced Matte Paper ❏ ❏ Paper thickness: 0.25 mm Roll core size (core diameter): 3 inches ❏...
- Page 189 SC-P20000 Series/SC-P10000 Series User's Guide Appendix ❏ : SC-P20000_Series WatercolorPaper-RadiantWhite_MK.icc (when ICC profile Matte Black is selected) : SC-P20000_Series WatercolorPaper-RadiantWhite_PK.icc (when Photo Black is selected) : SC-P10000_Series WatercolorPaper-RadiantWhite_MK.icc (when Matte Black is selected) : SC-P10000_Series WatercolorPaper-RadiantWhite_PK.icc (when Photo Black is selected) ❏...
- Page 190 SC-P20000 Series/SC-P10000 Series User's Guide Appendix Auto head Size Borderless Calibration Take-up alignment 432 mm/17 inches 610 mm/24 inches ✓ *1 ✓ 1118 mm/44 inches 1524 mm/60 inches*2 *1 Borderless printing available, but print quality may decline or borderless printing may not be available due to paper expanding or contracting.
-
Page 191: Cut Sheet
SC-P20000 Series/SC-P10000 Series User's Guide Appendix Cut sheet Premium Glossy Photo Paper ❏ Paper thickness: 0.27 mm ❏ : Photo Paper - EPSON Premium Glossy Photo Paper Printer driver settings ❏ : SC-P20000_Series PremiumGlossyPhotoPaper.icc ICC profile : SC-P10000_Series PremiumGlossyPhotoPaper.icc ❏ Supported paper sizes... - Page 192 ✓ * ✓ ✓ EPSON Proofing Paper White Semimatte ❏ Paper thickness: 0.25 mm ❏ : Proofing Paper - Epson Proofing Paper White Semimatte Printer driver settings ❏ : SC-P20000_Series EpsonProofingPaperWhiteSemimatte.icc ICC profile : SC-P10000_Series EpsonProofingPaperWhiteSemimatte.icc ❏ Supported paper sizes...
- Page 193 SC-P20000 Series/SC-P10000 Series User's Guide Appendix ❏ : SC-P20000_Series ArchivalMattePaper_MK.icc (when Matte Black is ICC profile selected) : SC-P20000_Series ArchivalMattePaper_PK .icc (when Photo Black is selected) : SC-P10000_Series ArchivalMattePaper_MK.icc (when Matte Black is selected) : SC-P10000_Series ArchivalMattePaper_PK.icc (when Photo Black is selected) ❏...
- Page 194 SC-P20000 Series/SC-P10000 Series User's Guide Appendix ❏ : SC-P20000_Series UltraSmoothFineArtPaper_MK.icc (when Matte ICC profile Black is selected) : SC-P20000_Series UltraSmoothFineArtPaper_PK.icc (when Photo Black is selected) : SC-P10000_Series UltraSmoothFineArtPaper_MK.icc (when Matte Black is selected) : SC-P10000_Series UltraSmoothFineArtPaper_PK.icc (when Photo Black is selected) ❏...
-
Page 195: Supported Commercially Available Paper
❏ Although plain paper and recycled paper manufactured by other companies can be loaded and fed in the printer as long as they meet the following specifications, Epson cannot guarantee the print quality. ❏ Although other paper types manufactured by other companies can be loaded in the printer as long as they meet the following specifications, Epson cannot guarantee the paper feeding and print quality. - Page 196 508 mm/20 inch * SC-P10000 Series not supported When used with the Epson Color Calibration Utility Even if the specified conditions are met, you cannot use the following paper types. ❏ Paper that is thin and soft (plain paper and so on) ❏...
-
Page 197: Before Printing On Commercially Available Paper
❏ Test the print quality with this printer before purchasing a large amount of paper. When using non-Epson media (Custom Paper), make the paper configuration according to the paper characteristics before printing. Printing without making settings may cause wrinkles, rubbing, uneven colors, and so on. - Page 198 SC-P20000 Series/SC-P10000 Series User's Guide Appendix When you have finished making settings, print using the saved settings and check the results. If you are not satisfied with the print results, check the following and set the item according to the problem.
-
Page 199: Notes When Moving Or Transporting The Printer
SC-P20000 Series/SC-P10000 Series User's Guide Appendix From the printer Notes When Moving or Buttons that are used in the following settings Transporting the Printer This section describes precaution when moving and transporting the product. See the Choosing a Place for the Printer section of the Setup Guide (booklet) in advance to make sure the location is suitable for installing the printer. -
Page 200: Notes When Moving The Printer
SC-P20000 Series/SC-P10000 Series User's Guide Appendix Lower the support bar to the storage position. Notes When Moving the Printer This section assumes that the product is being moved to another location on the same floor without traversing stairs, ramps, or lifts. See the following section for information on moving the printer between floors or to another building. -
Page 201: Notes When Reusing The Printer
SC-P20000 Series/SC-P10000 Series User's Guide Appendix ❏ Remove any optional components if they are When you move the printer while packaging it, place installed. your hands at the positions in the illustration, and To remove the optional components, see the then lift. -
Page 202: System Requirements
SC-P20000 Series/SC-P10000 Series User's Guide Appendix System Requirements Note: When installing, you must log in as a user with an computer administrator account (a user belonging to the Administrators group). System Requirements of the Printer Driver Mac OS X The following chart shows the system requirements to Operating system Mac OS X v10.6.8 or later... -
Page 203: Specifications Table
SC-P20000 Series/SC-P10000 Series User's Guide Appendix Specifications Table Printer Specifications Operating temperature/humidity (optional Hard Disk Unit not installed) Printer Specifications Printing method On-demand ink jet Nozzle configura- 800 nozzles x 10 colors (Cyan, tion Vivid Magenta, Yellow, Photo Black, Matte Black, Dark Gray,... -
Page 204: Information Of Eu Declaration Of Conformity
SC-P20000 Series/SC-P10000 Series User's Guide Appendix Information of EU Declaration Printer Specifications of Conformity SC-P20000 Series Weight Approx. 171 kg The full text of the EU declaration of conformity for SC-P10000 Series this equipment is available at the following internet Approx. -
Page 205: Where To Get Help
Epson support services for troubleshooting information in your product assistance. If Epson support for your area is not listed documentation. If you have a Web browser and can below, contact the dealer where you purchased your connect to the Internet, access the site at: product. -
Page 206: Help For Users In North America
❏ Computer configuration Epson Helpdesk ❏ Description of the problem Epson Helpdesk is provided as a final backup to make sure our clients have access to advice. Operators on the Helpdesk can aid you in installing, configuring Note: and operating your Epson product. -
Page 207: Help For Users In Singapore
SC-P20000 Series/SC-P10000 Series User's Guide Where To Get Help ❏ Sales enquiries and product information We encourage you to have all the relevant information on hand when you ring. The more information you ❏ Product usage questions or problems prepare, the faster we can help solve the problem. This information includes your Epson product ❏... -
Page 208: Help For Users In India
Kong Limited. Phone: 603-56288222 Internet Home Page ❏ Enquiries on repair services & warranty, product Epson Hong Kong has established a local home page usage and technical support (Techline) in both Chinese and English on the Internet to Phone: 603-56288333 provide users with the following information: ❏... -
Page 209: Help For Users In The Philippines
(9AM - 6PM) Prefix local STD code Help for Users in the Philippines To obtain technical support as well as other after sales services, users are welcome to contact the Epson Philippines Corporation at the telephone and fax numbers and e-mail address below:... -
Page 210: Open Source Software License
Program (each is defined in Section 5) until five (5) years after the discontinuation of same model of this printer product. If you desire to receive the source code above, please see the “Contacting Epson Support” in the User’s Guide, and contact the customer support of your region. You shall comply with the license terms of each open source software program. -
Page 211: Bonjour
SC-P20000 Series/SC-P10000 Series User's Guide Software License Terms This printer product includes the open source software program “Bonjour” which applies the terms and conditions provided by owner of the copyright to the “Bonjour”. Net-SNMP license This printer product includes the open source software program “Net-SNMP” which applies the terms and conditions provided by owner of the copyright to the “Net-SNMP”. - Page 212 SC-P20000 Series/SC-P10000 Series User's Guide Software License Terms 1. General; Definitions. This License applies to any program or other work which Apple Computer, Inc. ("Apple") makes publicly available and which contains a notice placed by Apple identifying such program or work as "Original Code"...
- Page 213 SC-P20000 Series/SC-P10000 Series User's Guide Software License Terms (a) You must retain and reproduce in all copies of Original Code the copyright and other proprietary notices and disclaimers of Apple as they appear in the Original Code, and keep intact all notices in the Original Code that refer to this License;...
- Page 214 SC-P20000 Series/SC-P10000 Series User's Guide Software License Terms 6. Additional Terms. You may choose to offer, and to charge a fee for, warranty, support, indemnity or liability obligations and/or other rights consistent with the scope of the license granted herein ("Additional Terms") to one or more recipients of Covered Code.
- Page 215 SC-P20000 Series/SC-P10000 Series User's Guide Software License Terms 11. Ownership. Subject to the licenses granted under this License, each Contributor retains all rights, title and interest in and to any Modifications made by such Contributor. Apple retains all rights, title and interest in and to the Original Code and any Modifications made by or on behalf of Apple ("Apple Modifications"), and such Apple...
-
Page 216: The Printer Sounds Like It Is Printing, But Other Software Licenses
SC-P20000 Series/SC-P10000 Series User's Guide Software License Terms 13.5 Severability. (a) If for any reason a court of competent jurisdiction finds any provision of this License, or portion thereof, to be unenforceable, that provision of the License will be enforced to the maximum extent permissible so as to effect the economic benefits and intent of the parties, and the remainder of this License will continue in full force and effect. - Page 217 SC-P20000 Series/SC-P10000 Series User's Guide Software License Terms Mark Adler, John Bush, Karl Davis, Harald Denker, Jean-Michel Dubois, Jean-loup Gailly, Hunter Goatley, Ed Gordon, Ian Gorman, Chris Herborth, Dirk Haase, Greg Hartwig, Robert Heath, Jonathan Hudson, Paul Kienitz, David Kirschbaum, Johnny Lee, Onno van der Linden, Igor Mandrichenko, Steve P. Miller, Sergio Monesi, Keith Owens, George Petrov, Greg Roelofs, Kai Uwe Rommel, Steve Salisbury, Dave Smith, Steven M.
Need help?
Do you have a question about the SC-P20000 SERIES and is the answer not in the manual?
Questions and answers