Table of Contents
Advertisement
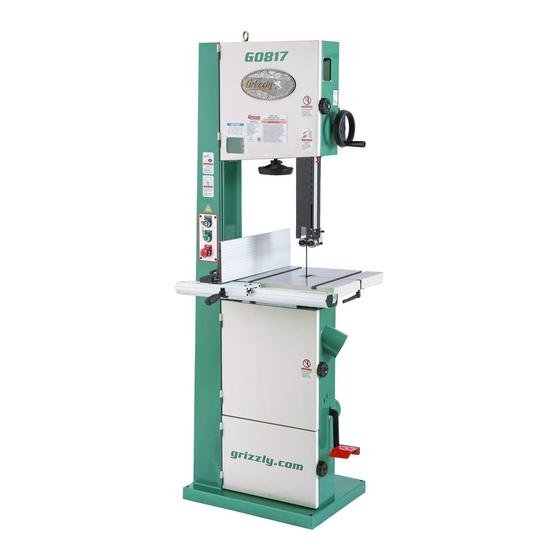
MODEL G0817
14" RESAW BANDSAW
w/FOOT BRAKE
OWNER'S MANUAL
(For models manufactured since 05/16)
COPYRIGHT © OCTOBER, 2016 BY GRIZZLY INDUSTRIAL, INC.
WARNING: NO PORTION OF THIS MANUAL MAY BE REPRODUCED IN ANY SHAPE
OR FORM WITHOUT THE WRITTEN APPROVAL OF GRIZZLY INDUSTRIAL, INC.
#WK18234 PRINTED IN TAIWAN
V1.10.16
Advertisement
Chapters
Table of Contents

Related Manuals for Grizzly G0817


Summary of Contents for Grizzly G0817
- Page 1 (For models manufactured since 05/16) COPYRIGHT © OCTOBER, 2016 BY GRIZZLY INDUSTRIAL, INC. WARNING: NO PORTION OF THIS MANUAL MAY BE REPRODUCED IN ANY SHAPE OR FORM WITHOUT THE WRITTEN APPROVAL OF GRIZZLY INDUSTRIAL, INC. #WK18234 PRINTED IN TAIWAN V1.10.16...
- Page 2 This manual provides critical safety instructions on the proper setup, operation, maintenance, and service of this machine/tool. Save this document, refer to it often, and use it to instruct other operators. Failure to read, understand and follow the instructions in this manual may result in fire or serious personal injury—including amputation, electrocution, or death.
-
Page 3: Table Of Contents
Table of Contents INTRODUCTION ..........2 SECTION 5: ACCESSORIES ......51 Contact Info............ 2 SECTION 6: MAINTENANCE ......53 Manual Accuracy ........... 2 Schedule ............53 Identification ........... 3 Wheel Brushes..........53 Controls & Components ......... 4 Cleaning & Protecting ........53 Machine Data Sheet ........ -
Page 4: Introduction
ID label (see below). This information is required for us to provide proper tech support, and it helps us determine if updated documenta- tion is available for your machine. Manufacture Date Serial Number Model G0817 (Mfd. Since 05/16) -
Page 5: Identification
Do not remove jammed cutoff pieces until blade has stopped. Maintain proper adjustment of blade tension, blade guides, and thrust bearings. d) Adjust upper guide to just clear workpiece. Hold workpiece firmly against table. Model G0817 (Mfd. Since 05/16) -
Page 6: Controls & Components
OFF when pressed. Motor will not start Can be adjusted from 0°–60° left or right, and until switch is reset. Twist clockwise to reset. has stops at 45°L, 90°, and 45°R. G. Fence Lock Handle: Secures fence position. Model G0817 (Mfd. Since 05/16) - Page 7 Hinge-Open Blade Cover: Opens for blade wear on blade and saw components when changes and upper blade guide adjustments not in use. Move UP to quickly release blade (refer to Pages 31–32). tension. Move DOWN to re-tension blade. Model G0817 (Mfd. Since 05/16)
-
Page 8: Table Tilt
Y. Foot Brake: Stops blade wheels and turns motor OFF. Important: After the foot brake is pressed, the machine can be restarted by pressing the ON button. The Emergency Stop button does not have to be reset. Model G0817 (Mfd. Since 05/16) -
Page 9: Machine Data Sheet
Machine Data Sheet MACHINE DATA SHEET Customer Service #: (570) 546-9663 · To Order Call: (800) 523-4777 · Fax #: (800) 438-5901 MODEL G0817 SUPER HEAVY‐DUTY 14" RESAW BANDSAW WITH FOOT BRAKE Product Dimensions: Weight................................319 lbs. Width (side-to-side) x Depth (front-to-back) x Height..............29 x 32-1/2 x 76 in. - Page 10 The information contained herein is deemed accurate as of 12/12/2016 and represents our most recent product specifications. Model G0817 PAGE 2 OF 2 Due to our ongoing improvement efforts, this information may not accurately describe items previously purchased. Model G0817 (Mfd. Since 05/16)
-
Page 11: Section 1: Safety
Everyday ery. Never operate under the influence of drugs or eyeglasses are NOT approved safety glasses. alcohol, when tired, or when distracted. Model G0817 (Mfd. Since 05/16) - Page 12 EXPERIENCING DIFFICULTIES. If at any time debris. Make sure they are properly installed, you experience difficulties performing the intend- undamaged, and working correctly BEFORE ed operation, stop using the machine! Contact our operating machine. Technical Support at (570) 546-9663. -10- Model G0817 (Mfd. Since 05/16)
-
Page 13: Additional Safety For Bandsaws
DO NOT try to stop or slow blade with your This machine is NOT designed to cut metal, hand or the workpiece. glass, stone, tile, etc. -11- Model G0817 (Mfd. Since 05/16) -
Page 14: Section 2: Power Supply
Nominal Voltage ..208V, 220V, 230V, 240V meets the specified circuit requirements. Cycle ............60 Hz Phase ........... Single-Phase Power Supply Circuit ......15 Amps Plug/Receptacle ......NEMA 6-15 -12- Model G0817 (Mfd. Since 05/16) -
Page 15: Extension Cords
The plug must only be inserted into a matching receptacle (see following figure) that is properly installed and grounded in accordance with all local codes and ordinances. -13- Model G0817 (Mfd. Since 05/16) -
Page 16: Converting Voltage To 220V
Wire Nut (14 AWG x 3) ....... 1 • Plug 6-15 ............ 1 • Wire Cutters/Stripper ........1 To convert Model G0817 to 220V: DISCONNECT MACHINE FROM POWER! Cut off existing 5-15 plug. Figure 15. Magnetic switch. Open motor junction box, then remove two Install a 6-15 plug on power cord, according wire nuts indicated in Figure 13. -
Page 17: Section 3: Setup
IMPORTANT: Save all packaging materials until you are completely satisfied with the machine and have resolved any issues between Grizzly or the shipping agent. You MUST have the original pack- aging to file a freight claim. It is also extremely helpful if you need to return your machine later. -
Page 18: Inventory
— Hex Nut M8-1.25 ........1 — Flat Washer 8mm ........1 — Flat Washers 6mm ........2 — Cap Screws M6-1 x 12 ......2 — Hex Wrench 5mm ........1 — Hex Wrench 8mm ........1 -16- Model G0817 (Mfd. Since 05/16) -
Page 19: Hardware Recognition Chart
Hardware Recognition Chart USE THIS CHART TO MATCH UP HARDWARE DURING THE INVENTORY AND ASSEMBLY PROCESS. Flat Head Screw -17- Model G0817 (Mfd. Since 05/16) -
Page 20: Cleanup
Figure 19. T23692 Orange Power Degreaser. Repeat Steps 2–3 as necessary until clean, then coat all unpainted surfaces with a quality metal protectant to prevent rust. -18- Model G0817 (Mfd. Since 05/16) -
Page 21: Site Considerations
Shadows, glare, or strobe effects that may distract access restricted location. or impede the operator must be eliminated. Keep Workpiece Unloading Area Unobstructed 32½" = Electrical Connection Keep Workpiece 28¾" Loading Area Unobstructed Figure 20. Minimum working clearances. -19- Model G0817 (Mfd. Since 05/16) -
Page 22: Lifting & Placing
Figure 21. Lifting bandsaw with eye bolt and machine to power before completing setup chain. process. DO NOT connect to power until instructed later in this manual. Remove pallet and slowly set bandsaw into position. -20- Model G0817 (Mfd. Since 05/16) -
Page 23: Anchoring To Floor
(see Figure 25). Flat Washer Machine Base Lag Shield Anchor Concrete Drilled Hole Figure 23. Popular method for anchoring Table machinery to a concrete floor. Figure 25. Table rotated with gap facing to the right. -21- Model G0817 (Mfd. Since 05/16) - Page 24 (see Figure 30). Figure 27. Table insert and gap screw installed. Lock Lever Fence Base Hex Nut M8-1.25 Figure 30. Fence base lock lever installed. -22- Model G0817 (Mfd. Since 05/16)
- Page 25 Figure 33. Installing fence in vertical position. Fence Face Fence Face Lock Lever Rail Lock Lever in Down (Locked) Position Figure 32. Fence base installed on fence rail. T-Channel Figure 34. Fence installed in horizontal position. -23- Model G0817 (Mfd. Since 05/16)
-
Page 26: Dust Collection
"how-to" book. lection system. See Accessories, beginning on Page 51, for more information. Tug hoses to make sure they do not come off. Note: A tight fit is necessary for proper performance. -24- Model G0817 (Mfd. Since 05/16) -
Page 27: Adjustment Overview
The ing tracking adjustments. shape of the wheels and the orientation of the Disconnect power from the wheels in relation to each other determine how bandsaw before performing the blade tracks. blade tracking adjustments. -25- Model G0817 (Mfd. Since 05/16) - Page 28 Blade Tension Blade Tension blade. Fine tune tracking must be done with Scale Handwheel the bandsaw turned ON. Refer to Page 30 for more information. Figure 38. Blade tensioning controls. -26- Model G0817 (Mfd. Since 05/16)
-
Page 29: Test Run
Connect machine to power by inserting power safety feature of the Emergency Stop but- cord plug into a matching receptacle. ton is NOT working properly and must be replaced before further using the machine. -27- Model G0817 (Mfd. Since 05/16) -
Page 30: Tensioning Blade
Note: Tensioning the blade before the Test Run was an approximate tension. The following proce- dures fine-tune the blade tension. -28- Model G0817 (Mfd. Since 05/16) -
Page 31: The Flutter Method
Step 5 until blade is properly tensioned. Adjust blade guides as described in Adjusting Blade Support Bearings and Adjusting Blade Guide Bearings on Pages 31–32. -29- Model G0817 (Mfd. Since 05/16) -
Page 32: Fine Tune Tracking
Tracking Observe blade tracking path through clear Control tracking window on right edge of bandsaw Lock (see Figures 42–43). Lever Figure 43. Fine-tune tracking controls. Figure 42. Example of blade, viewed through tracking window. -30- Model G0817 (Mfd. Since 05/16) -
Page 33: Adjusting Blade Support Bearings
To adjust support bearing: DISCONNECT MACHINE FROM POWER! Loosen support bearing adjustment screw (see Figure 44). Support Bearing Support Bearing Adjustment Screw Figure 44. Upper support bearing assembly and controls (guide post cover removed for clarity). -31- Model G0817 (Mfd. Since 05/16) -
Page 34: Adjusting Blade Guide Bearings
Guide Block Guide BladeThickness Adjustment Bearings Cap Screw “Tooth Set” Wider Than Blade Thickness Guide Block Figure 48. Illustration of blade "tooth set." Figure 46. Upper guide bearing components (guide post cover removed for clarity). -32- Model G0817 (Mfd. Since 05/16) -
Page 35: Installing "Euro-Style" Roller-Disc Guides
Grizzly offers accessory "Euro-Style" Roller-Disc Guides specially designed to fit Model G0817 (see Accessories on Page 51). Installing these blade guides is relatively easy, though it requires first removing the blade and existing blade guide assemblies. -
Page 36: Adjusting "Euro-Style" Roller-Disc Guides
Assembly Here Bearing Figure 53. Installing lower "Euro-style" roller-disc guide assembly. Re-install blade (refer to Page 46). Proceed to Adjusting "Euro-Style" Roller- Disc Guides in next section. Figure 54. Upper "Euro-style" roller-disc guide assembly. -34- Model G0817 (Mfd. Since 05/16) - Page 37 Note: With wider blades, it may not be pos- sible to bring the roller-discs just behind the blade gullets. Position them as far forward as possible without allowing the roller-disc hous- ing to touch the back of the blade. -35- Model G0817 (Mfd. Since 05/16)
-
Page 38: Aligning Table
— If the distance is not the same at the front and back of the table, it must be adjusted; proceed to Step 5. Straightedge Fine Ruler Figure 59. Checking miter slot parallelism. -36- Model G0817 (Mfd. Since 05/16) -
Page 39: Aligning Fence
— If the table is not perpendicular to the back 36 for detailed instructions). of the blade, you must shim the table; pro- ceed to Step 3. Blade Square Table Figure 61. Squaring back of blade and table. -37- Model G0817 (Mfd. Since 05/16) -
Page 40: Calibrating Miter Gauge
Note: Sometimes the tightening procedure can affect the adjustment. Loosen screw that secures angle pointer, adjust pointer to 0˚ mark on scale, then retighten screw to secure setting. -38- Model G0817 (Mfd. Since 05/16) -
Page 41: Section 4: Operations
Read books/magazines or get formal training before beginning any proj- ects. Regardless of the content in this sec- tion, Grizzly Industrial will not be held liable for accidents caused by lack of training. -39- Model G0817 (Mfd. Since 05/16) -
Page 42: Workpiece Inspection
On the contrary, a workpiece supported on the bowed side will rock during a cut and could cause kickback or severe injury. -40- Model G0817 (Mfd. Since 05/16) -
Page 43: Setting Upper Blade Guide Height
G. Tooth Pitch: The distance between tooth tips. H. Blade Back: The distance between the bot- tom of the gullet and the back edge of the blade. TPI: The number of teeth per inch measured from gullet to gullet. -41- Model G0817 (Mfd. Since 05/16) -
Page 44: Blade Dimensions
Blades will vary slightly even in the same length because of how they are welded. Refer to the Accessories section later in this manual for blade replacements from Grizzly. Blade Width Measured from the back of the blade to the tip of... -
Page 45: Tooth Pitch
Raker: Three teeth in a recurring group—one bent left, one bent right, and then one that is not bent. The raker set is ideal for most con- Carbon Steel Blade tour cuts. Weld High-Speed Steel Figure 70. Bi-metal blade composition. -43- Model G0817 (Mfd. Since 05/16) -
Page 46: Blade Selection Chart
Crosscutting Thick Stock Crosscutting Round Stock Miter Cut Tenons Sharp Curves Gradual Curves Tooth Type Tooth Pitch (Teeth Per Inch or TPI) Fine Medium Coarse Hook Raker Skip (14-32 TPI) (4-12 TPI) (2-4 TPI) -44- Model G0817 (Mfd. Since 05/16) -
Page 47: Blade Care & Break-In
• Using the wrong pitch (TPI) for the workpiece cut. thickness. The general rule of thumb is to have no less than two teeth in contact with the workpiece at all times during cutting. -45- Model G0817 (Mfd. Since 05/16) -
Page 48: Changing Blade
Table Insert If necessary, adjust blade tension quick- release lever (refer to Page 62 for more Table Pin information). Figure 71. Blade changing controls. -46- Model G0817 (Mfd. Since 05/16) -
Page 49: Tilting Table
Note: It is always a good idea to check the table tilt scale and make sure the posi- tive stop is calibrated. See Checking/ Calibrating Positive Stop on Page 48 for more information. -47- Model G0817 (Mfd. Since 05/16) -
Page 50: Ripping
0, follow Steps 1–5 for the desired angle. NEVER place fingers or hands in the line of cut. If you slip, your hands or fingers may go into the blade and may be cut. -48- Model G0817 (Mfd. Since 05/16) -
Page 51: Crosscutting
Always use push blocks when resawing and keep your hands clear of the blade. Figure 77. Example of a crosscutting operation with the miter gauge. -49- Model G0817 (Mfd. Since 05/16) -
Page 52: Cutting Curves
Figure 79 for an example of a stacked cut ⁄ '' ..........1 ⁄ setup). ⁄ '' ..........2 ⁄ ⁄ '' ..........3 ⁄ ⁄ '' ..........5 ⁄ Figure 79. Example of a stacked cut setup. -50- Model G0817 (Mfd. Since 05/16) -
Page 53: Section 5: Accessories
ACCESSORIES SECTION 5: ACCESSORIES T27908—"Euro-Style" Roller-Disc Guides Convert your G0817 blade guides to "Euro-Style" with these easy-to-install upper and lower blade Installing unapproved accessories may guide assemblies. Just loosen the screws that cause machine to malfunction, resulting in hold the old assemblies in place and swap them serious personal injury or machine damage. - Page 54 ® Figure 84. T26544 LED Light with 30 lb. Mag Base and Flexible Arm. Figure 86. Recommended products for protect- ing unpainted cast iron/steel part on machinery. www.grizzly.com 1-800-523-4777 order online at or call -52- Model G0817 (Mfd. Since 05/16)
-
Page 55: Section 6: Maintenance
The brushes should be checked daily and cleaned when they become dirty. There are adjustment brackets that allow the brushes to be adjusted for bristle wear (refer to Adjusting Wheel Brushes on Page 62 for detailed instructions). -53- Model G0817 (Mfd. Since 05/16) - Page 56 Lubrication Type ..GL2 Grease or Equivalent Amount ..........Thin Coat Frequency .......... As Needed Sliding Surfaces To lubricate tension adjustment assembly: DISCONNECT MACHINE FROM POWER! Figure 90. Cast iron trunnions produce their own lubricant. -54- Model G0817 (Mfd. Since 05/16)
-
Page 57: Section 7: Service
11. Contactor not energized/has poor contacts. 11. Test all legs for power/replace. 12. Centrifugal switch at fault. 12. Adjust/replace centrifugal switch if available. 13. Motor bearings at fault. 13. Test by rotating shaft; rotational grinding/loose shaft requires bearing replacement. -55- Model G0817 (Mfd. Since 05/16) - Page 58 8. Adjust/shim table/trunnion position until blade and 8. Table top surface is not parallel or square table are parallel and square (Page 37). to blade. 9. Tighten V-belt. Replace if worn or oily. (Page 59). 9. V-belt loose or slipping. -56- Model G0817 (Mfd. Since 05/16)
- Page 59 3. Re-install blade; replace (Page 46). 4. Blade is slipping on wheel. 4. Adjust blade tension (Page 28). 5. Blade guides hitting teeth and ruining tooth set. 5. Properly adjust guide bearings (Page 32). -57- Model G0817 (Mfd. Since 05/16)
- Page 60 2. Clogged dust port. 2. Clean dust port. 3. Low CFM (airflow) from dust collection 3. Inspect ducting for leaks/clogs and repair as system. necessary; move dust collector closer to machine; install a stronger dust collector. -58- Model G0817 (Mfd. Since 05/16)
-
Page 61: Tensioning/Replacing V-Belt
(refer to Replacing V-Belt Motor Mount on Page 60). Handle Motor Mount Cap Screw Motor Mount Lock Lever Figure 92. Location of V-belt tension controls. Retighten motor mount lock lever, then retighten cap screw to secure adjustment. -59- Model G0817 (Mfd. Since 05/16) - Page 62 Re-install lower wheel with bearing and secure it with wheel mount cap screw and washer removed in Step 3. Figure 93. Location of wheel mount cap screw and washer. Re-install blade, and close and secure wheel covers. -60- Model G0817 (Mfd. Since 05/16)
-
Page 63: Blade Lead
— If there is still blade lead present, com- pensate for this condition by skewing Finish cut using fence. the fence, as instructed in the following procedure. — If blade lead is still present, repeat Steps 1–5 until cutting results are satisfactory. -61- Model G0817 (Mfd. Since 05/16) -
Page 64: Adjusting Wheel Brushes
Figure 98. Location of tension adjustment screw, screws to secure wheel brushes in place. jam nut, and wheel block plate. -62- Model G0817 (Mfd. Since 05/16) -
Page 65: Adjusting Guide Post Parallelism
Figure 100. Guide post adjustment screws. Gently tap lower part of guide post in appro- priate direction until there is no gap between square and guide post. Tighten cap screws shown in Figure 100. -63- Model G0817 (Mfd. Since 05/16) - Page 66 Distance "B" Figure 103. Example of measuring distance Figure 101. Location of cap screws and flat between guide post rack and blade. washers that secure guide post guard. Figure 102. Guide post guard removed. -64- Model G0817 (Mfd. Since 05/16)
- Page 67 (1 of 4) guard so that blade will not make contact with it, then retighten screws. Upper Set Screws (1 of 2) Lower Set Screws (1 of 2) Figure 104. Guide post parallelism adjustment screws. -65- Model G0817 (Mfd. Since 05/16)
-
Page 68: Aligning Wheels
⁄ " 15" Upper wheel is not Lower wheel is not vertically aligned with laterally aligned with lower wheel. upper wheel. Side View Figure 105. Wheel alignment illustration. Figure 106. Dimensions of coplanarity gauge. -66- Model G0817 (Mfd. Since 05/16) -
Page 69: Wheels Parallel And Not Coplanar
Use upper wheel: Adjust blade tracking knob rear adjustment set to tilt upper wheel. bolts to tilt lower wheel left/right. Figure 108. Wheel alignment illustration with solutions to misalignment problems. -67- Model G0817 (Mfd. Since 05/16) -
Page 70: Lower Wheel
Remove wheel to be shimmed. Place as many shims as necessary to correct gap measured in Step 3 onto wheel shaft. Re-install and secure wheel. Re-install and properly tension blade. Figure 110. Location of rear lateral adjustment components. -68- Model G0817 (Mfd. Since 05/16) -
Page 71: Calibrating Table Tilt Scale Pointer
When wheels are parallel and coplanar, in Figure 113. remove blade, re-install table, and then re- install blade. Figure 113. Adjusting table perpendicular to blade (side to side). -69- Model G0817 (Mfd. Since 05/16) -
Page 72: Replacing Brake Shoe
1mm or less. Close wheel covers. Components and Hardware Needed: Replacement Brake Shoe (Part P0817119) ..1 Tools Needed: Hex Wrench 5mm ..........1 Hex Wrench 6mm ..........1 Wrench 10mm ........... 1 Wrench 17mm............ 1 -70- Model G0817 (Mfd. Since 05/16) -
Page 73: Section 8: Wiring
Technical Support at (570) 546-9663. The photos and diagrams included in this section are best viewed in color. You can view these pages in color at www.grizzly.com. -71- Model G0817 (Mfd. Since 05/16) -
Page 74: Wiring Diagram 110V
ON BUTTON YIAN KUANG YS-F1-G T1/2 T2/4 T3/6 NO14 E-STOP YIAN KUANG YS-K1 OL RELAY SDE RA-20 12-18A START CAPACITOR 200MFD Ground 250VAC MOTOR 110V CAPACITOR 50MFD 250VAC READ ELECTRICAL SAFETY -72- Model G0817 (Mfd. Since 05/16) ON PAGE 71! -
Page 75: Wiring Diagram 220V
E-STOP YIAN KUANG YS-K1 OL RELAY SDE RA-20 5-8A START CAPACITOR 200MFD Ground 250VAC MOTOR 220V CAPACITOR Dotted line indicates 50MFD 250VAC voltage conversion from 110V to 220V READ ELECTRICAL SAFETY -73- Model G0817 (Mfd. Since 05/16) ON PAGE 71! -
Page 76: Electrical Component Wiring Photos
Figure 119. Magnetic switch wiring 110V. Figure 117. Start and run capacitors. Figure 120. Magnetic switch wiring 220V. Figure 118. Control panel wiring. Figure 121. Foot brake limit switch. READ ELECTRICAL SAFETY -74- Model G0817 (Mfd. Since 05/16) ON PAGE 71! -
Page 77: Section 9: Parts
SECTION 9: PARTS We do our best to stock replacement parts when possible, but we cannot guarantee that all parts shown are available for purchase. Call (800) 523-4777 or visit www.grizzly.com/parts to check for availability. Main 19-3 19-1 19-4 19-2... -
Page 78: Main Parts List
82-11 P0817082-11 BALL BEARING 6203ZZ (REAR) P0817038 BLADE TENSION ADJUSTING ROD P0817083 ADJUSTABLE HANDLE M10-1.5 X 35 P0817039 BUTTON HD CAP SCR M5-.8 X 8 P0817084 LOCK WASHER 10MM P0817040 KEYED SWITCH YIAN KUANG YS-K1 P0817085 MOTOR MOUNT BRACKET -76- Model G0817 (Mfd. Since 05/16) -
Page 79: Main Parts List Continued
POWER CORD 14G 3W 83" 6-15P 130-2 P0817130-2 OL RELAY SDE RA-20 12-18A 161-5 P0817161-5 MOTOR CORD 14G 3W 22" 130-3 P0817130-3 SWITCH BOX 161-6 P0817161-6 CONTROL CORD 16G 3W 60" 130-4 P0817130-4 POWER CORD 14G 3W 83" 5-15P -77- Model G0817 (Mfd. Since 05/16) -
Page 80: Table, Trunnion, & Blade Guides
146-3 146-14 146-4 146-15 146-7 146-5 146-3 146-6 146-17 146-23 146-30 146-34 146-24 146-18 146-29 146-19 146-28 146-20 146-32 146-2 146-27 146-33 146-21 144-3 146-1 146-26 146-22 146-25 144-6 144-1 144-7 144-2 144-4 144-5 -78- Model G0817 (Mfd. Since 05/16) - Page 81 CAP SCREW M6-1 X 12 144-3 P0817144-3 ECCENTRIC SHAFT P0817151 HEX NUT M8-1.25 144-4 P0817144-4 EXT RETAINING RING 15MM P0817153 FLAT WASHER 8MM 144-5 P0817144-5 BALL BEARING 6202ZZ P0817154 HEX BOLT M10-1.5 X 35 -79- Model G0817 (Mfd. Since 05/16)
-
Page 82: Fence
145-12 P0817145-12 PHLP HD SCR 3/8-24 X 1/2 121-20 P0817121-20 TAP SCREW 3.5 X 12 145-13 P0817145-13 HEX NUT M4-.7 121-21 P0817121-21 FENCE SCALE 145-14 P0817145-14 PHLP HD SCR M4-.7 X 16 121-22 P0817121-22 LOCK WASHER 6MM 145-15 P0817145-15 MITER SCALE -80- Model G0817 (Mfd. Since 05/16) -
Page 83: Foot Brake
FLAT WASHER 13 X 22 X .05 (STEEL) P0817110 SET SCREW M7-1 X 10 (NYLON) P0817159 ADHESIVE CABLE-TIE MOUNT P0817112 CAP SCREW M6-1 X 16 P0817160 CABLE TIE 300MM P0817113 EXTENSION SPRING 1.6 X 16 X 63 -81- Model G0817 (Mfd. Since 05/16) -
Page 84: Labels & Cosmetics
FOR GRIZZLY MACHINES ONLY! DO NOT REPRODUCE OR CHANGE THIS ARTWORK • Labels MUST be made of WITHOUT WRITTEN APPROVAL! Grizzly will not accept labels changed without approval. artwork changes are required, contact us immediately at manuals@grizzly.com. chemical-resistant material G0817 Machine Labels A •... -
Page 85: Warranty Card
Would you recommend Grizzly Industrial to a friend? _____ Yes _____No Would you allow us to use your name as a reference for Grizzly customers in your area? Note: We never use names more than 3 times. _____ Yes _____No 10. - Page 86 FOLD ALONG DOTTED LINE Place Stamp Here GRIZZLY INDUSTRIAL, INC. P.O. BOX 2069 BELLINGHAM, WA 98227-2069 FOLD ALONG DOTTED LINE Send a Grizzly Catalog to a friend: Name_______________________________ Street_______________________________ City______________State______Zip______ TAPE ALONG EDGES--PLEASE DO NOT STAPLE...
-
Page 87: Warranty & Returns
WARRANTY & RETURNS Grizzly Industrial, Inc. warrants every product it sells for a period of 1 year to the original purchaser from the date of purchase. This warranty does not apply to defects due directly or indirectly to misuse, abuse, negligence, accidents, repairs or alterations or lack of maintenance.
Need help?
Do you have a question about the G0817 and is the answer not in the manual?
Questions and answers