Advertisement
Quick Links
Download this manual
See also:
Instruction Manual
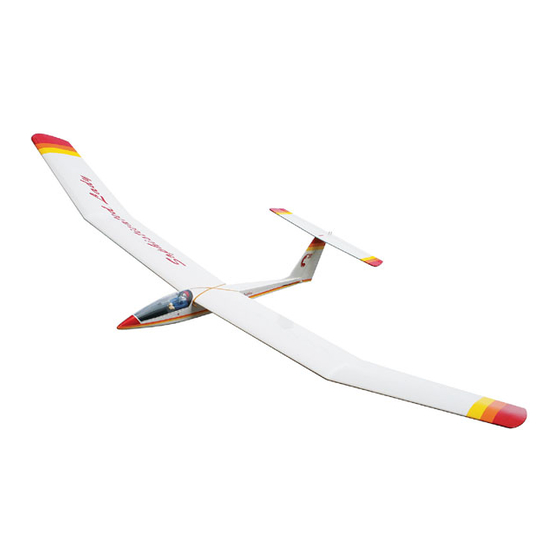
SOPHISTICATED LADY ARF
he SOPHISTICATED LADY is a sailplane design that blends simple straight-forward construction with
T
the elegant styling of a sleek, full-scale soaring machine. The clean lines have not compromised the
functionality of this model aircraft, which you will find a delight to fly both in thermals and on the slope
And if it's competition you desire, this "Lady" can compete with the best and look great in the winners'
circle!
Although a simple two-channel radio meets the minimum requirements for piloting this model, a third
channel is more desirable, enabling you to control airborne "power-on/power-off" commands when the
electric power pod is installed. The Carl Goldberg Products Electric Power Pod (Item #678) is an option-
al accessory which provides power assistance for small-field launching, or when the towline is just too
much trouble. A small gas engine is also a power option. In addition, your sailplane so may be
launched via high start, hand tow, or winch, and, if you live in a hilly or mountainous area, you may wish
to simply pitch your glider off the slope. Whichever method you choose, the SOPHISTICATED LADY
will provide many hours of enjoyment.
THIS IS NOT A TOY! A radio-controlled model is not a toy and is not intended for persons under 16 years old. Keep this
kit out of the reach of younger children, as it contains parts that could be dangerous. A radio-controlled model is capable
of causing serious bodily injury and property damage. It is the buyer's responsibility to build this kit correctly and to prop-
erly install the motor, radio, and all other equipment. Test and fly the finished model only in the presence and with the assis-
tance of another experienced R/C flyer. The model must always be operated and flown using great care and common
sense, as well as in accordance with the safety standards of the Academy of Model Aeronautics (5151 Memorial Drive,
Muncie, IN 47302, 1-800-435-9262). We suggest you join the AMA and become properly insured prior to flying this model.
Also, consult with the AMA or your local hobby dealer to find an experienced instructor in your area. Per the Federal
Communications Commission, you are required to use only those radio frequencies specified "for Model Aircraft."
Carl Goldberg Products, Ltd.
P.O. Box 818
Fax # 770-532-2163
INSTRUCTIONS
WARNING!
4462 Oakwood Road Oakwood, GA 30566 Phone # 678-450-0085
E-mail: Questions@carlgoldbergproducts.com
©Copyright 1986
1
TM
Advertisement

Related Manuals for Carl Goldberg Products SOPHISTICATED LADY


Summary of Contents for Carl Goldberg Products SOPHISTICATED LADY
- Page 1 "power-on/power-off" commands when the electric power pod is installed. The Carl Goldberg Products Electric Power Pod (Item #678) is an option- al accessory which provides power assistance for small-field launching, or when the towline is just too much trouble.
- Page 2 LIMITED WARRANTY Carl Goldberg Products, Ltd. has inspected and certified the components of this aircraft. The company urges the buyer to perform his own inspection, prior to assembly, and to immediately request a replacement of any parts he believes to be defective for their intended use.
- Page 3 Be sure to trial fit parts together before gluing. Also, never use watery THIN type CA glue for gluing plywood and hardwood parts. Thin CA's do not adequately bond NOTE: these areas. SOPHISTICATED LADY ARF COVERING CAUTION CLOSELY MATCHES ORACOVER: Some people may experience an allergic reaction when (#870) WHITE exposed to fumes from CA glue or epoxy .
-
Page 4: Tail Installation
WING TAIL INSTALLATION 1. COLLECT THE FOLLOWING ITEMS: (1) FUSELAGE (1) FIN WITH RUDDER (2) STABILIZER AND ELEVATOR 1. COLLECT THE FOLLOWING ITEMS: (1) 1/4” PLY WING JOINER (1) 1/8” PLY WING JOINER Insert the fin into the notches in the top of the fuselage. - Page 5 Using a sharp knife or razor blade, carefully do not remove remove cut 1/16” in side the line and remove the cov- ering. Do not cut into the wood. Remove the covering from the top of the fin and sides of tab. Do not remove covering from top of tab.
-
Page 6: Radio Installation
Fit the rudder in place and remove the pins. Push the rudder tight against the fin. Deflect the rudder 1-1/2” in one direction and apply ULTRA SET™ thin CA to each hinge. Deflect the rudder in the opposite direction and apply glue to the hinges from the other side. - Page 7 RUDDER PUSHROD SERVO ELEVATOR PUSHROD RUBBER GROMMET RECEIVER FOAM BATTERY ON/OFF SWITCH CHARGING JACK FOAM TAPE Locate one of the pushrod connectors and fit it into the bottom hole in one of the control horns. 1. COLLECT THE FOLLOWING ITEMS: (1) FUSELAGE (2) SERVOS (1) THREADED PUSHROD WIRE...
- Page 8 Take two short control arm and attach the adjustable servo connectors to them. Locate the rudder pushrod parts, 10” wire thread- ed on one end, 4” piece of unthreaded wire, wooden dowel, two pieces of shrink tubing. Cut the threaded wire to a length of 7-1/4” leav- ing the threads.
-
Page 9: Canopy Installation
CANOPY INSTALLATION Wrap the radio receiver carefully in foam rubber, making sure the antenna wires extend outside the foam. Do not cut the antenna wires. Place the receiver just to the rear of the battery pack. Drill a small hole in the bulkhead and thread the antenna further back, under the wing rest rails and through the fuse. -
Page 10: Applying Decal's
Locate the ply plate on the inside of the fuselage Mount the cockpit to the plane using the small behind the servos. Open the hole in the middle rubber band. of the plate through to the bottom of the fuse. Put a nut and washer on the tow hook and insert into the hole. - Page 11 BALANCING THE AIRCRAFT IMPORTANT: NEVER NEGLECT THIS STEP WITH ANY AIRPLANE. If you try to fly a plane with the bal- ance point behind the recommended range, you run the risk of having an unstable aircraft and the strong likelihood of a crash. TAKE THE TIME TO PROPER- LY BALANCE YOUR MODEL! 3”...
- Page 12 FLYING YOUR SOPHISTICATED LADY LEARNING TO FLY antenna collapsed to 6"-8", you should have an at least 100 foot range on the ground. To check this, turn on Flying R/C is both fun and challenging. As with other both the transmitter and the receiver switches, set the...
- Page 13 The strategy for thermal flying is basic. Launch your If there is no club or other R/C flying site available, Sophisticated Lady via a high-start, winch, or hand- locate a square area (preferably a grassy field), at least tow and start searching for a thermal in areas likely to four or five football fields long, which is free of power be a good thermal generator.
- Page 14 SLOPE FLYING Slope soaring is a nice divergence from thermal flying. For a slope to be effective, the wind should, for the most part, blow directly into the face of the slope. Wind velocity is not as critical, but there should be some wind. Also, it is not necessary to be atop Mt.
- Page 15 GENERAL FLYING TIPS & LANDINGS While flying your pattern, try to maintain shall turns. Remember that the wind will tend to blow your plane further downwind. To compensate for the the wind, make upwind (flying into the wind) turns shallow and downwind turns a little steeper.
Need help?
Do you have a question about the SOPHISTICATED LADY and is the answer not in the manual?
Questions and answers